> ## Documentation Index
> Fetch the complete documentation index at: https://docs.suprsend.com/llms.txt
> Use this file to discover all available pages before exploring further.
# Bigquery
> Set up the SuprSend BigQuery connector to auto sync user cohorts and subscriber lists from your data warehouse and power notifications on warehouse data.
With this integration, you can directly send notifications on your 360 degree data sitting in your data warehouse. This enables your data teams or product managers to automate user syncing, setup recurring user cohort sync and create [subscriber lists](/docs/lists) on SuprSend. You can then trigger notification to this list using our [broadcast](/docs/broadcast) API.
## Getting started
To start syncing data from your BigQuery database, you need to add this integration on the connector page.
1. Go to [SuprSend dashboard -> Settings -> Connectors](https://app.suprsend.com/en/staging/connectors) page. Here, you'll see the list of available connectors. If you have already setup any connectors in the past, you'll see a list of existing connectors. Click on **`+New Connector`** button to add the connector.
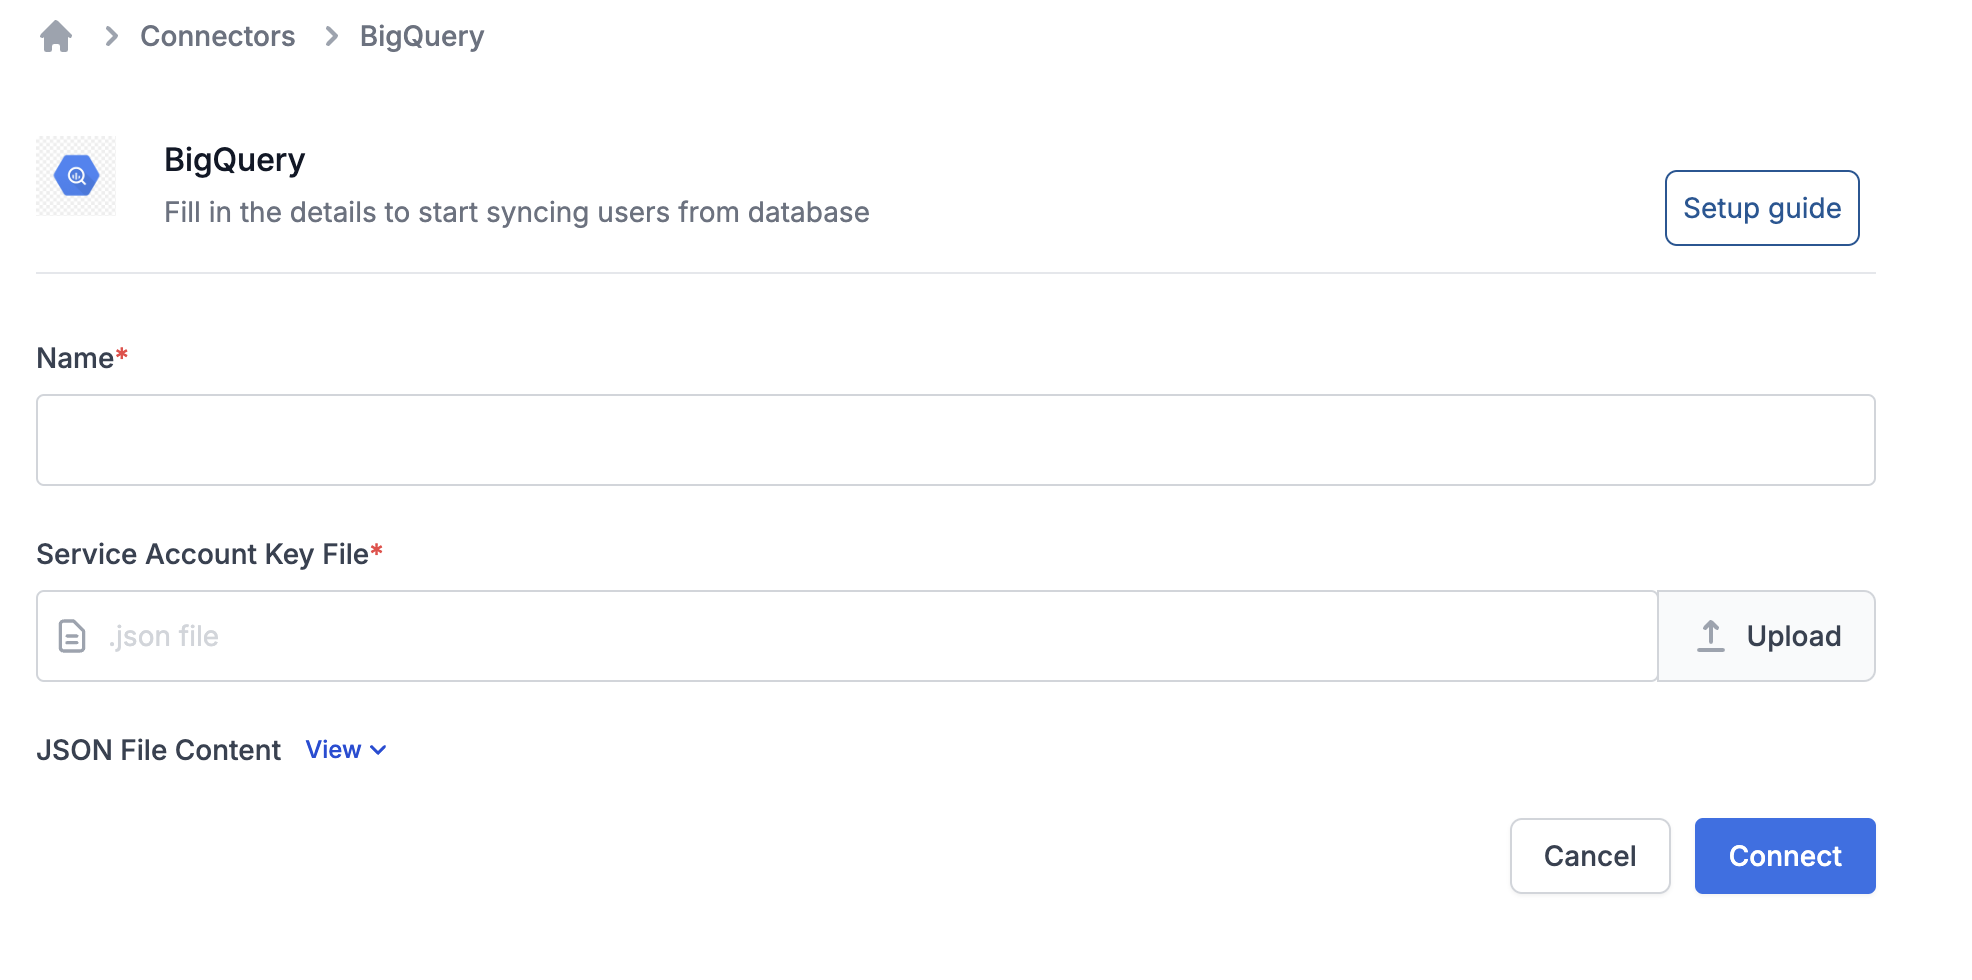
2. Click on BigQuery and add below information:
* **Name**: A name to uniquely qualify the connection as you'll see it in the connector list on your sync task. You can add the name of database here for easy identification.
* **Service account key json**: Steps to generate this are mentioned in the next section.
 ### Step-1: Generating OAuth client key and secret
Go to the [Credentials](https://console.cloud.google.com/apis/credentials) page in the Google Cloud Platform console and click on **"+Create Credentials"**. Select OAuth client ID from the options list.
### Step-1: Generating OAuth client key and secret
Go to the [Credentials](https://console.cloud.google.com/apis/credentials) page in the Google Cloud Platform console and click on **"+Create Credentials"**. Select OAuth client ID from the options list.
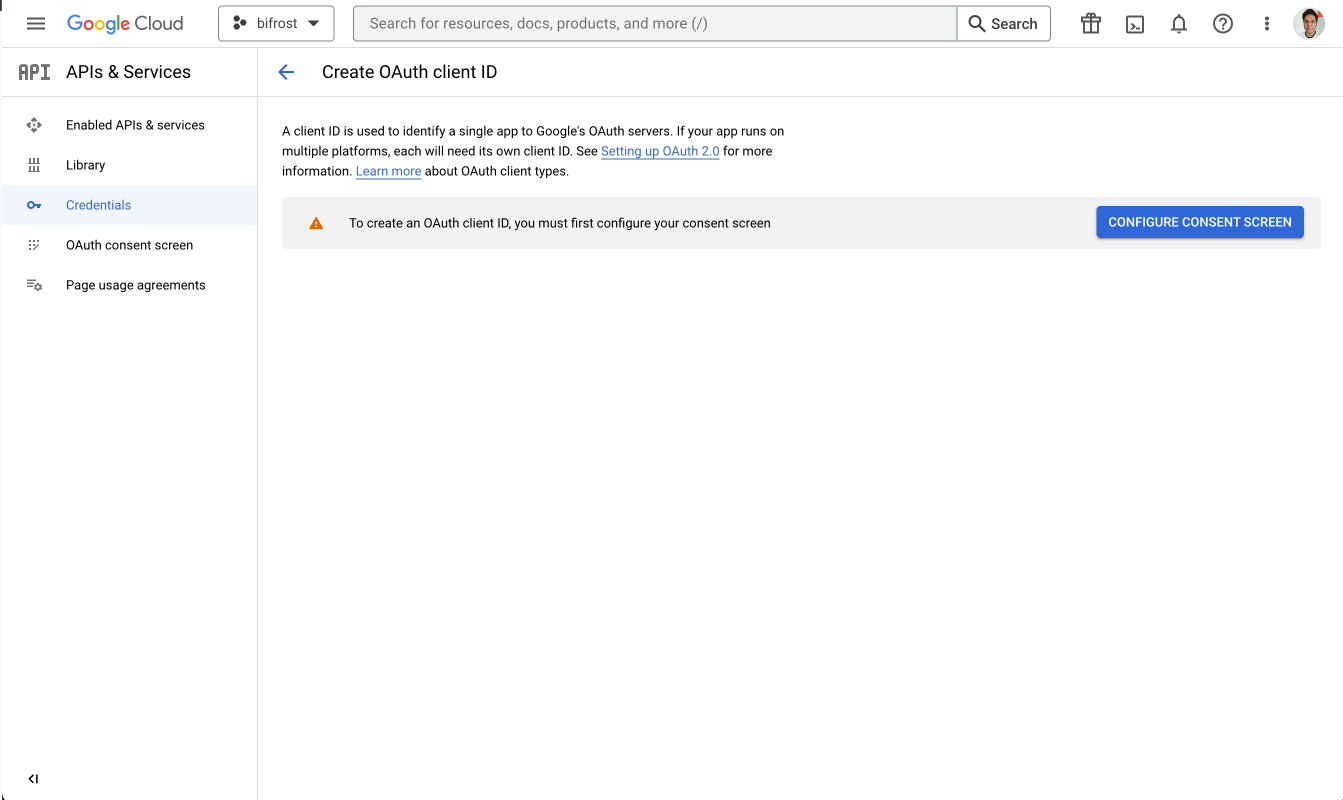
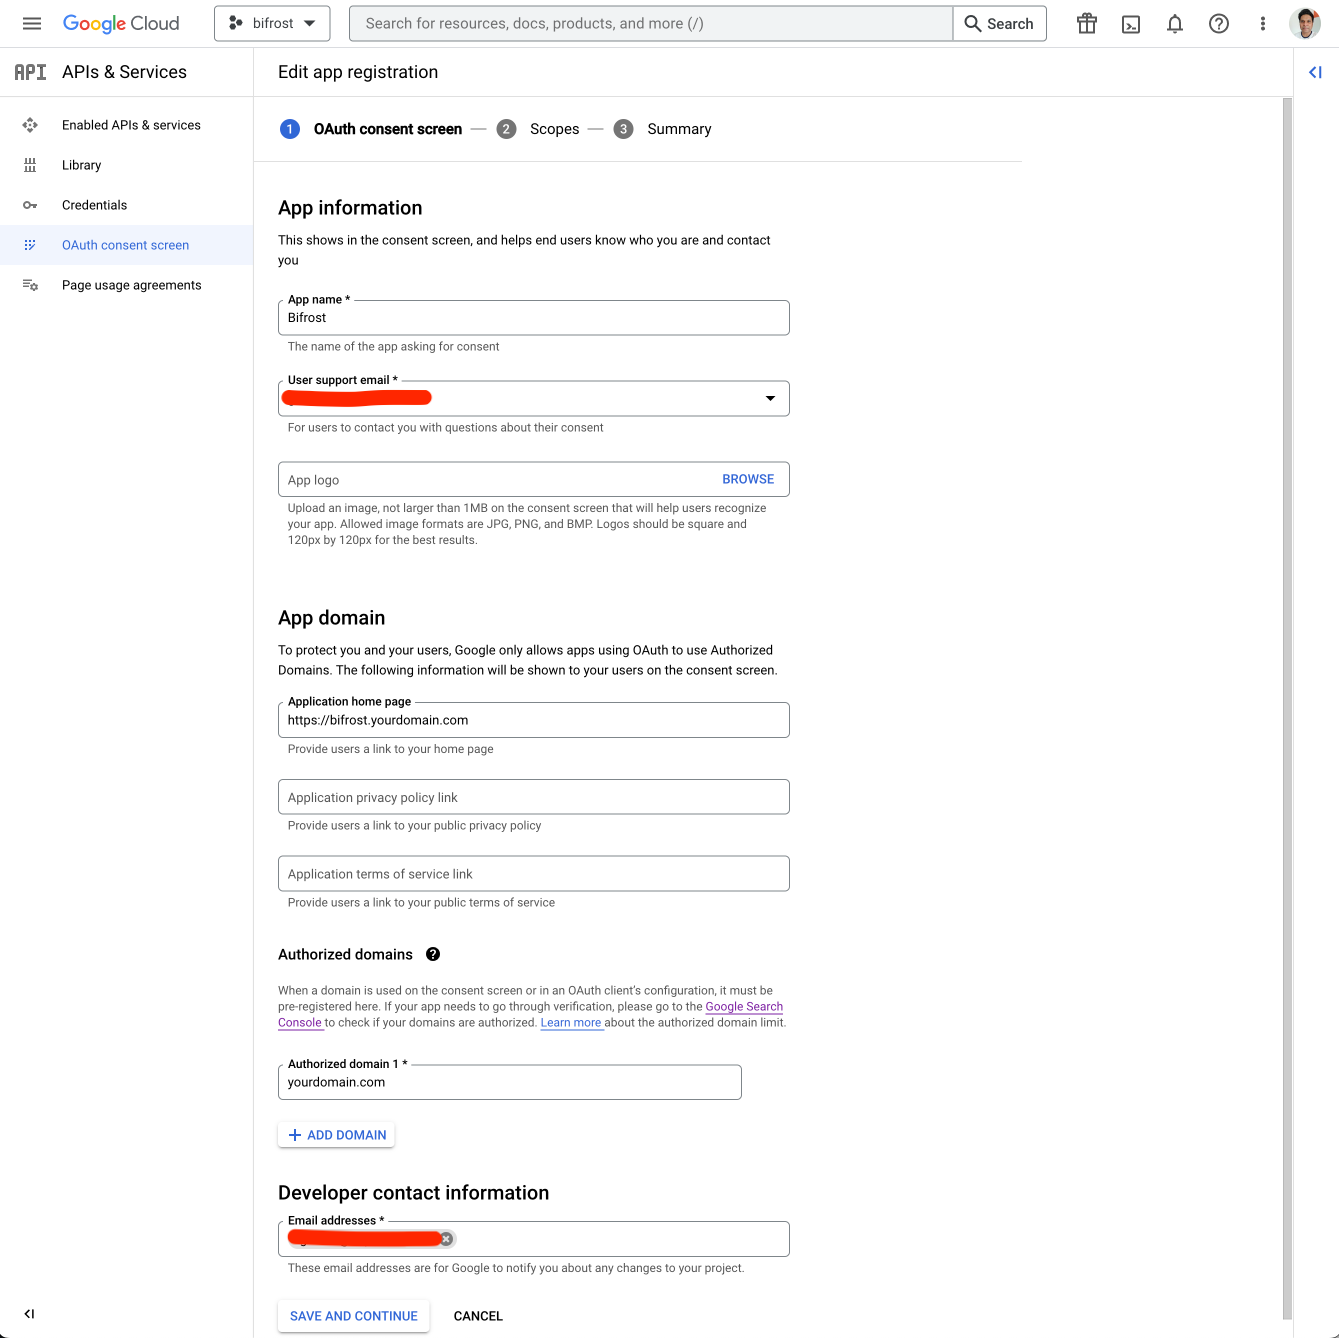
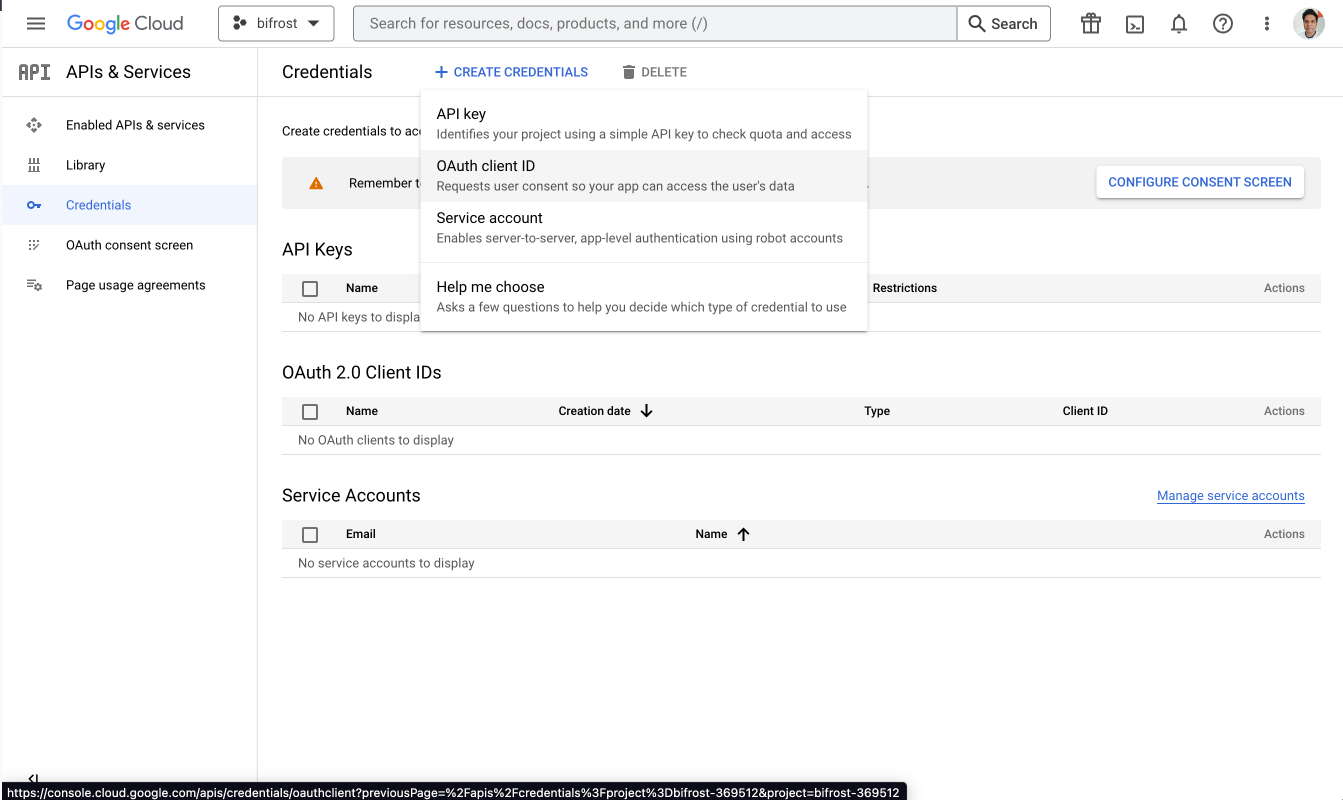 If you have not created OAuth consent screen before, you will need to create one.
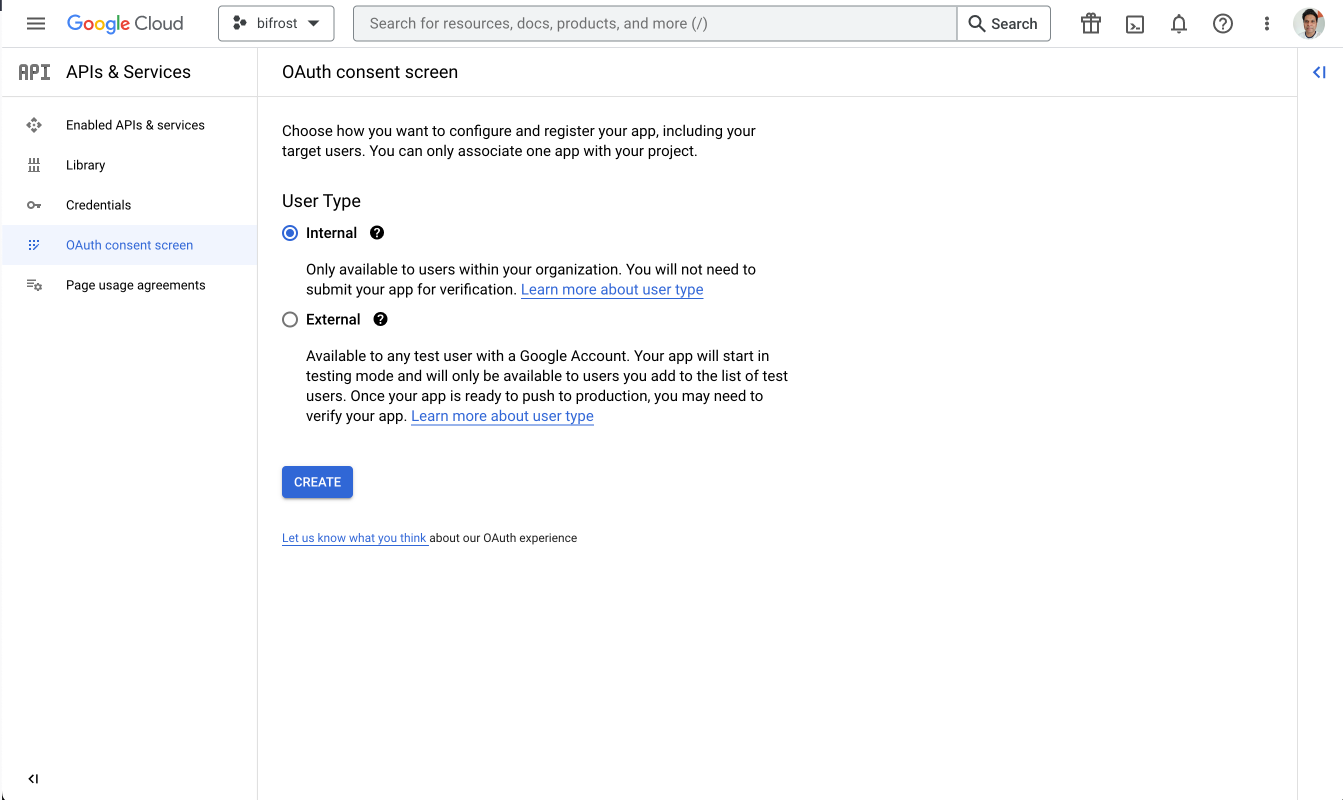
 Since SuprSend will be used for your internal employees only, Use `Internal` option from the list
 Enter required details like App name, your email, developer contact information, authorized domain etc.
 ### Step-2: Granting permissions
SuprSend requires you to grant certain user permissions on your BigQuery warehouse to successfully access data from it. Perform the below three steps in the exact order to grant these permissions:
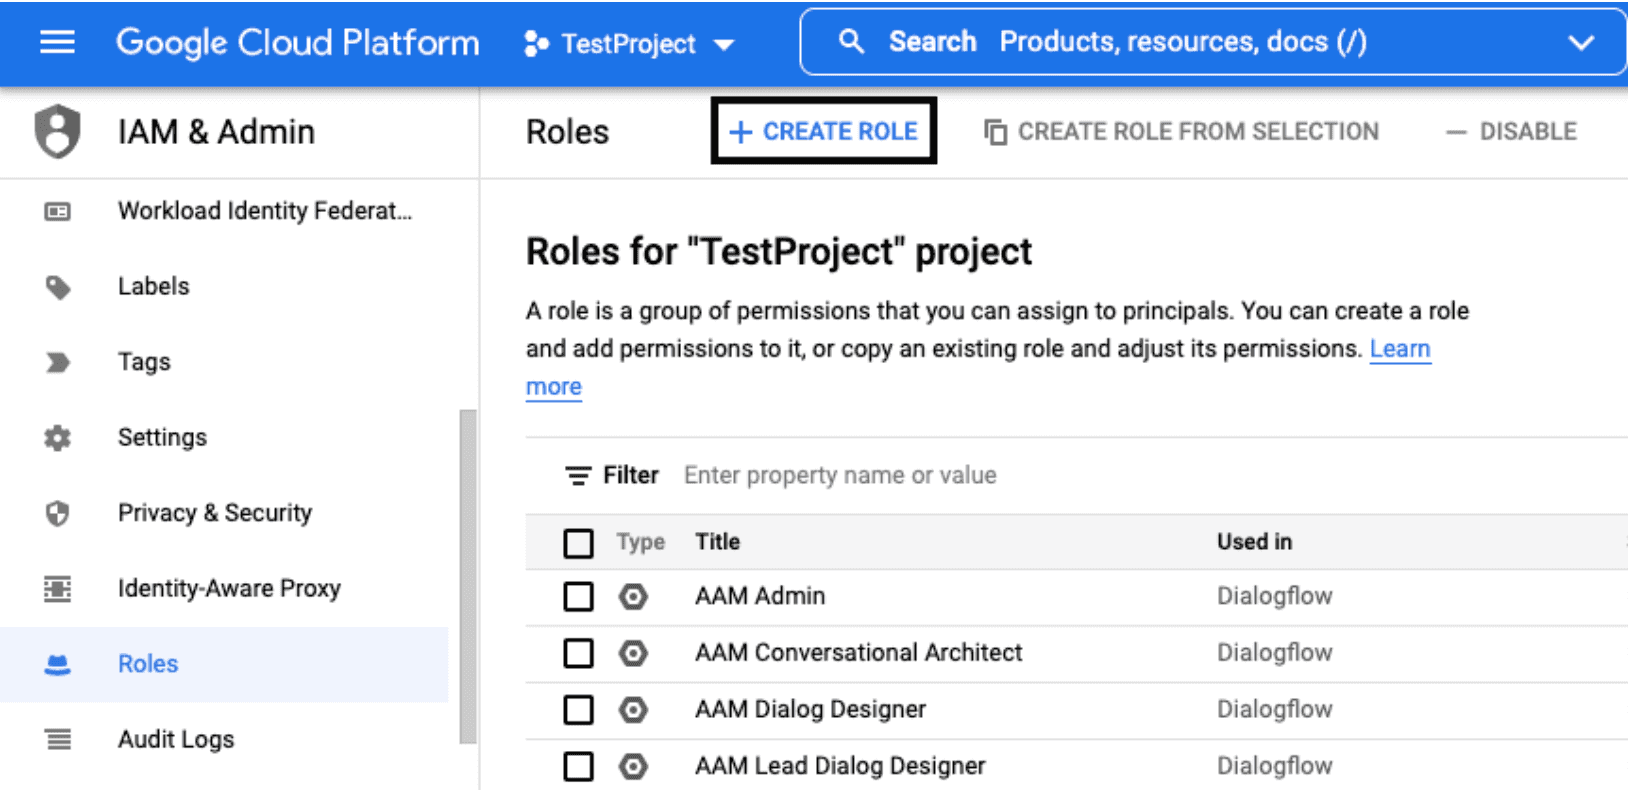
1.1. Go to the [Roles](https://console.cloud.google.com/iam-admin/roles) section of Google Cloud platform dashboard and click on **CREATE ROLE**.
### Step-2: Granting permissions
SuprSend requires you to grant certain user permissions on your BigQuery warehouse to successfully access data from it. Perform the below three steps in the exact order to grant these permissions:
1.1. Go to the [Roles](https://console.cloud.google.com/iam-admin/roles) section of Google Cloud platform dashboard and click on **CREATE ROLE**.
 1.2. Fill in the details as shown
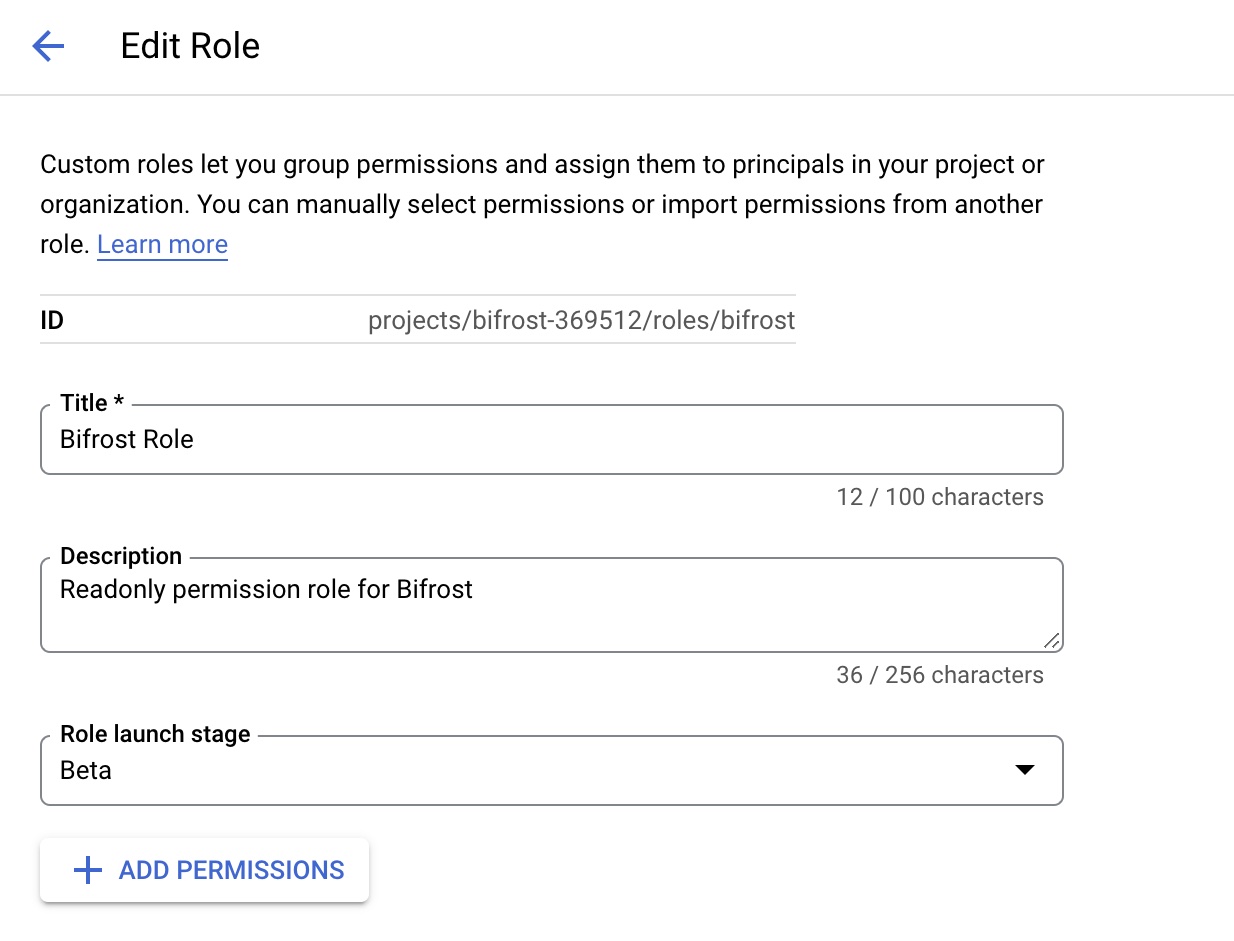 1.3. Click on **ADD PERMISSIONS** and add the following permissions
> bigquery.datasets.get
> bigquery.jobs.create
> bigquery.jobs.list
> bigquery.tables.get
> bigquery.tables.getData
> bigquery.tables.list
1.4. Finally, click on **CREATE**.
2.1. Go to [Service Accounts](https://console.cloud.google.com/iam-admin/serviceaccounts) and select the project which has the dataset or the table that you want to use and Click on CREATE SERVICE ACCOUNT
1.3. Click on **ADD PERMISSIONS** and add the following permissions
> bigquery.datasets.get
> bigquery.jobs.create
> bigquery.jobs.list
> bigquery.tables.get
> bigquery.tables.getData
> bigquery.tables.list
1.4. Finally, click on **CREATE**.
2.1. Go to [Service Accounts](https://console.cloud.google.com/iam-admin/serviceaccounts) and select the project which has the dataset or the table that you want to use and Click on CREATE SERVICE ACCOUNT
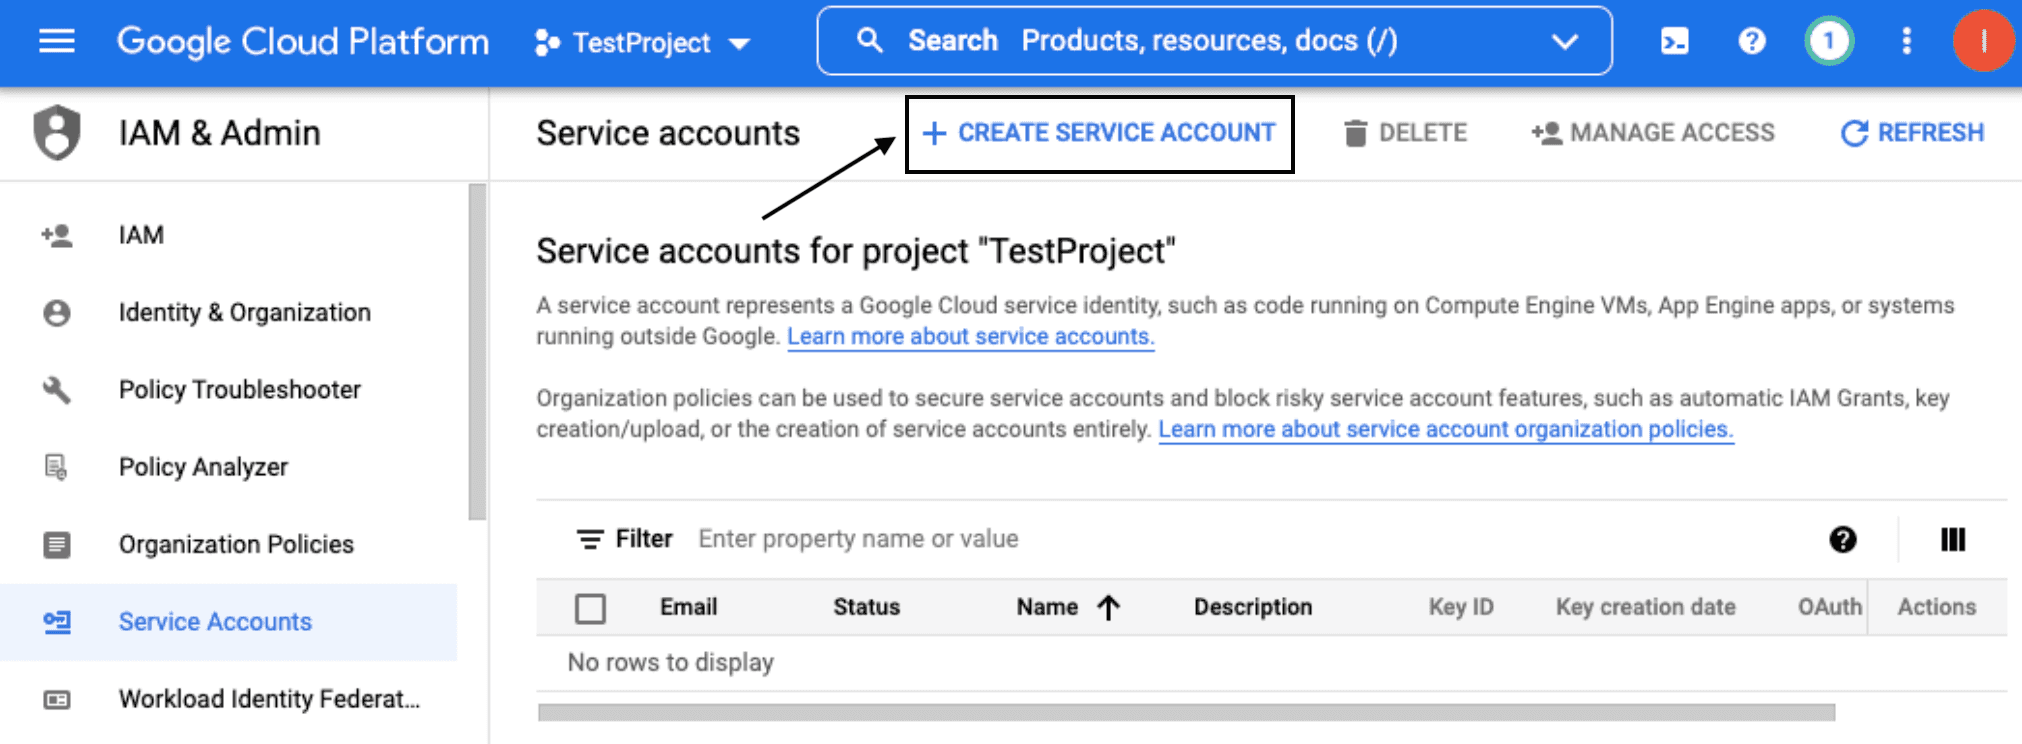 2.2. Fill in the Service Account details as shown below, and click on CREATE AND CONTINUE:
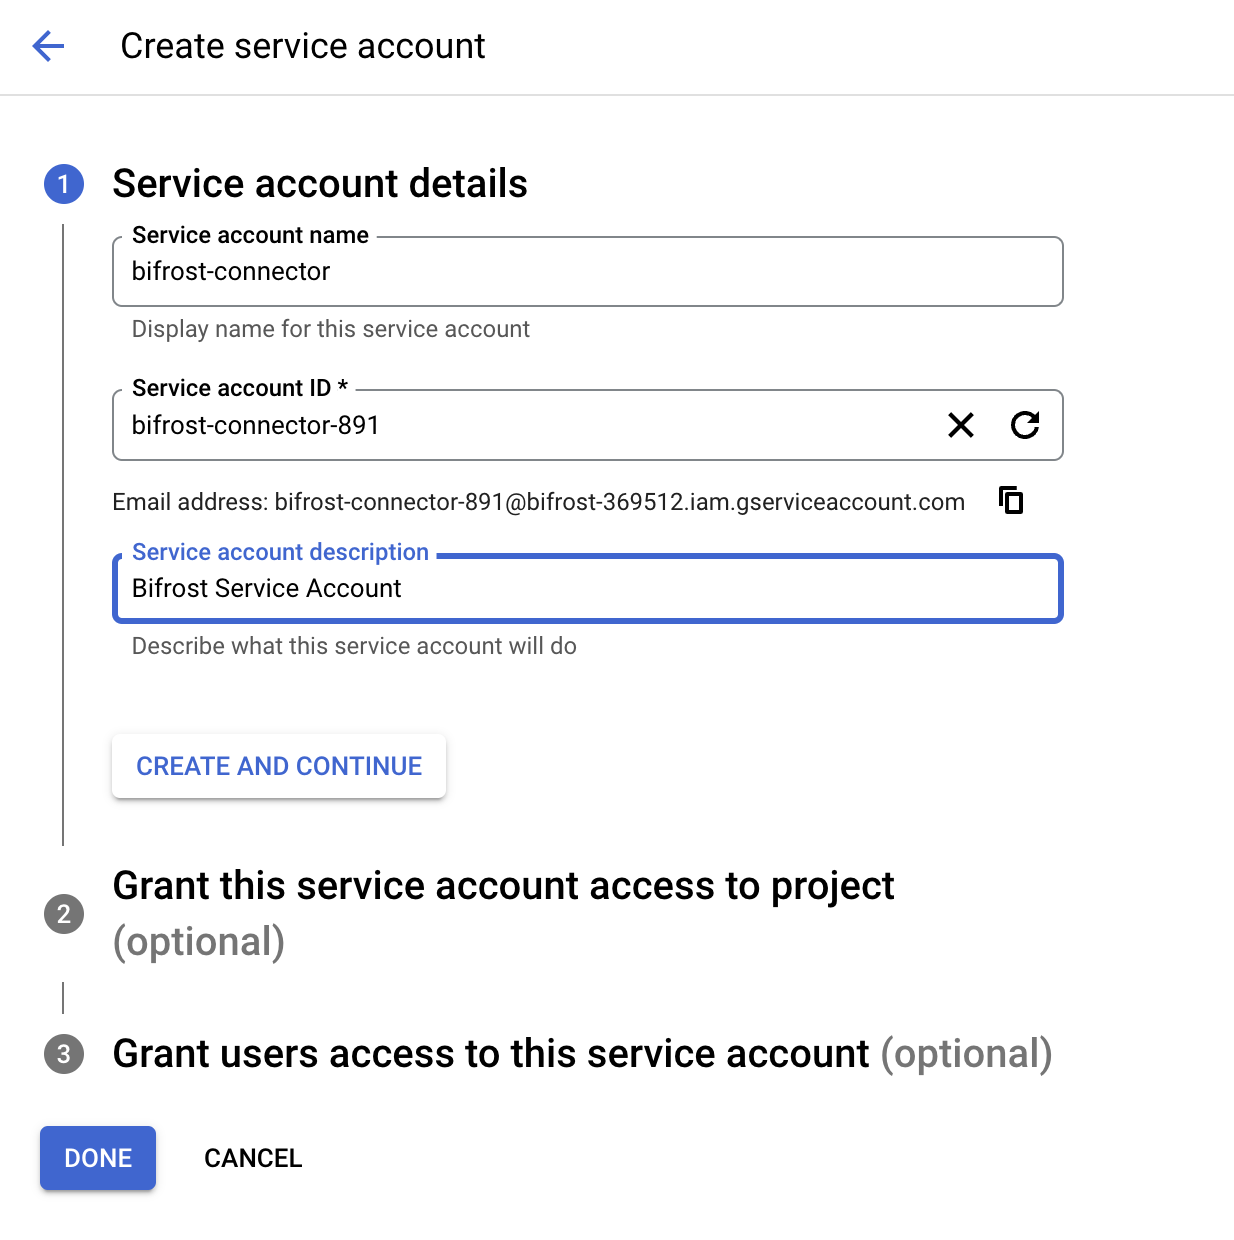 2.3. Fill in the Role details as shown below, and click on CONTINUE:
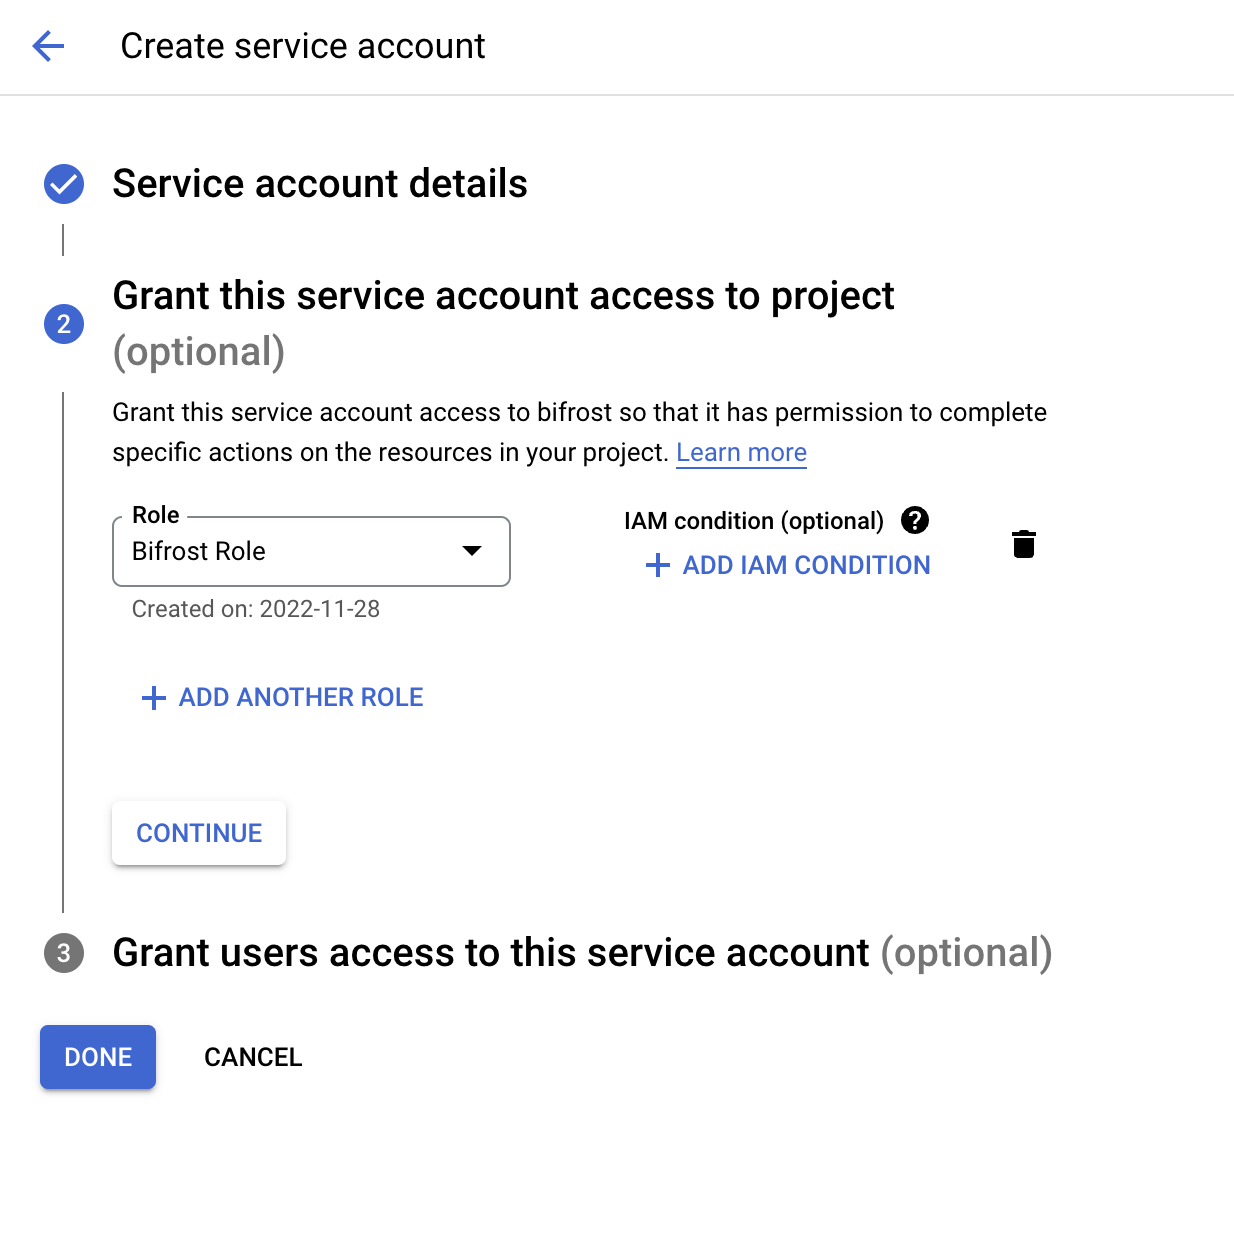 2.4. Click on DONE to move to the list of service accounts.
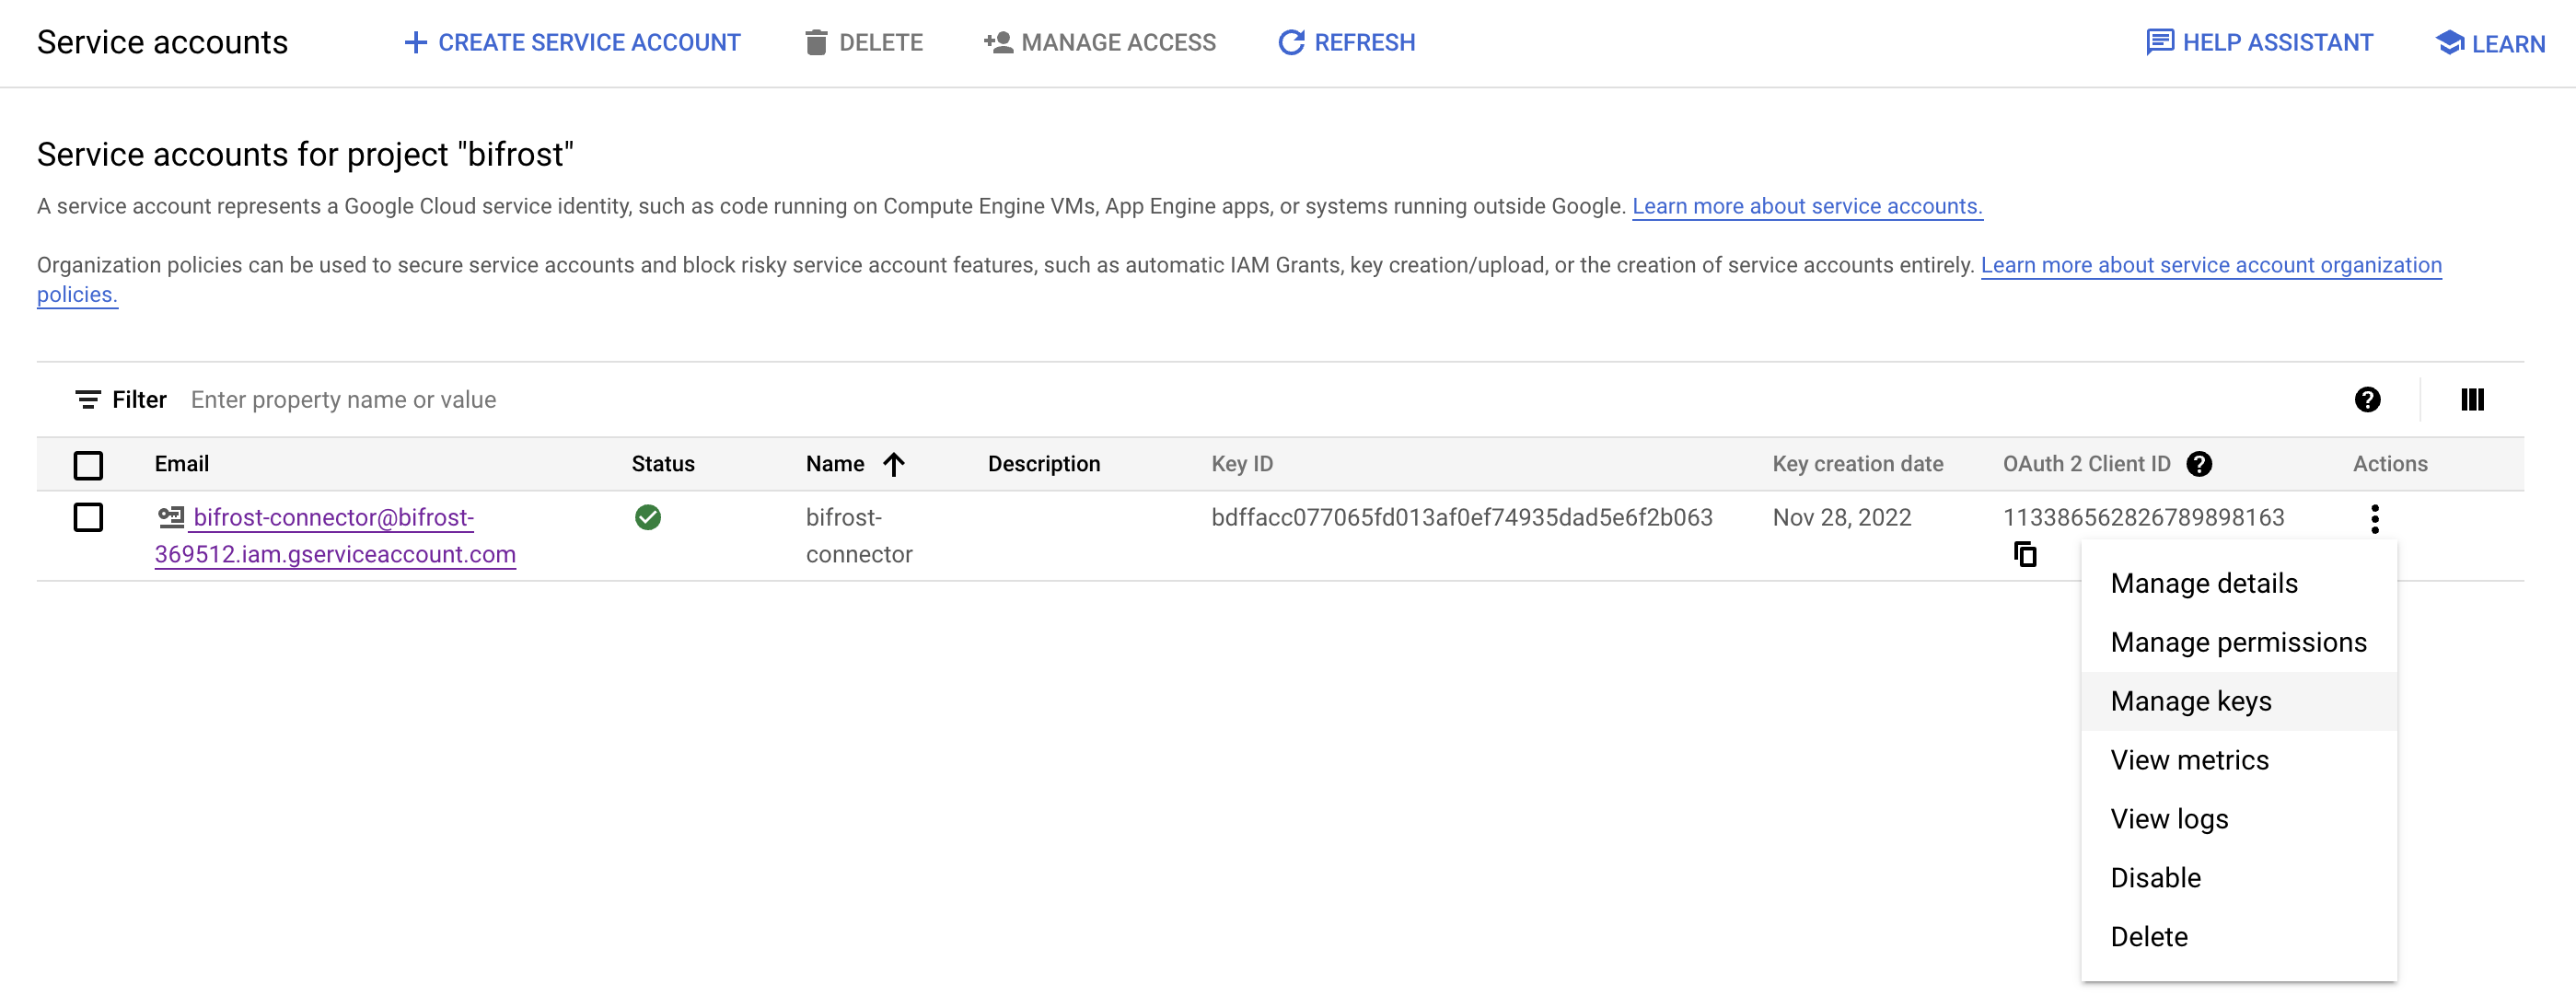
3.1. Click on the three dots icon under Actions in the service account that you just created and select **Manage keys**, as shown:
2.4. Click on DONE to move to the list of service accounts.
3.1. Click on the three dots icon under Actions in the service account that you just created and select **Manage keys**, as shown:
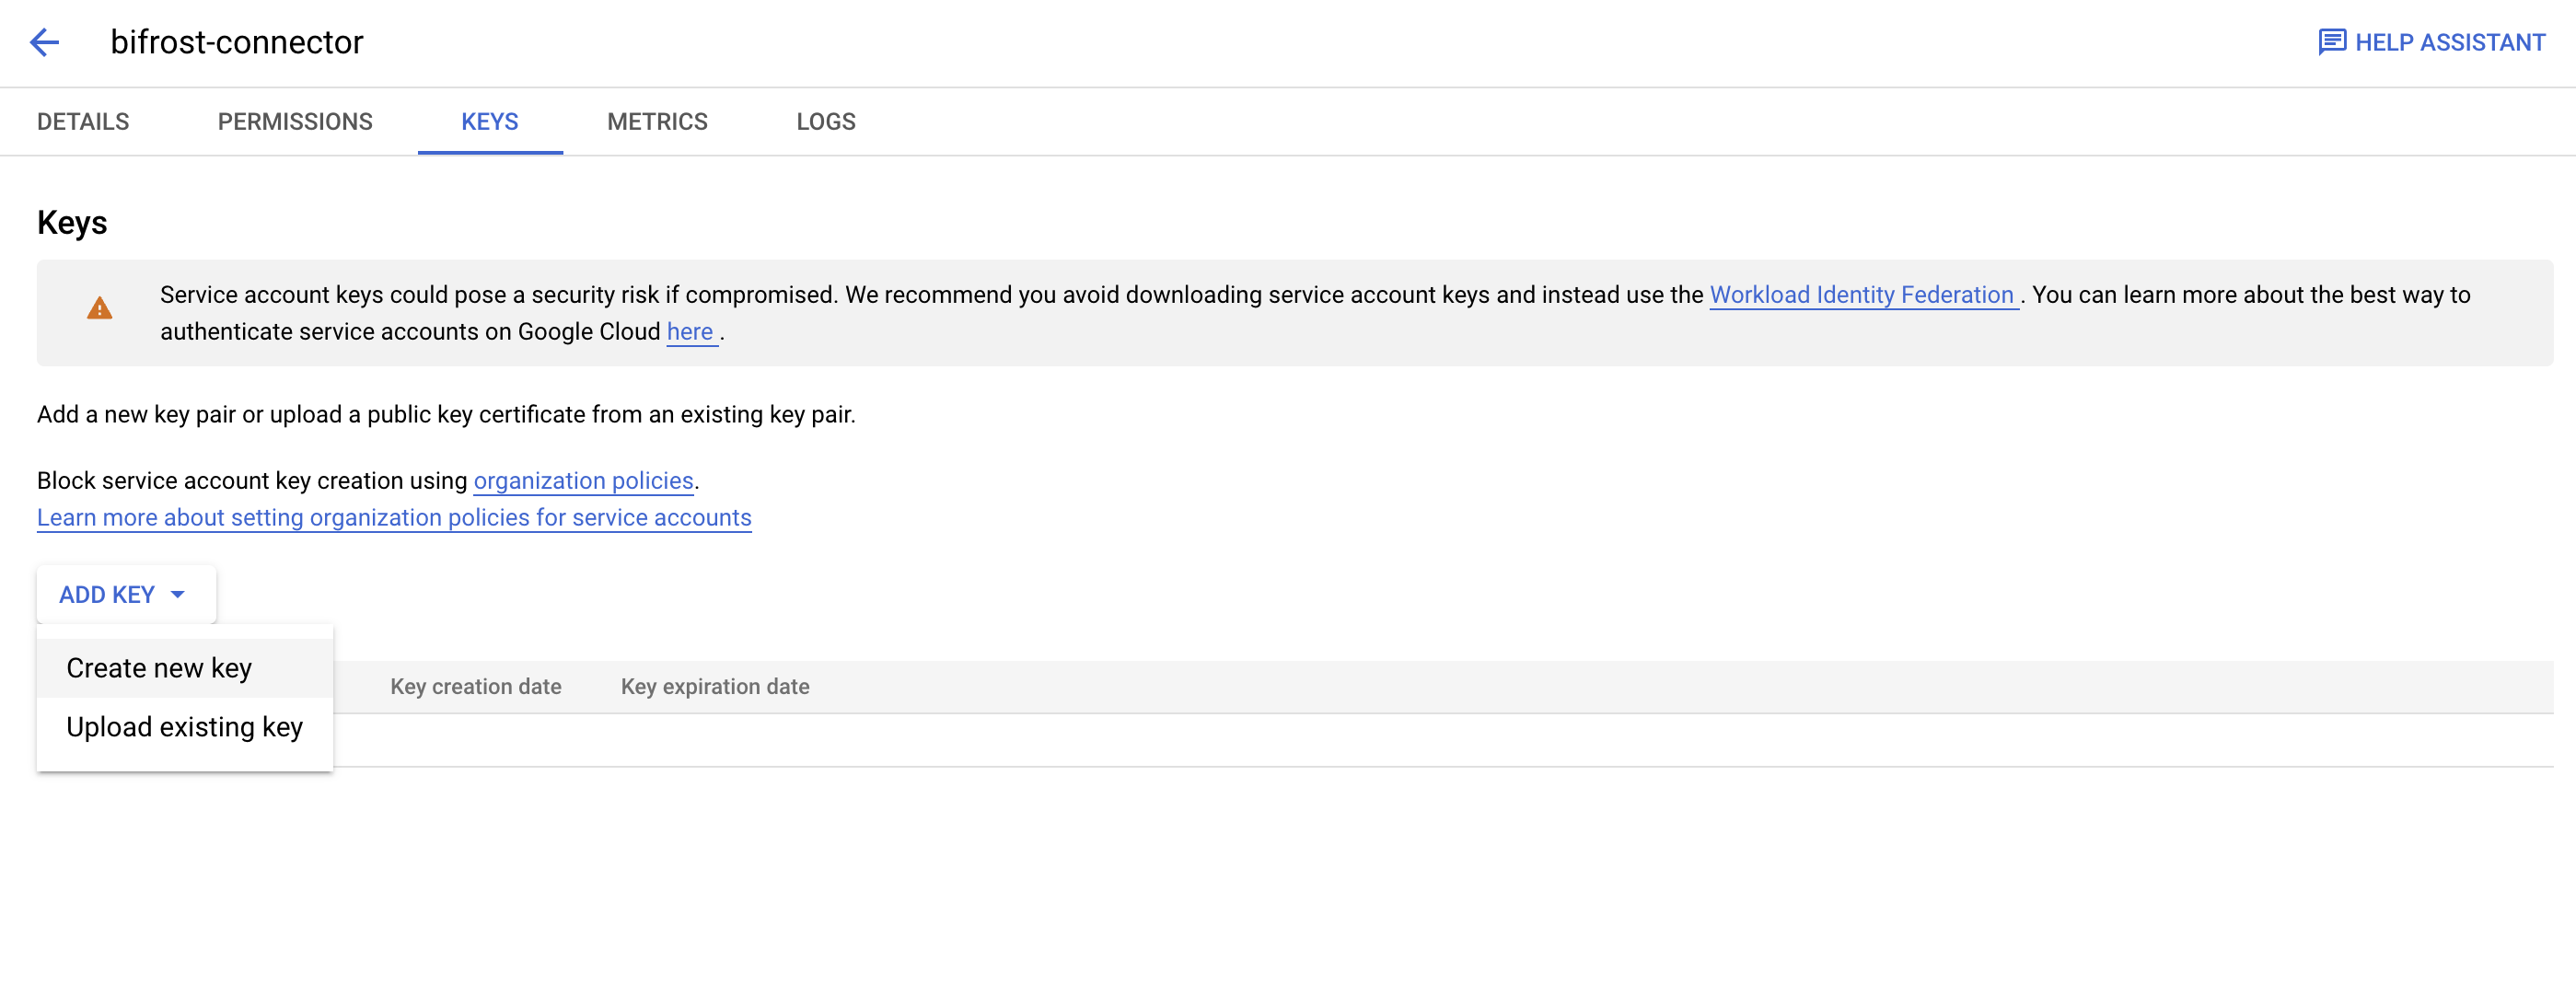
 3.2. Click on **ADD KEY**, followed by Create new key, as shown:
 3.3. Select **JSON** and click on **CREATE**
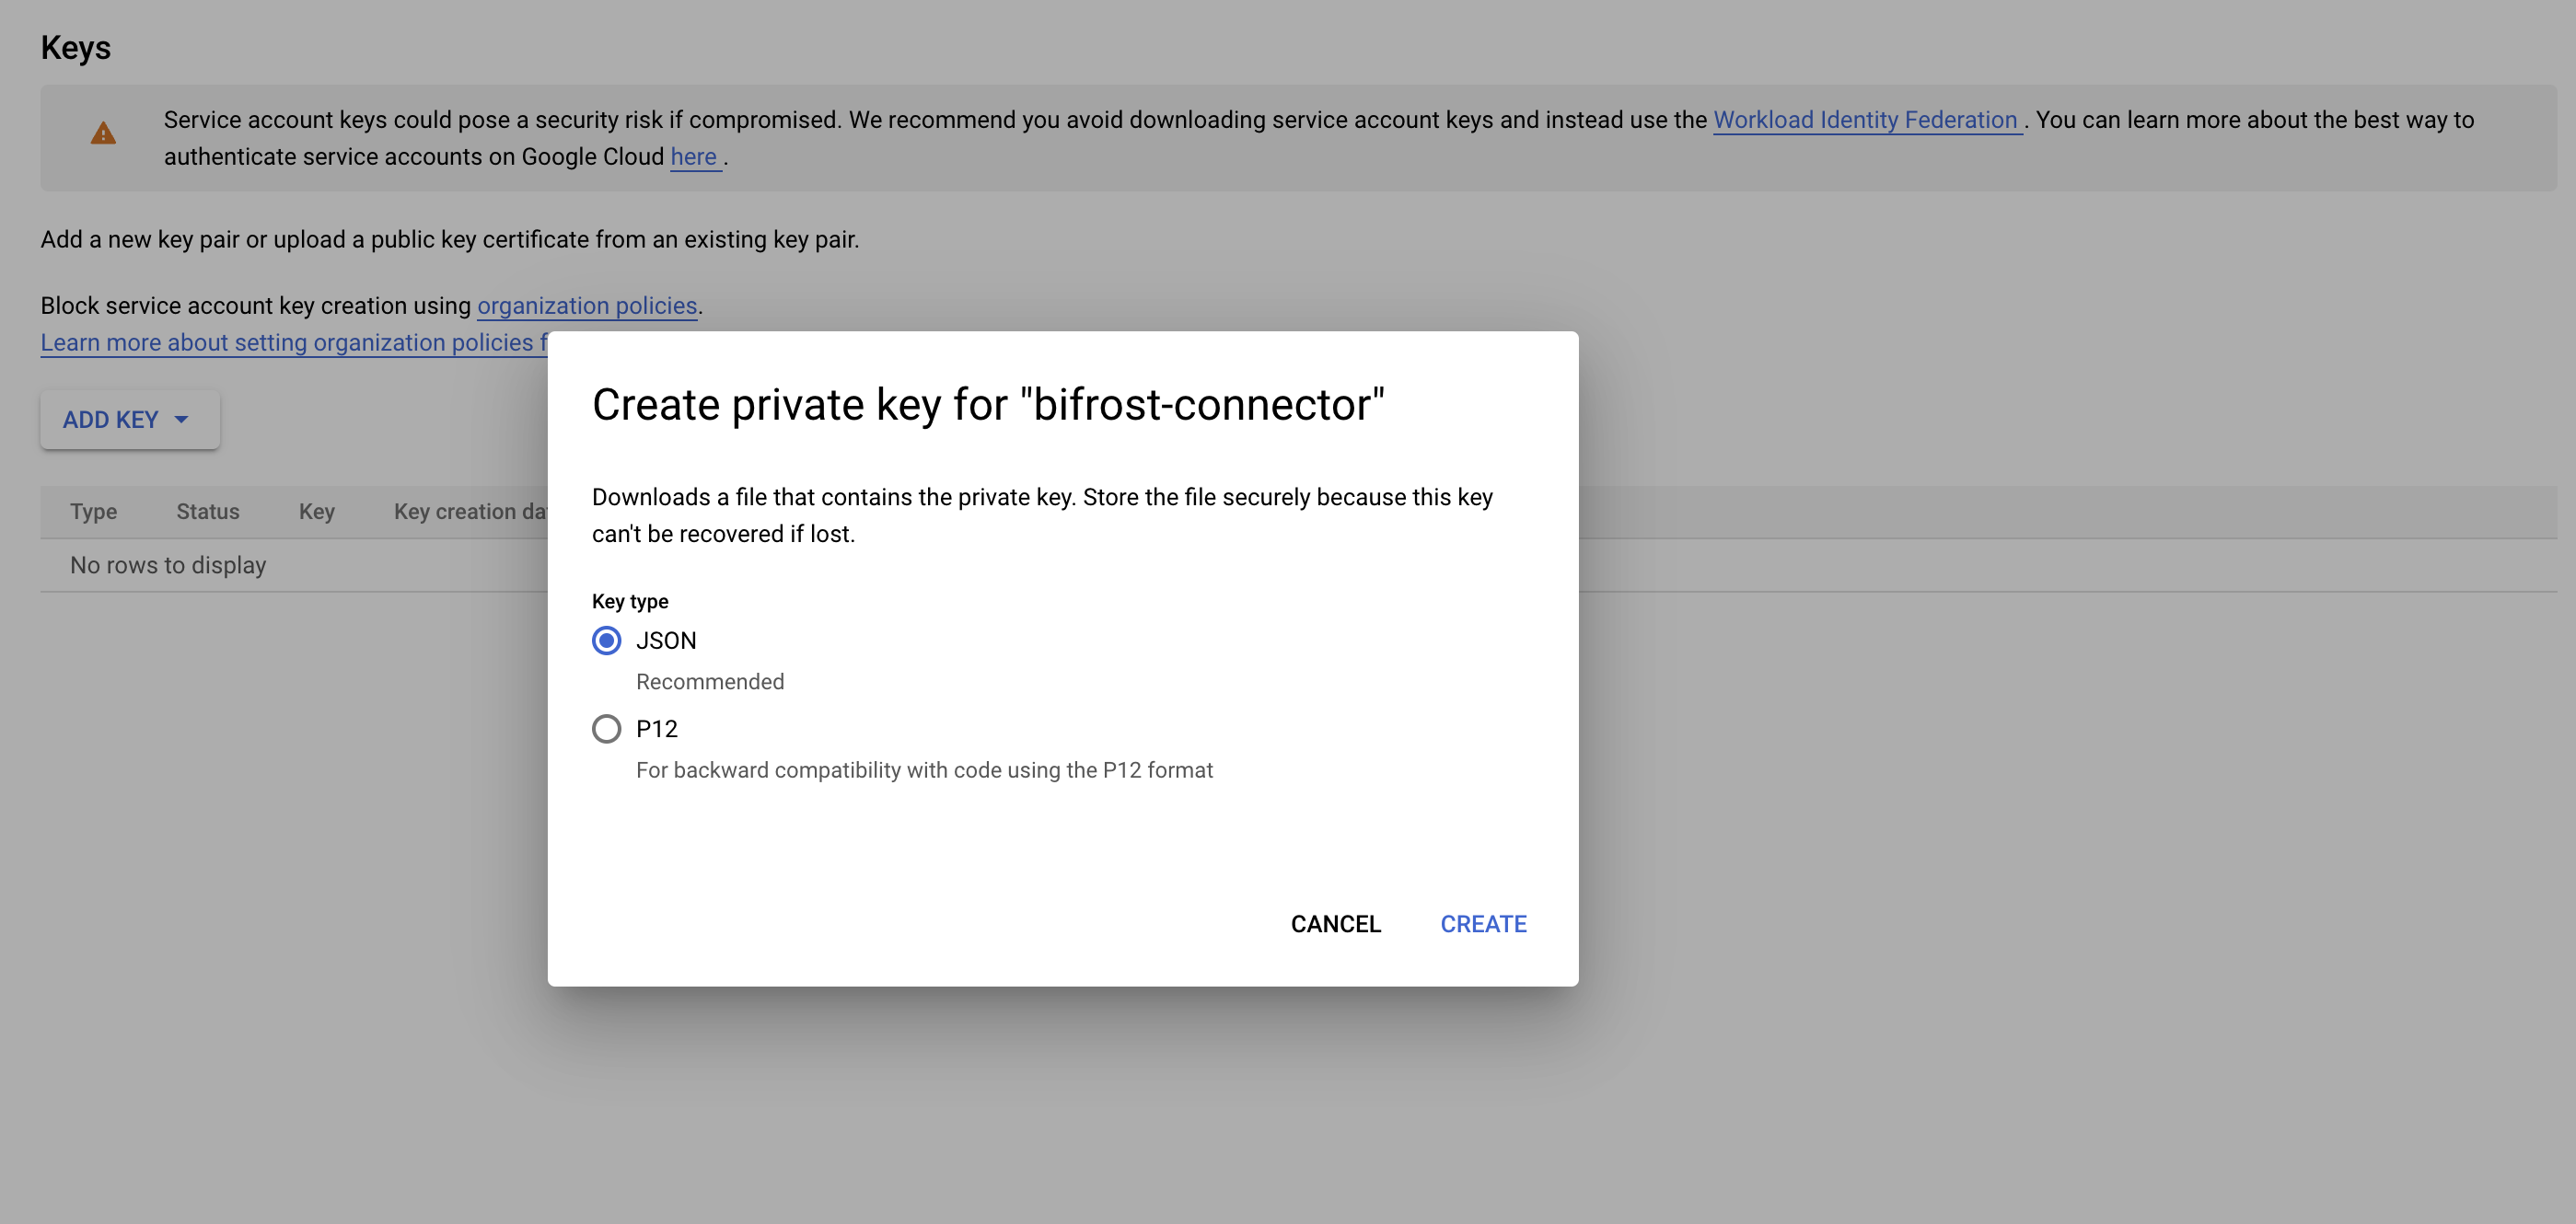 3.4. A JSON file will be downloaded on your system. This file is required in your database integration form.
## Best Practices
Before you setup your database sync, you should take some measures to ensure the security of your customers’ data and limit performance impacts to your backend database. The following “best practice” suggestions can help you limit the potential for data exposure and minimize performance impacts:
* **Sync your read-only replica instance:** Do not sync data directly from your main instance. Instead use a read-only data replica to minimize the load and avoid data loss on your main database.
* **User connected here should have minimal privileges:** You should have a database user with minimal privileges. This person only requires read permissions with access limited to the tables you want to sync from.
* **Sync only the data that you’ll need:** Limiting your query can improve performance, and minimize the potential to expose sensitive data. Select only the columns you need to either update user profile in SuprSend and to create list sync.
* **"Use `{{last_sync_time}}` to limit query results:** Make sure you use the **`{{last_sync_time}}`** variable in your recurring sync queries. It stores the timestamp of last successful sync in your list. Adding it in your where statement against datetime index can really speed up the query and limit the number of results returned in consecutive syncs. `{{last_sync_time}}` is stored in timestamp format. Use relevant cast expression to format it based on your column type.
* **Limit your sync frequency:** Setup a sync frequency based on how frequently you want to send notifications on that list. If the previous sync is still in progress when the next interval occurs, we’ll skip the operation and catch up your data on the next interval. Skipped syncs show`Ignored`status in the logs. Frequently skipped operations may indicate that you’re syncing too often. You should monitor your first few syncs to ensure that you haven’t impacted your system’s performance.
***
3.4. A JSON file will be downloaded on your system. This file is required in your database integration form.
## Best Practices
Before you setup your database sync, you should take some measures to ensure the security of your customers’ data and limit performance impacts to your backend database. The following “best practice” suggestions can help you limit the potential for data exposure and minimize performance impacts:
* **Sync your read-only replica instance:** Do not sync data directly from your main instance. Instead use a read-only data replica to minimize the load and avoid data loss on your main database.
* **User connected here should have minimal privileges:** You should have a database user with minimal privileges. This person only requires read permissions with access limited to the tables you want to sync from.
* **Sync only the data that you’ll need:** Limiting your query can improve performance, and minimize the potential to expose sensitive data. Select only the columns you need to either update user profile in SuprSend and to create list sync.
* **"Use `{{last_sync_time}}` to limit query results:** Make sure you use the **`{{last_sync_time}}`** variable in your recurring sync queries. It stores the timestamp of last successful sync in your list. Adding it in your where statement against datetime index can really speed up the query and limit the number of results returned in consecutive syncs. `{{last_sync_time}}` is stored in timestamp format. Use relevant cast expression to format it based on your column type.
* **Limit your sync frequency:** Setup a sync frequency based on how frequently you want to send notifications on that list. If the previous sync is still in progress when the next interval occurs, we’ll skip the operation and catch up your data on the next interval. Skipped syncs show`Ignored`status in the logs. Frequently skipped operations may indicate that you’re syncing too often. You should monitor your first few syncs to ensure that you haven’t impacted your system’s performance.
***