> ## Documentation Index
> Fetch the complete documentation index at: https://docs.suprsend.com/llms.txt
> Use this file to discover all available pages before exploring further.
# iOS Push Setup (APNs)
## Prerequisites
* [Integration of SuprSend Flutter SDK](/docs/flutter-integration)
* Configuring [iOS vendor form](/docs/ios-push-vendor-integration) in SuprSend dashboard
Example can be found in the [`example/`](https://github.com/suprsend/suprsend-flutter-sdk/tree/main/example) app.
## Step 1: Add capabilities in iOS application
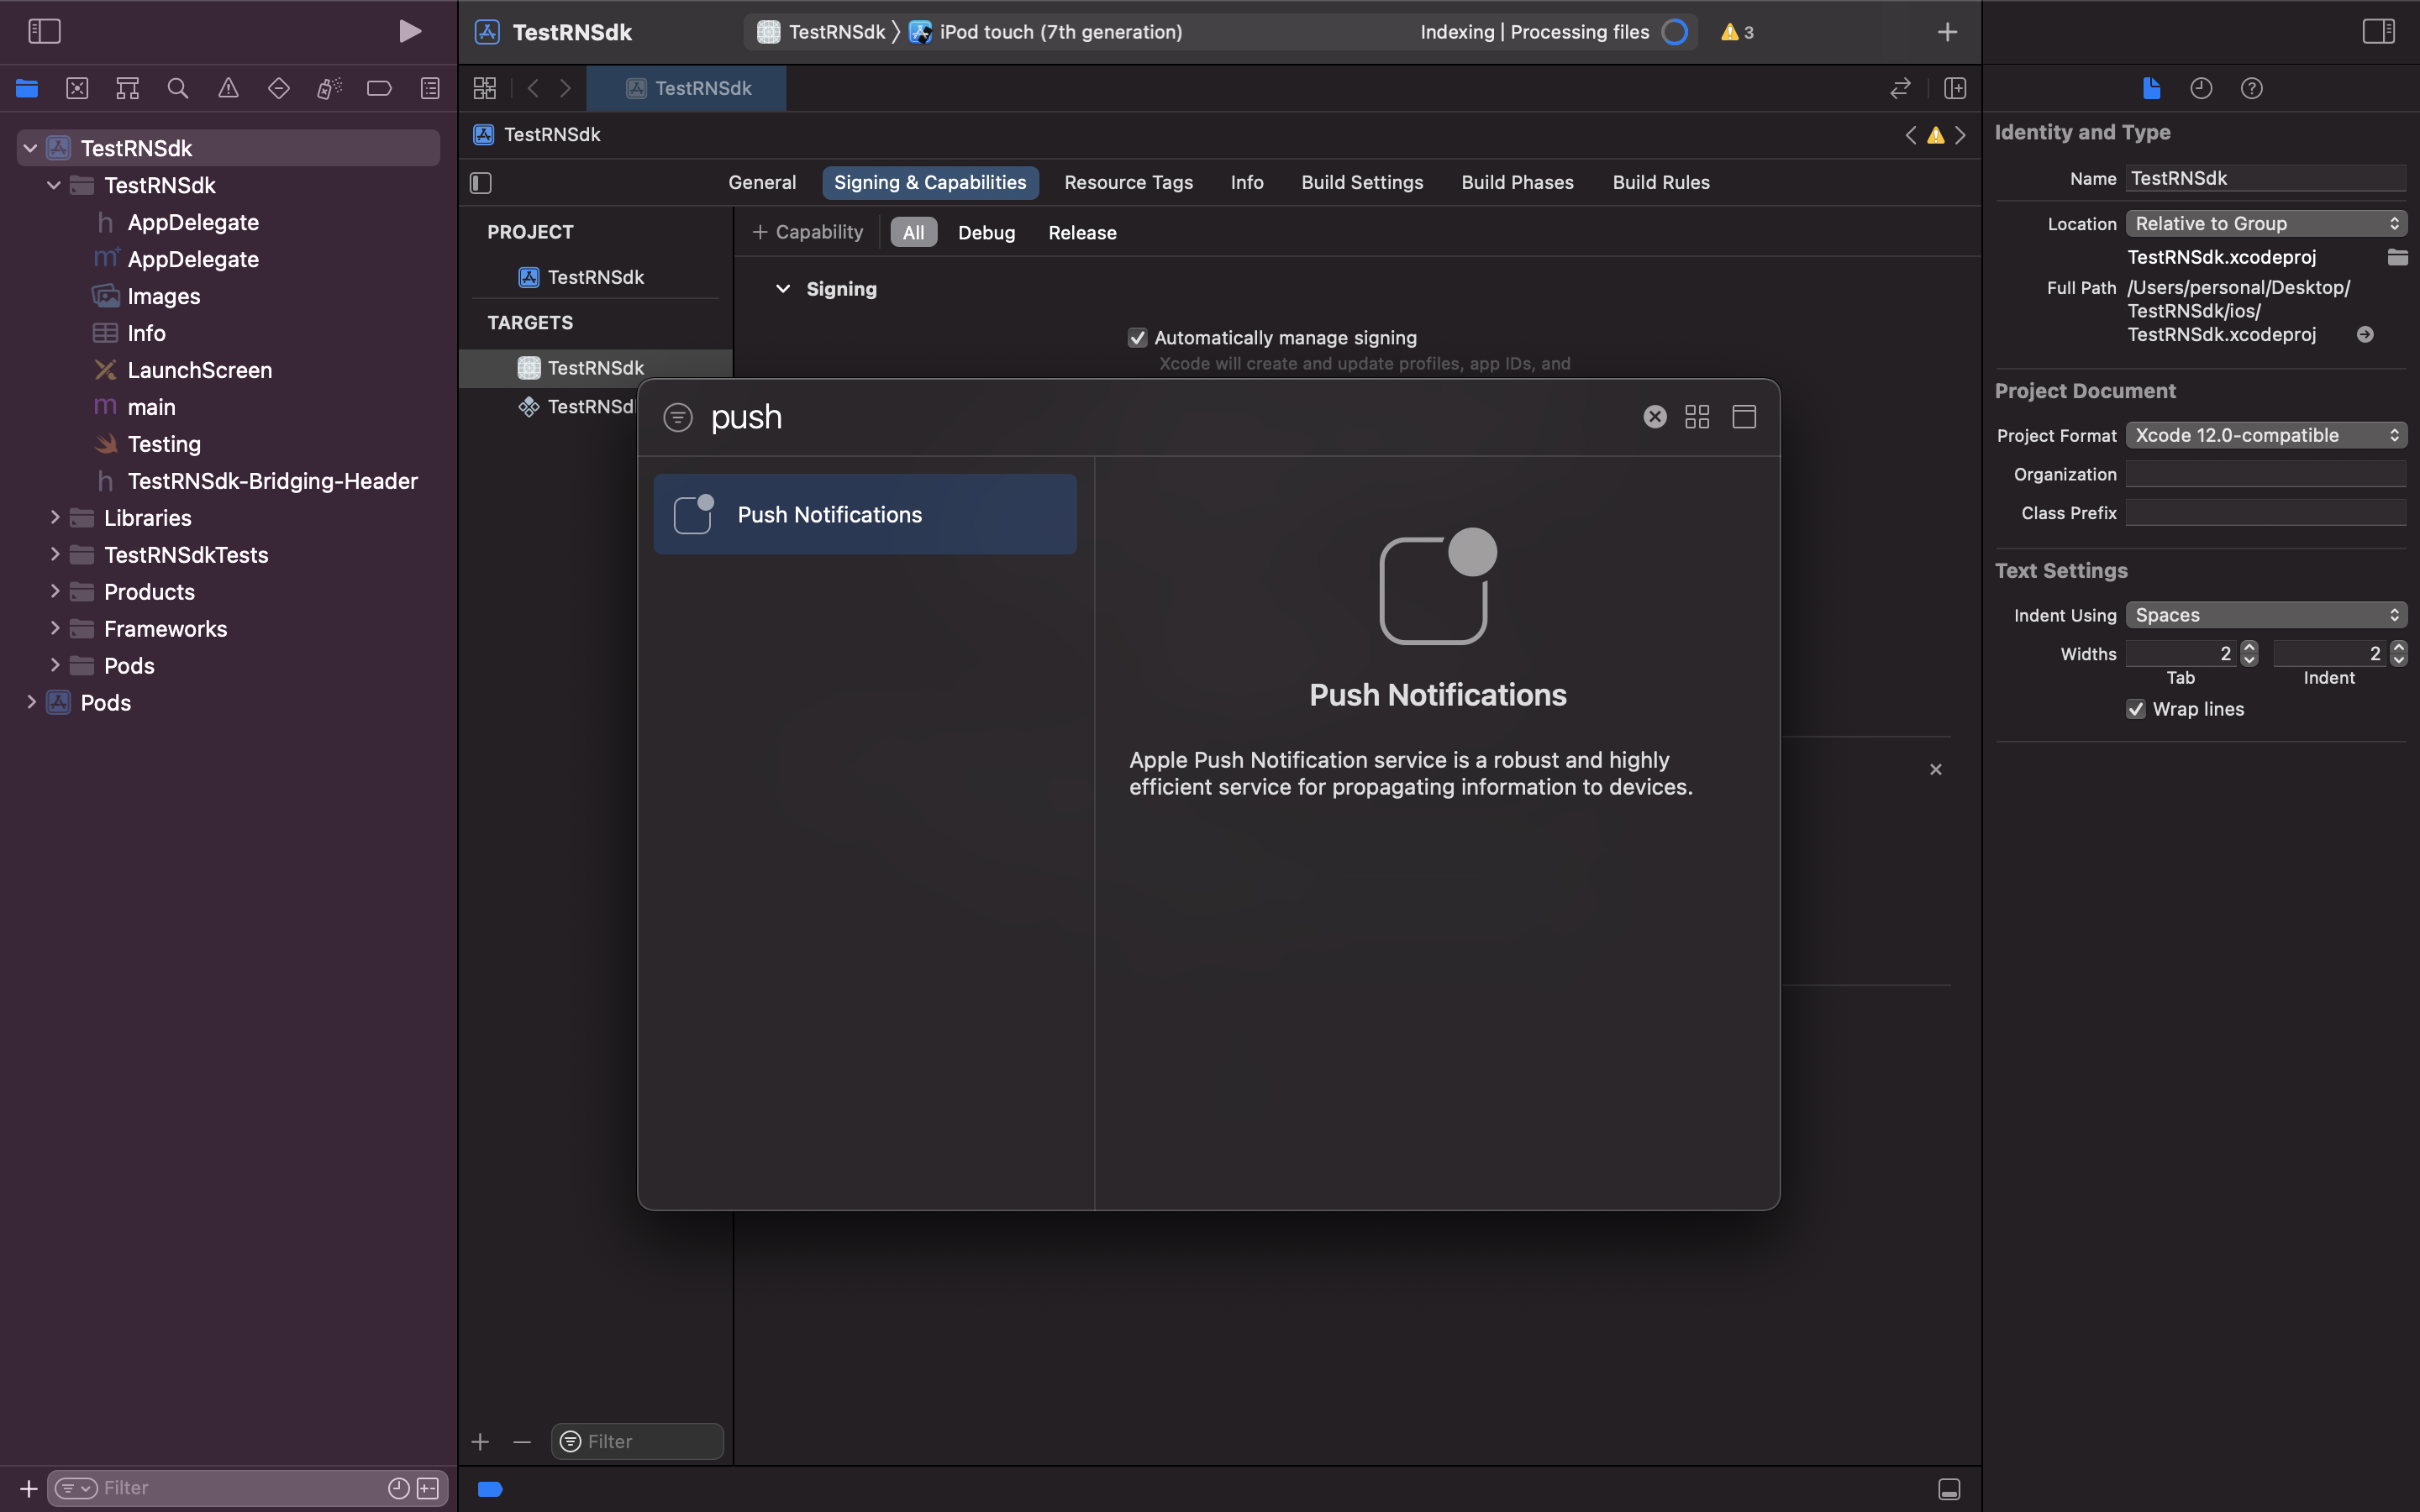
Open `ios/Runner.xcworkspace`, select the **Runner** target → **Signing & Capabilities**, click **+ Capability**, and add **Push Notifications**.
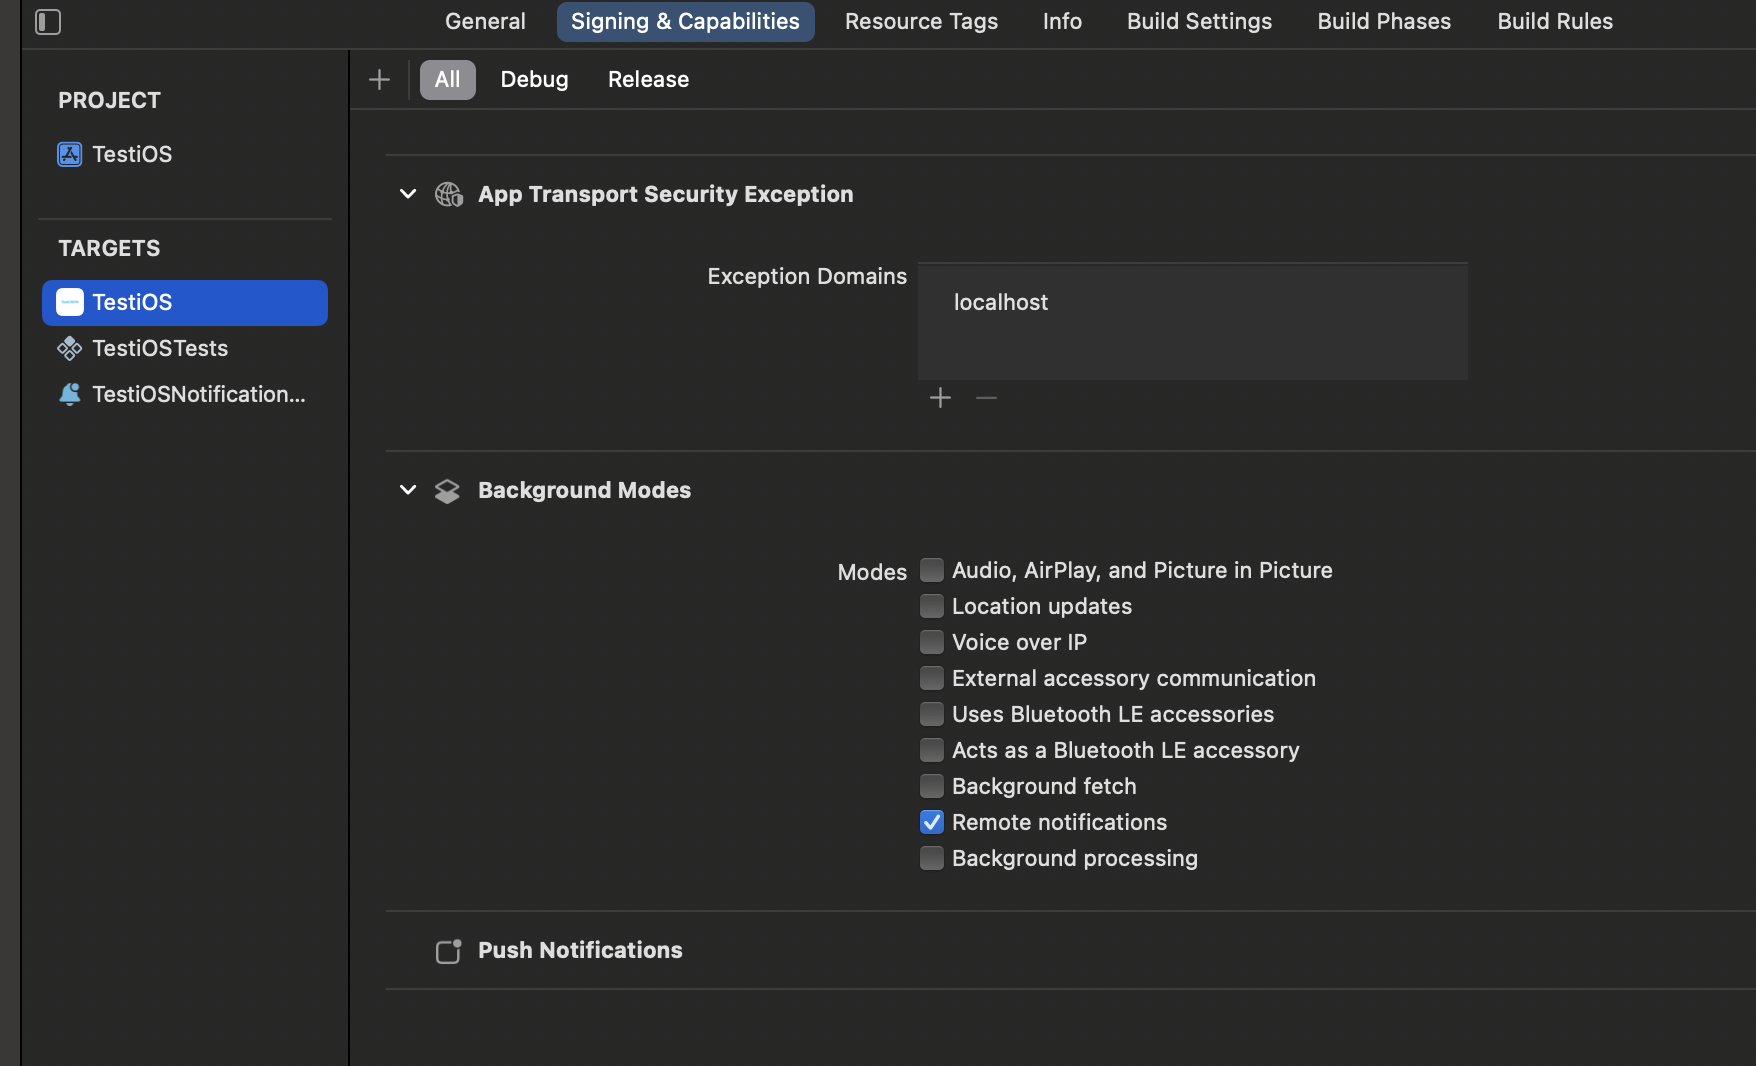
 Add **Background Modes** the same way, then tick **Remote notifications**. This lets APNs wake the app so delivery of background notifications can be tracked.
 ## Step 2: Ask permission and register for push notification
In `ios/Runner/AppDelegate.swift`, set the notification center delegate, request permission, and register with APNs inside `didFinishLaunchingWithOptions`:
```swift AppDelegate.swift theme={"system"}
import UIKit
import Flutter
import UserNotifications
import SuprSendSwift
@UIApplicationMain
@objc class AppDelegate: FlutterAppDelegate {
override func application(
_ application: UIApplication,
didFinishLaunchingWithOptions launchOptions: [UIApplication.LaunchOptionsKey: Any]?
) -> Bool {
GeneratedPluginRegistrant.register(with: self)
// Request notification permission and register for the APNs token.
UNUserNotificationCenter.current().delegate = self
UNUserNotificationCenter.current().requestAuthorization(
options: [.alert, .sound, .badge]
) { granted, _ in
if granted {
DispatchQueue.main.async {
application.registerForRemoteNotifications()
}
}
}
return super.application(application, didFinishLaunchingWithOptions: launchOptions)
}
}
```
### Asking user permission
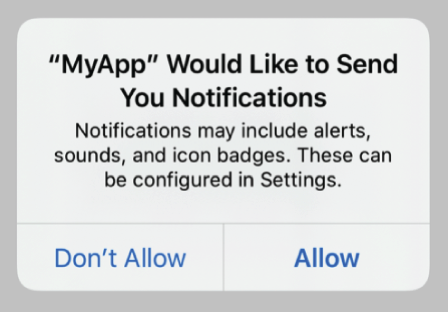
The `options` you pass to `requestAuthorization` decide how the user is prompted for permission.
This shows the system permission dialog and, once the user allows it, enables alert, sound and badge.
```swift AppDelegate.swift theme={"system"}
UNUserNotificationCenter.current().requestAuthorization(
options: [.alert, .sound, .badge]
) { granted, _ in
// ...
}
```
Explicit authorization is the default method, as it automatically sets alert, sound and badge as soon as the user allows the request.
## Step 2: Ask permission and register for push notification
In `ios/Runner/AppDelegate.swift`, set the notification center delegate, request permission, and register with APNs inside `didFinishLaunchingWithOptions`:
```swift AppDelegate.swift theme={"system"}
import UIKit
import Flutter
import UserNotifications
import SuprSendSwift
@UIApplicationMain
@objc class AppDelegate: FlutterAppDelegate {
override func application(
_ application: UIApplication,
didFinishLaunchingWithOptions launchOptions: [UIApplication.LaunchOptionsKey: Any]?
) -> Bool {
GeneratedPluginRegistrant.register(with: self)
// Request notification permission and register for the APNs token.
UNUserNotificationCenter.current().delegate = self
UNUserNotificationCenter.current().requestAuthorization(
options: [.alert, .sound, .badge]
) { granted, _ in
if granted {
DispatchQueue.main.async {
application.registerForRemoteNotifications()
}
}
}
return super.application(application, didFinishLaunchingWithOptions: launchOptions)
}
}
```
### Asking user permission
The `options` you pass to `requestAuthorization` decide how the user is prompted for permission.
This shows the system permission dialog and, once the user allows it, enables alert, sound and badge.
```swift AppDelegate.swift theme={"system"}
UNUserNotificationCenter.current().requestAuthorization(
options: [.alert, .sound, .badge]
) { granted, _ in
// ...
}
```
Explicit authorization is the default method, as it automatically sets alert, sound and badge as soon as the user allows the request.
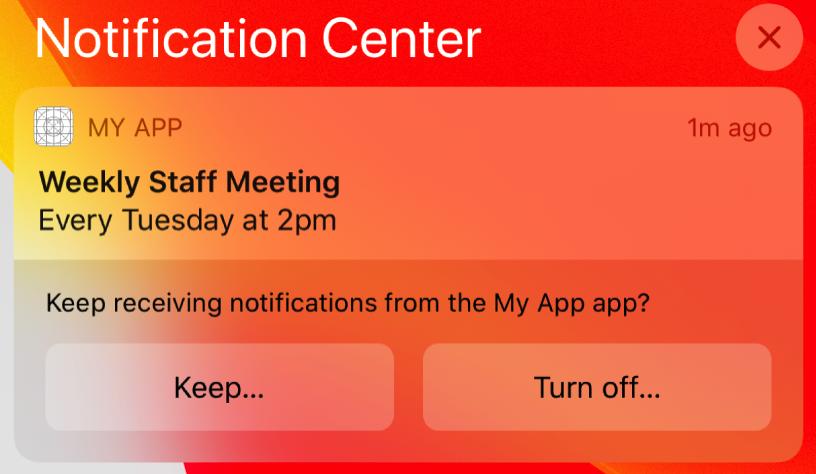
 Supported on iOS 12+. Add `.provisional` to deliver notifications quietly (to Notification Center only, without an upfront prompt) until the user chooses to **Keep** or **Turn off** notifications.
```swift AppDelegate.swift theme={"system"}
UNUserNotificationCenter.current().requestAuthorization(
options: [.alert, .sound, .badge, .provisional]
) { granted, _ in
// ...
}
```
Supported on iOS 12+. Add `.provisional` to deliver notifications quietly (to Notification Center only, without an upfront prompt) until the user chooses to **Keep** or **Turn off** notifications.
```swift AppDelegate.swift theme={"system"}
UNUserNotificationCenter.current().requestAuthorization(
options: [.alert, .sound, .badge, .provisional]
) { granted, _ in
// ...
}
```
 ## Step 3: Enable sending and tracking of push notifications
Add the following overrides to `AppDelegate` to hand the APNs token to SuprSend and forward notification lifecycle events, so delivery and clicks are tracked:
```swift AppDelegate.swift theme={"system"}
// APNs returned the device token — forward it to SuprSend.
override func application(
_ application: UIApplication,
didRegisterForRemoteNotificationsWithDeviceToken deviceToken: Data
) {
let token = deviceToken.map { String(format: "%02.2hhx", $0) }.joined()
Task { _ = await SuprSendClient.shared.user.addiOSPush(token) } // Send APNs token to SuprSend
super.application(application, didRegisterForRemoteNotificationsWithDeviceToken: deviceToken)
}
// Background / silent notification delivery.
override func application(
_ application: UIApplication,
didReceiveRemoteNotification userInfo: [AnyHashable: Any],
fetchCompletionHandler completionHandler: @escaping (UIBackgroundFetchResult) -> Void
) {
SuprSendClient.shared.push.application(
application, didReceiveRemoteNotification: userInfo, fetchCompletionHandler: completionHandler)
completionHandler(.newData)
}
// Notification shown while the app is in the foreground.
override func userNotificationCenter(
_ center: UNUserNotificationCenter,
willPresent notification: UNNotification,
withCompletionHandler completionHandler: @escaping (UNNotificationPresentationOptions) -> Void
) {
SuprSendClient.shared.push.userNotificationCenter(
center, willPresent: notification, withCompletionHandler: completionHandler)
if #available(iOS 14.0, *) {
completionHandler([.banner, .badge, .sound])
} else {
completionHandler([.alert, .badge, .sound])
}
}
// User tapped or dismissed a notification.
override func userNotificationCenter(
_ center: UNUserNotificationCenter,
didReceive response: UNNotificationResponse,
withCompletionHandler completionHandler: @escaping () -> Void
) {
SuprSendClient.shared.push.userNotificationCenter(
center, didReceive: response, withCompletionHandler: completionHandler)
completionHandler()
}
```
The token is associated with the current user automatically and cleared on [`SuprSend.reset()`](/docs/flutter-integration#integration-steps), so notifications stop after logout.
## Step 4: Adding support for Notification service
A Notification Service Extension lets APNs payloads be modified before display — for example to download and attach an image — and improves delivery tracking. Add it if you send rich (image/media) notifications.
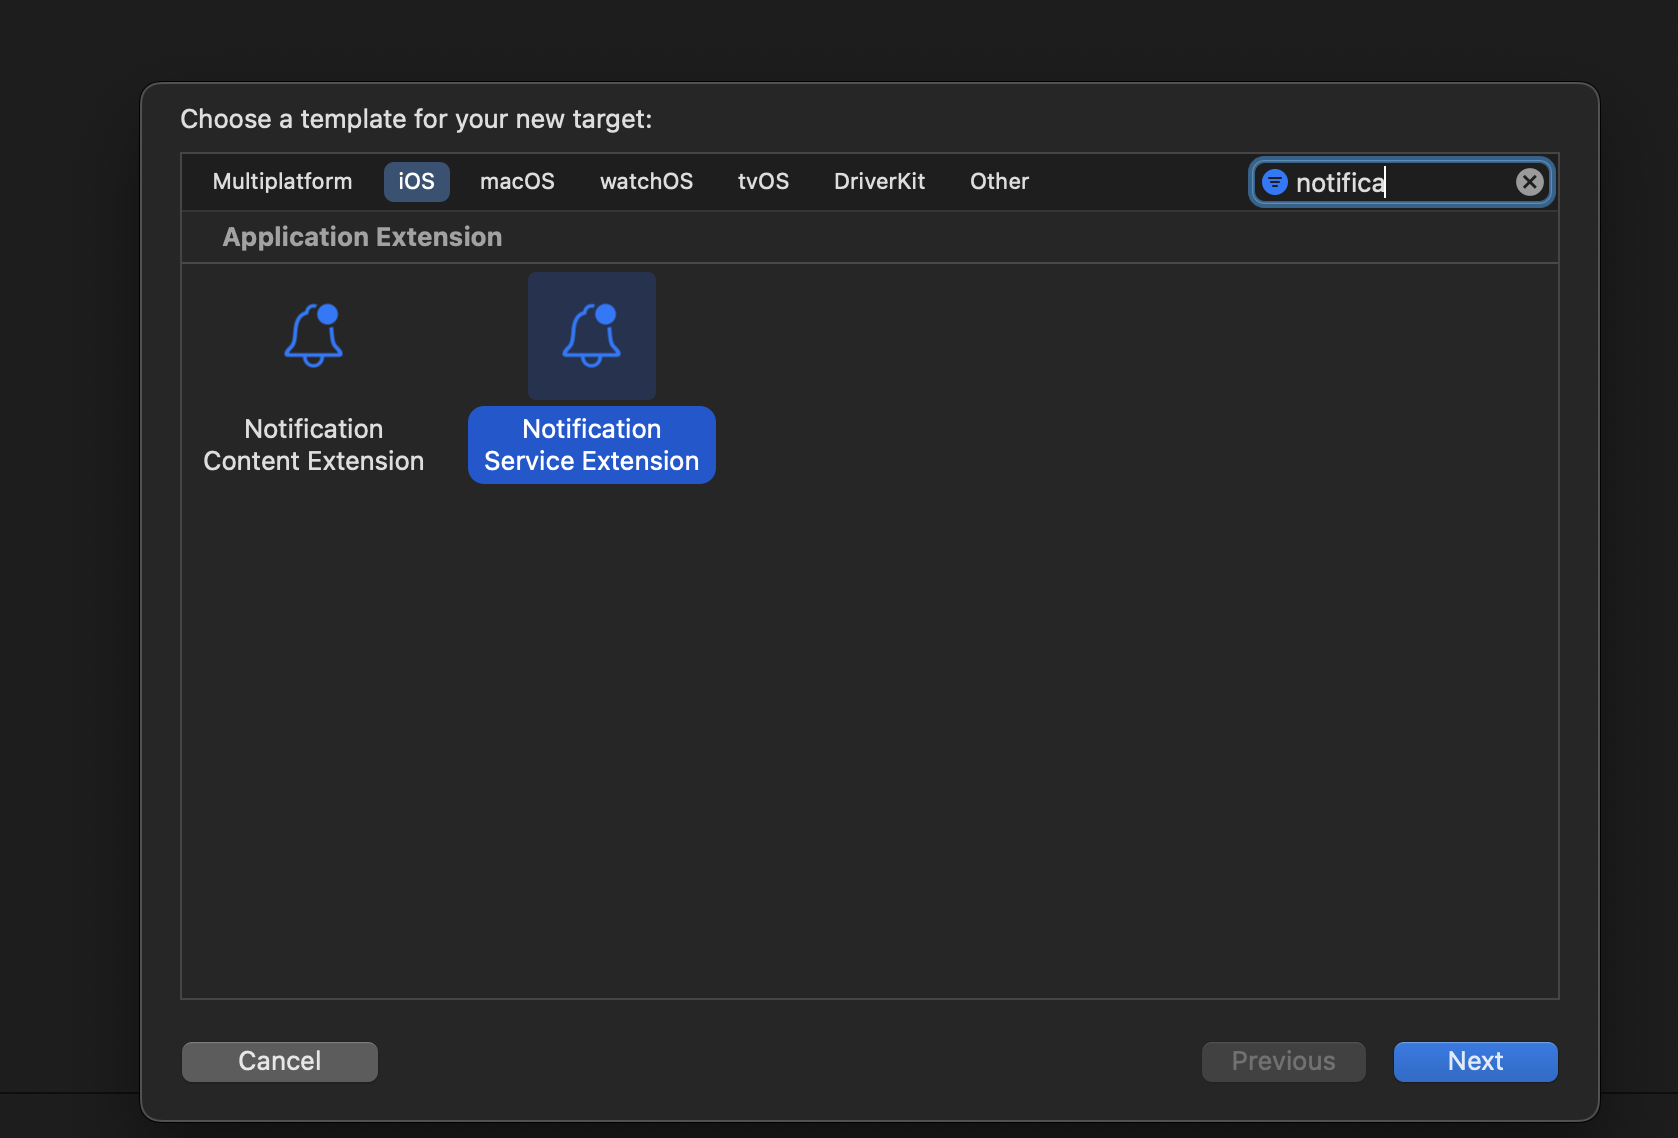
Select **Notification Service Extension** from the template list.
Give the target a name, e.g. `NotificationService`.
## Step 3: Enable sending and tracking of push notifications
Add the following overrides to `AppDelegate` to hand the APNs token to SuprSend and forward notification lifecycle events, so delivery and clicks are tracked:
```swift AppDelegate.swift theme={"system"}
// APNs returned the device token — forward it to SuprSend.
override func application(
_ application: UIApplication,
didRegisterForRemoteNotificationsWithDeviceToken deviceToken: Data
) {
let token = deviceToken.map { String(format: "%02.2hhx", $0) }.joined()
Task { _ = await SuprSendClient.shared.user.addiOSPush(token) } // Send APNs token to SuprSend
super.application(application, didRegisterForRemoteNotificationsWithDeviceToken: deviceToken)
}
// Background / silent notification delivery.
override func application(
_ application: UIApplication,
didReceiveRemoteNotification userInfo: [AnyHashable: Any],
fetchCompletionHandler completionHandler: @escaping (UIBackgroundFetchResult) -> Void
) {
SuprSendClient.shared.push.application(
application, didReceiveRemoteNotification: userInfo, fetchCompletionHandler: completionHandler)
completionHandler(.newData)
}
// Notification shown while the app is in the foreground.
override func userNotificationCenter(
_ center: UNUserNotificationCenter,
willPresent notification: UNNotification,
withCompletionHandler completionHandler: @escaping (UNNotificationPresentationOptions) -> Void
) {
SuprSendClient.shared.push.userNotificationCenter(
center, willPresent: notification, withCompletionHandler: completionHandler)
if #available(iOS 14.0, *) {
completionHandler([.banner, .badge, .sound])
} else {
completionHandler([.alert, .badge, .sound])
}
}
// User tapped or dismissed a notification.
override func userNotificationCenter(
_ center: UNUserNotificationCenter,
didReceive response: UNNotificationResponse,
withCompletionHandler completionHandler: @escaping () -> Void
) {
SuprSendClient.shared.push.userNotificationCenter(
center, didReceive: response, withCompletionHandler: completionHandler)
completionHandler()
}
```
The token is associated with the current user automatically and cleared on [`SuprSend.reset()`](/docs/flutter-integration#integration-steps), so notifications stop after logout.
## Step 4: Adding support for Notification service
A Notification Service Extension lets APNs payloads be modified before display — for example to download and attach an image — and improves delivery tracking. Add it if you send rich (image/media) notifications.
Select **Notification Service Extension** from the template list.
Give the target a name, e.g. `NotificationService`.
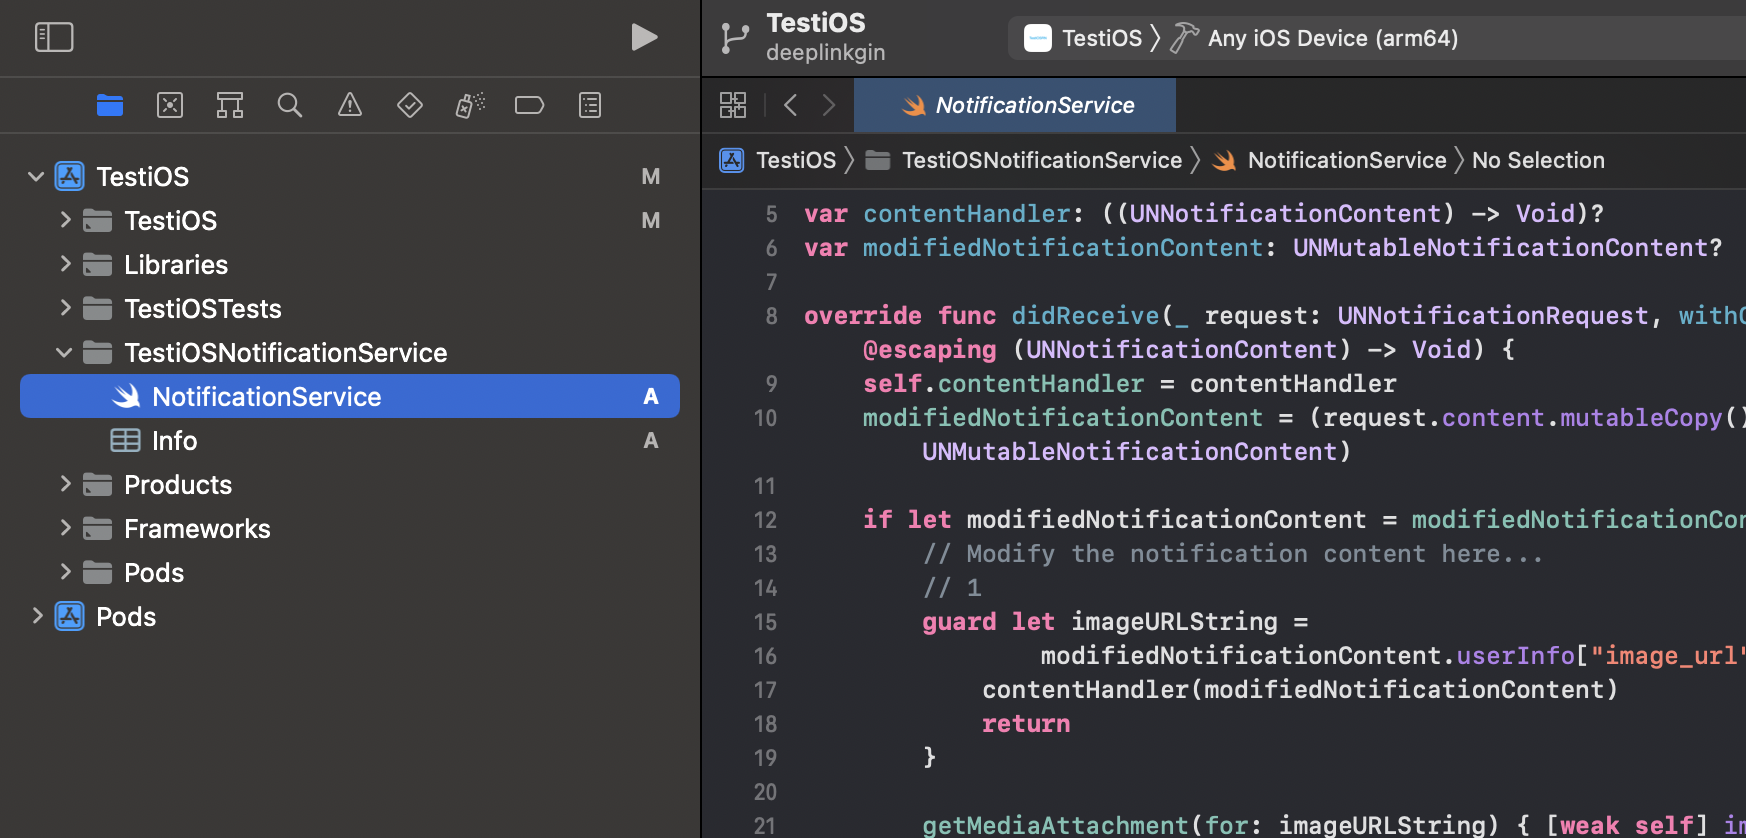
 Xcode creates a folder containing `NotificationService.swift` and `Info.plist`.
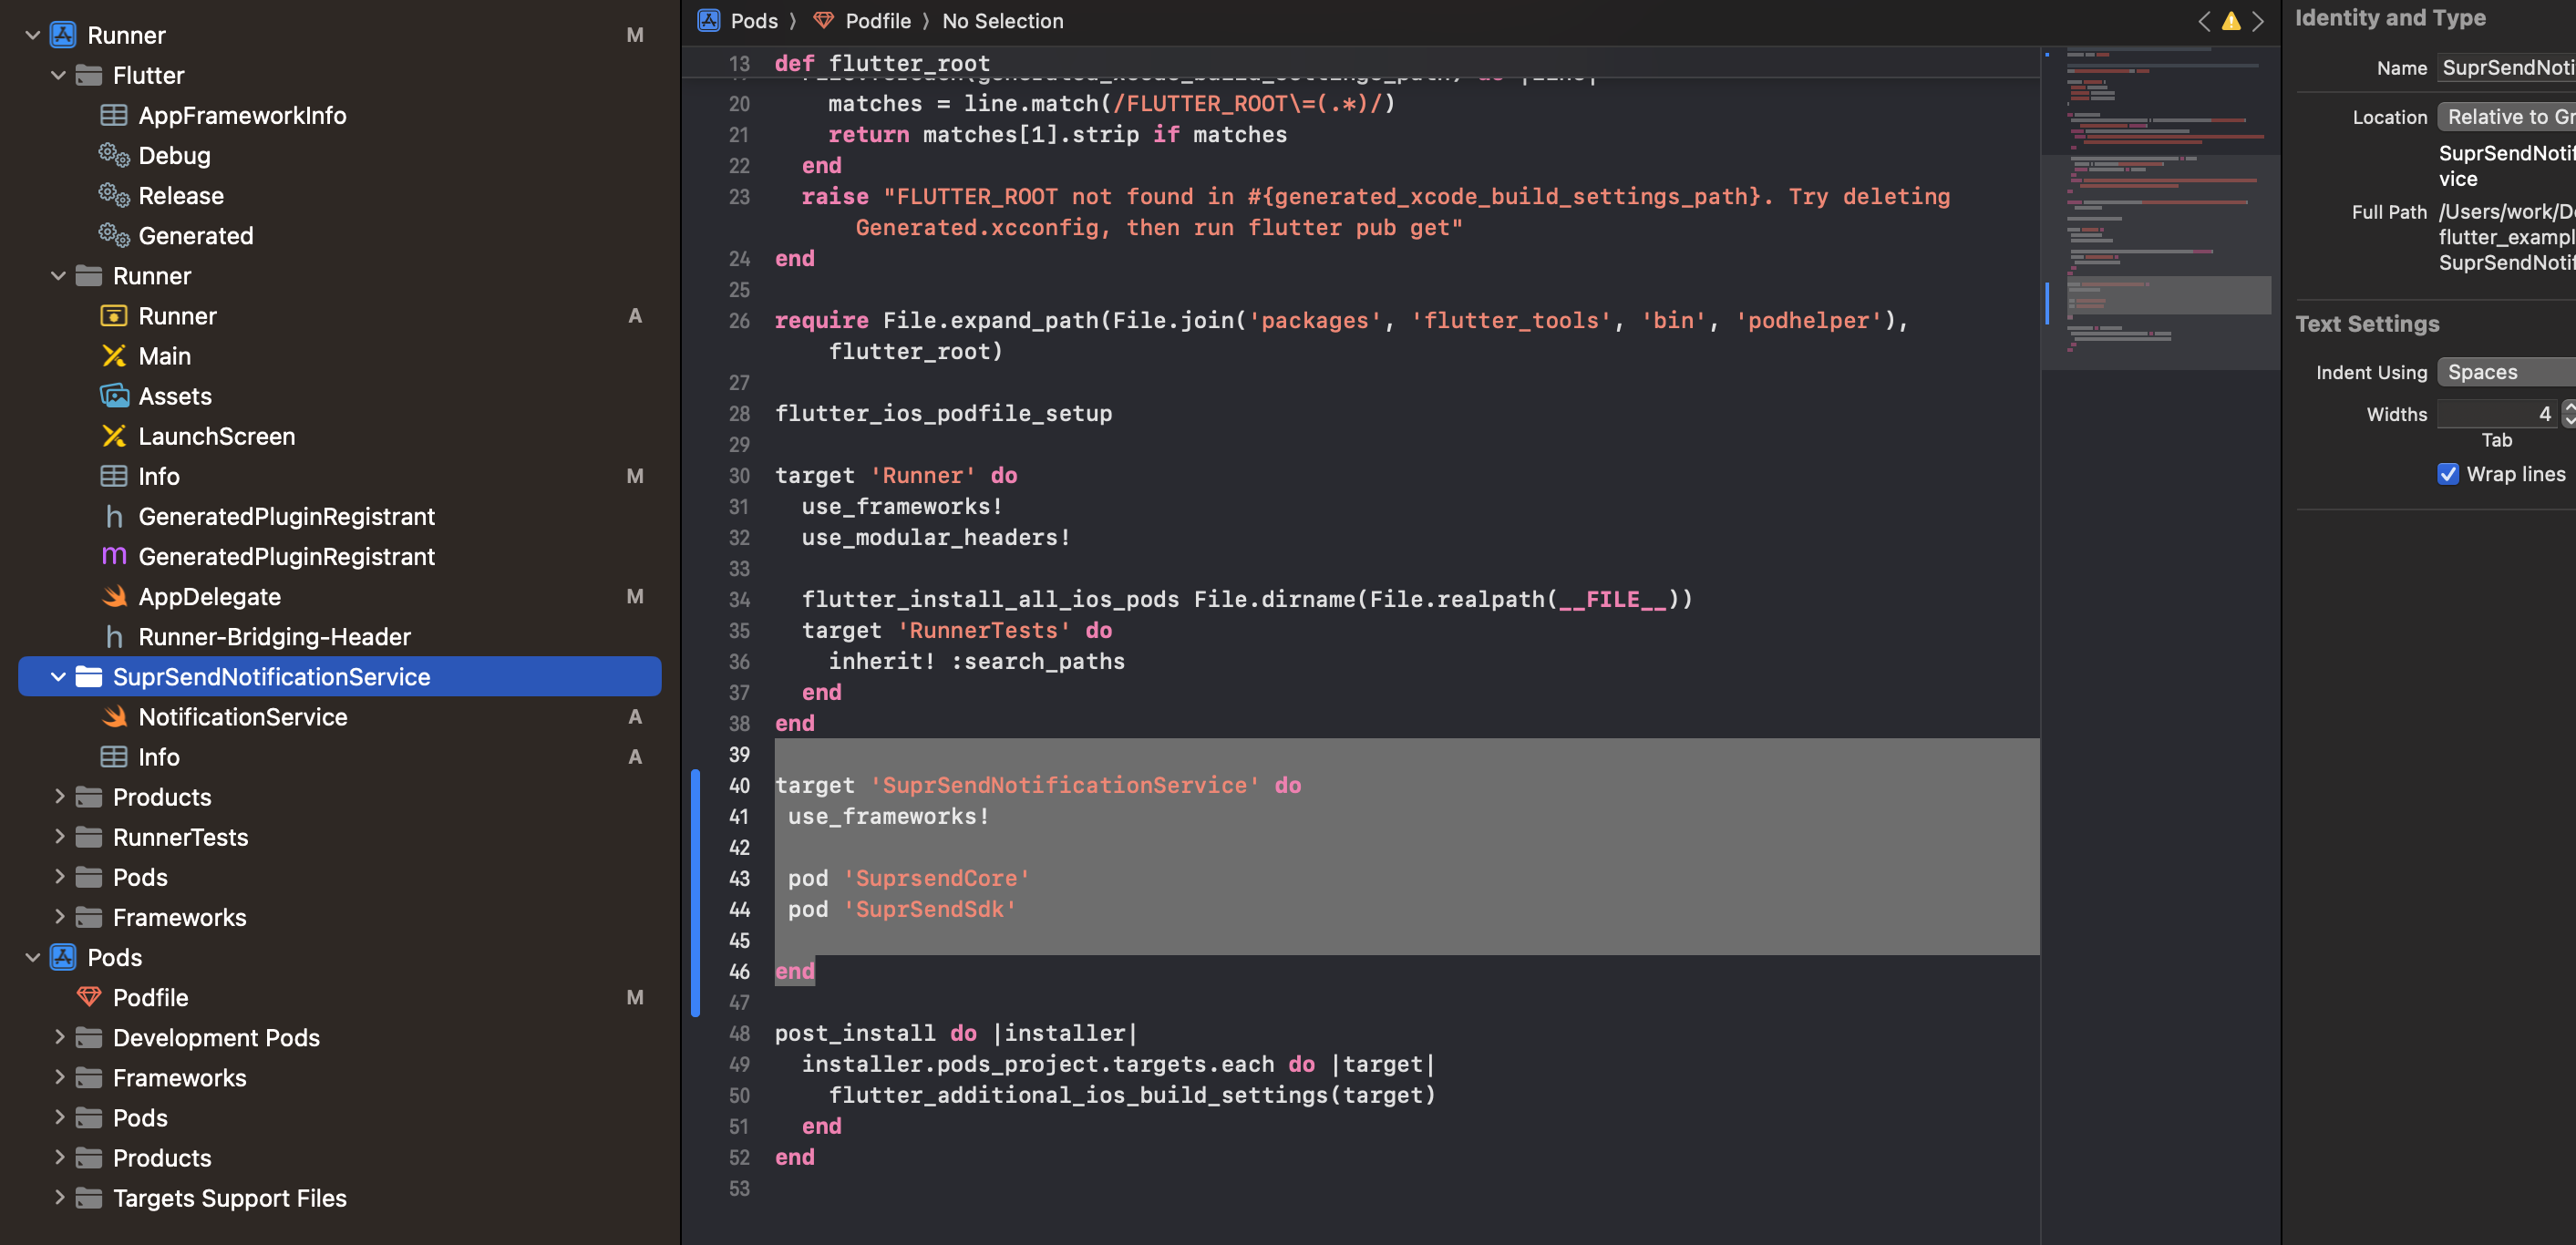
 In `ios/Podfile`, add a target block for the extension then run `pod install` from the `ios/` directory:
```ruby ios/Podfile theme={"system"}
# Notification Service Extension: links SuprSendSwift for rich (image/media) notifications.
target 'NotificationService' do
use_frameworks!
pod 'SuprSendSwift', '~> 1.2'
end
```
In `ios/Podfile`, add a target block for the extension then run `pod install` from the `ios/` directory:
```ruby ios/Podfile theme={"system"}
# Notification Service Extension: links SuprSendSwift for rich (image/media) notifications.
target 'NotificationService' do
use_frameworks!
pod 'SuprSendSwift', '~> 1.2'
end
```
 Replace the generated `NotificationService.swift` code with the below one and add a valid public api key in place of `YOUR_PUBLIC_KEY`.
```swift NotificationService.swift theme={"system"}
import UserNotifications
import SuprSendSwift
final class NotificationService: SuprSendNotificationService {
// Must match the public key passed to SuprSend(...) in your Dart main().
override func publicKey() -> String {
"YOUR_PUBLIC_KEY"
}
}
```
That's it, you are all set to test your APNs push.
Replace the generated `NotificationService.swift` code with the below one and add a valid public api key in place of `YOUR_PUBLIC_KEY`.
```swift NotificationService.swift theme={"system"}
import UserNotifications
import SuprSendSwift
final class NotificationService: SuprSendNotificationService {
// Must match the public key passed to SuprSend(...) in your Dart main().
override func publicKey() -> String {
"YOUR_PUBLIC_KEY"
}
}
```
That's it, you are all set to test your APNs push.