> ## Documentation Index
> Fetch the complete documentation index at: https://docs.suprsend.com/llms.txt
> Use this file to discover all available pages before exploring further.
# iOS Push
> Guide to setup APNS iOS Push configuration in SuprSend.
## Add APNs configuration on SuprSend dashboard
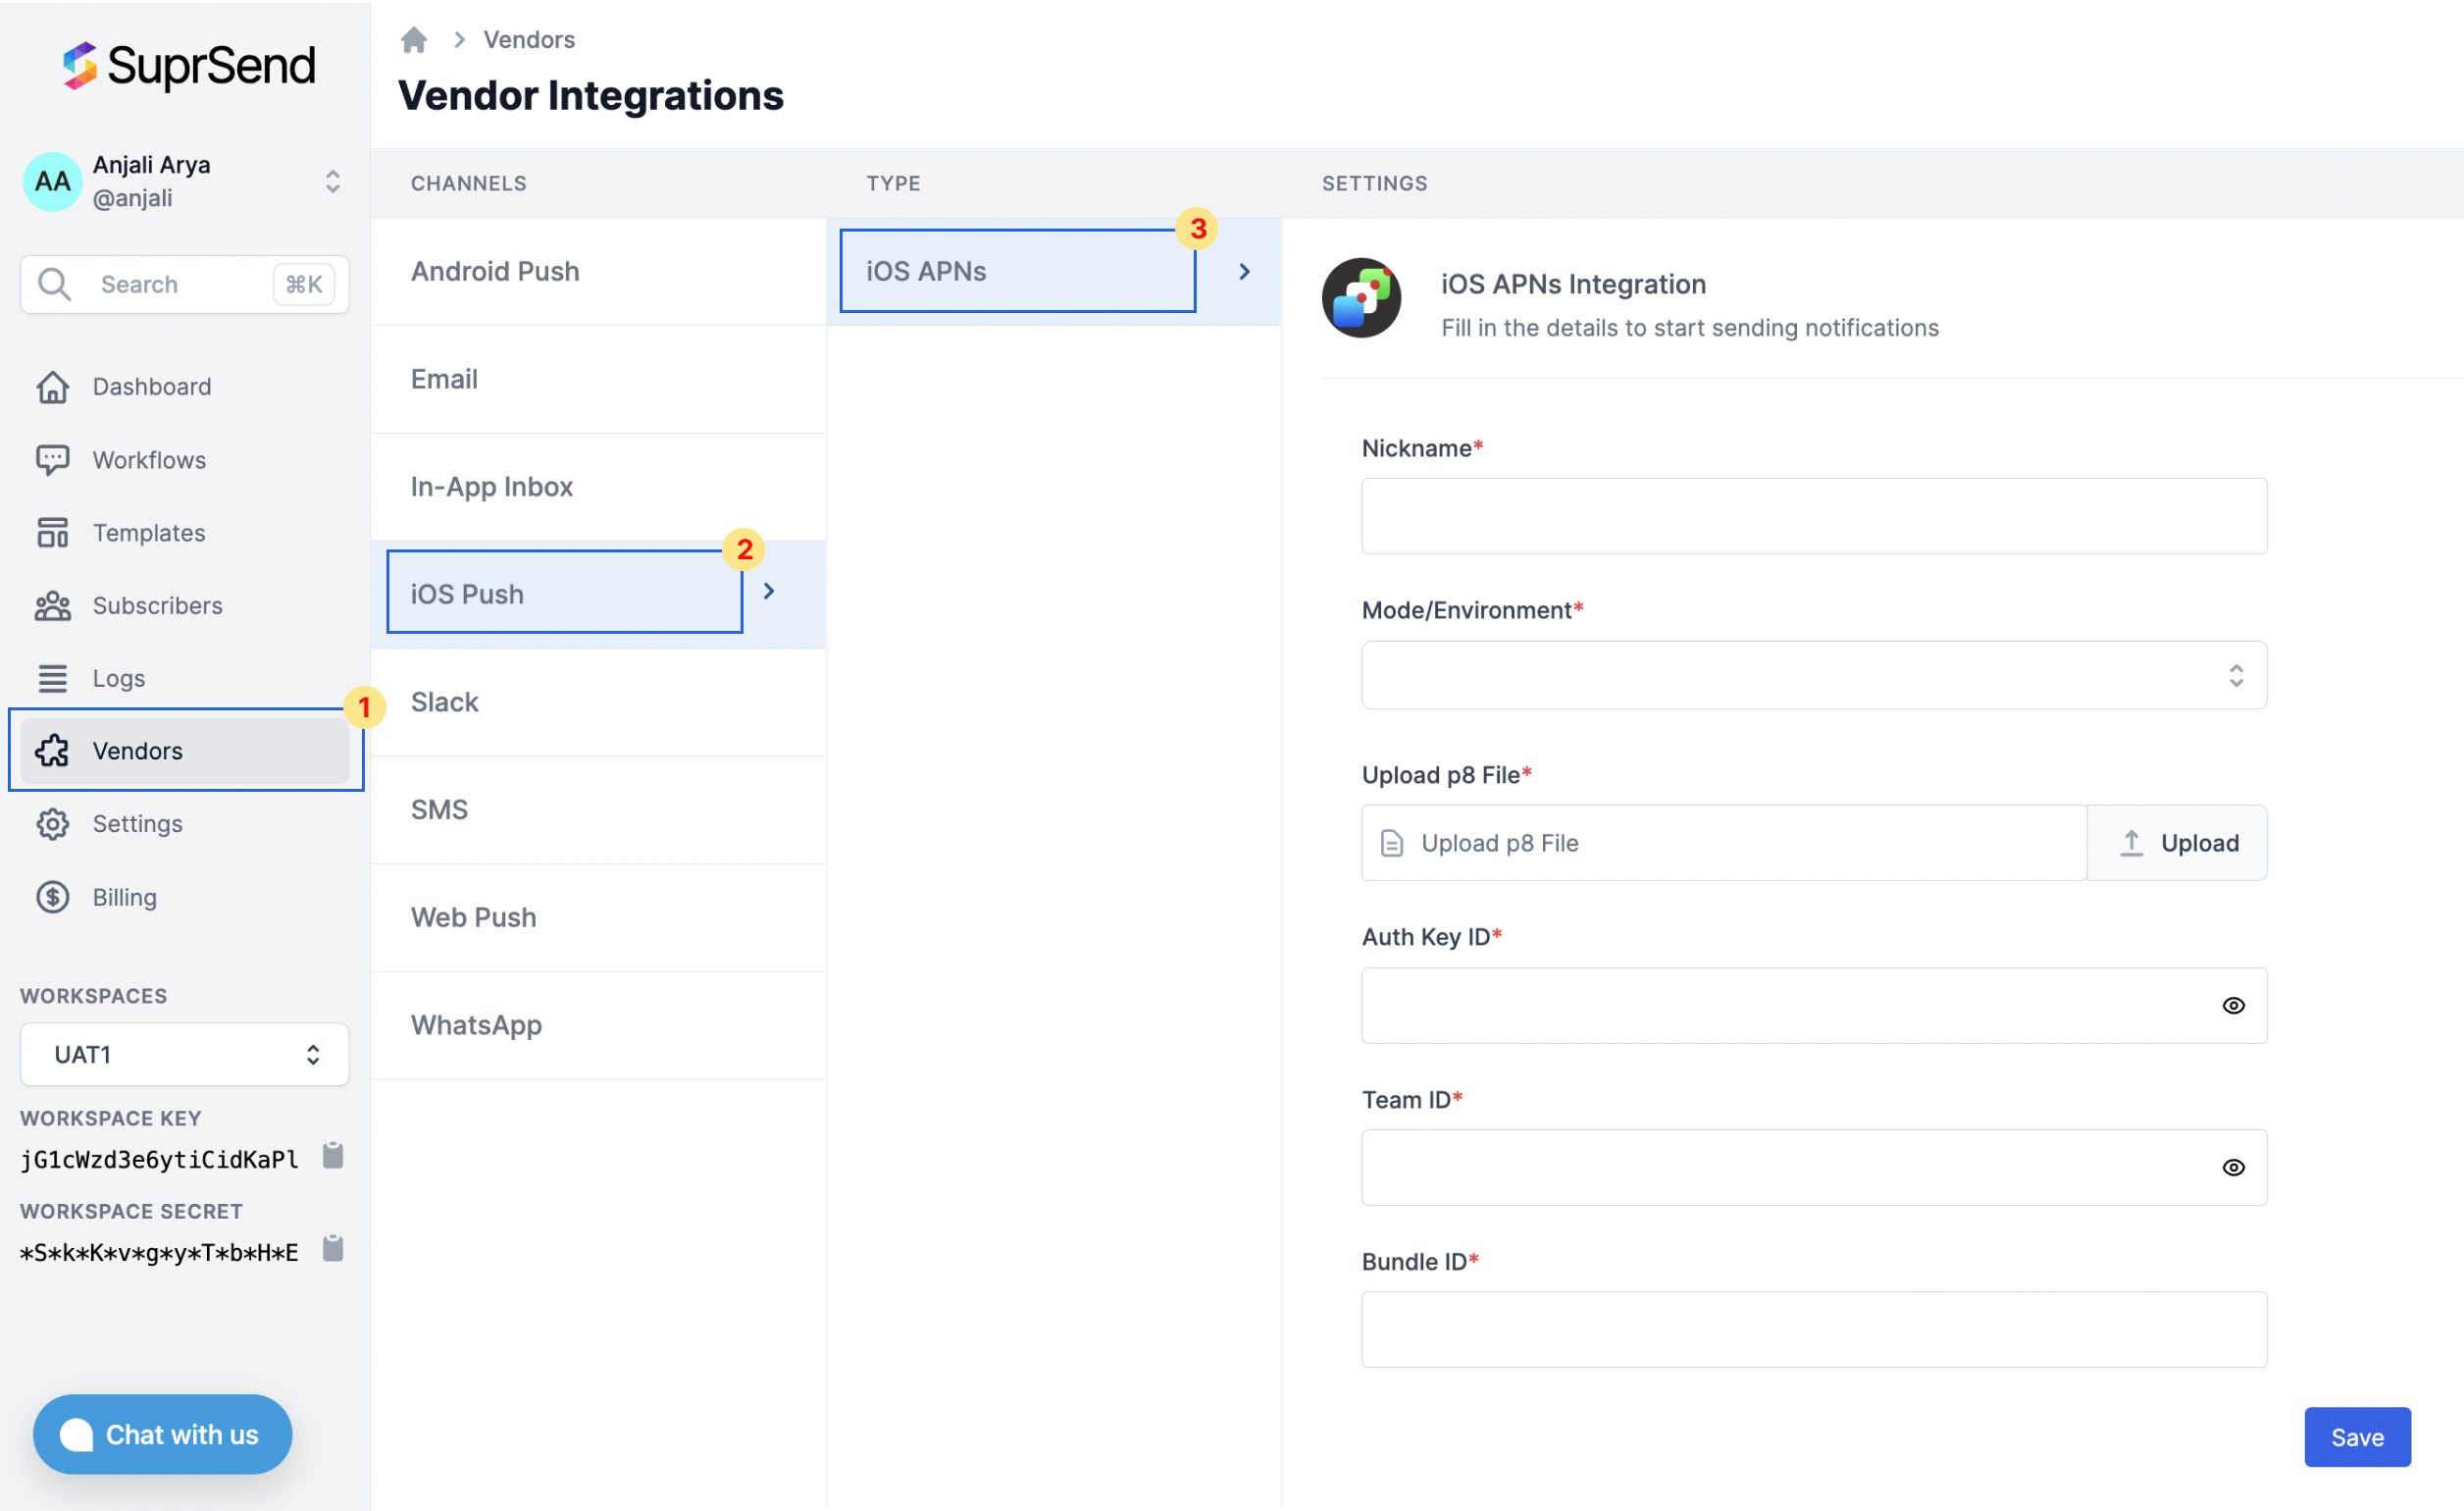
On the SuprSend dashboard, go to vendor page from side panel, select iOSpush and fill in below details. You'll get all these information from [Apple developer account](https://developer.apple.com/account/)
 | Form Field | Description |
| ---------------- | ----------------------------------------------------------------------------------------------------------------------------------------------------------------------------------------------------------------------------------------------------------------------------------------------------------------- |
| Nickname | You can give any name which may help you to identify this account easily |
| Mode/Environment | Select **Production** if you're testing the app via TestFlight or running the live App Store build. Select **Development** if you're testing the app locally through Xcode (debug build on a connected device or simulator). The mode here must match the build type you're testing with - see the warning below. |
| Upload p8 file | You'll get .p8 key file from your apple developer account. Refer [section below](/docs/ios-push-vendor-integration#generating-p8-key-file-and-auth-key-id) to see how to generate .p8 file |
| Auth Key ID | Auth key ID is a part of the filename of your .p8 file. Refer [section below](/docs/ios-push-vendor-integration#generating-p8-key-file-and-auth-key-id) to see how to get Auth key ID |
| Team ID | You'll get Team ID from your apple developer account. Refer [section below ](/docs/ios-push-vendor-integration#how-to-get-team-id)to see how to get Team ID |
| Bundle ID | Bundle ID is a unique identifier of your app. SuprSend will require this key to identify your app for sending push notification.[Refer section](/docs/ios-push-vendor-integration#how-to-get-bundle-id) to see how to get Bundle ID |
**Mode/Environment must match your build type.** This is the most common reason iOS pushes fail to deliver. If the mode doesn't match the build, APNs rejects the push with a `BadDeviceToken` error (visible in SuprSend logs as the delivery failure reason) because sandbox and production tokens are issued by different APNs endpoints and aren't interchangeable.
* Set **Production** when testing on **TestFlight** builds or the live **App Store** build (these use production APNs tokens).
* Set **Development** when testing locally through **Xcode** - i.e., a debug build run on a physical device or simulator (these use sandbox APNs tokens).
If you flip these by mistake (e.g., Production mode while debugging in Xcode, or Development mode on a TestFlight build), the device will register a token but every push will fail with `BadDeviceToken`. To fix it, switch the vendor mode to match the build you're testing.
### Generate .p8 key file and Auth key ID
To generate a `.p8 key` file, login to your [Apple developer account](https://developer.apple.com/account/) page, then select **Certificates, IDs & Profiles**.
| Form Field | Description |
| ---------------- | ----------------------------------------------------------------------------------------------------------------------------------------------------------------------------------------------------------------------------------------------------------------------------------------------------------------- |
| Nickname | You can give any name which may help you to identify this account easily |
| Mode/Environment | Select **Production** if you're testing the app via TestFlight or running the live App Store build. Select **Development** if you're testing the app locally through Xcode (debug build on a connected device or simulator). The mode here must match the build type you're testing with - see the warning below. |
| Upload p8 file | You'll get .p8 key file from your apple developer account. Refer [section below](/docs/ios-push-vendor-integration#generating-p8-key-file-and-auth-key-id) to see how to generate .p8 file |
| Auth Key ID | Auth key ID is a part of the filename of your .p8 file. Refer [section below](/docs/ios-push-vendor-integration#generating-p8-key-file-and-auth-key-id) to see how to get Auth key ID |
| Team ID | You'll get Team ID from your apple developer account. Refer [section below ](/docs/ios-push-vendor-integration#how-to-get-team-id)to see how to get Team ID |
| Bundle ID | Bundle ID is a unique identifier of your app. SuprSend will require this key to identify your app for sending push notification.[Refer section](/docs/ios-push-vendor-integration#how-to-get-bundle-id) to see how to get Bundle ID |
**Mode/Environment must match your build type.** This is the most common reason iOS pushes fail to deliver. If the mode doesn't match the build, APNs rejects the push with a `BadDeviceToken` error (visible in SuprSend logs as the delivery failure reason) because sandbox and production tokens are issued by different APNs endpoints and aren't interchangeable.
* Set **Production** when testing on **TestFlight** builds or the live **App Store** build (these use production APNs tokens).
* Set **Development** when testing locally through **Xcode** - i.e., a debug build run on a physical device or simulator (these use sandbox APNs tokens).
If you flip these by mistake (e.g., Production mode while debugging in Xcode, or Development mode on a TestFlight build), the device will register a token but every push will fail with `BadDeviceToken`. To fix it, switch the vendor mode to match the build you're testing.
### Generate .p8 key file and Auth key ID
To generate a `.p8 key` file, login to your [Apple developer account](https://developer.apple.com/account/) page, then select **Certificates, IDs & Profiles**.
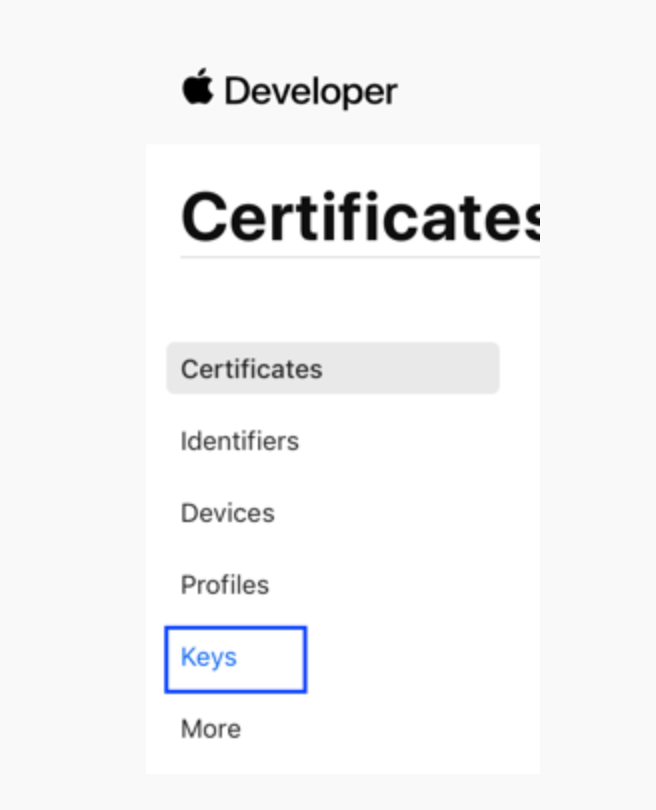
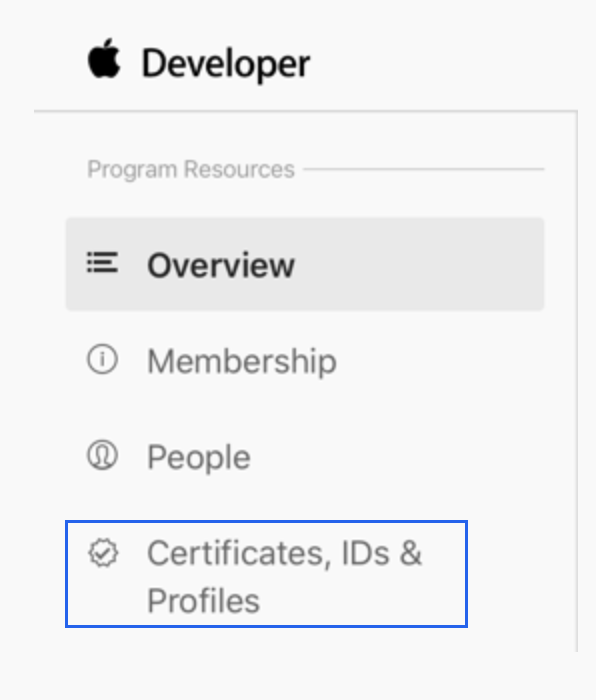 Under Certificates, IDs & Profiles section, select **"Keys"**
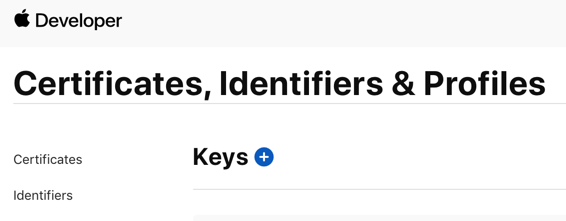
 Click on "`+`" button next to keys to add a new key
 On the new key page, type in your key name and check the Apple Push Notification service (APNs) box, then click “Continue” and “Register".
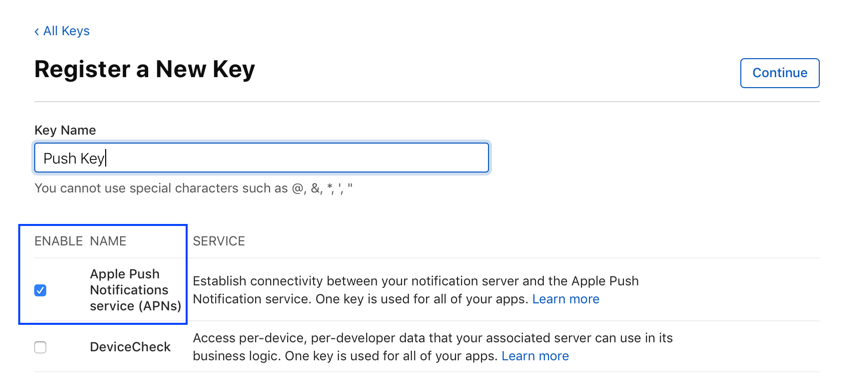 Once the key is generated, **`download the p8 key`** file by clicking on "`Download`"
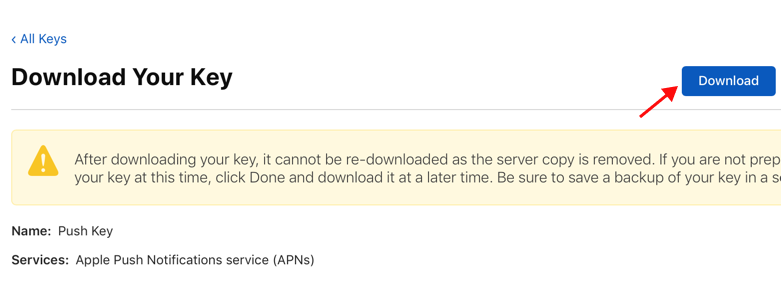 The Auth Key filename will look like this: `**AuthKeyABCD1234.p8**`, the `**ABCD1234**` is the Key ID for this key, add this key ID in Auth key ID field on Vendor configuration page
### How to get team ID
You can get team ID from your [Apple developer account membership page](https://developer.apple.com/account/#/membership)
The Auth Key filename will look like this: `**AuthKeyABCD1234.p8**`, the `**ABCD1234**` is the Key ID for this key, add this key ID in Auth key ID field on Vendor configuration page
### How to get team ID
You can get team ID from your [Apple developer account membership page](https://developer.apple.com/account/#/membership)
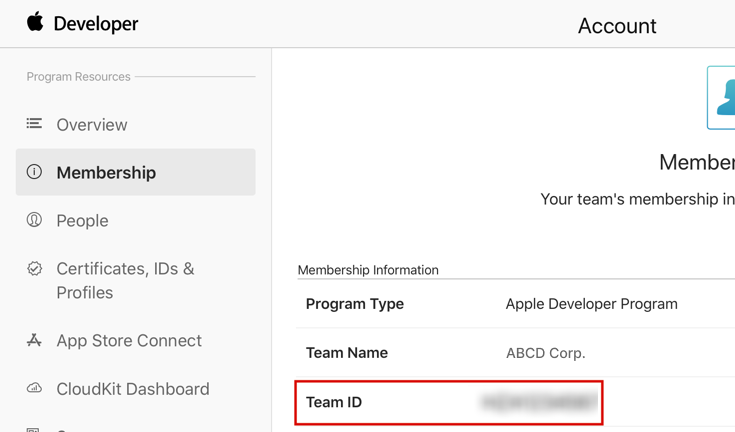 ### How to get bundle ID
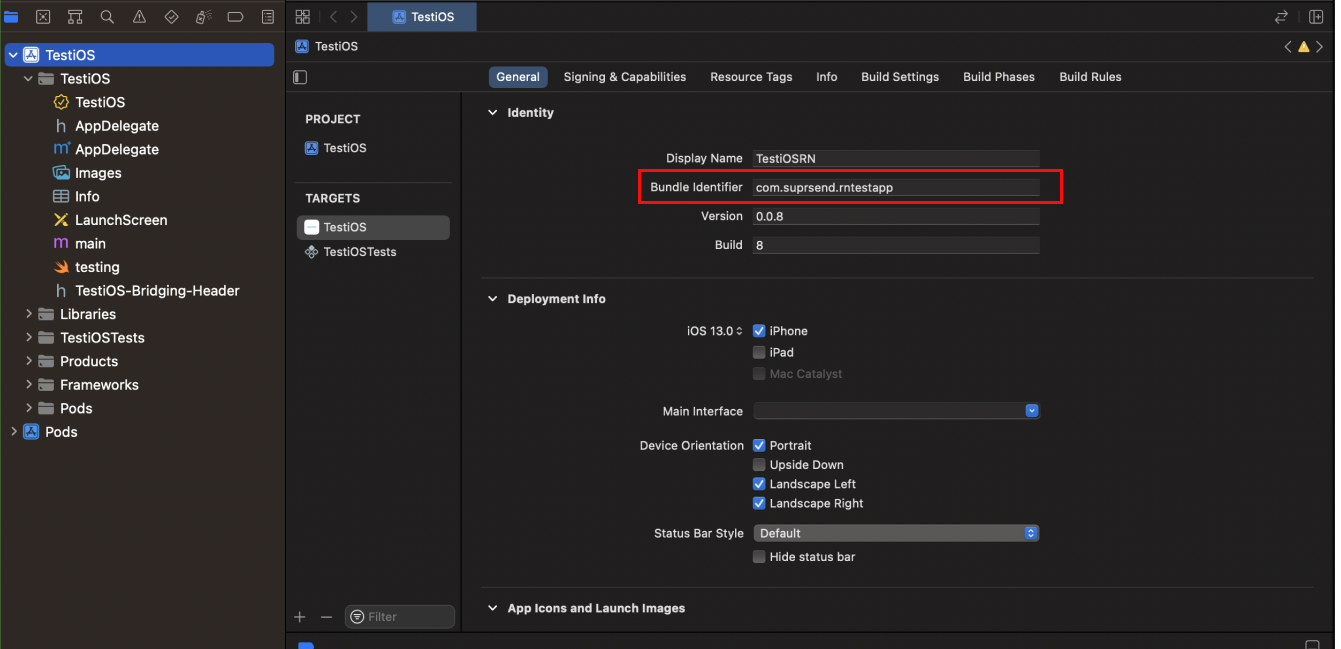
You can get this ID from your app project
### How to get bundle ID
You can get this ID from your app project
 ***
***