> ## Documentation Index
> Fetch the complete documentation index at: https://docs.suprsend.com/llms.txt
> Use this file to discover all available pages before exploring further.
# Managing Team Members
> Learn how to invite teammates, remove users, change roles, and manage access control for your SuprSend workspace from the team settings page.
## Overview
Access the [team page](https://app.suprsend.com/en/account-settings/team) via **Account Settings** → **Team**. You can search members, change their roles, invite new members, and remove members. All actions are logged in audit logs.
## Accessing the team page
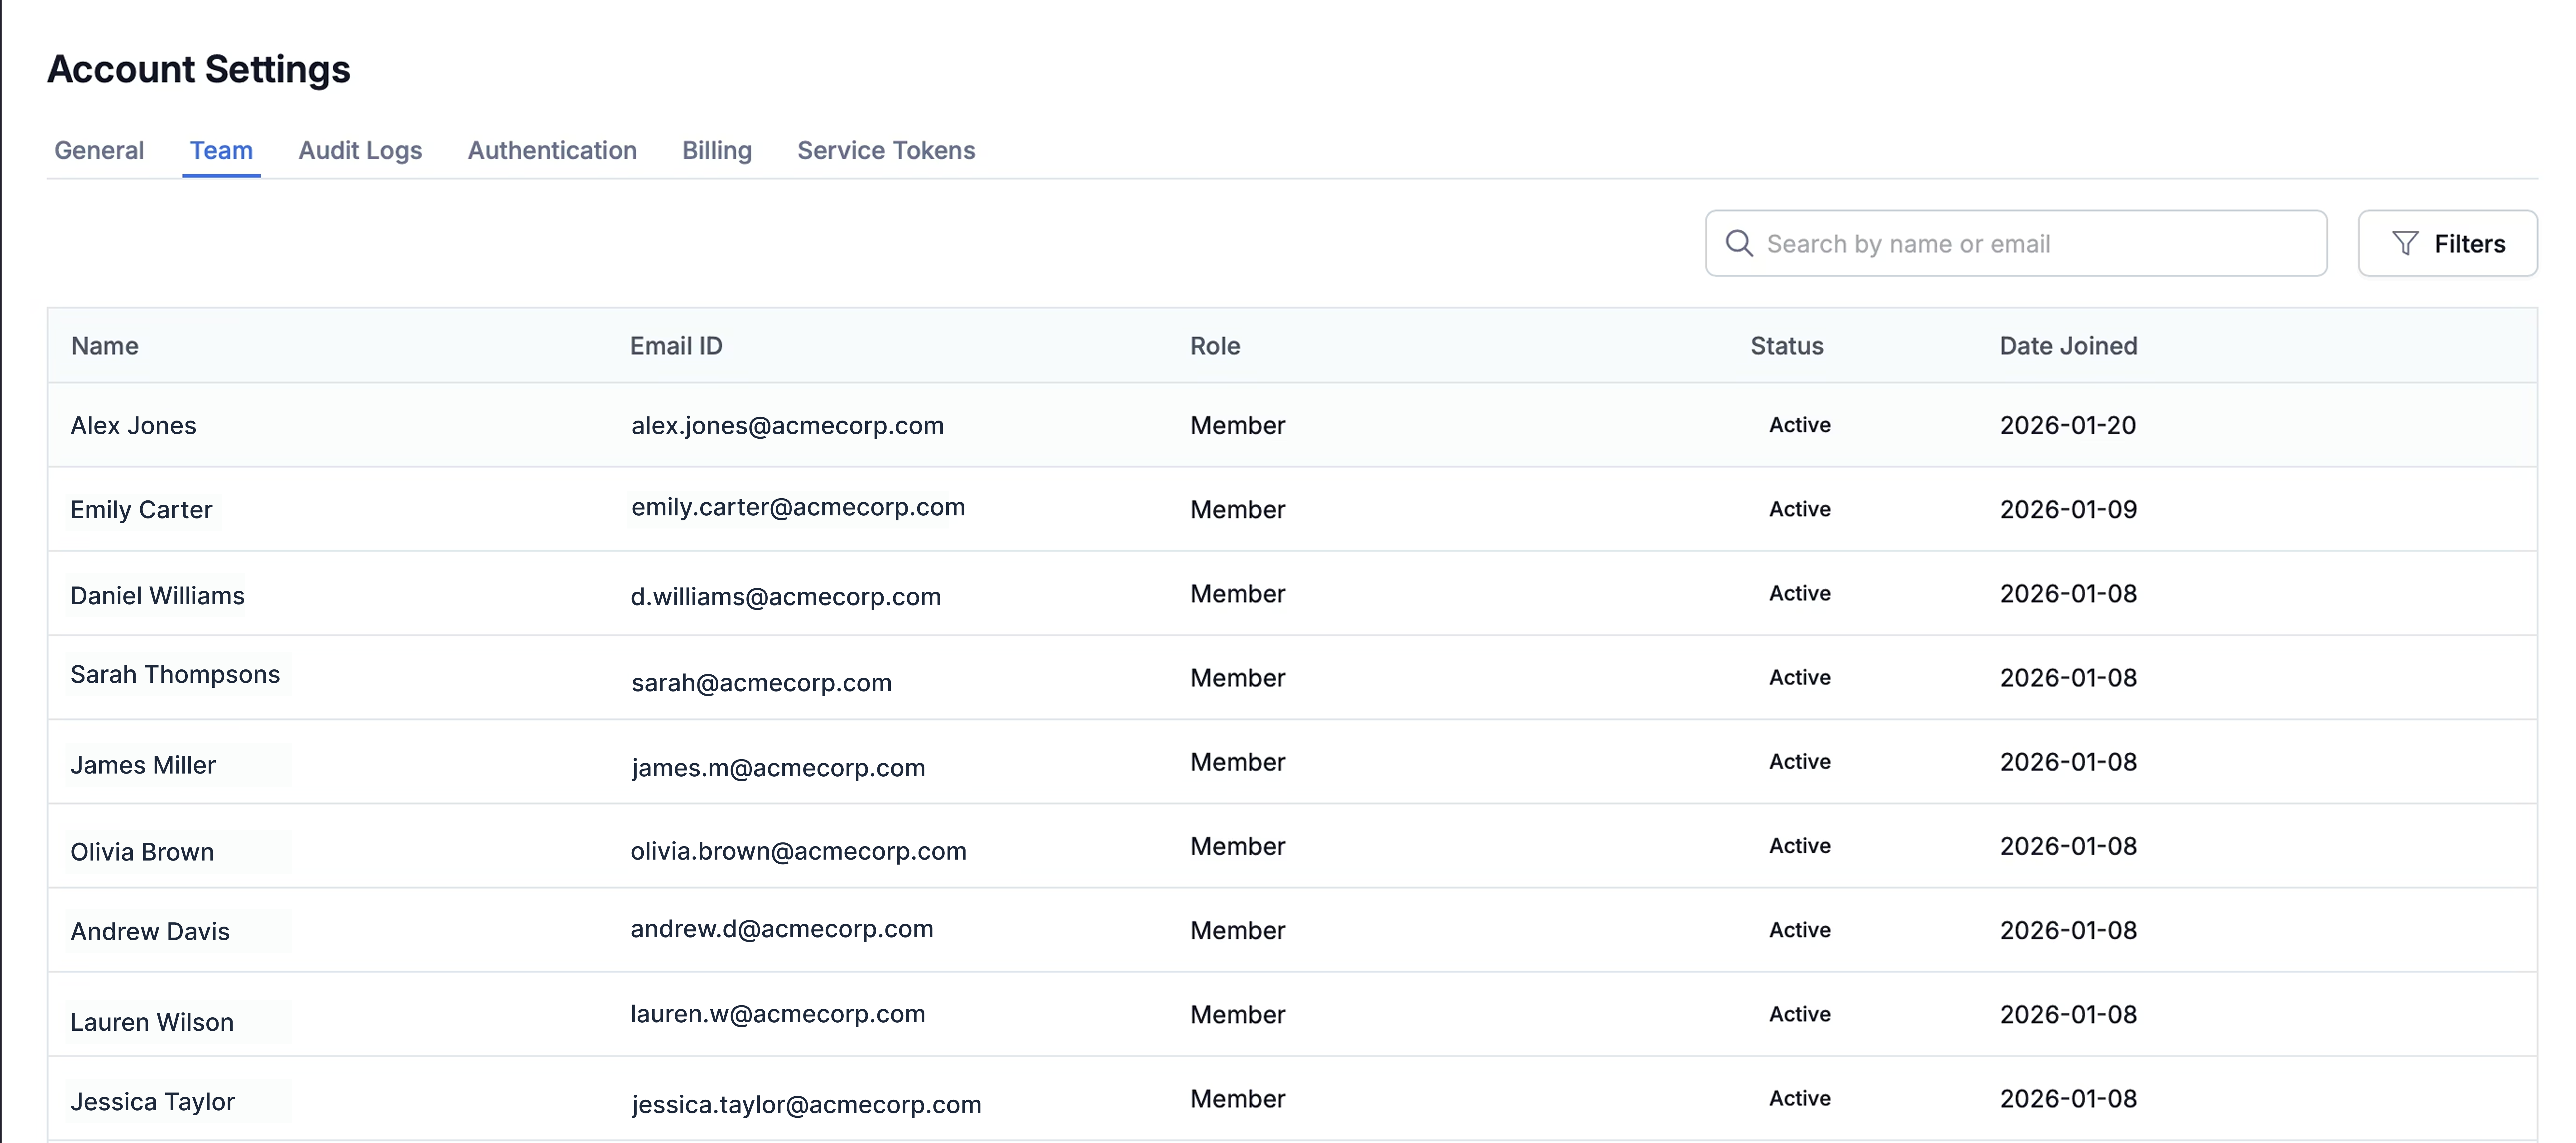
You can see all members who have access to the SuprSend account from [Account Settings -> Team](https://app.suprsend.com/en/account-settings/team) page. You can search members by name or email address or filter the list by role or status. All active, invited and deactivated members are shown in the list.
 ## Inviting a new user
Admins can invite new team members to join the account:
Click the **Invite member** button located at the top right of the team page.
## Inviting a new user
Admins can invite new team members to join the account:
Click the **Invite member** button located at the top right of the team page.
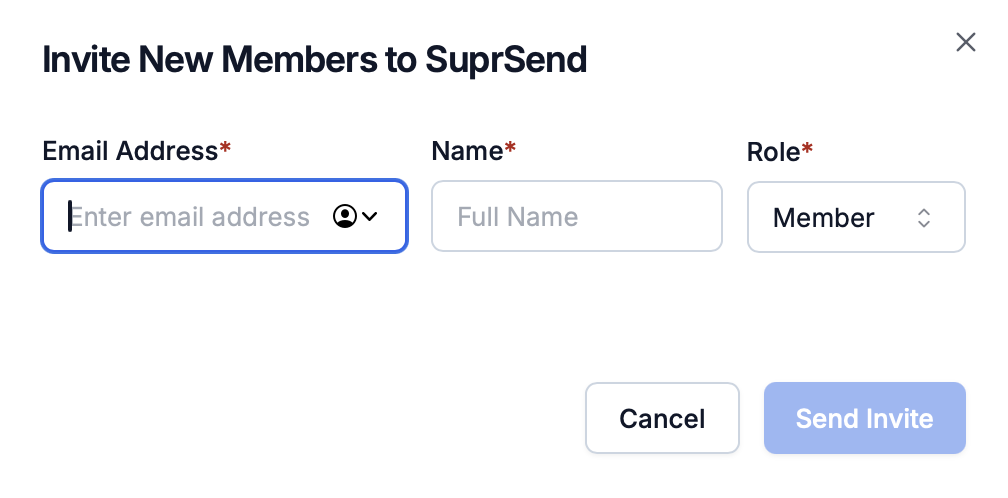 Provide:
* **Email Address** (required)
* **Name** (required)
* **Role** (required): Member or Admin (default: Member)
Click **Send Invite** to send the invitation email to the user.
SuprSend uses invite-only membership. Users who sign up with your domain are not added to your account automatically. If a user already belongs to another team, you’ll see the following error:
`[email] is already a member in another team. Reach out to support to add user to this account.`
Contact us via email or Slack, and we’ll remove the user from the other account so you can add them to yours.
The user receives an email invitation. Invited members appear with "Invited" status until they accept.
### Cancel invitation
If you have mistakenly invited a user, you can cancel the invitation by clicking on the three dots icon on the right side of the member's row and selecting **Delete invite**.
Provide:
* **Email Address** (required)
* **Name** (required)
* **Role** (required): Member or Admin (default: Member)
Click **Send Invite** to send the invitation email to the user.
SuprSend uses invite-only membership. Users who sign up with your domain are not added to your account automatically. If a user already belongs to another team, you’ll see the following error:
`[email] is already a member in another team. Reach out to support to add user to this account.`
Contact us via email or Slack, and we’ll remove the user from the other account so you can add them to yours.
The user receives an email invitation. Invited members appear with "Invited" status until they accept.
### Cancel invitation
If you have mistakenly invited a user, you can cancel the invitation by clicking on the three dots icon on the right side of the member's row and selecting **Delete invite**.
 ### Resend invitation
The invitation link is valid for 24 hours after it is sent. If the user hasn't accepted the invitation yet, you can resend it by clicking on the three dots icon on the right side of the member's row and selecting **Resend invite**.
## Removing a member
We recommend you to remove a member's account access when they leave your organization. Along with this, also delete or rotate API keys and service tokens the member had access to. This is critical for maintaining account security.
Find the member in the team list using search or filters.
Click the three dots icon on the right side of the member's row.
### Resend invitation
The invitation link is valid for 24 hours after it is sent. If the user hasn't accepted the invitation yet, you can resend it by clicking on the three dots icon on the right side of the member's row and selecting **Resend invite**.
## Removing a member
We recommend you to remove a member's account access when they leave your organization. Along with this, also delete or rotate API keys and service tokens the member had access to. This is critical for maintaining account security.
Find the member in the team list using search or filters.
Click the three dots icon on the right side of the member's row.
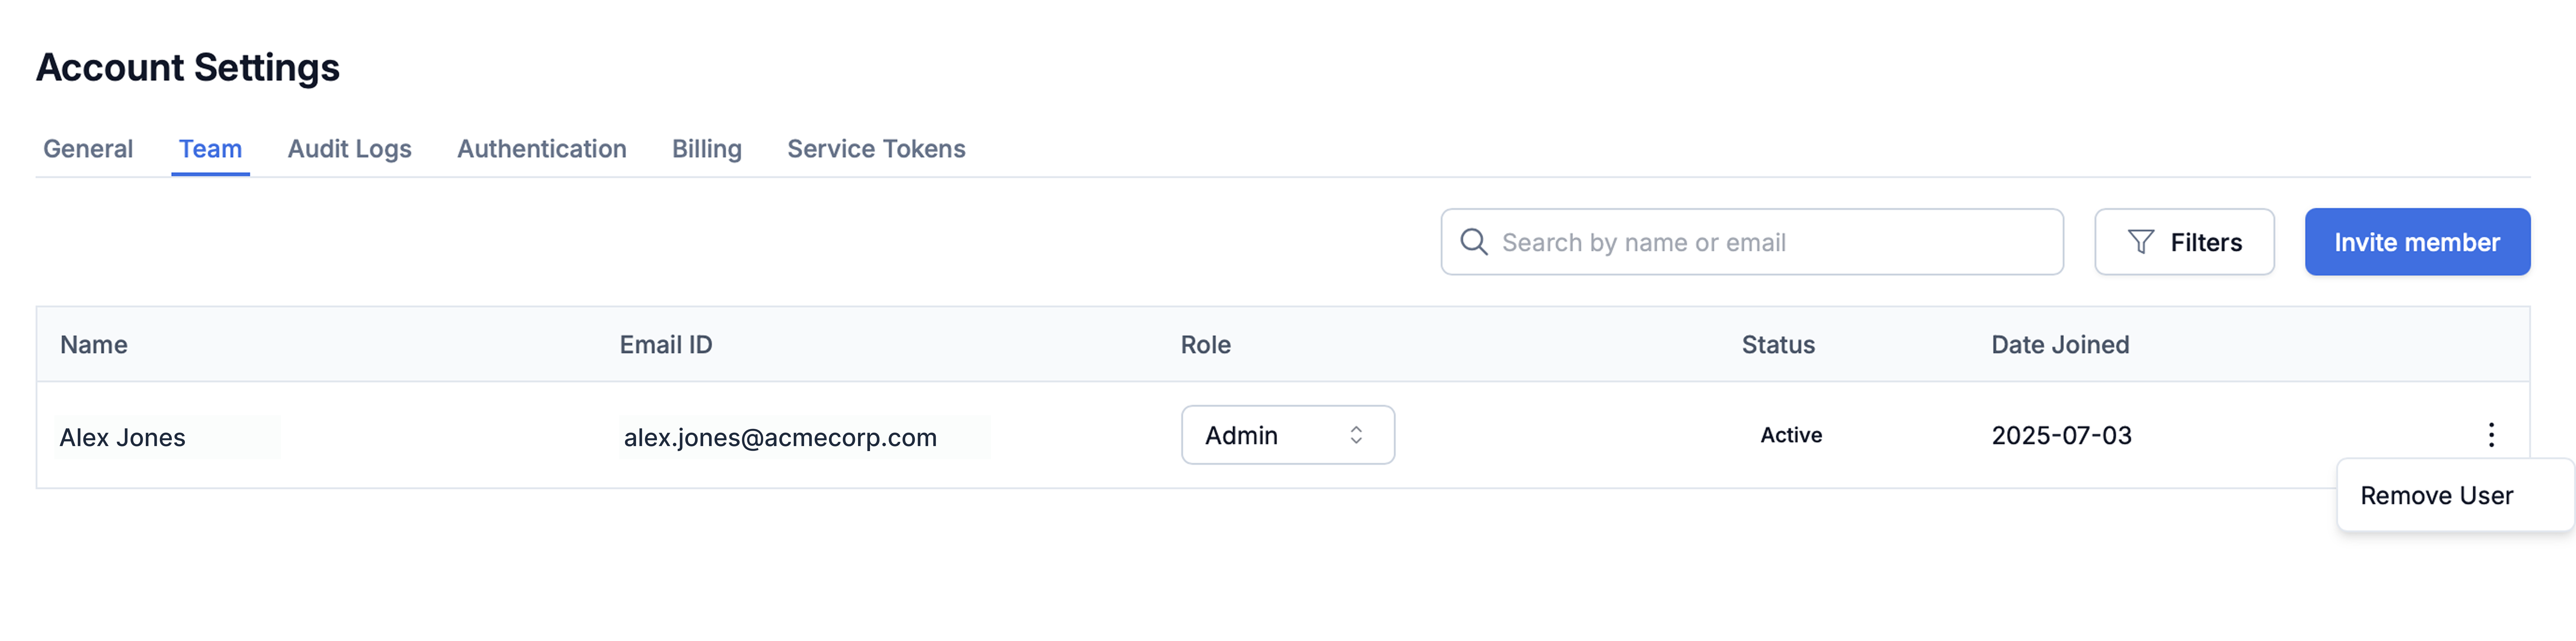 Click **Remove User** from the dropdown menu.
Confirm the action. The member's status changes to "Deactivated" and their row appears in a light gray/disabled state.
## Reactivating removed member
If you've mistakenly removed a member, you can reactivate them by sending a new invitation.
Filter by "Deactivated" status or search by name/email. Deactivated members appear in a light gray/disabled state.
Click the three dots icon on the right side of the deactivated member's row. Click **Invite user** from the dropdown menu to send a rejoin invitation.
Click **Remove User** from the dropdown menu.
Confirm the action. The member's status changes to "Deactivated" and their row appears in a light gray/disabled state.
## Reactivating removed member
If you've mistakenly removed a member, you can reactivate them by sending a new invitation.
Filter by "Deactivated" status or search by name/email. Deactivated members appear in a light gray/disabled state.
Click the three dots icon on the right side of the deactivated member's row. Click **Invite user** from the dropdown menu to send a rejoin invitation.
 After accepting, their status changes to "Active" and they regain access with their previous role.
## Roles and Permissions
Admins can change a team member's role, which affects their permissions and access level. You can change the role by clicking on the role dropdown (Member/Admin) in the member's row.
### Changing member role
SuprSend currently supports two roles: Admin and Member.
* **Admins** have full access to the platform.
* **Members** have restricted access and cannot manage team settings or modify sensitive user data in the production workspace.
After accepting, their status changes to "Active" and they regain access with their previous role.
## Roles and Permissions
Admins can change a team member's role, which affects their permissions and access level. You can change the role by clicking on the role dropdown (Member/Admin) in the member's row.
### Changing member role
SuprSend currently supports two roles: Admin and Member.
* **Admins** have full access to the platform.
* **Members** have restricted access and cannot manage team settings or modify sensitive user data in the production workspace.
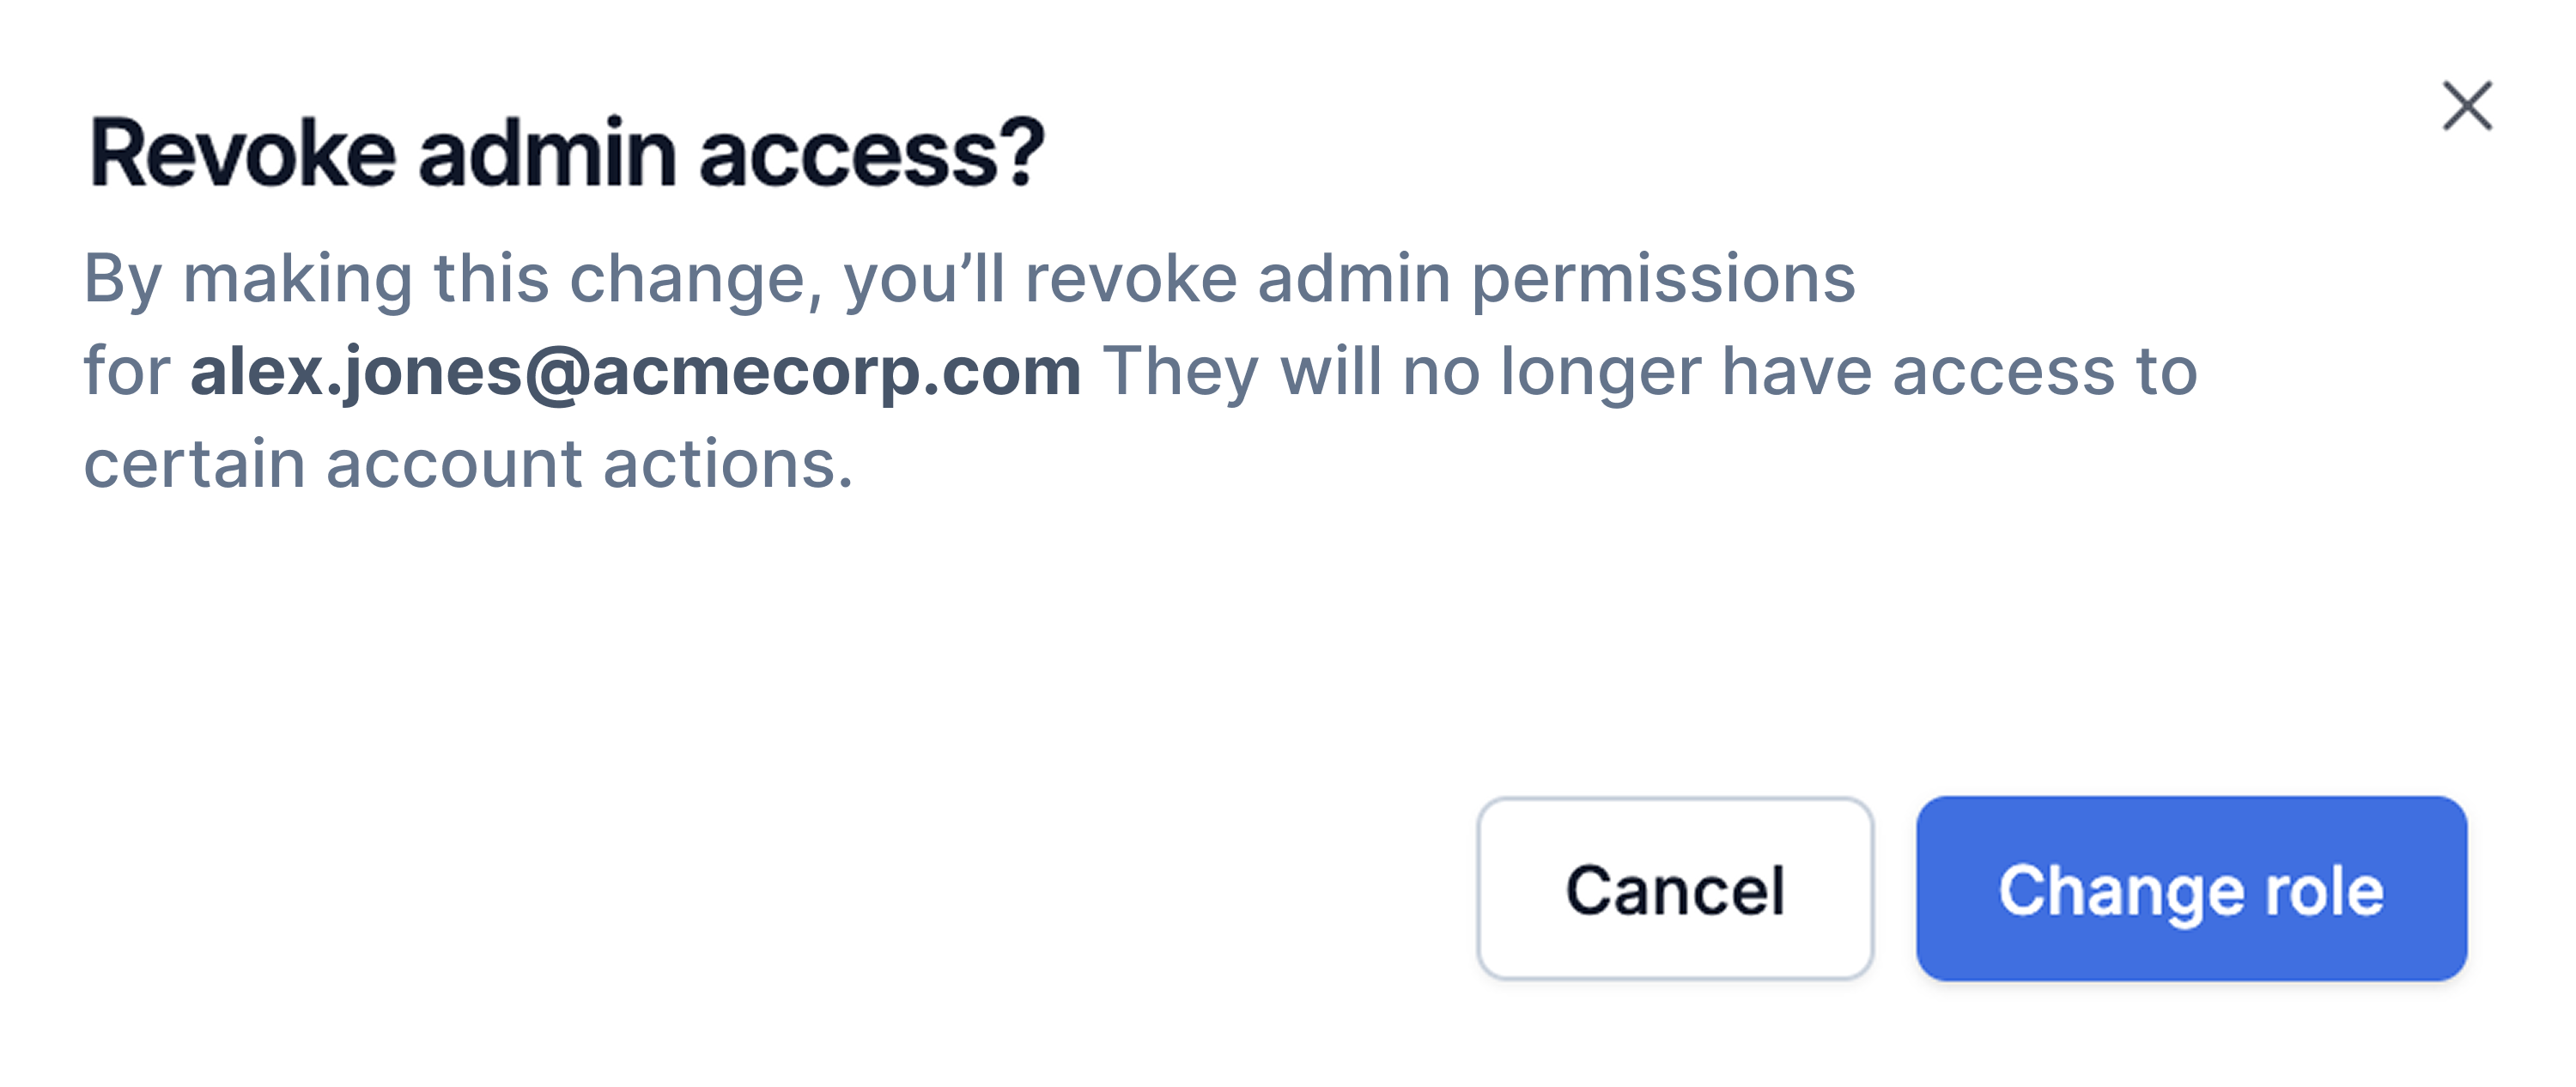 The `account.member_role_changed` action is logged when a role change is applied.
### Permissions
Permissions for Admin and Member roles:
| Action | Admin | Member |
| --------------------------------------- | ----- | ------------------------------------------------------------ |
| View all assets and data in the account | ✓ | all except user PII information in production workspace |
| Manage team members and their roles | ✓ | ✗ |
| Invite new members | ✓ | ✗ |
| Remove/deactivate members | ✓ | ✗ |
| Reactivate members | ✓ | ✗ |
| Create API keys and service tokens | ✓ | ✓ |
| View audit logs | ✓ | ✓ |
| View notification logs | ✓ | can view all logs, but can't expand workflow execution steps |
| Edit user and object properties | ✓ | only in staging and sandbox workspaces |
| Edit user and object preferences | ✓ | only in staging and sandbox workspaces |
The `account.member_role_changed` action is logged when a role change is applied.
### Permissions
Permissions for Admin and Member roles:
| Action | Admin | Member |
| --------------------------------------- | ----- | ------------------------------------------------------------ |
| View all assets and data in the account | ✓ | all except user PII information in production workspace |
| Manage team members and their roles | ✓ | ✗ |
| Invite new members | ✓ | ✗ |
| Remove/deactivate members | ✓ | ✗ |
| Reactivate members | ✓ | ✗ |
| Create API keys and service tokens | ✓ | ✓ |
| View audit logs | ✓ | ✓ |
| View notification logs | ✓ | can view all logs, but can't expand workflow execution steps |
| Edit user and object properties | ✓ | only in staging and sandbox workspaces |
| Edit user and object preferences | ✓ | only in staging and sandbox workspaces |