> ## Documentation Index
> Fetch the complete documentation index at: https://docs.suprsend.com/llms.txt
> Use this file to discover all available pages before exploring further.
# Create a Teams app and add the vendor
> Register an Azure bot, wrap it in a Teams app package, and save the bot credentials on the Microsoft Teams vendor in SuprSend.
Every Microsoft Teams send in SuprSend needs this page: you create the app, then save **App ID**, **password**, **App Type**, and **Tenant ID** on the vendor form. That includes [incoming webhook](/docs/microsoft-teams-incoming-webhook) sends.
For bot delivery you also wrap the bot in a Teams app package that customers install. That's what makes the message show *your* name and icon, and what lets you DM people. In the [customer's bot](/docs/microsoft-teams-customer-bot) use case they create their own copy. For webhook-only, you still save the vendor credentials; you don't have to install the app in the customer's tenant, because Microsoft's Workflows app is what posts in the channel.
You'll need a Microsoft 365 account that can create apps.
Since **31 July 2025**, every new Azure bot is **single-tenant**. That's fine — customers still get your bot by installing your Teams **app**. Existing multi-tenant bots keep working.
On the SuprSend vendor form, set **App Type** to `Single tenant` for any bot created after that date. Picking `Multi tenant` still returns an access token, but every send then fails with `401 Authorization has been denied for this request`.
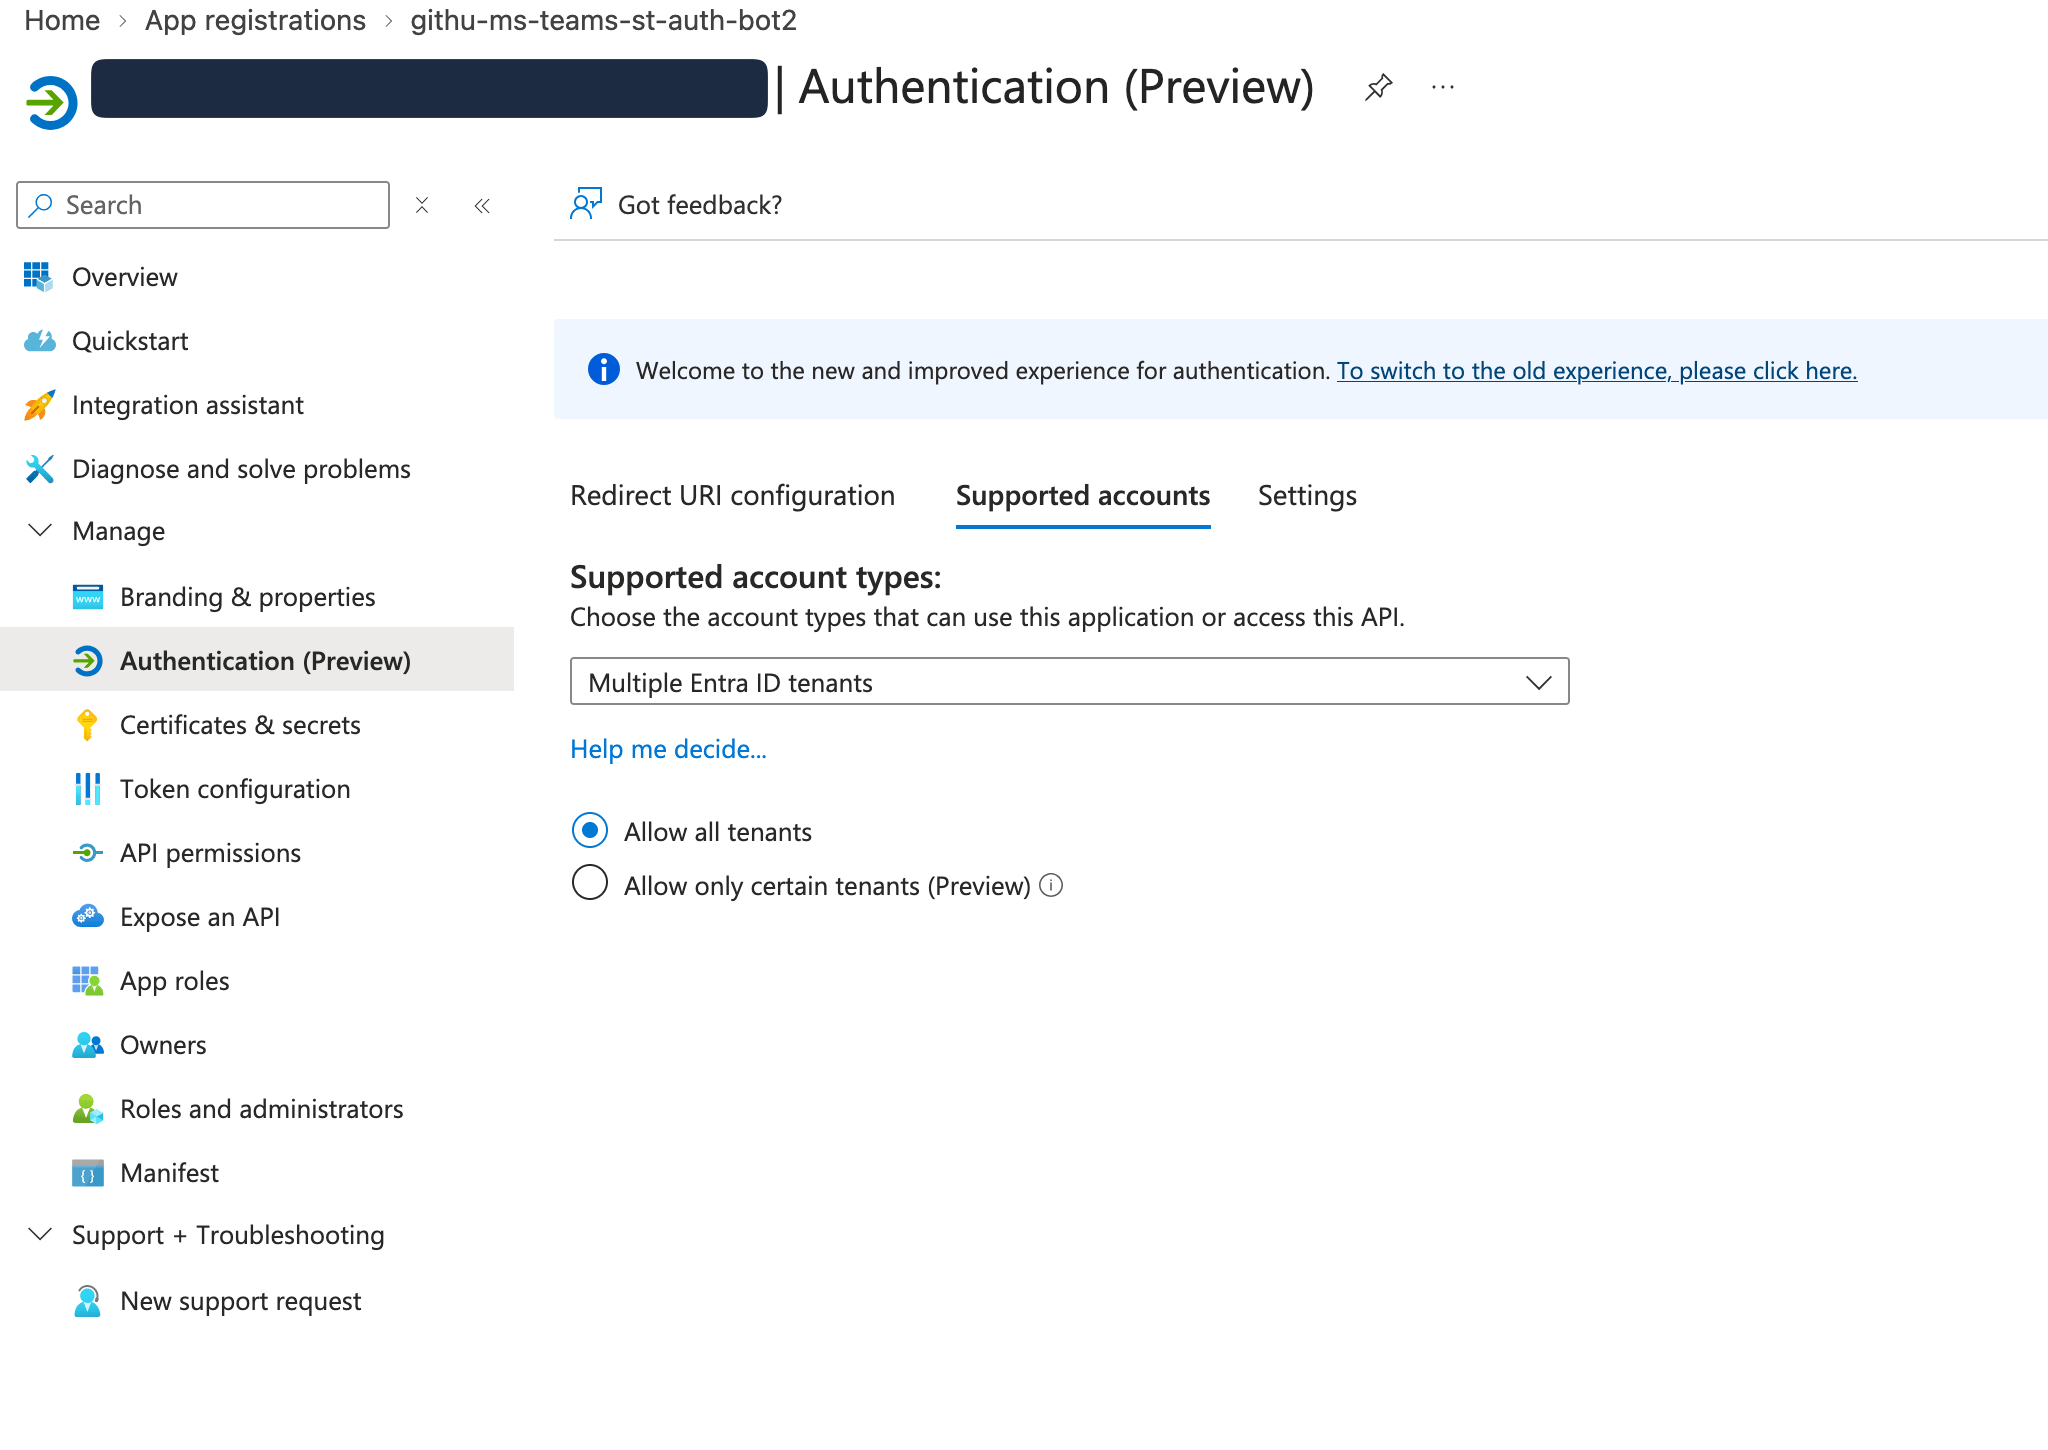
This is separate from **Supported account types** in Azure, which controls which directories can install your app. Set that to multiple tenants if customers will install it (see step 4).
## Create the Teams app
### 1. Create the app
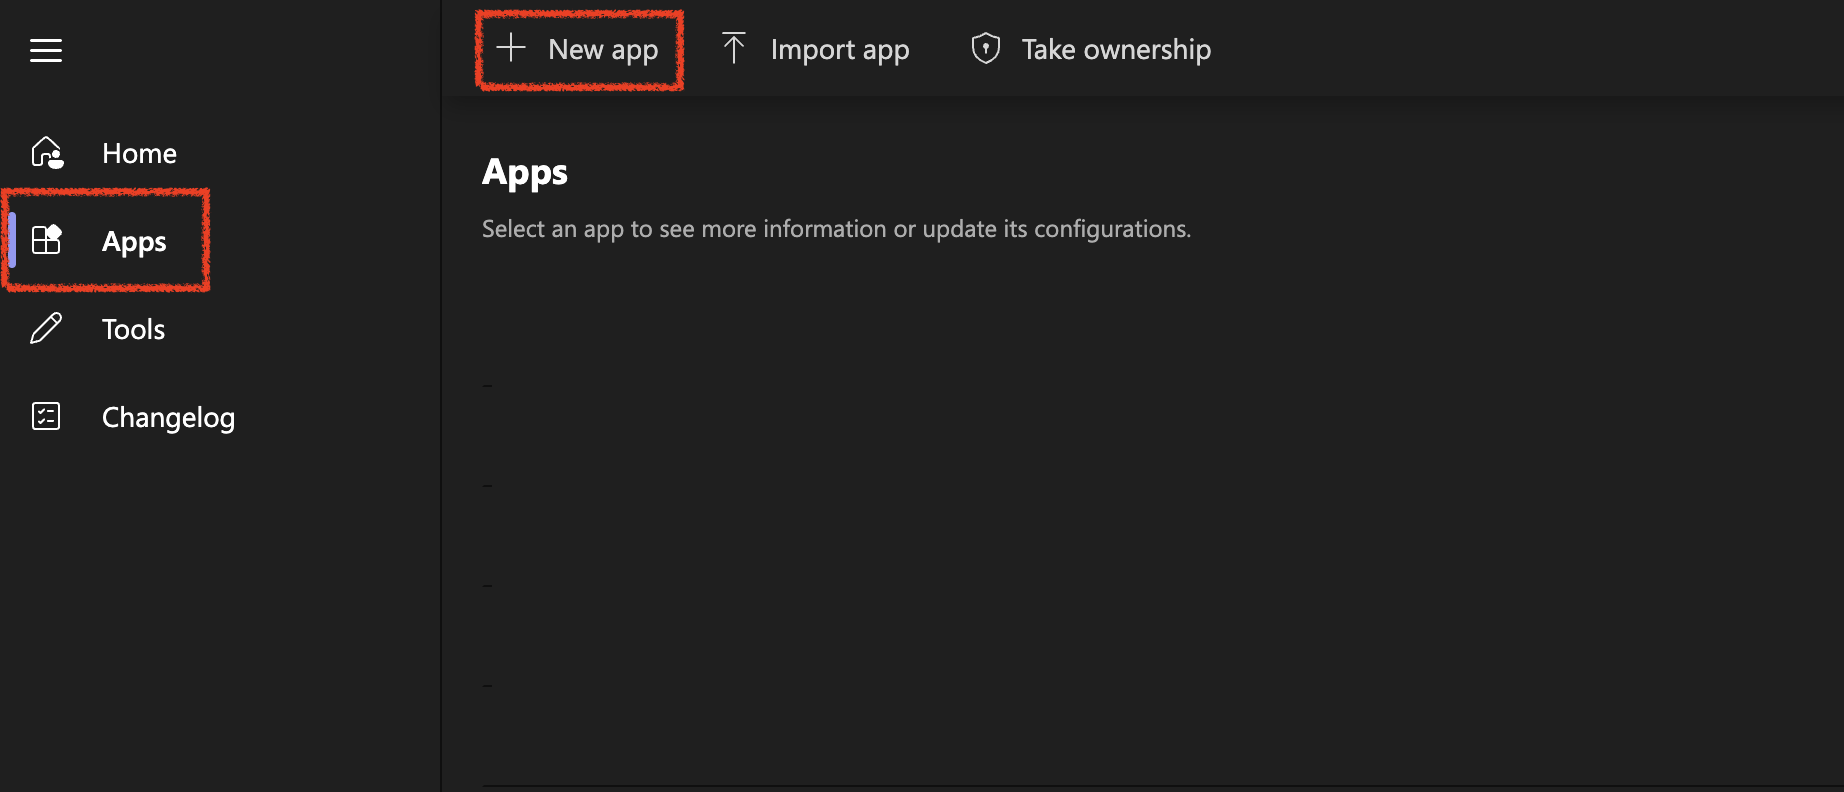
Open the [Teams Developer Portal](https://dev.teams.microsoft.com/) → **Apps** → **+ New App**. Name it something people will recognize in the Teams app list, such as `Incident Alerts`.
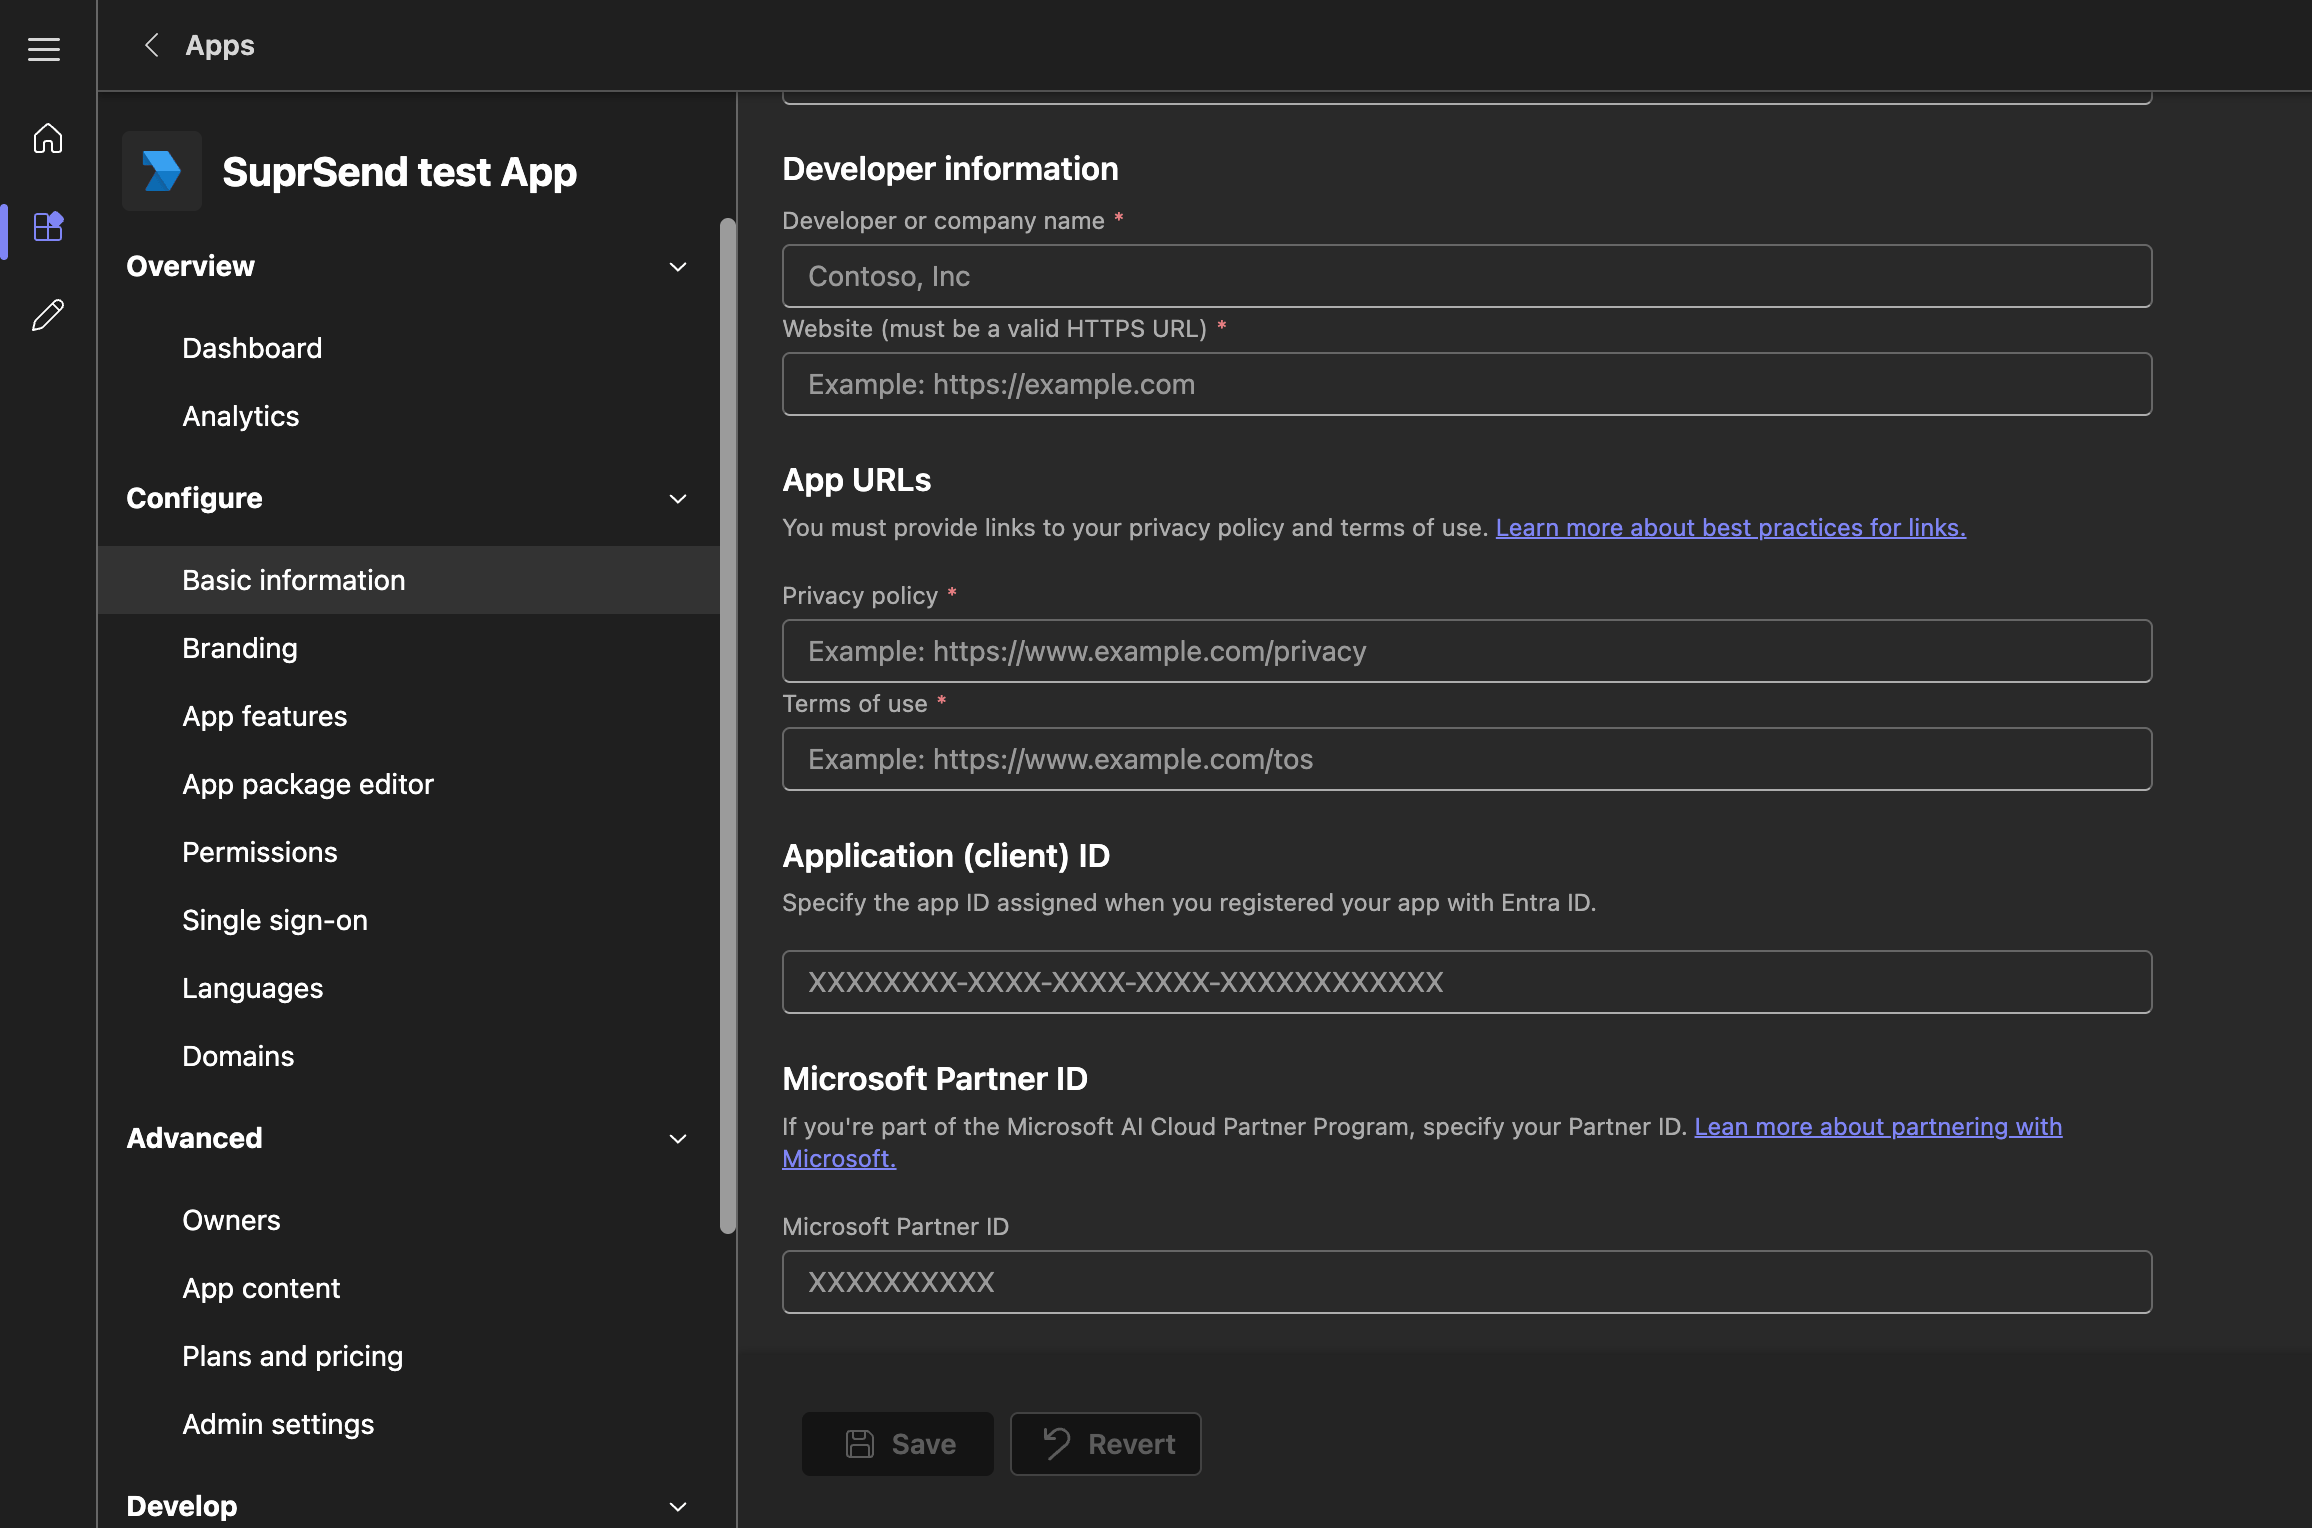
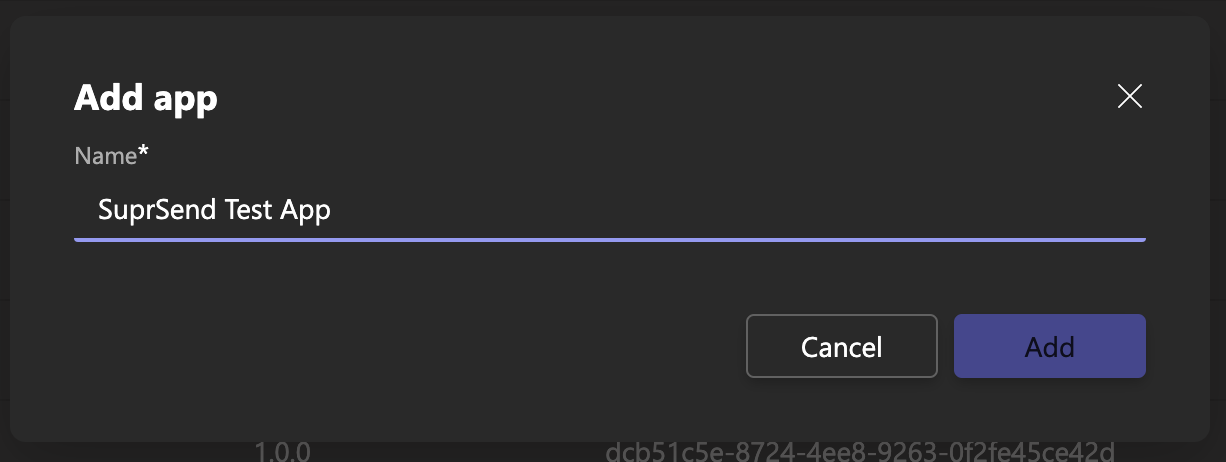 You'll land on the **Basic information** form shown below. Fill in the app name, descriptions, company name, and the website, privacy policy, and terms of use URLs. All three URLs must be `https://` — an `http://` link or a missing one blocks publishing.
 ### 2. Create the bot and a client secret
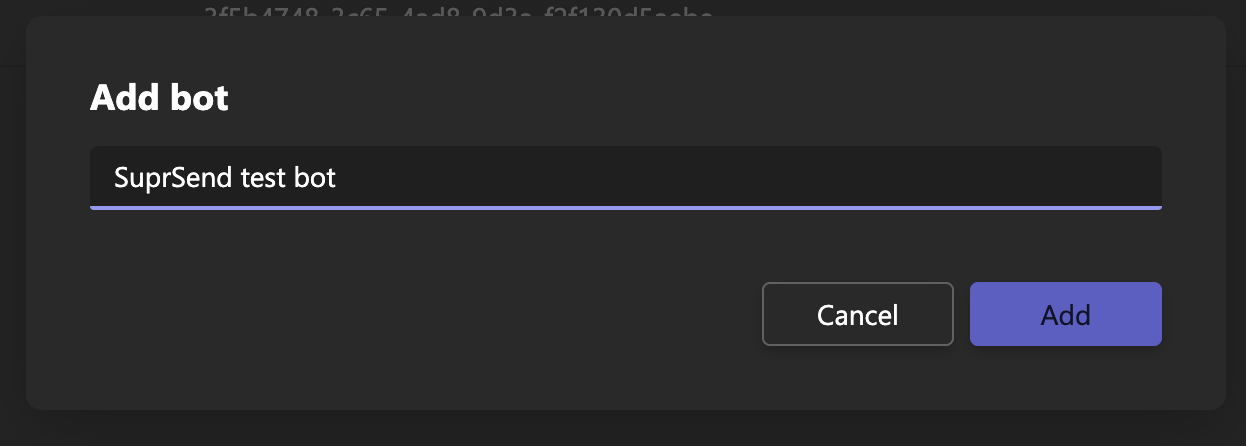
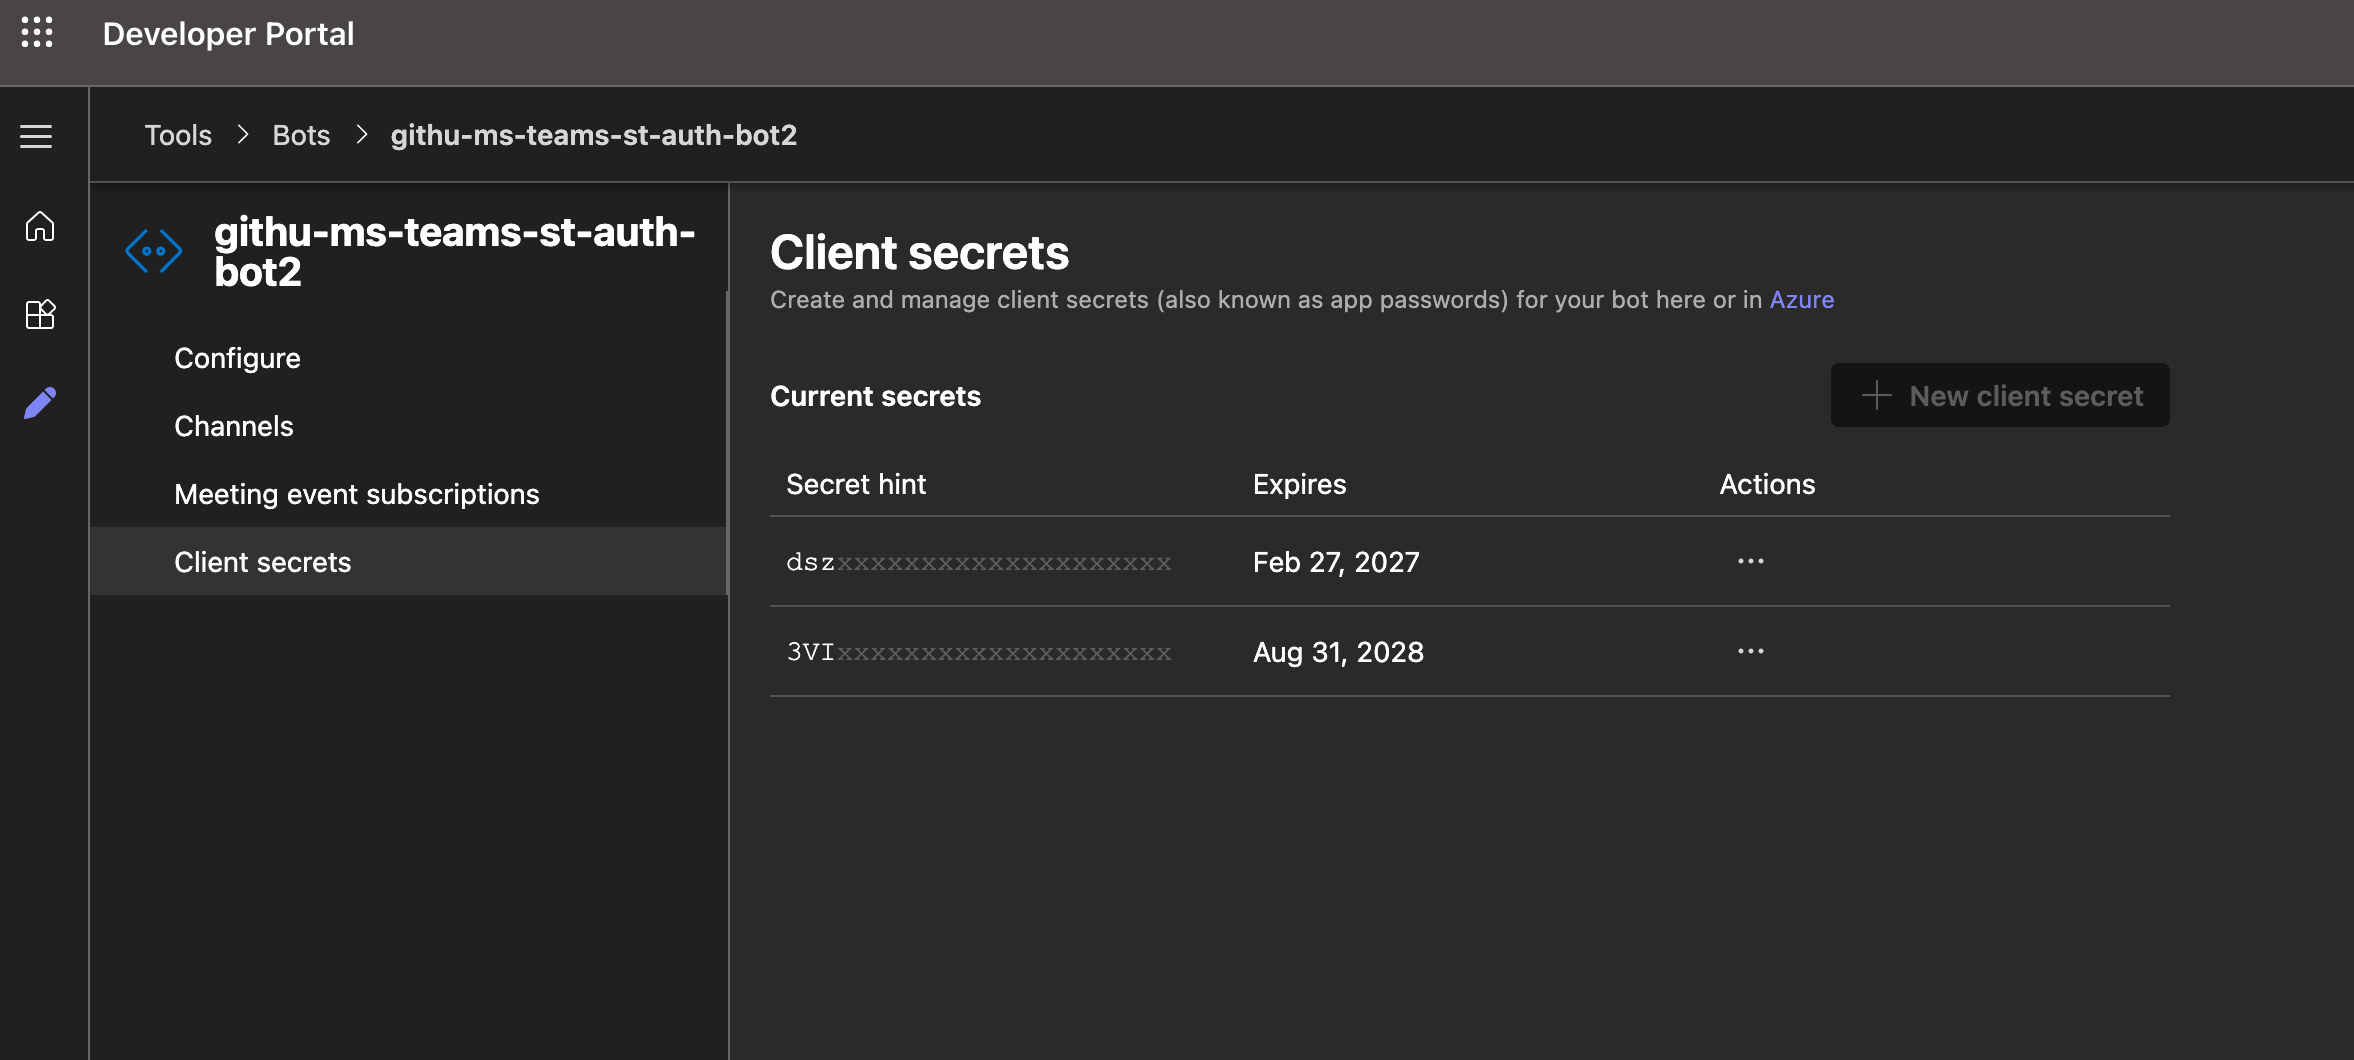
Left panel → **App features → Bot**. Pick an existing bot or **Create a new bot**. On the [bot page](https://dev.teams.microsoft.com/bots), **+ New Bot**, name it, **Add**.
Leave the messaging endpoint blank unless you also handle inbound activity (for example @mentions). Select **Microsoft Teams** as the channel.
### 2. Create the bot and a client secret
Left panel → **App features → Bot**. Pick an existing bot or **Create a new bot**. On the [bot page](https://dev.teams.microsoft.com/bots), **+ New Bot**, name it, **Add**.
Leave the messaging endpoint blank unless you also handle inbound activity (for example @mentions). Select **Microsoft Teams** as the channel.
 Then create a **client secret**. It is shown only once — save it. That value is **Password** on the SuprSend vendor form.
 ### 3. Attach the bot and set scopes
Select **App features → Bot**, then pick the bot you just created. Its **Application (client) ID** is filled in on **Basic information** and cannot be edited there. You will need that value when you configure the vendor in SuprSend.
### 3. Attach the bot and set scopes
Select **App features → Bot**, then pick the bot you just created. Its **Application (client) ID** is filled in on **Basic information** and cannot be edited there. You will need that value when you configure the vendor in SuprSend.
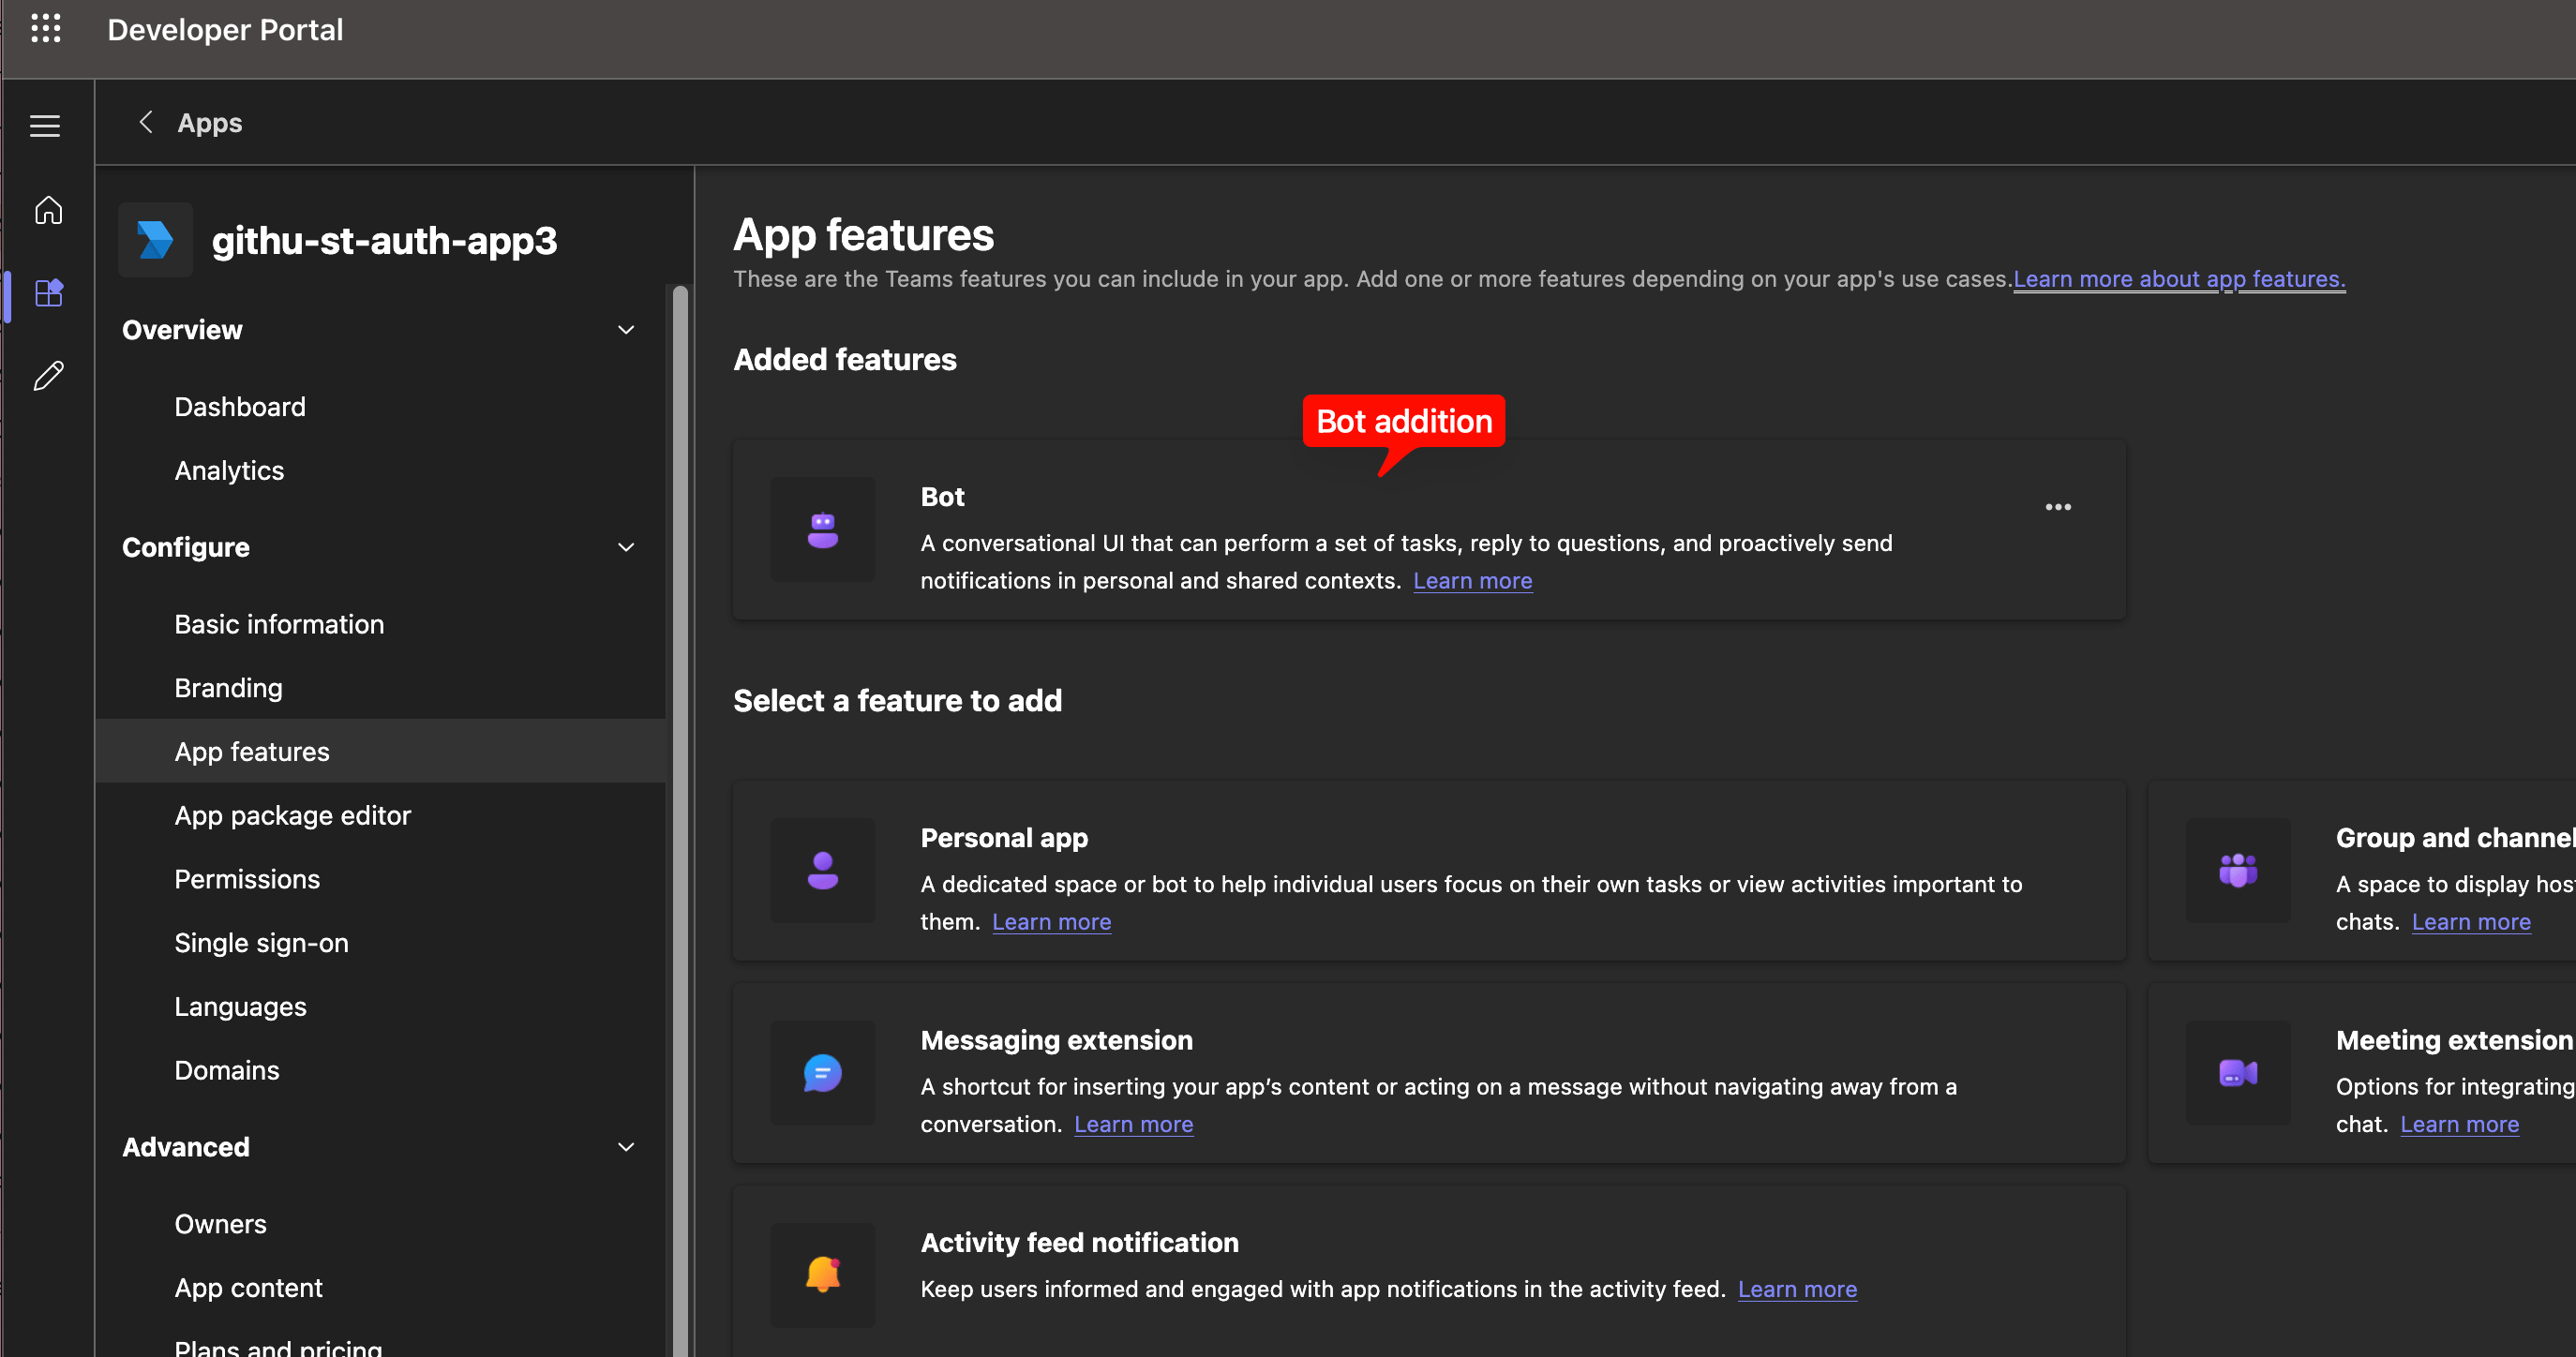 Under **What can your bot do?**, choose **Only send notifications** unless you also handle inbound messages. Add the scopes you'll use:
* **personal** — DMs
* **team** — channel posts
* **group chat** — group chats
Save.
Under **What can your bot do?**, choose **Only send notifications** unless you also handle inbound messages. Add the scopes you'll use:
* **personal** — DMs
* **team** — channel posts
* **group chat** — group chats
Save.
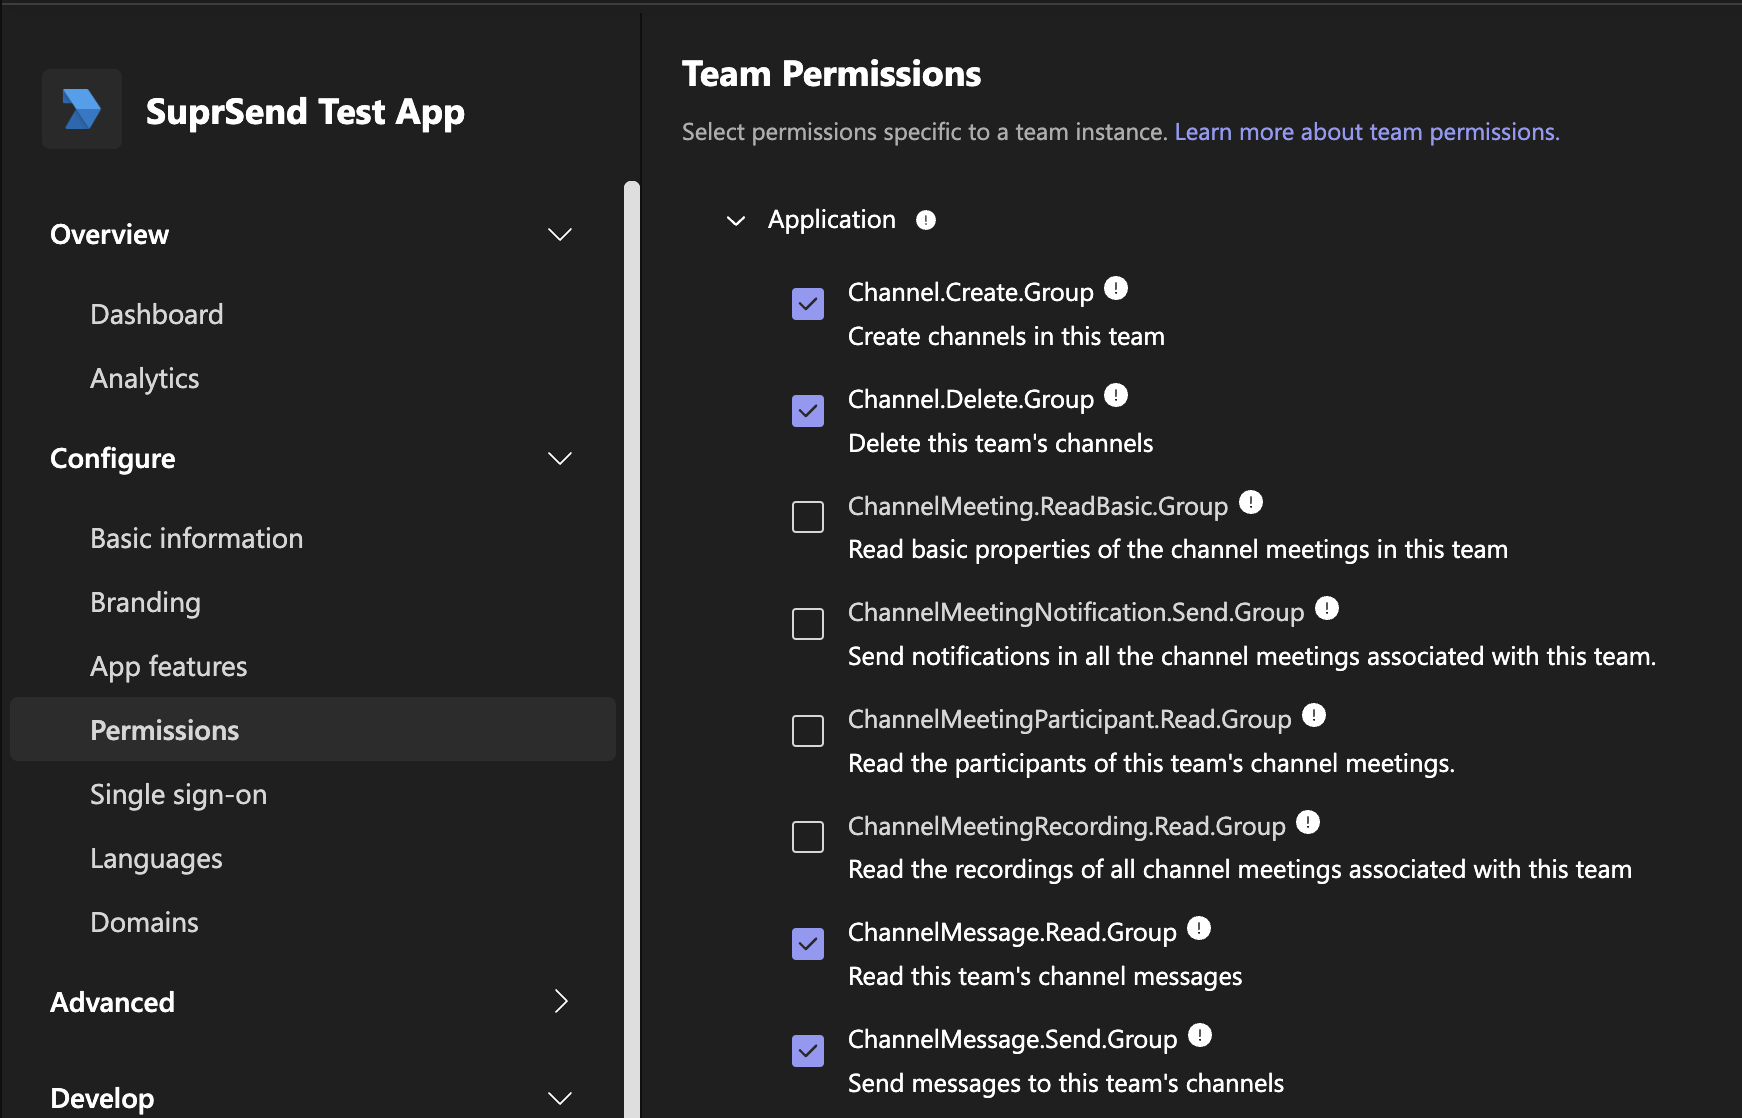
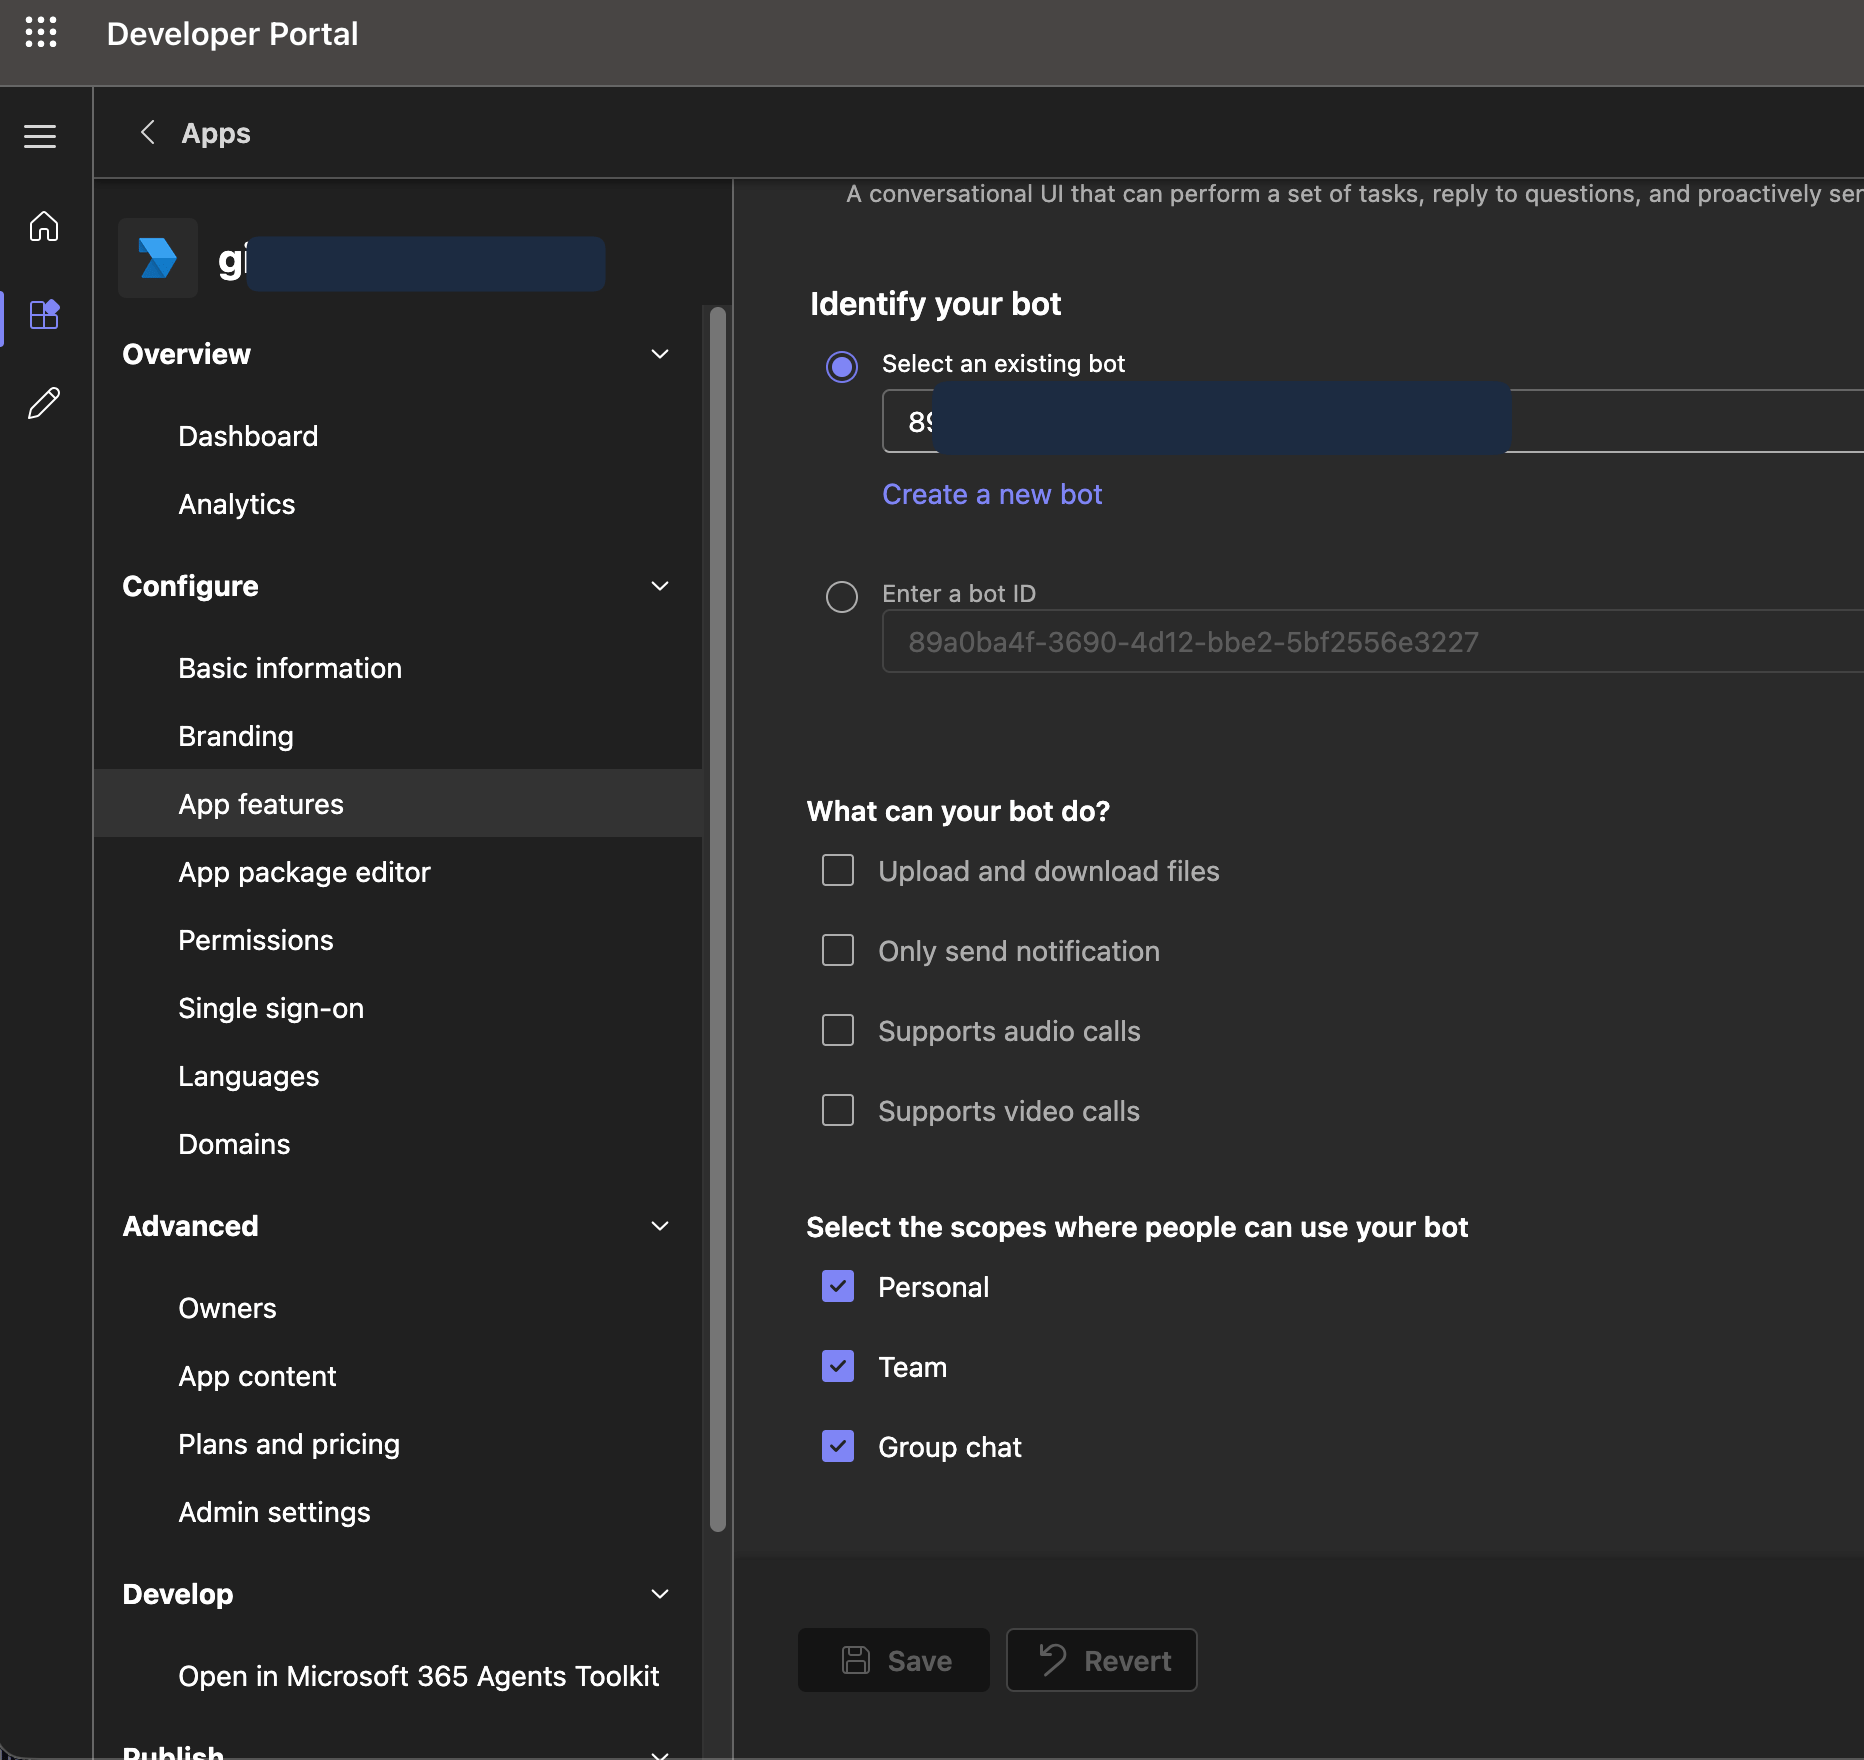 Add these application permissions:
| Section | Permissions |
| -------------------------------------- | ------------------------------------------------------------------------------------------------------------------------------------ |
| Team Permissions → Application | `Channel.Create.Group`, `Channel.Delete.Group`, `ChannelMessage.Read.Group`, `ChannelMessage.Send.Group`, `TeamsActivity.Send.Group` |
| Chat/Meeting Permissions → Application | `ChatMessage.Read.Chat`, `ChatMessage.Send.Chat` |
| User Permissions → Application | `TeamsActivity.Send.User` |
If you need Entra object IDs from the roster (stable `user_id`s for DMs), include a resource-specific consent permission such as `TeamMember.Read.Group`.
Add these application permissions:
| Section | Permissions |
| -------------------------------------- | ------------------------------------------------------------------------------------------------------------------------------------ |
| Team Permissions → Application | `Channel.Create.Group`, `Channel.Delete.Group`, `ChannelMessage.Read.Group`, `ChannelMessage.Send.Group`, `TeamsActivity.Send.Group` |
| Chat/Meeting Permissions → Application | `ChatMessage.Read.Chat`, `ChatMessage.Send.Chat` |
| User Permissions → Application | `TeamsActivity.Send.User` |
If you need Entra object IDs from the roster (stable `user_id`s for DMs), include a resource-specific consent permission such as `TeamMember.Read.Group`.
 Your app package is ready. To test it, upload it in your own tenant from **Teams admin center → Teams apps → Manage apps → Upload new app**. How customers install it is covered on the [your bot](/docs/microsoft-teams-customer-workspaces) page.
### 4. Let other directories install the app (SaaS)
Skip this if the bot only ever serves your own Microsoft Entra directory.
In the [Azure portal](https://portal.azure.com/), open **App registrations → your app → Authentication**, and set **Supported account types** to **Multiple Entra ID tenants**.
The bot still mints its token from *your* directory. This setting only lets other organizations install the app.
Your app package is ready. To test it, upload it in your own tenant from **Teams admin center → Teams apps → Manage apps → Upload new app**. How customers install it is covered on the [your bot](/docs/microsoft-teams-customer-workspaces) page.
### 4. Let other directories install the app (SaaS)
Skip this if the bot only ever serves your own Microsoft Entra directory.
In the [Azure portal](https://portal.azure.com/), open **App registrations → your app → Authentication**, and set **Supported account types** to **Multiple Entra ID tenants**.
The bot still mints its token from *your* directory. This setting only lets other organizations install the app.
 Until the app registration has a verified publisher (MPN ID), end users in those organizations cannot consent themselves — an administrator has to approve it.
### Alternative: create the bot with the Azure CLI
Prefer scripts over portal clicks? These commands do the **Azure side** of steps 2–4 — the app registration, its client secret, and the Azure Bot with the Teams channel enabled. They're useful if you provision infrastructure with scripts, or if you're setting up a bot inside a customer's subscription for the [customer's bot](/docs/microsoft-teams-customer-bot) use case.
They do **not** build the Teams app package (name, scopes, permissions). You still do that in the Developer Portal — steps 1 and 3 above — and attach the bot these commands create.
```bash theme={"system"}
# Your home directory. The bot authenticates against this tenant.
HOME_TENANT_ID=$(az account show --query tenantId -o tsv)
RG="incident-alerts"
BOT_NAME="incident-alerts-bot"
# 1. A resource group to hold the bot.
az group create --name "$RG" --location eastus
# 2. Register the Entra app. This is the same as Azure portal → App registrations.
# AzureADMultipleOrgs lets other organizations install your app (step 4).
# Use AzureADMyOrg if the bot will only ever serve your own directory.
APP_ID=$(az ad app create \
--display-name "Incident Alerts" \
--sign-in-audience AzureADMultipleOrgs \
--query appId -o tsv)
# 3. Create the client secret. It prints once — copy it. This is the
# Password on the SuprSend vendor form.
az ad app credential reset --id "$APP_ID" --append \
--display-name "suprsend" --years 2
# 4. Create the Azure Bot, bound to your home tenant. SingleTenant is the
# only option for new bots; MultiTenant fails after 31 July 2025.
az bot create \
--resource-group "$RG" \
--name "$BOT_NAME" \
--appid "$APP_ID" \
--app-type SingleTenant \
--tenant-id "$HOME_TENANT_ID" \
--sku F0 \
--location global
# 5. Enable the Microsoft Teams channel on the bot.
az bot msteams create --name "$BOT_NAME" --resource-group "$RG"
```
When it finishes you have the three values the vendor form needs: `$APP_ID` (Application ID), the secret printed in step 3 (Password), and `$HOME_TENANT_ID` (Tenant ID), with App Type `Single tenant`.
The CLI created the bot outside the Developer Portal, so it won't show up in the bot list there. Go back to step 3 in the [Teams Developer Portal](https://dev.teams.microsoft.com/), open your app → **App features → Bot**, and enter `$APP_ID` as the bot ID to attach it to your Teams app.
## Add the vendor in SuprSend
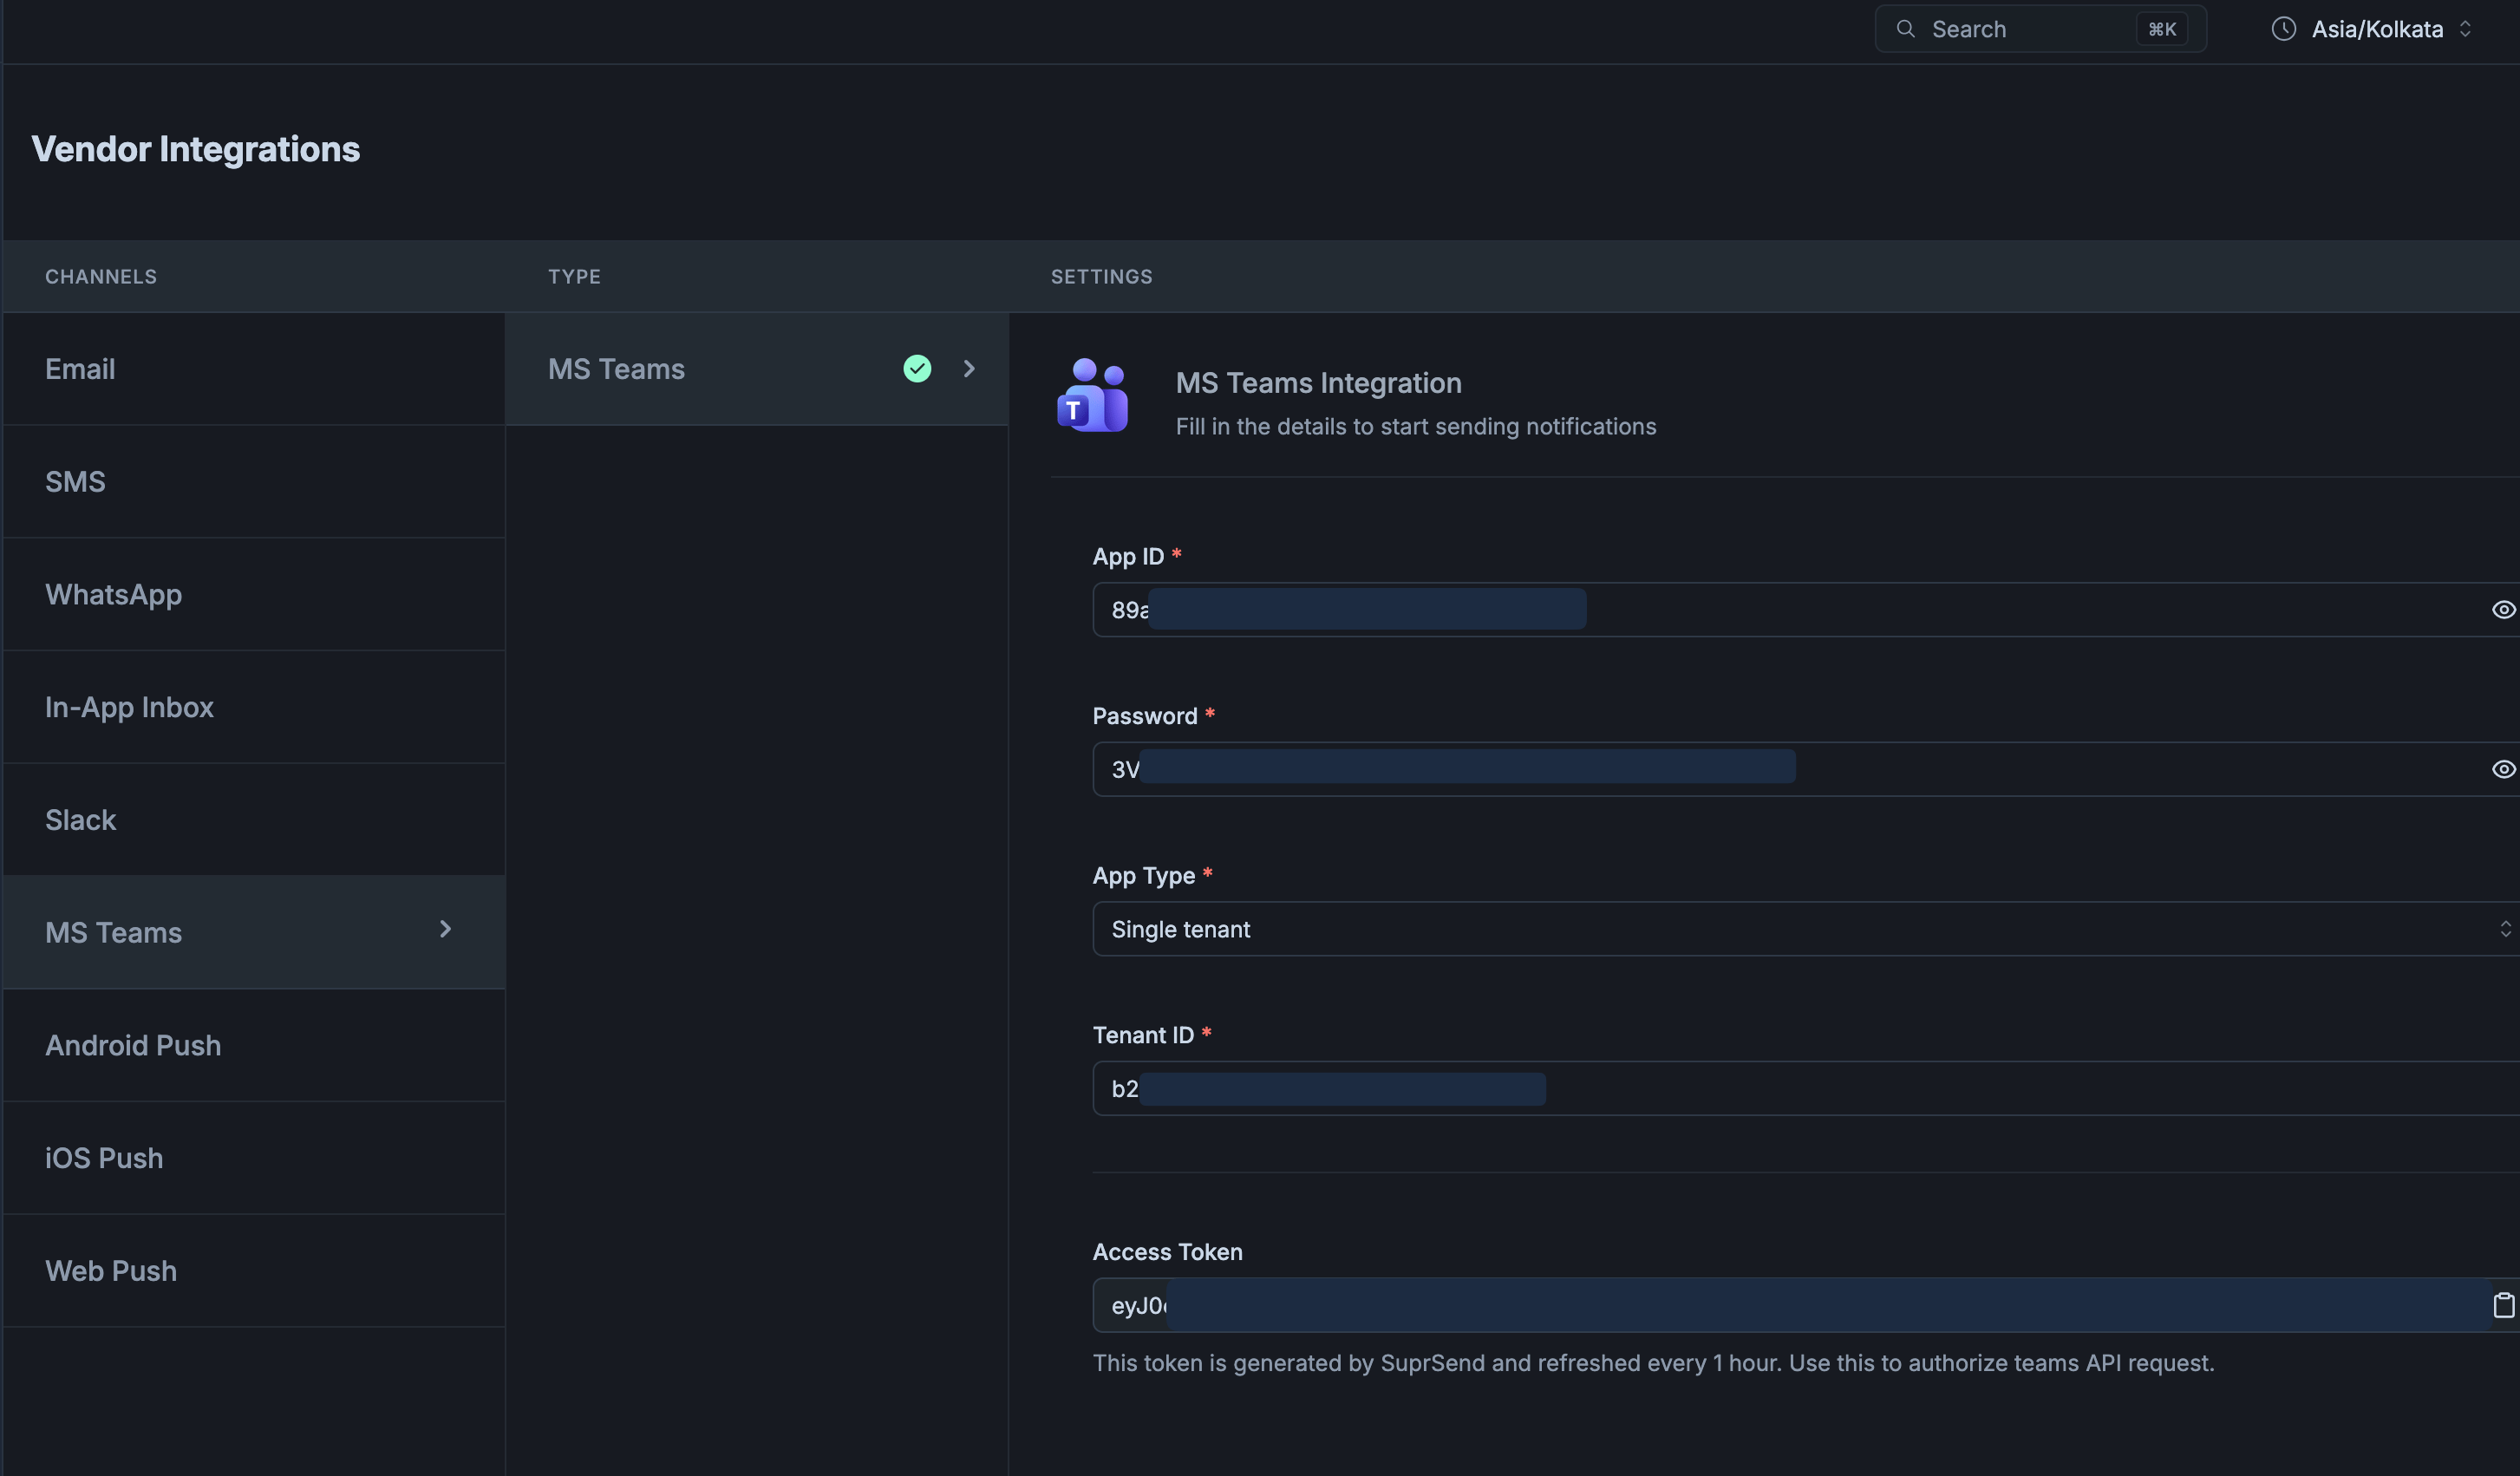
Go to **Vendors → Microsoft Teams** ([open vendor settings](https://app.suprsend.com/en/staging/vendors/ms_teams/ms_teams-ms_teams?tenant_id=default)). Add the **Application (client) ID** and the **client secret** (Password field). This form is required for webhook sends as well as bot sends.
Until the app registration has a verified publisher (MPN ID), end users in those organizations cannot consent themselves — an administrator has to approve it.
### Alternative: create the bot with the Azure CLI
Prefer scripts over portal clicks? These commands do the **Azure side** of steps 2–4 — the app registration, its client secret, and the Azure Bot with the Teams channel enabled. They're useful if you provision infrastructure with scripts, or if you're setting up a bot inside a customer's subscription for the [customer's bot](/docs/microsoft-teams-customer-bot) use case.
They do **not** build the Teams app package (name, scopes, permissions). You still do that in the Developer Portal — steps 1 and 3 above — and attach the bot these commands create.
```bash theme={"system"}
# Your home directory. The bot authenticates against this tenant.
HOME_TENANT_ID=$(az account show --query tenantId -o tsv)
RG="incident-alerts"
BOT_NAME="incident-alerts-bot"
# 1. A resource group to hold the bot.
az group create --name "$RG" --location eastus
# 2. Register the Entra app. This is the same as Azure portal → App registrations.
# AzureADMultipleOrgs lets other organizations install your app (step 4).
# Use AzureADMyOrg if the bot will only ever serve your own directory.
APP_ID=$(az ad app create \
--display-name "Incident Alerts" \
--sign-in-audience AzureADMultipleOrgs \
--query appId -o tsv)
# 3. Create the client secret. It prints once — copy it. This is the
# Password on the SuprSend vendor form.
az ad app credential reset --id "$APP_ID" --append \
--display-name "suprsend" --years 2
# 4. Create the Azure Bot, bound to your home tenant. SingleTenant is the
# only option for new bots; MultiTenant fails after 31 July 2025.
az bot create \
--resource-group "$RG" \
--name "$BOT_NAME" \
--appid "$APP_ID" \
--app-type SingleTenant \
--tenant-id "$HOME_TENANT_ID" \
--sku F0 \
--location global
# 5. Enable the Microsoft Teams channel on the bot.
az bot msteams create --name "$BOT_NAME" --resource-group "$RG"
```
When it finishes you have the three values the vendor form needs: `$APP_ID` (Application ID), the secret printed in step 3 (Password), and `$HOME_TENANT_ID` (Tenant ID), with App Type `Single tenant`.
The CLI created the bot outside the Developer Portal, so it won't show up in the bot list there. Go back to step 3 in the [Teams Developer Portal](https://dev.teams.microsoft.com/), open your app → **App features → Bot**, and enter `$APP_ID` as the bot ID to attach it to your Teams app.
## Add the vendor in SuprSend
Go to **Vendors → Microsoft Teams** ([open vendor settings](https://app.suprsend.com/en/staging/vendors/ms_teams/ms_teams-ms_teams?tenant_id=default)). Add the **Application (client) ID** and the **client secret** (Password field). This form is required for webhook sends as well as bot sends.
 | Field | What it is |
| --------------------------- | ------------------------------------------------------------------------------------------------------------------------ |
| **Application (client) ID** | Filled onto the app in Developer Portal when you attach the bot. Same value as Azure **App registration → Overview**. |
| **Password** | Bot client secret (shown only once when you created it) |
| **App Type** | Must match the **Azure Bot**. `Single tenant` for bots created after 31 July 2025. `Multi tenant` only for an older bot. |
| **Tenant ID** | The Microsoft Entra tenant **your bot is registered in**. Required for single-tenant. Not the customer's directory. |
Find **Tenant ID** in the [Azure portal](https://portal.azure.com/) under **Microsoft Entra ID → Overview → Tenant ID**, or on the app registration **Overview** as *Directory (tenant) ID*.
| Field | What it is |
| --------------------------- | ------------------------------------------------------------------------------------------------------------------------ |
| **Application (client) ID** | Filled onto the app in Developer Portal when you attach the bot. Same value as Azure **App registration → Overview**. |
| **Password** | Bot client secret (shown only once when you created it) |
| **App Type** | Must match the **Azure Bot**. `Single tenant` for bots created after 31 July 2025. `Multi tenant` only for an older bot. |
| **Tenant ID** | The Microsoft Entra tenant **your bot is registered in**. Required for single-tenant. Not the customer's directory. |
Find **Tenant ID** in the [Azure portal](https://portal.azure.com/) under **Microsoft Entra ID → Overview → Tenant ID**, or on the app registration **Overview** as *Directory (tenant) ID*.
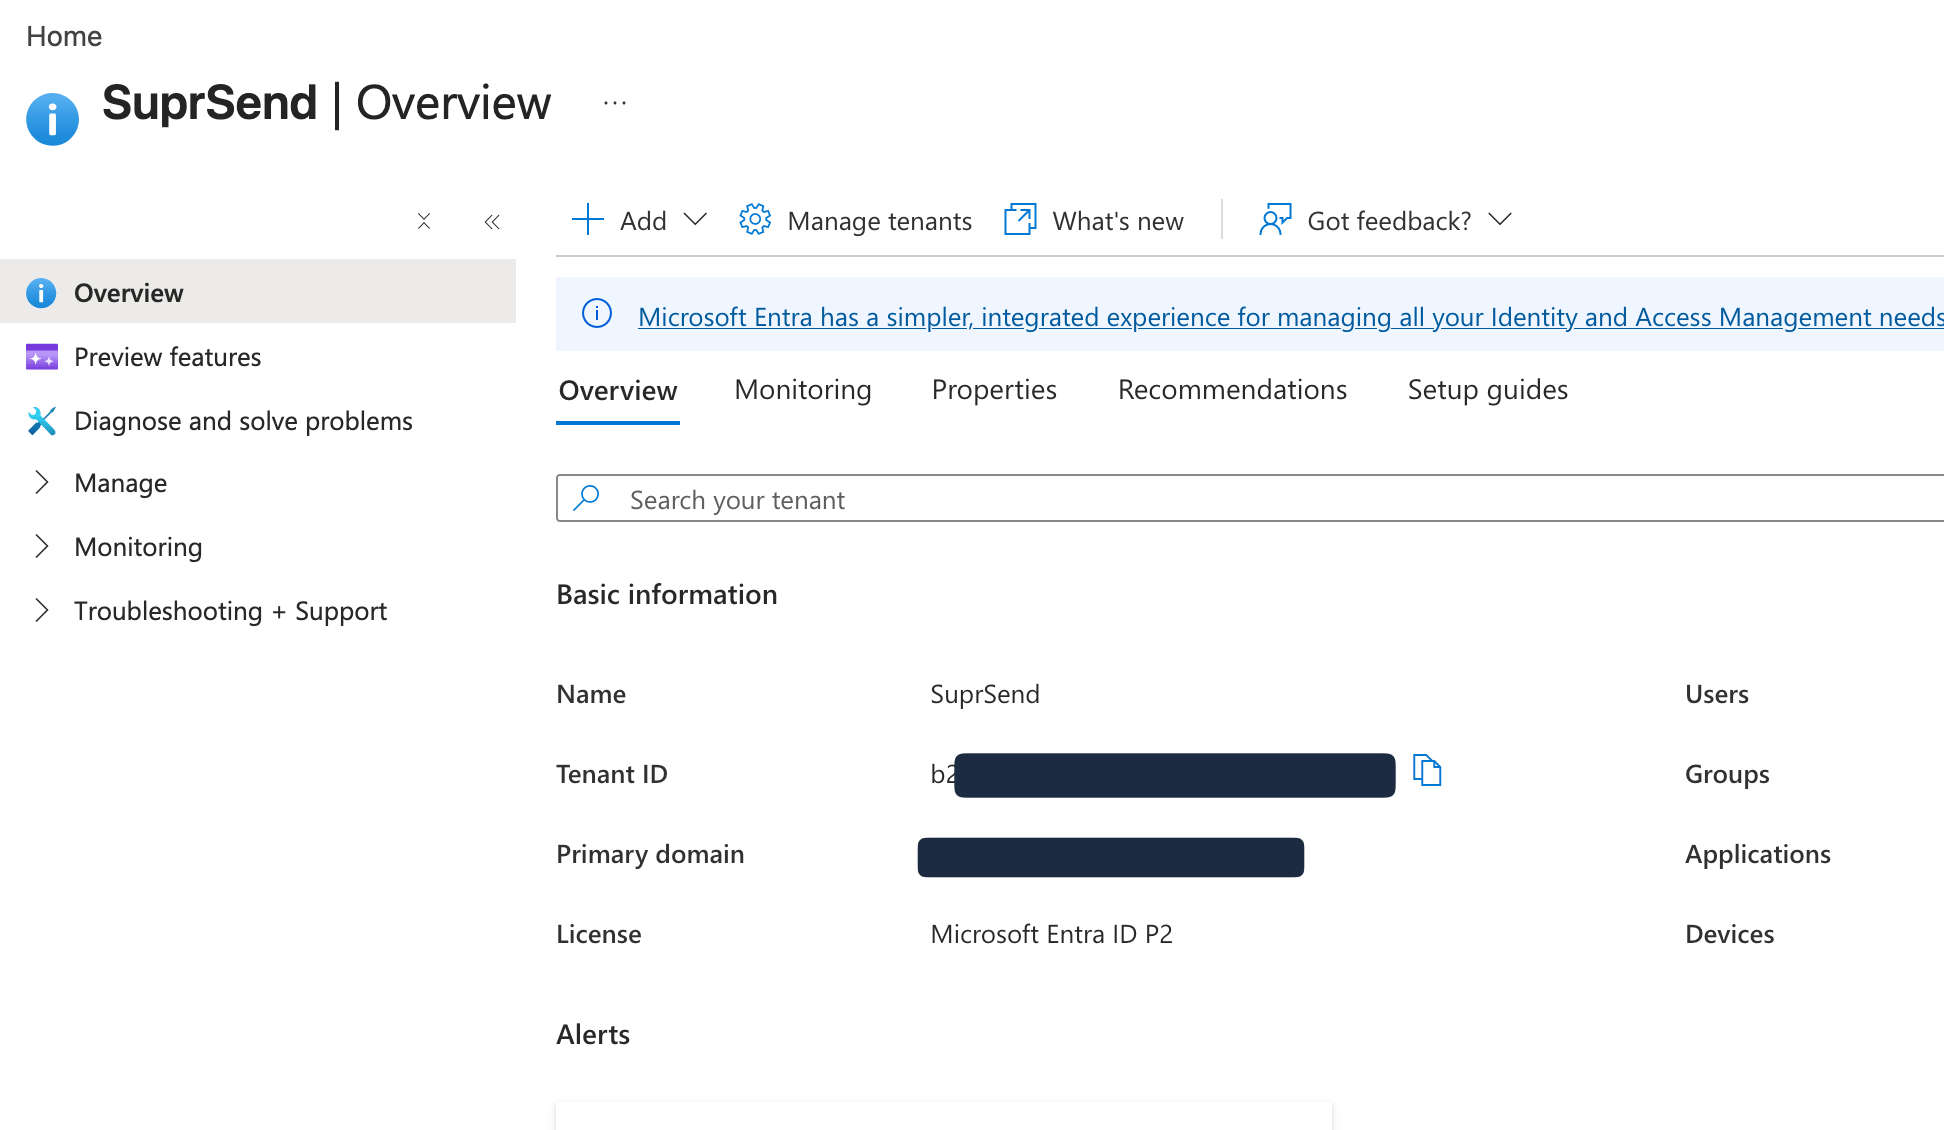 Save. SuprSend requests a token immediately.
* Empty **Access Token** and `AADSTS700016` — Tenant ID is missing or isn't the bot's home directory.
* Token filled in — credentials were accepted. That does not prove sends will work. Microsoft issues the token, then checks at send time that it came from the tenant the bot is registered against. A wrong App Type produces a healthy-looking token and `401 Authorization has been denied for this request` on every send. Send a test from the use-case page you picked.
**Tenant ID** on the vendor is the directory your **bot** is registered in. `tenant_id` on a user or object `$ms_teams` channel is the **recipient's** organization. They are the same value when the bot only serves its own directory. Once the bot serves several customers, a destination without its own `tenant_id` falls back to the vendor's and the send fails with `401`.
If an enterprise customer brings their own bot, those credentials go on a [tenant-level vendor](/docs/tenant-vendor) instead. See [Send with their bot](/docs/microsoft-teams-customer-bot).
## Next
Customers install your app. DMs on users, channels on objects.
The customer registers the app in their own Entra directory and hands you the credentials.
Save. SuprSend requests a token immediately.
* Empty **Access Token** and `AADSTS700016` — Tenant ID is missing or isn't the bot's home directory.
* Token filled in — credentials were accepted. That does not prove sends will work. Microsoft issues the token, then checks at send time that it came from the tenant the bot is registered against. A wrong App Type produces a healthy-looking token and `401 Authorization has been denied for this request` on every send. Send a test from the use-case page you picked.
**Tenant ID** on the vendor is the directory your **bot** is registered in. `tenant_id` on a user or object `$ms_teams` channel is the **recipient's** organization. They are the same value when the bot only serves its own directory. Once the bot serves several customers, a destination without its own `tenant_id` falls back to the vendor's and the send fails with `401`.
If an enterprise customer brings their own bot, those credentials go on a [tenant-level vendor](/docs/tenant-vendor) instead. See [Send with their bot](/docs/microsoft-teams-customer-bot).
## Next
Customers install your app. DMs on users, channels on objects.
The customer registers the app in their own Entra directory and hands you the credentials.