> ## Documentation Index
> Fetch the complete documentation index at: https://docs.suprsend.com/llms.txt
> Use this file to discover all available pages before exploring further.

# Quickstart

> Get started with tenants using a minimal working example.

This guide walks through creating a tenant, using tenant data in templates, and triggering a notification with tenant context.

## Step 1: Create a Tenant

<Tabs>
  <Tab title="MCP">
    With the [SuprSend MCP server](/reference/mcp-overview) configured in your AI assistant (Claude, Cursor, etc.), just pass a simple prompt to create tenant:

    ```text theme={"system"}
    Create a tenant in staging workspace for my company with ID - `<company_id>`, pick name, logo, colors and social links from my website - `<website_url>`
    ```

    The MCP server calls the `upsert_suprsend_tenant` tool under the hood to create the tenant.
  </Tab>

  <Tab title="Backend Code">
    <CodeGroup>
      ```curl curl theme={"system"}
      curl --request POST \
           --url https://hub.suprsend.com/v1/tenant/acme-corp \
           --header 'Authorization: Bearer __api_key__' \
           --header 'accept: application/json' \
           --header 'content-type: application/json' \
           --data '{
        "tenant_name": "Acme Corp",
        "logo": "https://acme.com/logo.png",
        "primary_color": "#0055ff",
        "social_links": {
          "website": "https://acme.com"
        }
      }'
      ```

      ```python Python theme={"system"}
      from suprsend import Suprsend

      supr_client = Suprsend("workspace_key", "workspace_secret")

      response = supr_client.tenants.upsert("acme-corp", {
          "tenant_name": "Acme Corp",
          "logo": "https://acme.com/logo.png",
          "primary_color": "#0055ff",
          "social_links": {
              "website": "https://acme.com"
          }
      })
      print(response)
      ```

      ```javascript Node.js theme={"system"}
      const { Suprsend } = require("@suprsend/node-sdk");

      const supr_client = new Suprsend("workspace_key", "workspace_secret");

      const response = supr_client.tenants.upsert("acme-corp", {
          tenant_name: "Acme Corp",
          logo: "https://acme.com/logo.png",
          primary_color: "#0055ff",
          social_links: {
              website: "https://acme.com"
          }
      });
      response.then((res) => console.log(res));
      ```

      ```java Java theme={"system"}
      import org.json.JSONObject;

      import suprsend.Suprsend;
      import suprsend.SuprsendAPIException;

      Suprsend suprsendClient = new Suprsend("workspace_key", "workspace_secret");

      JSONObject payload = new JSONObject()
          .put("tenant_name", "Acme Corp")
          .put("logo", "https://acme.com/logo.png")
          .put("primary_color", "#0055ff")
          .put("social_links", new JSONObject()
              .put("website", "https://acme.com")
          )
      ;

      JSONObject response = suprsendClient.tenants.upsert("acme-corp", payload);
      System.out.println(response);
      ```

      ```go Go theme={"system"}
      suprClient, _ := suprsend.NewClient("workspace_key", "workspace_secret")

      tenantPayload := &suprsend.Tenant{
          TenantName:   suprsend.String("Acme Corp"),
          Logo:         suprsend.String("https://acme.com/logo.png"),
          PrimaryColor: suprsend.String("#0055ff"),
      }

      res, err := suprClient.Tenants.Upsert(context.Background(), "acme-corp", tenantPayload)
      if err != nil {
          log.Fatalln(err)
      }
      log.Println(res)
      ```
    </CodeGroup>

    <Note>
      `upsert` creates the tenant if it doesn't exist, or updates it if it does. The Tenant ID cannot be changed after creation.
    </Note>
  </Tab>

  <Tab title="SuprSend UI">
    <Steps>
      <Step title="Select Tenants tab and create New Tenant">
        Select **Tenants** tab from the side navigation and click on **New Tenant**.
        Enter a **Tenant ID**, generally the customer ID from your system and a **Tenant Name**, generally the company name, then confirm.

        <Frame caption="New Tenant button on Tenants page">
          <img src="https://mintcdn.com/suprsend/nfqBnimD1YK6ZiIa/images/add-tenant.png?fit=max&auto=format&n=nfqBnimD1YK6ZiIa&q=85&s=2b1d6233867824dd27674b561f999917" alt="" width="2730" height="436" data-path="images/add-tenant.png" />
        </Frame>
      </Step>

      <Step title="Configure Properties">
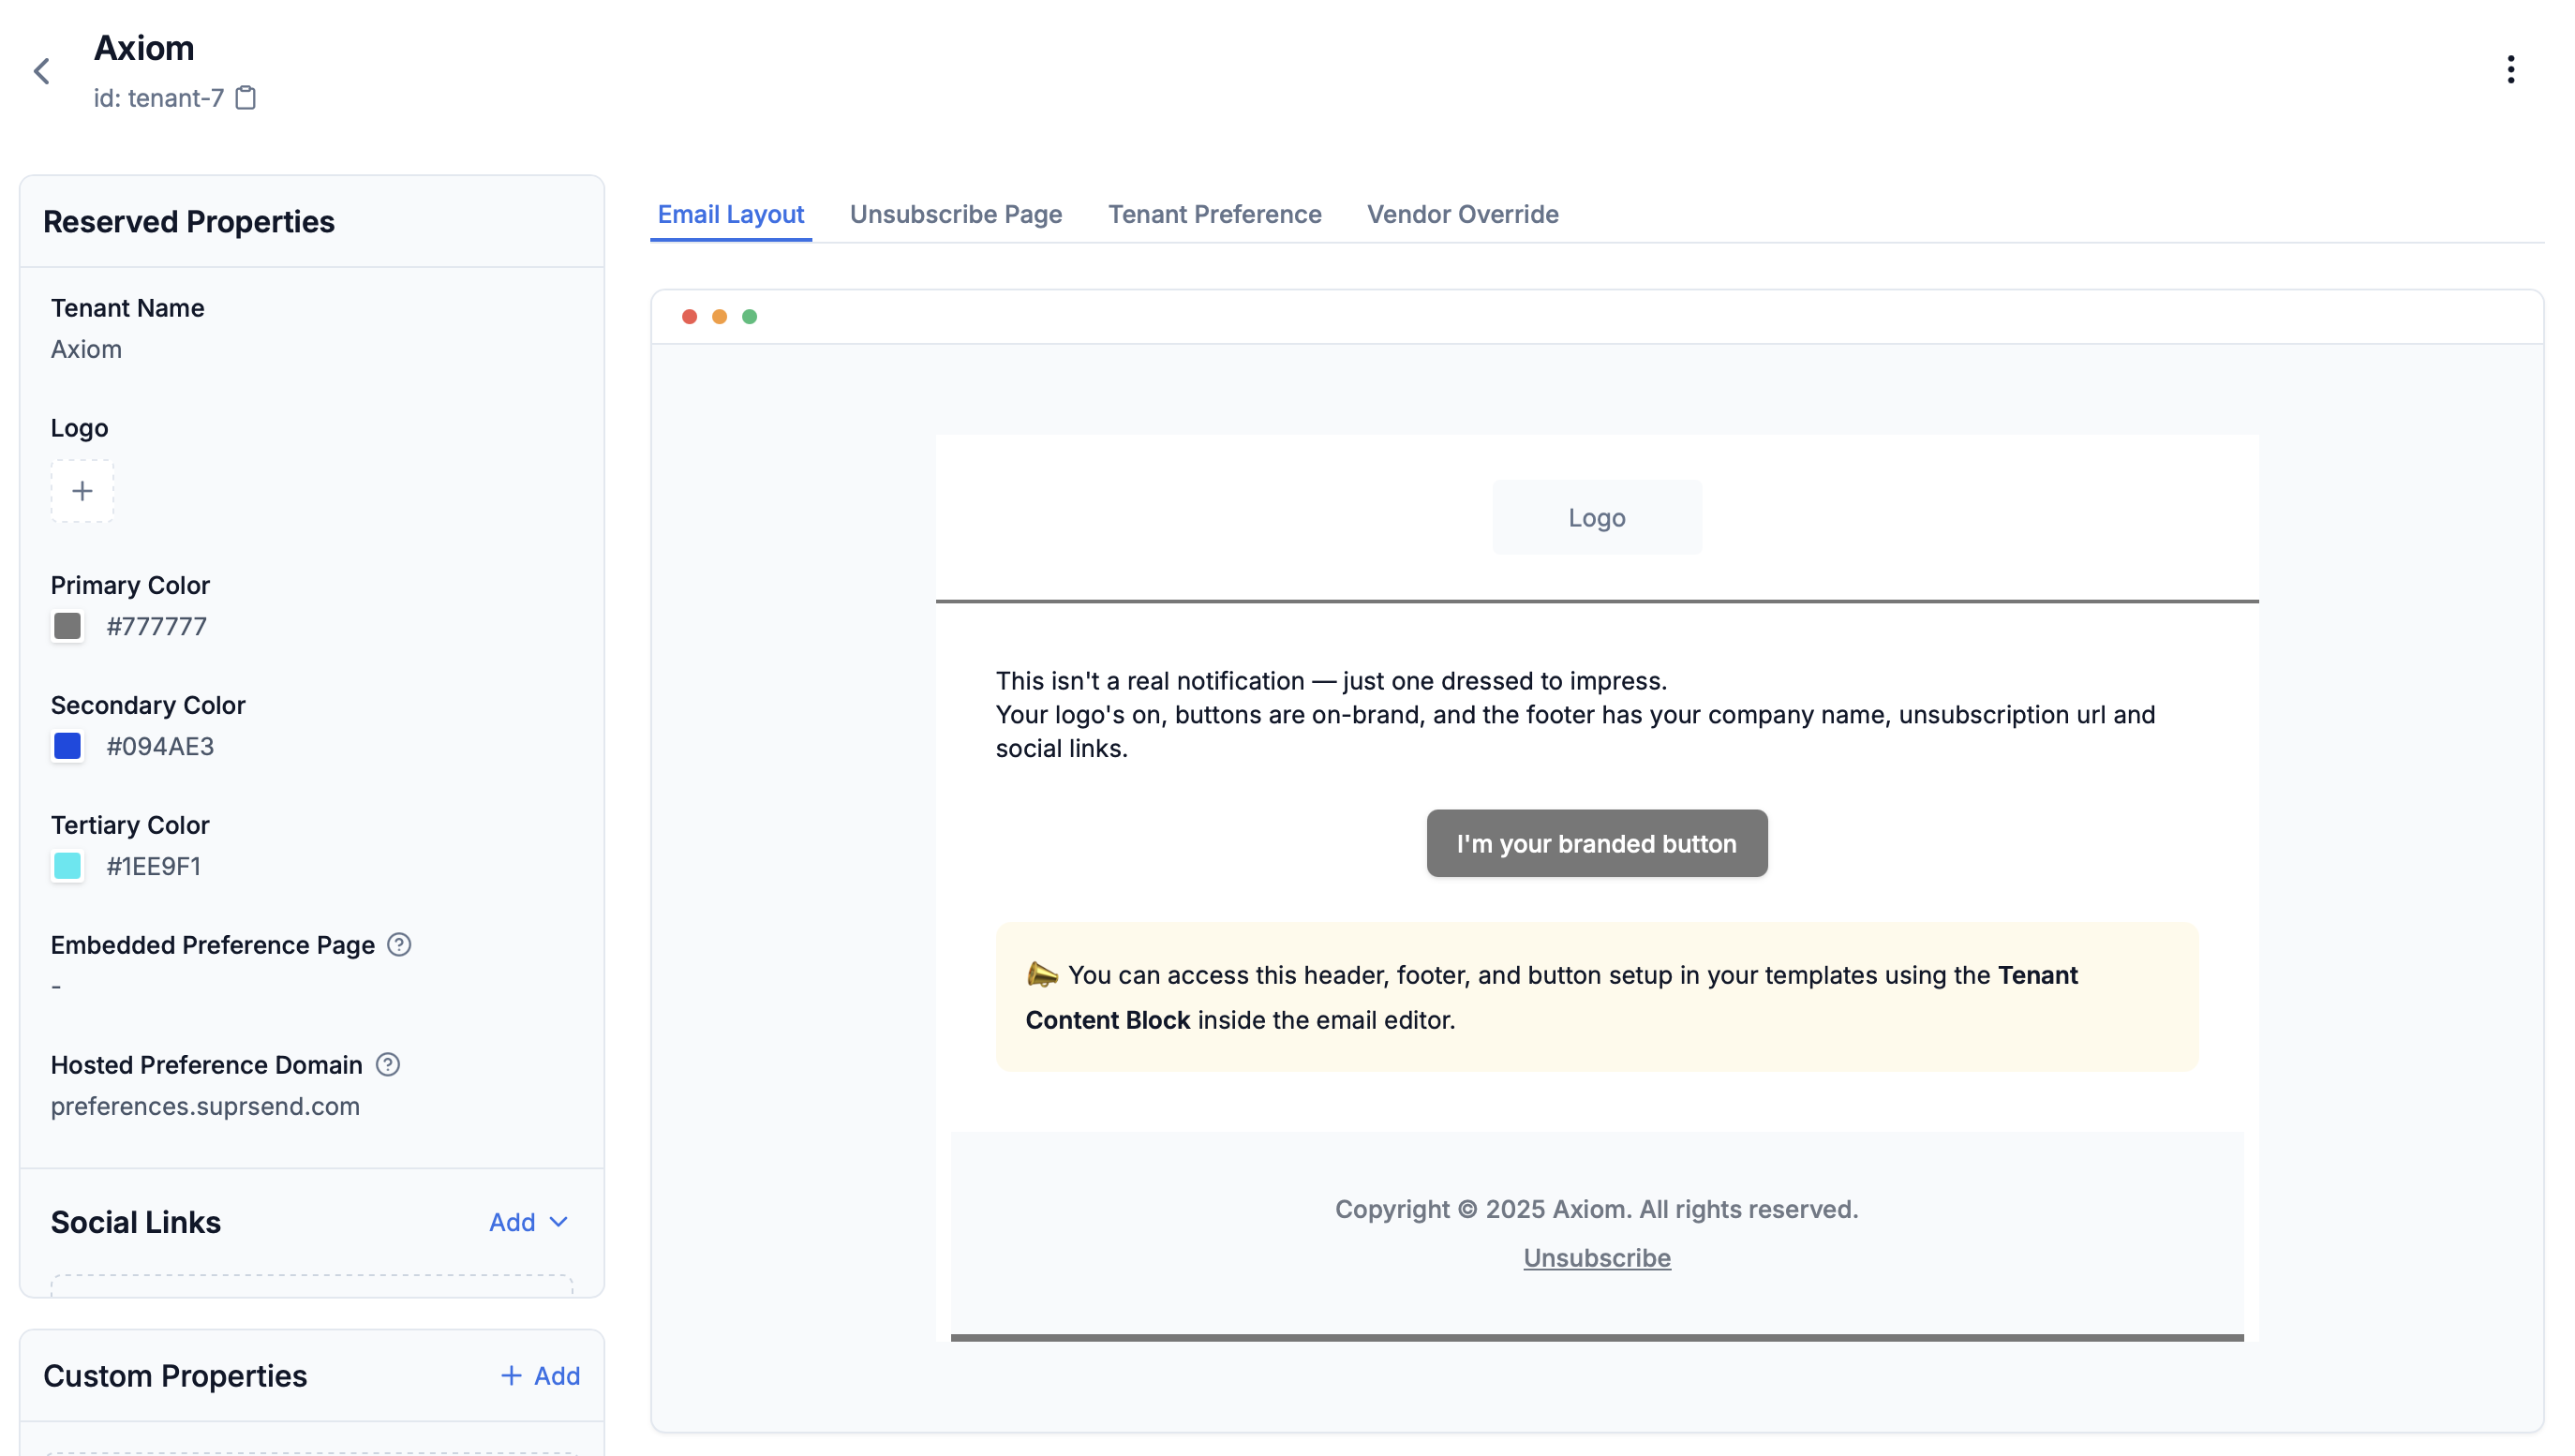
        On the tenant details page, set the logo, colors, social links, or other properties (address, paid/free) that you might need in your template or workflow for customization.

        <Frame caption="Configure tenant properties">
          <img src="https://mintcdn.com/suprsend/nfqBnimD1YK6ZiIa/images/configure-tenant.png?fit=max&auto=format&n=nfqBnimD1YK6ZiIa&q=85&s=90ccc0214e5aa545f887f0118edd3018" alt="" width="2748" height="1554" data-path="images/configure-tenant.png" />
        </Frame>
      </Step>
    </Steps>
  </Tab>
</Tabs>

## Step 2: Customize tenant templates

Open any template in the [template editor](https://app.suprsend.com/en/staging/templates). Tenant variables follow the format `$brand.<property>` and are replaced at send time based on the `tenant_id` you pass.

### Customizing header, footer, and buttons in email templates

You can use the built-in **Tenant block** in email designer to automatically get the branded header, footer, and buttons for a tenant. For any other customization, pass tenant variable as `$brand.<property>` in the template.

### Inserting tenant variables

Type `{` in email editor or `{{` in other channels to see tenant variables in auto-suggestions. Here's an example email template:

```handlebars Email template theme={"system"}
<h2>Hello from {{$brand.tenant_name}}!</h2>
<p>Your account is now active. Visit us at {{$brand.social_links.website}}.</p>
<p style="color: {{$brand.primary_color}};">We're glad to have you.</p>
```

When triggered with `tenant_id="acme-corp"`, the variables resolve to Acme Corp's actual values.

### Show/Hide template content based on tenant properties

Use custom properties to conditionally show content for specific tenants. Set a property (e.g., `pricing_type: free`) on the tenant, then basis that, show upgrade banner in the template.
In email template, you can use [display condition](/docs/email-template#display-email-blocks-based-on-condition) to show/hide the content based on the property.

```handlebars Inbox template theme={"system"}
{{#compare $brand.properties.pricing_type '==' "free"}}
  🎉 You're on a free trial — [upgrade now]({{$brand.properties.upgrade_url}})
{{/compare}}
```

## Step 3: Trigger a Workflow with tenant\_id

Pass `tenant_id` when triggering a workflow. SuprSend applies the matching tenant's branding and preferences automatically.

<CodeGroup>
  ```curl curl theme={"system"}
  curl --request POST \
       --url https://hub.suprsend.com/trigger/ \
       --header 'Authorization: Bearer __api_key__' \
       --header 'content-type: application/json' \
       --data '{"workflow": "welcome_email", "recipients": [...], "tenant_id": "acme-corp"}'
  ```

  ```python Python theme={"system"}
  w1 = WorkflowTriggerRequest(body={...}, tenant_id="acme-corp")
  supr_client.workflows.trigger(w1)
  ```

  ```javascript Node.js theme={"system"}
  const w1 = new WorkflowTriggerRequest(body, { tenant_id: "acme-corp" });
  supr_client.workflows.trigger(w1);
  ```

  ```java Java theme={"system"}
  WorkflowTriggerRequest wf = new WorkflowTriggerRequest(body, "acme-corp");
  suprClient.workflows.trigger(wf);
  ```

  ```go Go theme={"system"}
  w1 := &suprsend.WorkflowTriggerRequest{Body: body, TenantId: "acme-corp"}
  suprClient.Workflows.Trigger(w1)
  ```
</CodeGroup>

SuprSend resolves all `$tenant.*` and `$brand.*` variables using the properties of `acme-corp` before sending.