> ## Documentation Index
> Fetch the complete documentation index at: https://docs.suprsend.com/llms.txt
> Use this file to discover all available pages before exploring further.
# Quickstart: ChatGPT and Codex
> Add the hosted SuprSend MCP server to ChatGPT as a custom MCP server, or to Codex CLI, and sign in with your SuprSend account.
## Set up the connection
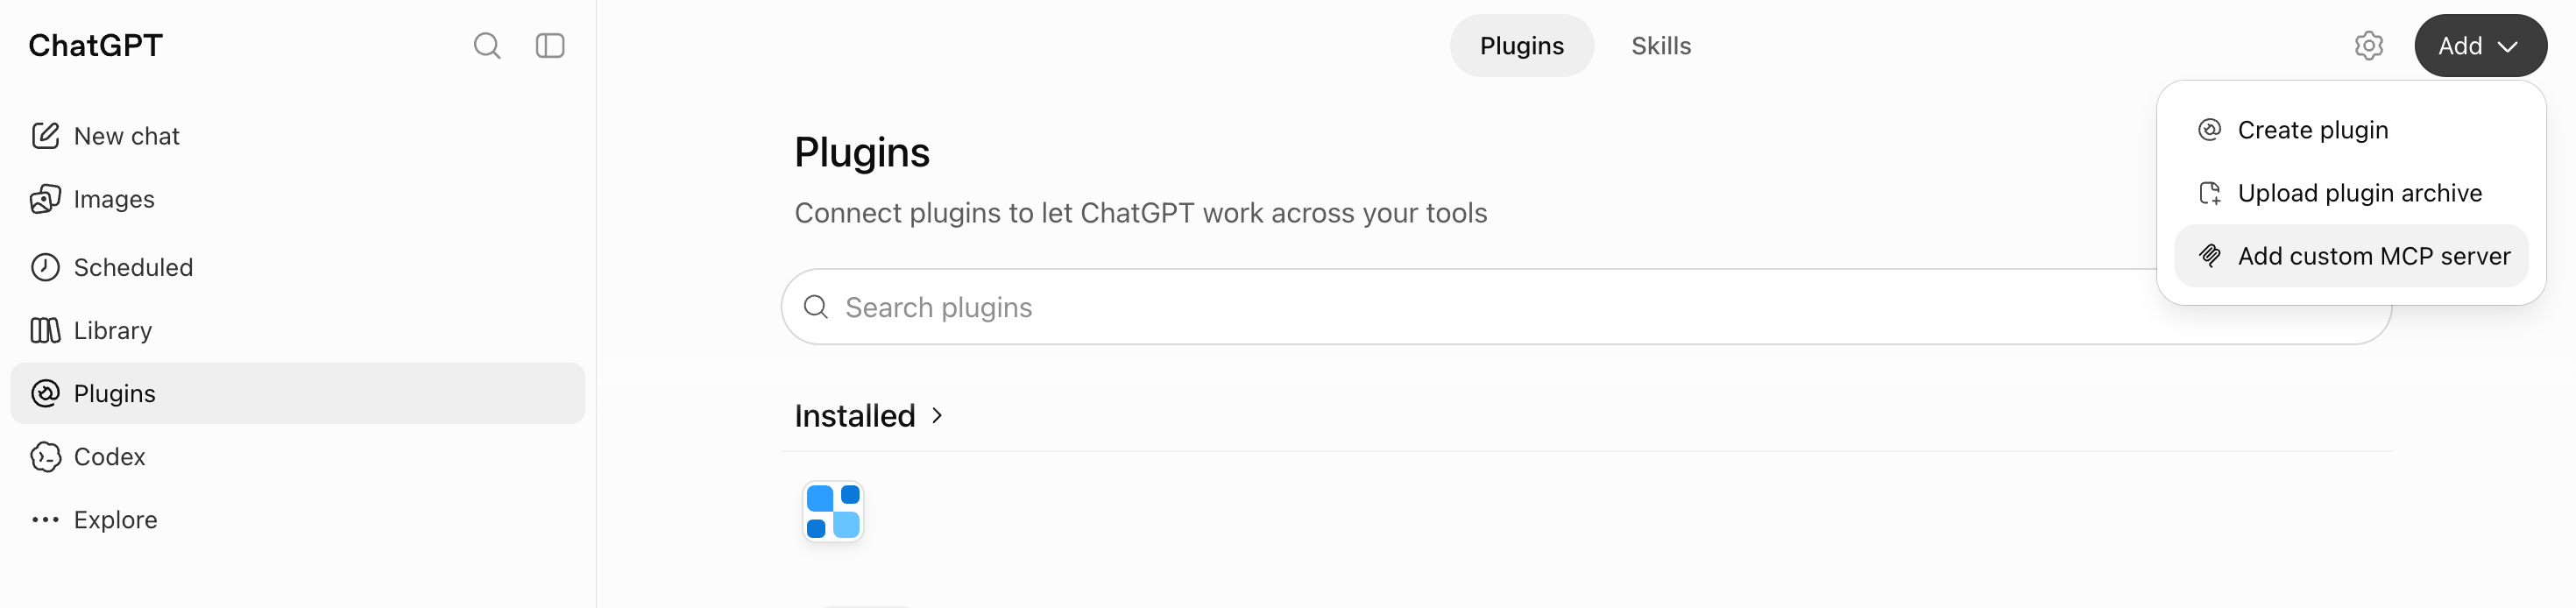
In ChatGPT, open **Plugins** in the sidebar, then click **Add** → **Add custom MCP server**.
 ```
https://mcp.suprsend.com/mcp
```
ChatGPT warns that custom MCP servers can run tool calls on your account. Click **I understand and want to continue**, then **Create as a plugin**.
ChatGPT opens a sign-in popup. Sign in with your SuprSend account. The agent gets the same permissions your role has in the SuprSend dashboard.
In a new chat, ask:
```
List my SuprSend workspaces.
```
ChatGPT answers with your SuprSend workspaces.
```bash theme={"system"}
codex mcp add suprsend --url https://mcp.suprsend.com/mcp
```
When you add the server, Codex opens your browser. Sign in with your SuprSend account. The agent gets the same permissions your role has in the SuprSend dashboard.
In a Codex session, ask:
```
List my SuprSend workspaces.
```
Codex answers with your SuprSend workspaces.
## Pin a workspace and restrict tools
By default, ChatGPT and Codex can use every workspace and tool your role allows. To keep them on one workspace, or to give them only the tools a job needs, use one of these URLs when you add the server:
* **Pin a workspace** by adding its slug to the path. The agent then can't switch to another workspace:
```
https://mcp.suprsend.com/mcp/staging
```
* **Restrict tools** with `?tools=`, a comma-separated list of tool names or groups:
```
https://mcp.suprsend.com/mcp/staging?tools=users_*,data_*
```
See [Scope the connection](/reference/mcp-overview#scope-the-connection) for every URL pattern, and the [tool list](/reference/mcp-tool-list) for every tool.
## Troubleshooting
Check the workspace slug in the URL. It must match a workspace in your SuprSend account exactly, for example `staging`, not the workspace's display name. A slug that doesn't exist fails with `403 workspace_forbidden`. To see your slugs, remove the slug, reconnect, and ask: "List my SuprSend workspaces."
Every tool, grouped by category, with read vs write labels.
Ready-to-use prompts to get started fast.
This documentation is built and hosted on [Mintlify](https://mintlify.com), a developer documentation platform.
```
https://mcp.suprsend.com/mcp
```
ChatGPT warns that custom MCP servers can run tool calls on your account. Click **I understand and want to continue**, then **Create as a plugin**.
ChatGPT opens a sign-in popup. Sign in with your SuprSend account. The agent gets the same permissions your role has in the SuprSend dashboard.
In a new chat, ask:
```
List my SuprSend workspaces.
```
ChatGPT answers with your SuprSend workspaces.
```bash theme={"system"}
codex mcp add suprsend --url https://mcp.suprsend.com/mcp
```
When you add the server, Codex opens your browser. Sign in with your SuprSend account. The agent gets the same permissions your role has in the SuprSend dashboard.
In a Codex session, ask:
```
List my SuprSend workspaces.
```
Codex answers with your SuprSend workspaces.
## Pin a workspace and restrict tools
By default, ChatGPT and Codex can use every workspace and tool your role allows. To keep them on one workspace, or to give them only the tools a job needs, use one of these URLs when you add the server:
* **Pin a workspace** by adding its slug to the path. The agent then can't switch to another workspace:
```
https://mcp.suprsend.com/mcp/staging
```
* **Restrict tools** with `?tools=`, a comma-separated list of tool names or groups:
```
https://mcp.suprsend.com/mcp/staging?tools=users_*,data_*
```
See [Scope the connection](/reference/mcp-overview#scope-the-connection) for every URL pattern, and the [tool list](/reference/mcp-tool-list) for every tool.
## Troubleshooting
Check the workspace slug in the URL. It must match a workspace in your SuprSend account exactly, for example `staging`, not the workspace's display name. A slug that doesn't exist fails with `403 workspace_forbidden`. To see your slugs, remove the slug, reconnect, and ask: "List my SuprSend workspaces."
Every tool, grouped by category, with read vs write labels.
Ready-to-use prompts to get started fast.
This documentation is built and hosted on [Mintlify](https://mintlify.com), a developer documentation platform.