How It Works
Three Levels of Control
What are user preferences?
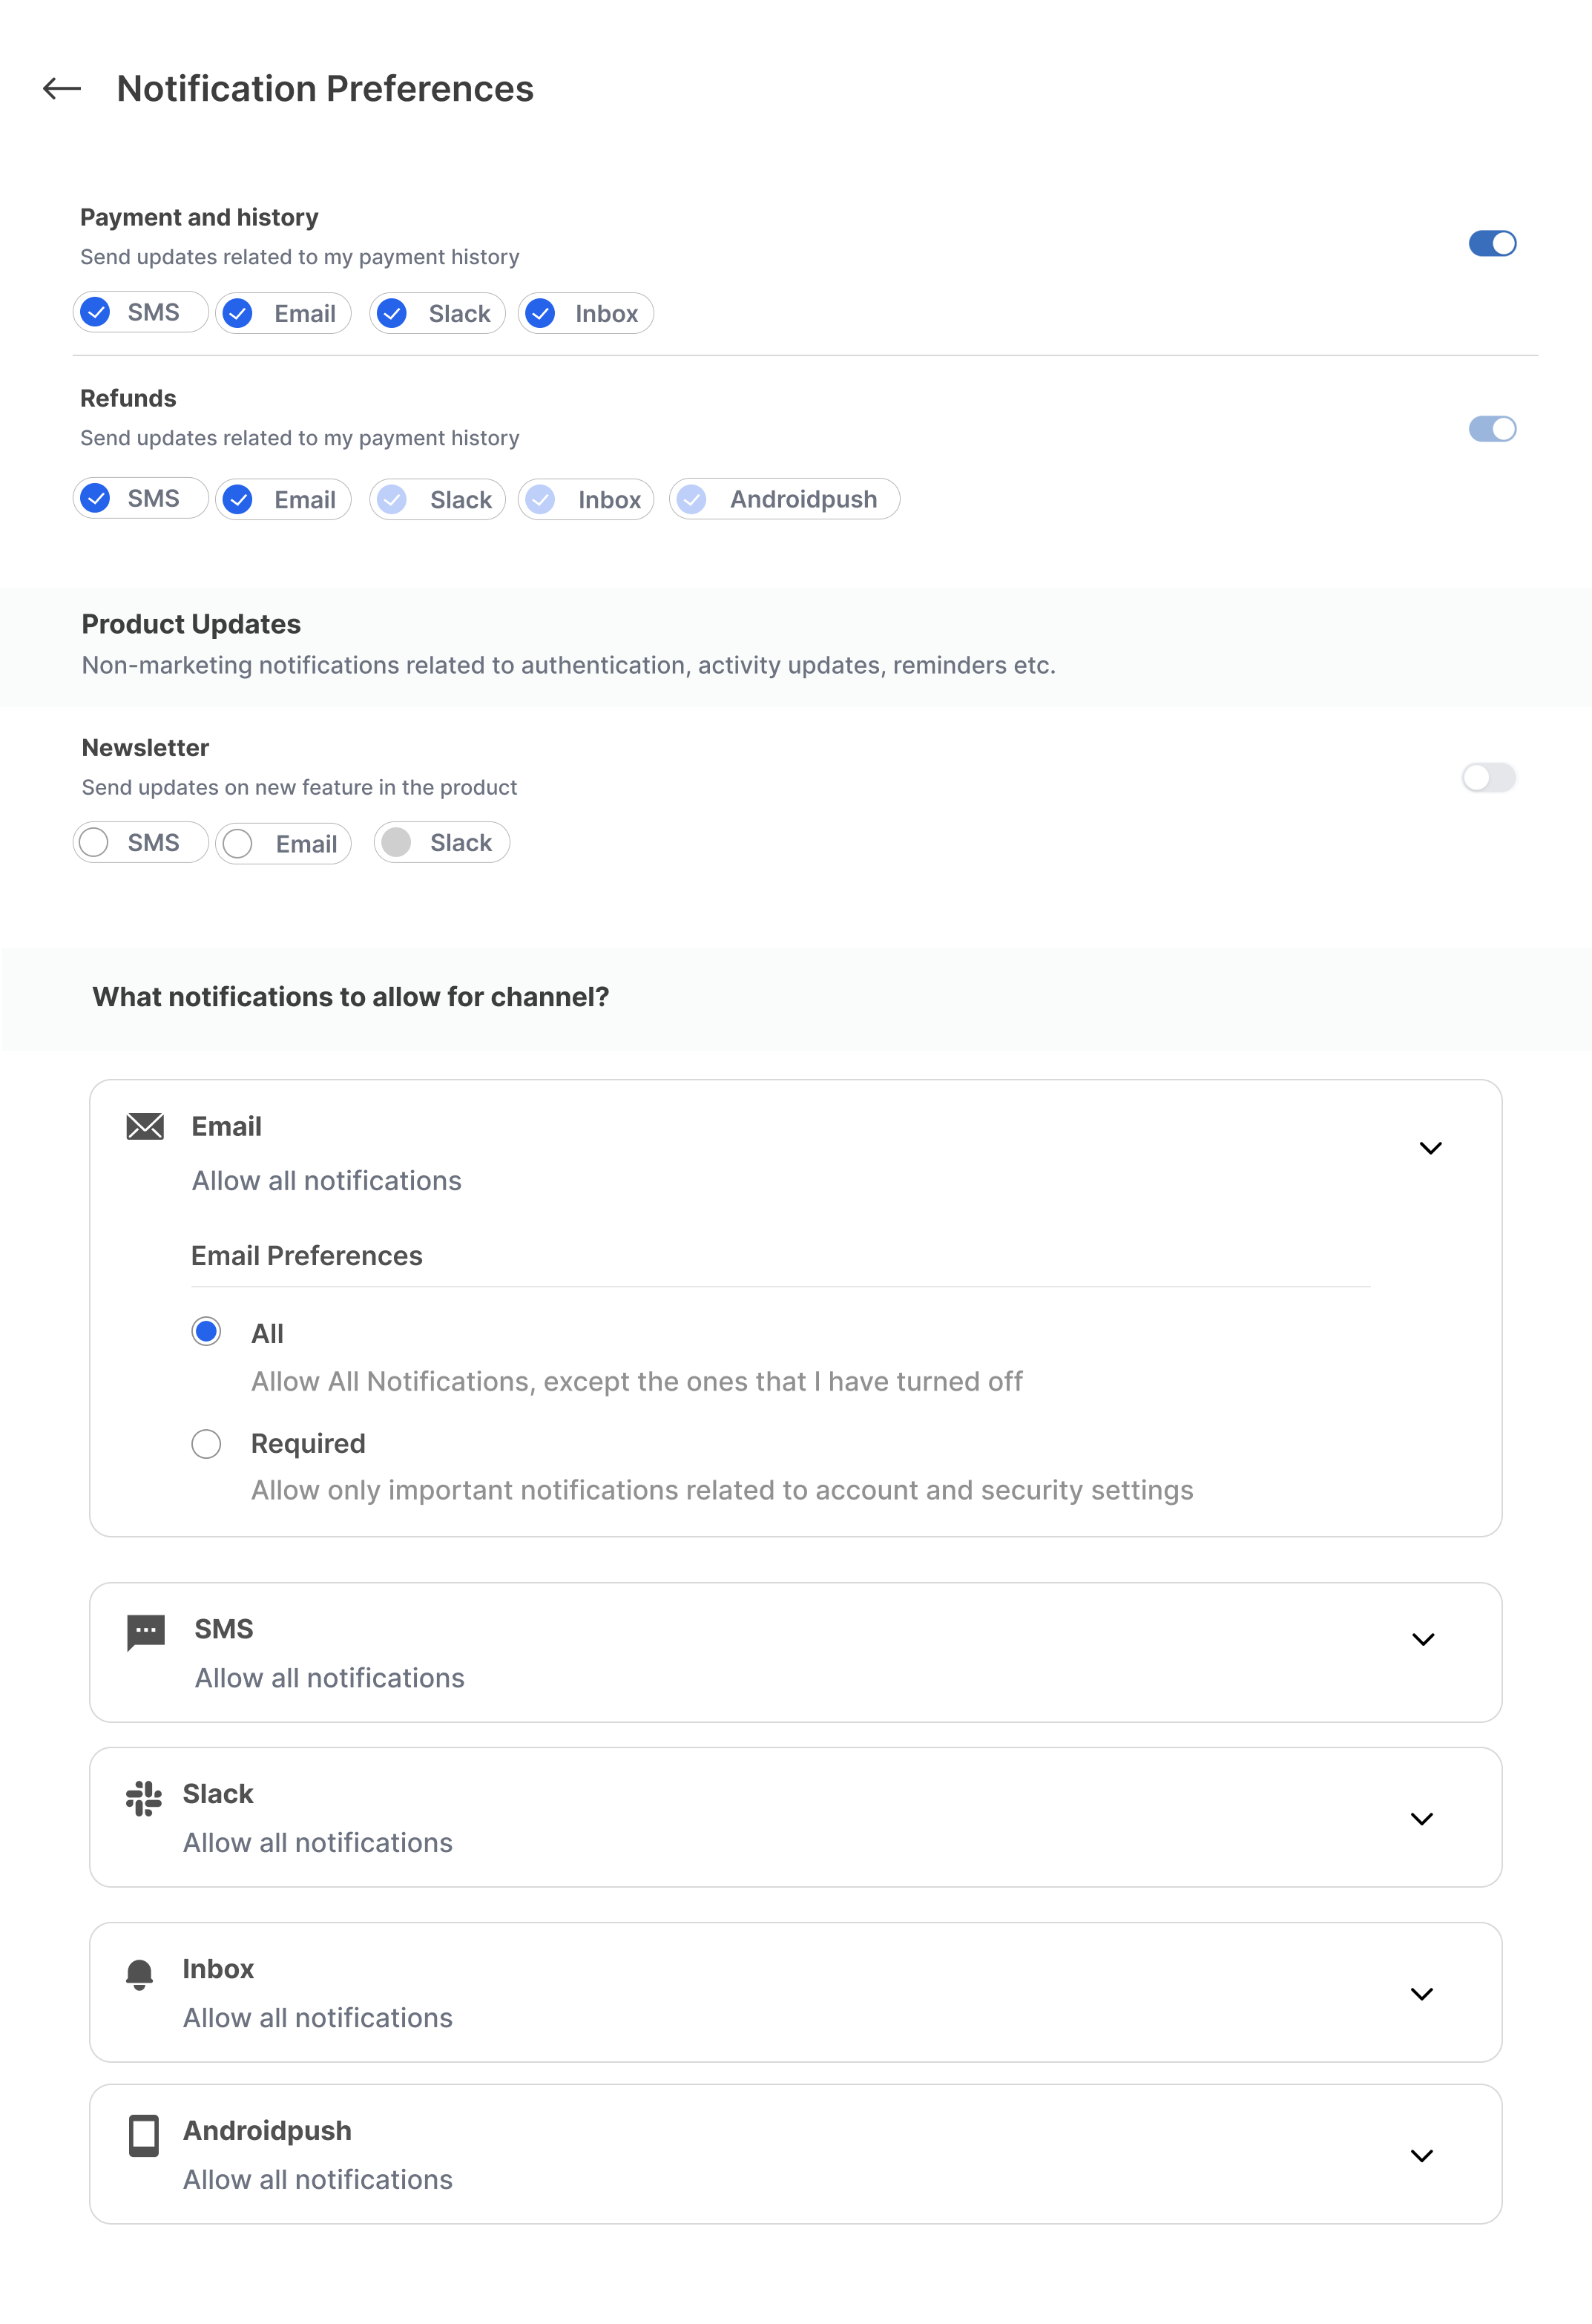
Each user has a preference set that controls which notifications they receive. A preference set has three levels of control:channel_preferences— Global channel opt-outs (for example, opt out of all email)categories— Category-level preferences (opt in/out of all channels of a notification type)opt_out_channels— Opt-in/out of specific channels within a category
invoice-ready category completely, and stays opted in to payment-reminder but without Slack.
How preferences are determined
When a user hasn’t set their own preferences in a category, SuprSend uses defaults in this order:- User Preference - Individual user’s explicit choices (highest priority)
- Tenant Default Preference - Default preferences set by tenant for the category
- Category Default Preference - Default preferences set at the category level (lowest priority)
Setting up preference categories
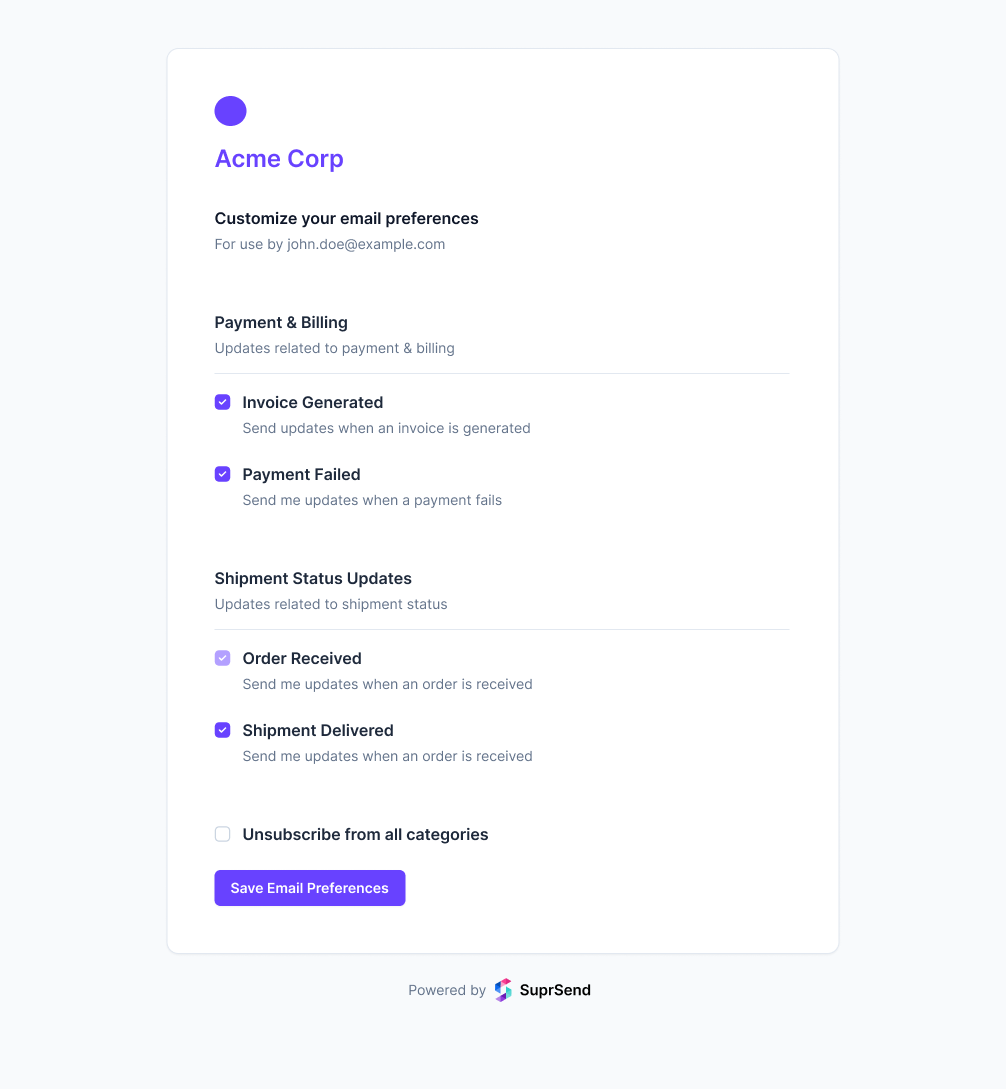
Before users can set their preferences, you must first create and configure preference categories. For step-by-step setup instructions, see Manage Categories and Preferences.Default preferences
Default preferences determine how users receive notifications when they haven’t set their own preferences. Configure these at the sub-category level when setting up categories.What default preferences control
Default preferences control:- Channel or Category defaults: Which categories or channels will be turned on/off by default on users’ preference page.
- Mandatory channels: Which channel or category users cannot opt out of (shown as disabled on preference page)
- Visibility: Whether a category appears on the preference page
Preference types
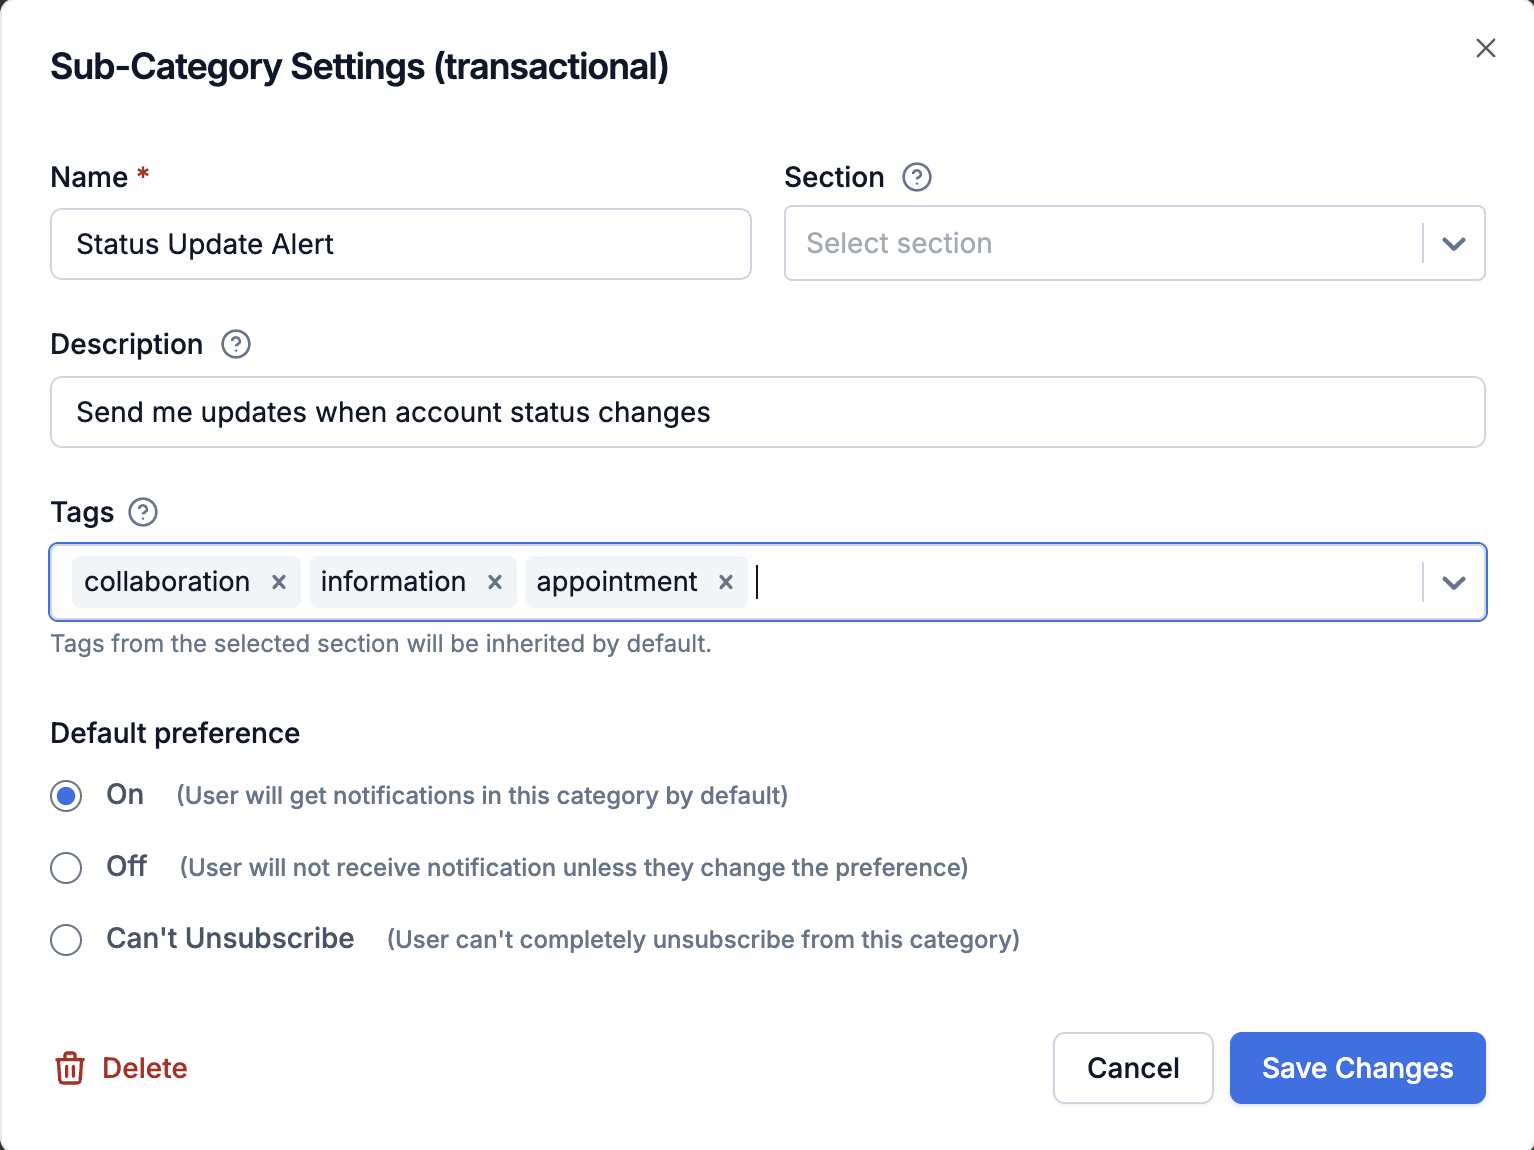
On - Users receive this category's notifications by default
On - Users receive this category's notifications by default
- All: All available channels are enabled by default
- Selected Channels only: Only specific channels you select are enabled by default (for example, Email, Android Push, iOS Push, In-App Inbox, MS Teams, Slack)
Off - Users must opt in to get notifications
Off - Users must opt in to get notifications
Can't Unsubscribe - Users cannot opt out of mandatory channels in this category
Can't Unsubscribe - Users cannot opt out of mandatory channels in this category
- Mandatory Channels: Channels which can’t be opted out of by the user. Set to “All” or “Selected Channels”.
- Opt-in Channels: In case of “Selected” Mandatory Channels, you can configure the channels that will be opted in by default. Channels other than mandatory and opt-in will be skipped for sending notification unless user explicitly opts in to them.
Digest schedule and conditions
Beyond on/off and channel preferences, a sub-category can carry two additional, optional settings that you configure when managing categories:- Digest schedule — lets users pick how often they receive batched notifications for a sub-category (for example, Instant, Daily at 9 AM, or Weekly on Monday) right from their preference page. You define the available cadence options; the option a user selects drives the workflow Digest node at send time.
- Condition properties — custom, configurable values you attach to a sub-category and then reference inside workflow branch conditions or trigger condition. Use them to control when a category’s notifications are sent — for example, a minimum severity, an alert threshold, or which user roles should be notified.
Digest schedule
Each subcategory in the preference API response includesdigest_schedule_options (all available options for the preference UI) and digest_schedule (the resolved active schedule for the user).
digest_schedule to null in the update request to fall back to the tenant or category default. Only fields with edit_policy: "editable" can be overridden by the user.
Condition properties
Each subcategory in the preference API response includes aproperties array with the configured condition properties and the user’s current values.
Capturing user preferences
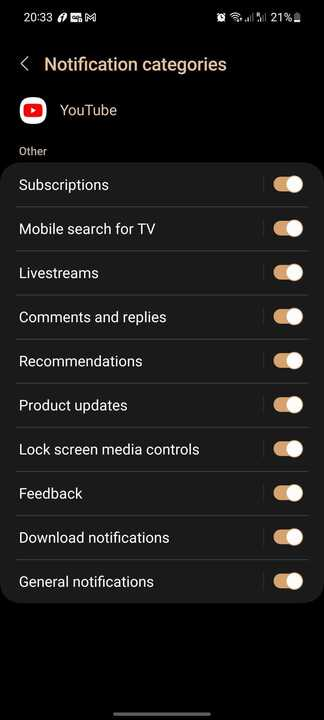
Users can set their preferences through one of the following methods:Hosted preference page
Once you publish preference categories, SuprSend automatically generates a dedicated unsubscription webpage for collecting user preferences. Users can set channel-specific preferences from the hosted page. If the link is included in an email, the hosted page will show and save email preferences.Include it in your templates using
{{$hosted_preference_url}}.
This page is currently hosted on a SuprSend domain, but you can reach out to support@suprsend.com if you’d prefer it hosted on your own domain.
Embed in your product
You can embed the preference interface directly inside your product using SuprSend’s ready-made UI components. SDKs exist in the languages below. Update your product preference page link on the tenant page and render it in templates using{{$embedded_preference_url}}.
Javascript
React
Angular
Embeddable preference page
Controlling what categories to show on UI
It’s always a good practice to show only the categories that are relevant to the user. There are two ways to achieve this:Hide categories for tenant users
In a multi-tenant setup, tenants or admins can control which categories their users see. Settingvisible_to_subscriber: false in tenant preferences hides the category from tenant users’ preference pages. Hidden categories won’t send notifications to those users, even if they previously opted in.
Filter categories with tags
Use tags to show categories based on user roles, departments, or teams. Filter categories in the preference center using thetags query parameter.
Setting Preference tags
Filter Categories with Tags
tags=tag1) or a more advanced filter using logical operators.Supported operators:tags={ "or": [{ "and": ["sales", "manager"] }, { "and": ["marketing", "associate"] }] }.If no tags are provided, the preference center returns all visible categories.Translating preference categories in user’s locale
- Upload translation files for your category names and descriptions. See How to manage Category translations for details.
-
Once uploaded, pass a
localeparameter (for example,es,fr,de) when:- Loading the embeddable preference center
- As a query parameter in the get user preference API.
- The hosted preference page picks the locale from user’s profile.
-
On hosted preference page,
- Dynamic content (category names, descriptions) is translated using translation files you upload.
- Static content (CTA text, labels, buttons, etc.) is translated automatically using SuprSend’s built-in i18n support for commonly used languages. You can see the list of supported languages below.
Supported languages
Supported languages
How preferences are evaluated
SuprSend evaluates category-level preference opt-outs at trigger time — if a user has opted out of a category, the workflow is not executed for that user. Channel-level preferences are evaluated at the delivery node when the notification is about to be sent. In both cases, the system checks user-level preferences first, then tenant-level overrides, and finally category defaults. For detailed information on the evaluation process, see Preference Evaluation.Other ways to unsubscribe from notifications
In addition to the preference center within SuprSend, communication channels provide their own opt-out options, which SuprSend manages internally.Email: Unsubscribe URL header
Email: Unsubscribe URL header
{{$hosted_preference_url}} here to load the SuprSend hosted preference page from the email header.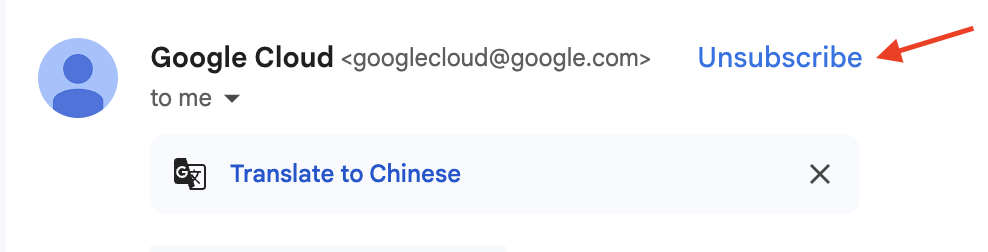
Inbox (In-App): Render preference page inside your Inbox
Inbox (In-App): Render preference page inside your Inbox
Mobile Push: Preference Page in App settings
Mobile Push: Preference Page in App settings
SMS & WhatsApp: Reply `STOP`
SMS & WhatsApp: Reply `STOP`
FAQ
Can users control when they receive digest notifications?
Can users control when they receive digest notifications?
category_digest_schedule and SuprSend sends each recipient’s digest on the cadence they chose. See Configuring digest schedule.Alternatively, if you want full control over the schedule object passed at runtime, store the preferred schedule as a custom property in the user profile and reference it in a dynamic digest schedule:What happens to existing user preference view if I change default preference setting?
What happens to existing user preference view if I change default preference setting?
I have multiple enterprise customers with various product offerings. Customers should only receive notifications for the products they have enabled, and the same should be visible on their preference page. How can I manage this in SuprSend?
I have multiple enterprise customers with various product offerings. Customers should only receive notifications for the products they have enabled, and the same should be visible on their preference page. How can I manage this in SuprSend?
SuprSend dashboard -> tenant details page -> global preference settings. Turning off the preference for a category automatically removes it from the tenant preference APIs, UI view and also from user’s preference page.Why don't I see the 'inbox' channel in my user preferences?
Why don't I see the 'inbox' channel in my user preferences?
Why do users still receive promotional notifications even after unsubscribing from all categories?
Why do users still receive promotional notifications even after unsubscribing from all categories?
"promotional" in your workflows, users cannot unsubscribe from those notifications through the preference center, even if they unsubscribe from all visible categories.Solution: Create sub-categories under the Promotional category (for example, “Marketing”, “Newsletter”, “Product Updates”) and use those sub-category slugs in your workflows.Best practice: Organize notifications into meaningful sub-categories rather than using top-level categories directly. This provides users with granular control and improves their experience.Can I use user preferences in workflow branching to control which notifications are sent?
Can I use user preferences in workflow branching to control which notifications are sent?
How do I let users control both notification on/off and the time they want to be reminded?
How do I let users control both notification on/off and the time they want to be reminded?
- Create a preference category (for example, “meeting-reminders”) that users can opt in/out of using the preference APIs or preference center UI.
- When users select their preferred reminder time, store it as a custom property in their user profile. For example:
- In your workflow’s digest node, configure it to use a dynamic schedule that references the user property (for example,
."$recipient".meetingReminderTime). - The digest will only send if the user has opted in to the category, and it will send at their preferred time.
Related documentation
- Preference Categories - Setting up categories & defaults
- Manage Categories and Preferences - Complete guide to setting up and managing categories and preferences
- Tenant Preferences - Managing tenant-level preferences
- Preference Evaluation - How SuprSend evaluates preferences at runtime