Pre-Requisites
- Integrate JavaScript SDK
- Identify user on login and reset on logout to ensure that preference changes are tagged to the correct user
- Configure preference categories on SuprSend dashboard
- Understanding of the preference data structure and methods
Example implementation
GitHub Repository for this example implementation can be found here: (“https://github.com/suprsend/angular-example”)Integration
There will be 3 components in example implementation:- preference
- channel-level-preferences
- category-level-preferences
Preference component setup
preference will be the main component and inside it, there will be a property (preferencesData) that contains full user preference data. Whenever there’s an update we will update the latest preference data in the preferencesData so that component to rerender. We already created SuprSend service to access SuprSend client everywhere in the application which is used to call methods. Call getPreferences method to get the preferences data for the already identified user. This method is used to get full user preferences data from the SuprSend. This method should be called first before any update methods. Calling this method will make an API call and returns a preference response, which you can store in your instance property preferenceData if there is no error. Note: Category translations work automatically-no additional configuration required. Since the Angular SDK is built on the web SDK, the locale is automatically passed through the underlying web SDK, and all embeddable SDKs in the preference centre inherit this behavior. Category names and descriptions are automatically displayed in the user’s locale. After that we configure 2 event listenerspreferences_updated and preferences_error to listen to updates in preference data and errors.
Our Main component preference has 2 child components one for Category-level preference section and other for Overall Channel-level preference section.
preference.component.ts
preference.component.html
preference.component.css
Category level Preference section
In category-level preferences, you’ll have to fetch the data from 3 parts:- Section-to show sections like “Product Updates” in below example
- Category-to show categories and their overall status like “Refunds” in below example
- CategoryChannel-to show communication channels inside the category and their status
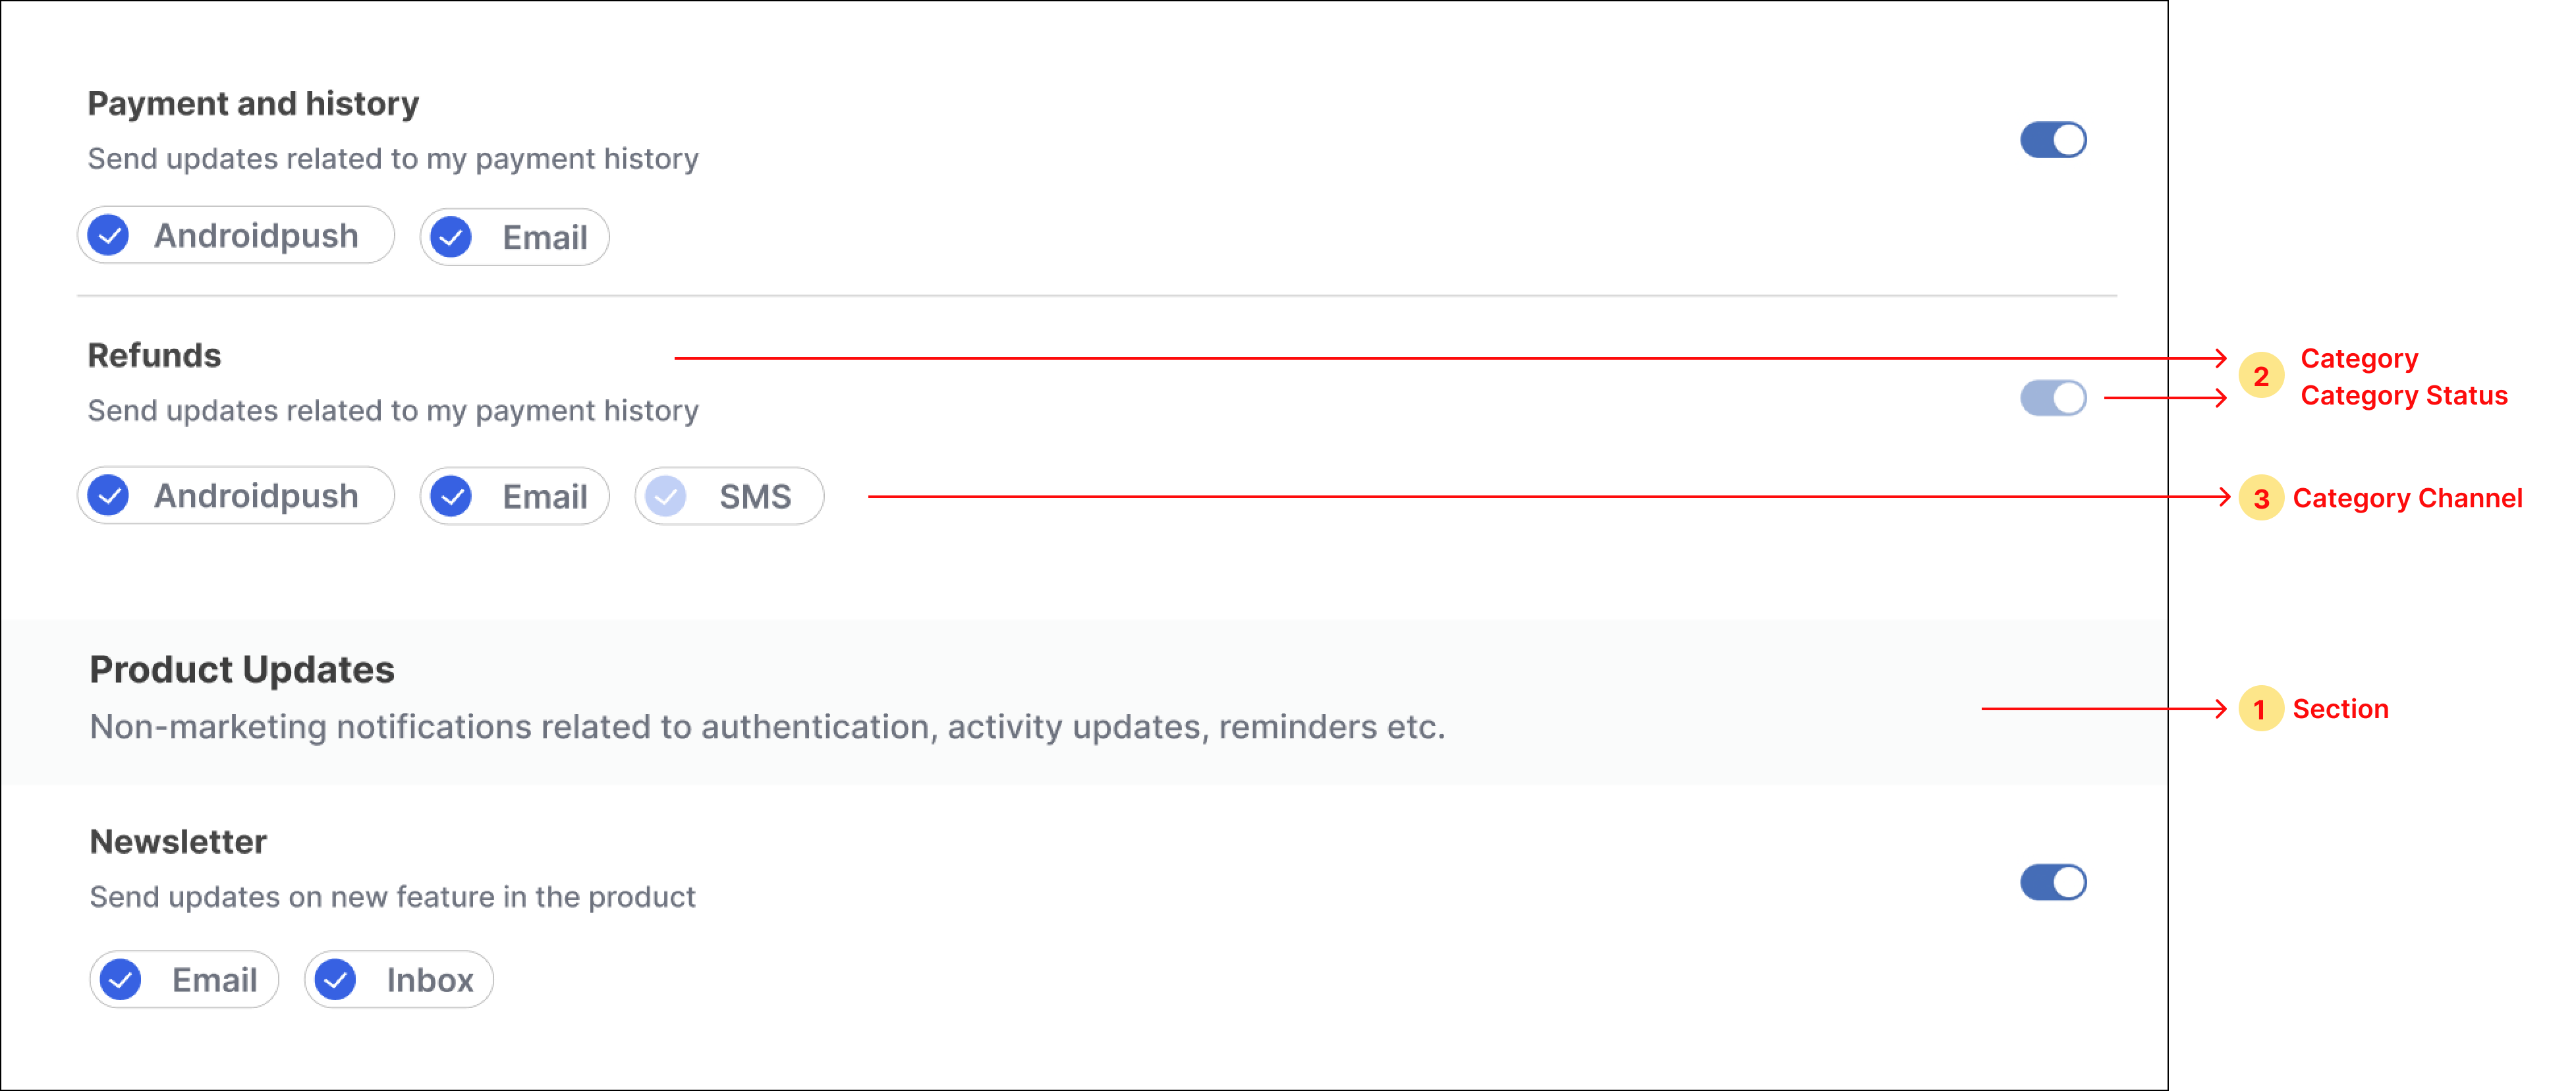
- Loop through the property preferenceData.sections for showing sections, show sub-categories inside each section, and show subcategory’s channels inside each sub-category.
- Add a switch button next to each sub-category for opting in and out of the category. Add checkbox components in sub-category channels for opting in and out of category-channel. You can use any third-party npm package to import these components or design your own component.
- To update category preference on the click of the switch button, call updateCategoryPreference method and if no error is received in response, update the latest data in the instance property. For preference state
opt-inset the switch state as on and off for theopt-outstate.

- To update category-channel preference on the click of checkbox next to each channel, call the updateChannelPreferenceInCategory method. Update the latest data in the instance property if no error is received in response. For preference state
opt-inset the checkbox state as checked and unchecked for theopt-outstate.

category-level-preferences.component.ts
category-level-preferences.component.css
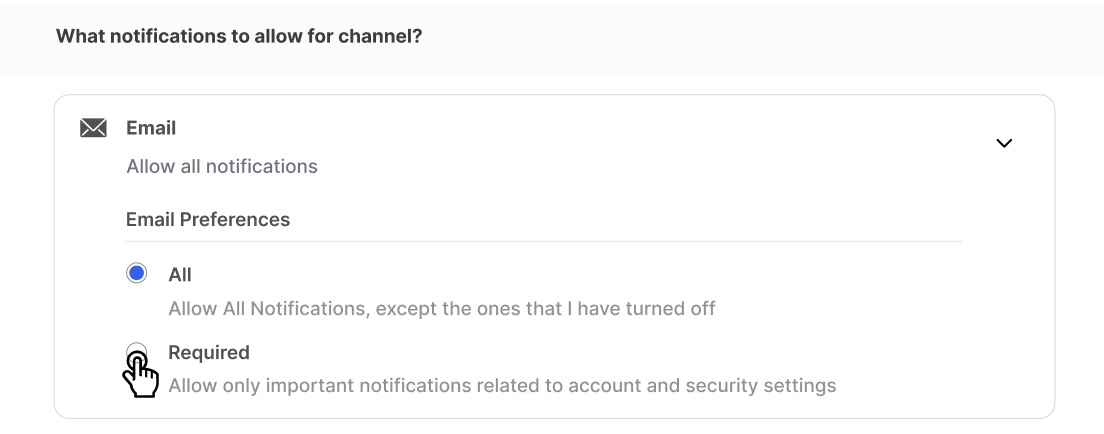
Channel level Preference section
Below are the steps to render channel preference UI:- Loop through the property preferenceData.channel_preferences for showing channels and for every channel item we will show an option to select preference using radio buttons.
- Add a radio button next, against channel level options for switching from
alltorequiredpreference in channel. - To update channel preference on the click of the radio button, call updateOverallChannelPreference method, and if no error is received in response, update the latest data in the state.
channel-level-preferences.component.ts
channel-level-preferences.component.html
channel-level-preferences.component.css