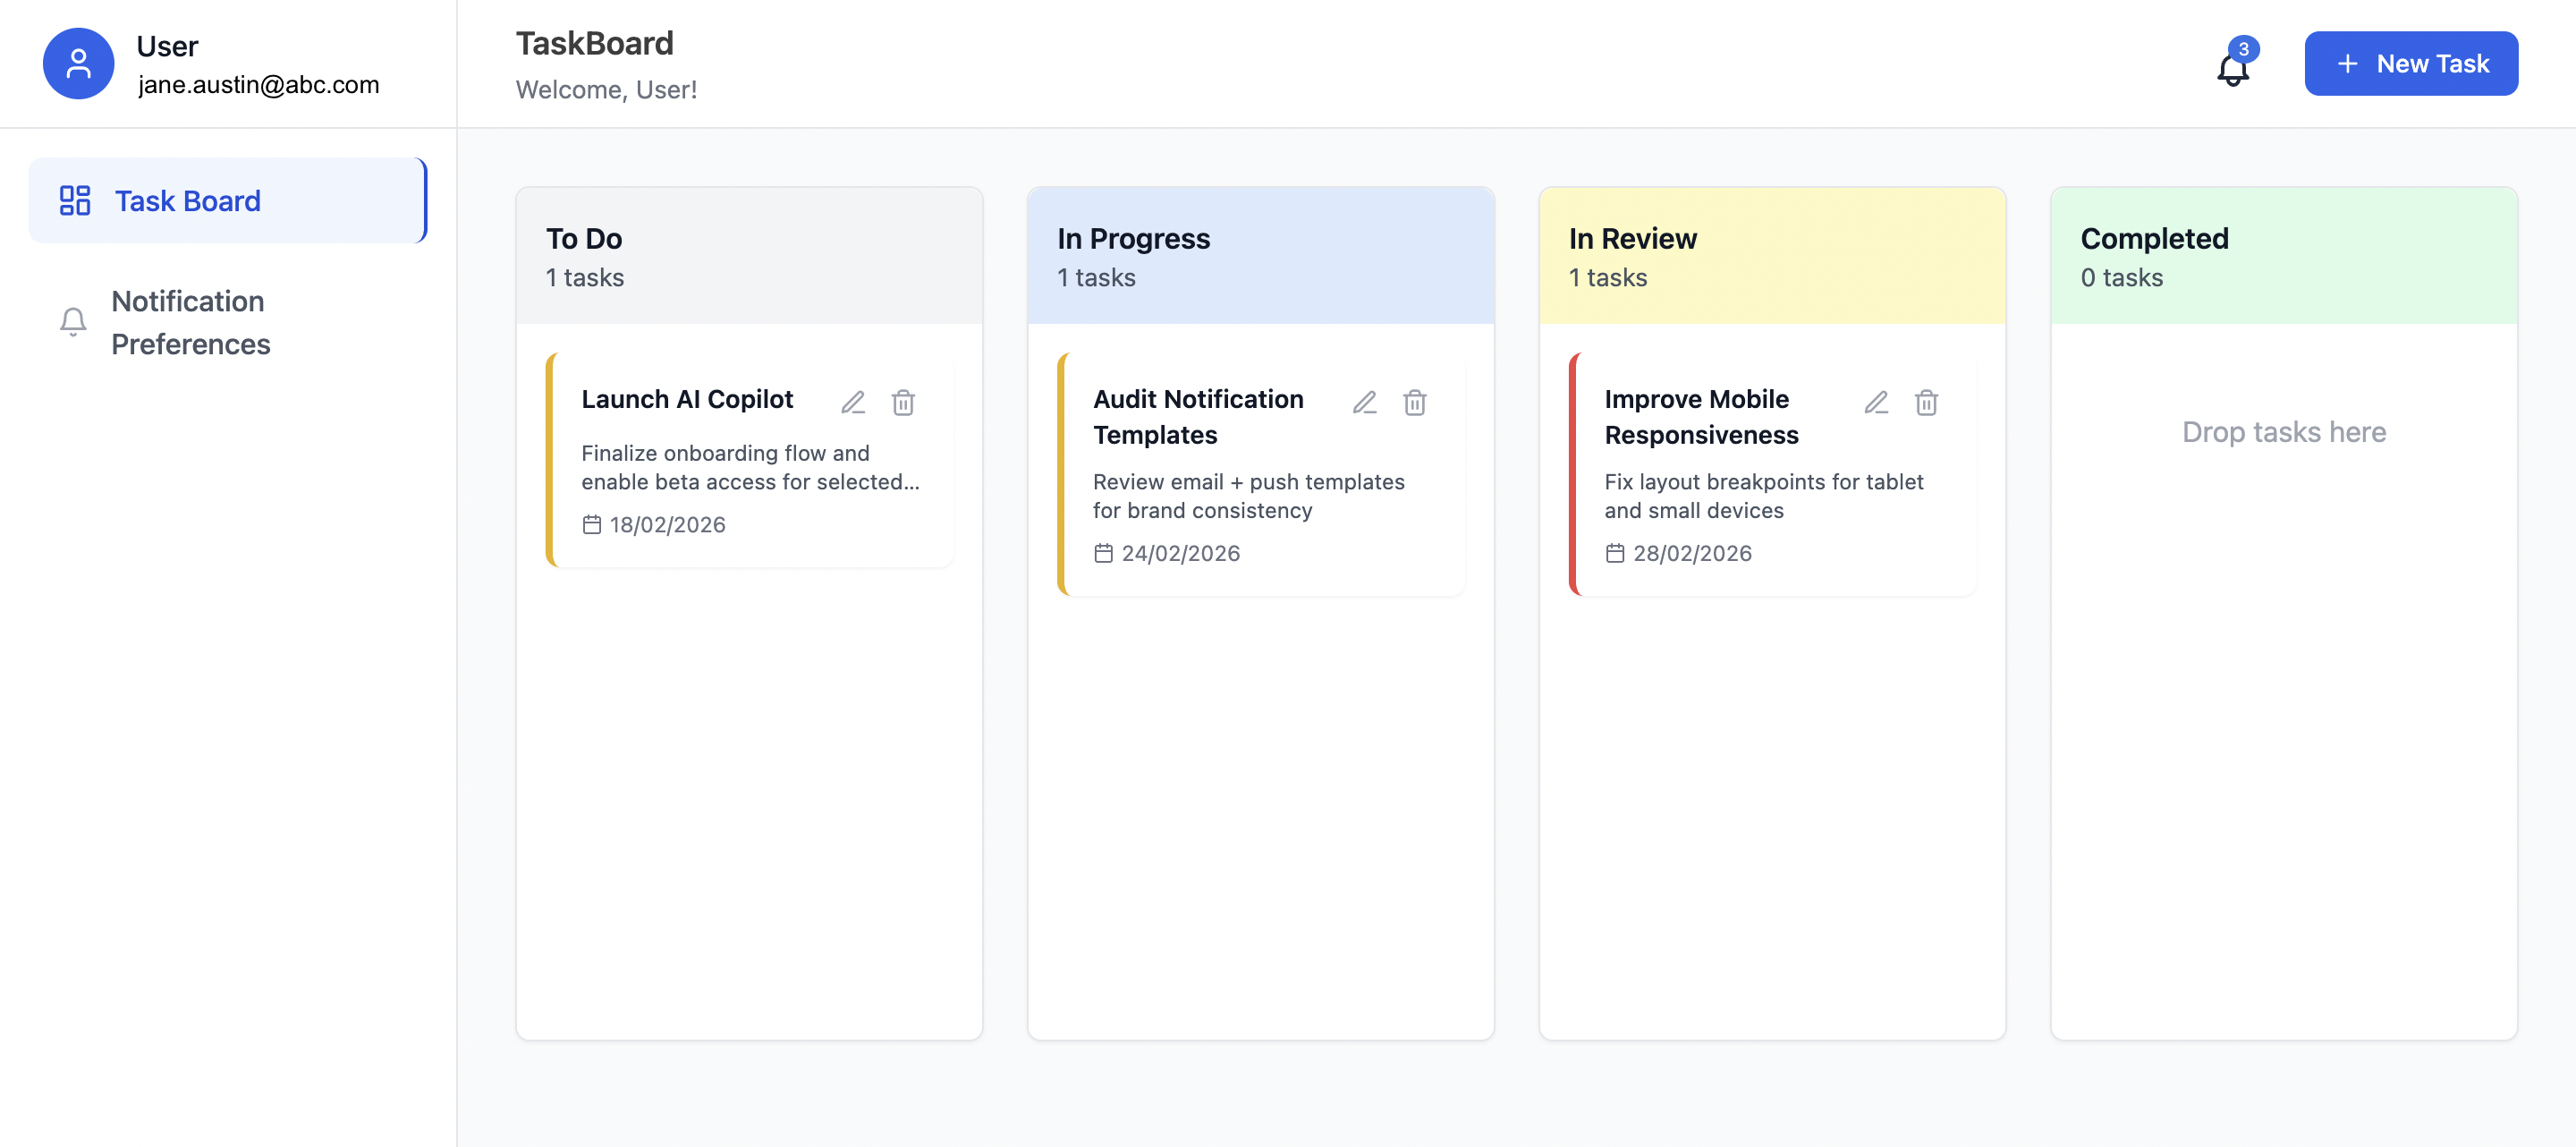
Documentation Index

Fetch the complete documentation index at: https://docs.suprsend.com/llms.txt

Use this file to discover all available pages before exploring further.

taskboard-example-app

Task Board

Kanban board build in react with drop-in Inbox and Preference Centre.
Try it out | GitHub code repository

Follow these steps in order. You’ll set up SuprSend, create dashboard assets, then run the prompts so your AI assistant can build the app. By the end you’ll have a working TaskBoard with OTP login, Kanban board, in-app inbox, and notification preferences.

Step 1: Setup SuprSend MCP Server

Start by setting up SuprSend MCP Server in your AI coding assistant. Once MCP Server is setup, you can just copy and paste the prompts below to build the entire application step by step.

Step 2: Get Your SuprSend Keys

Get workspace key and secret for the backend, and a public key for the frontend. Add them after Prompt 1 creates the project.
  1. Open SuprSend dashboard → Developers → API Keys.
  2. Copy workspace key and workspace secret (backend).
  3. Copy one Public Key (frontend).
Put backend keys in server .env and the public key in client .env. Don’t commit these files.

Step 3: Setup in the SuprSend dashboard

Create these in the SuprSend dashboard (same account as Step 2). Do this before or after Prompt 1.
AssetWhat you create
Preference categories1 category “Task Management” with 3 sub-categories
Templates4 templates (OTP, task-created, task-status-changed, task_deleted)
Workflows4 workflows (otp_verification, task_created, task_status_changed, task_deleted)

3a. Create notification categories

Set up your notification categories with root Task Management and sub-categories. Publish the structure.
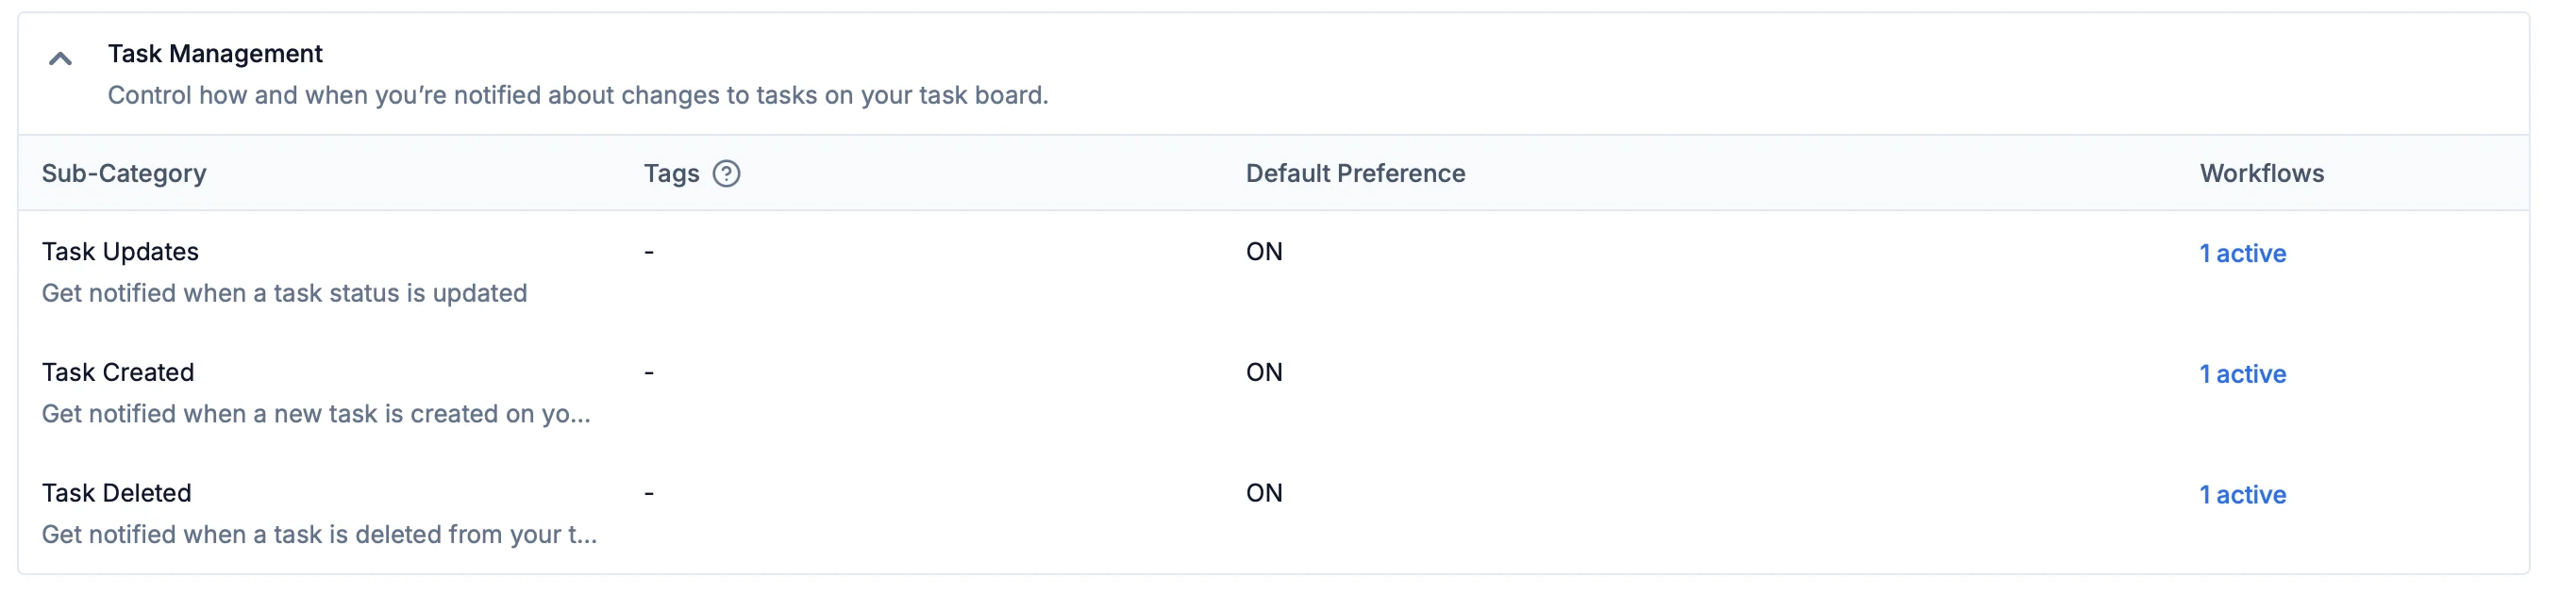
Link each workflow in 3d to the matching sub-category so the app’s preferences page controls them.

3b. Create templates

In Templates, create these four. Use placeholders (e.g. user name, code, task title) in the body. Publish each.
Template nameWhere it’s sentWhat it’s for
otp_verificationEmail (optionally SMS)6-digit login code
task-createdEmail + In-appNew task created
task-status-changedEmail + In-appTask moved to another column
task_deletedEmail + In-appTask deleted

3c. Create workflows

In Workflows, create these four. Add Email and In-App nodes with the templates from 3b. Commit the workflows.
SlugTriggerTemplate
task_createdAPItask-created
otp_verificationAPIotp_verification
task_status_changedEventtask-status-changed
task_deletedAPItask_deleted

Prompt 1: Set up the project

I want a task management app with a React frontend and an Express backend.
Set up the frontend with React 18, Vite, and Tailwind in a client folder,
and the backend with Express in a server folder. When I run the frontend in
development, it should send all requests that start with /api to the backend.
Get both running so I can open the app in the browser and it can talk to the backend.

Prompt 2: Backend: login codes and notifications

Add these backend endpoints. First, when someone asks for a login code: create
a random 6-digit code, save it temporarily, and use SuprSend to send them an
email with that code (the same "login code" workflow we set up in the dashboard).
In development you can optionally return the code in the response so we can test
without checking email. Second, when someone enters the code: check it against
what we saved, and if it's correct, create or update their profile in SuprSend
with their name and email so we can send them notifications. Third, add an
endpoint the frontend can call to tell SuprSend when a task was created, when
its status changed (e.g. moved to another column), or when it was deleted-so
SuprSend can send the right emails and in-app notifications. Keep all SuprSend
keys only on the backend. Clean and validate every input (email, name, code) and
use a secure random generator for the 6-digit code.

Prompt 3: Login page and main layout

On the login page, do a two-step flow. Step one: the user types their name and
email and clicks something like "Send code." The app calls the backend to send
the 6-digit code to their email. Step two: they type the code they received and
click "Verify and sign in." The app checks the code with the backend, then
signs them in and takes them to the task board. No demo or skip option-only
this email code login. For the main app, use a layout with a sidebar on the left
that shows the user's name and email, links to "Task Board" and "Notification
Preferences," and a Sign out button. The rest of the screen shows whichever page
they're on. Use Tailwind and Lucide icons for styling.

Prompt 4: Task board (Kanban)

Add a task board with four columns: To Do, In Progress, In Review, and Completed.
Users can drag tasks between columns. Each task has a title, description, priority
(low, medium, high), and due date. They can add, edit, and delete tasks in a popup
modal. Save tasks per user in the browser (localStorage) so they persist. When
someone creates a task, tell the backend so it can send a "task created"
notification. When they move a task to another column, tell the backend so it
can send a "status changed" notification. When they delete a task, tell the
backend so it can send a "task deleted" notification (use whatever workflow we
set up for that in SuprSend). Show priority with a colored left border (e.g. red
for high, yellow for medium, green for low). Important: define the column component
in the same file as the board; don't create a separate file for it or you'll get
a duplicate error.

Prompt 5: Connect the app to SuprSend (notification setup)

Add the SuprSend React package to the frontend. When the user is logged in and
we've added the SuprSend public key (from the dashboard) to the app's environment,
wrap the app in whatever SuprSend needs so it can show notifications and the
preferences page later. If the key isn't set or the user isn't logged in, just
show the app as usual without the notification features. Don't add the bell or
the preferences page yet-only this connection step.

Prompt 6: Inbox (bell + popover)

Add SuprSend's drop-in inbox (the bell with popover feed) next to the "New task"
button on the task board page.

Prompt 7: Toast when a new notification arrives

Show a toast when a new notification arrives. The SuprSend React SDK exposes a
feed event for new notifications (feed.new_notification). Inside the Inbox tree,
listen for that event on the feed client. When it fires, show a toast using your
toast library (e.g. react-hot-toast) and render SuprSend's ToastNotificationCard
with the notification data. Optionally mark the notification as seen. Clean up
the listener on unmount.

Prompt 8: Notification preferences page

Add a page called "Notification Preferences" and put a link to it in the sidebar.
On this page, show the notification types we set up in SuprSend-like when a task
is created, when a task is updated, and when a task is deleted. For each type,
let the user turn it on or off and choose whether they want to get it by email
and/or in the app (the bell). Use toggle switches. When the SuprSend public key
isn't in the app, show a short message that preferences aren't available instead
of loading anything from SuprSend.

Prompt 9: Light theme and error handling

Make the whole app use a light theme-light gray or white backgrounds and dark
text everywhere: the main area, sidebar, login screen, task board, task cards,
the task popup, the preferences page, and any error screen. Also add a simple
error boundary: if something breaks in the app, show a friendly error message and
a "Try again" button instead of a blank or broken screen.