
Set up the connection
1
Open Connectors
In Lovable, open Connectors in the sidebar. Click + and choose MCP server. If it’s greyed out, a workspace admin has turned off custom MCP servers.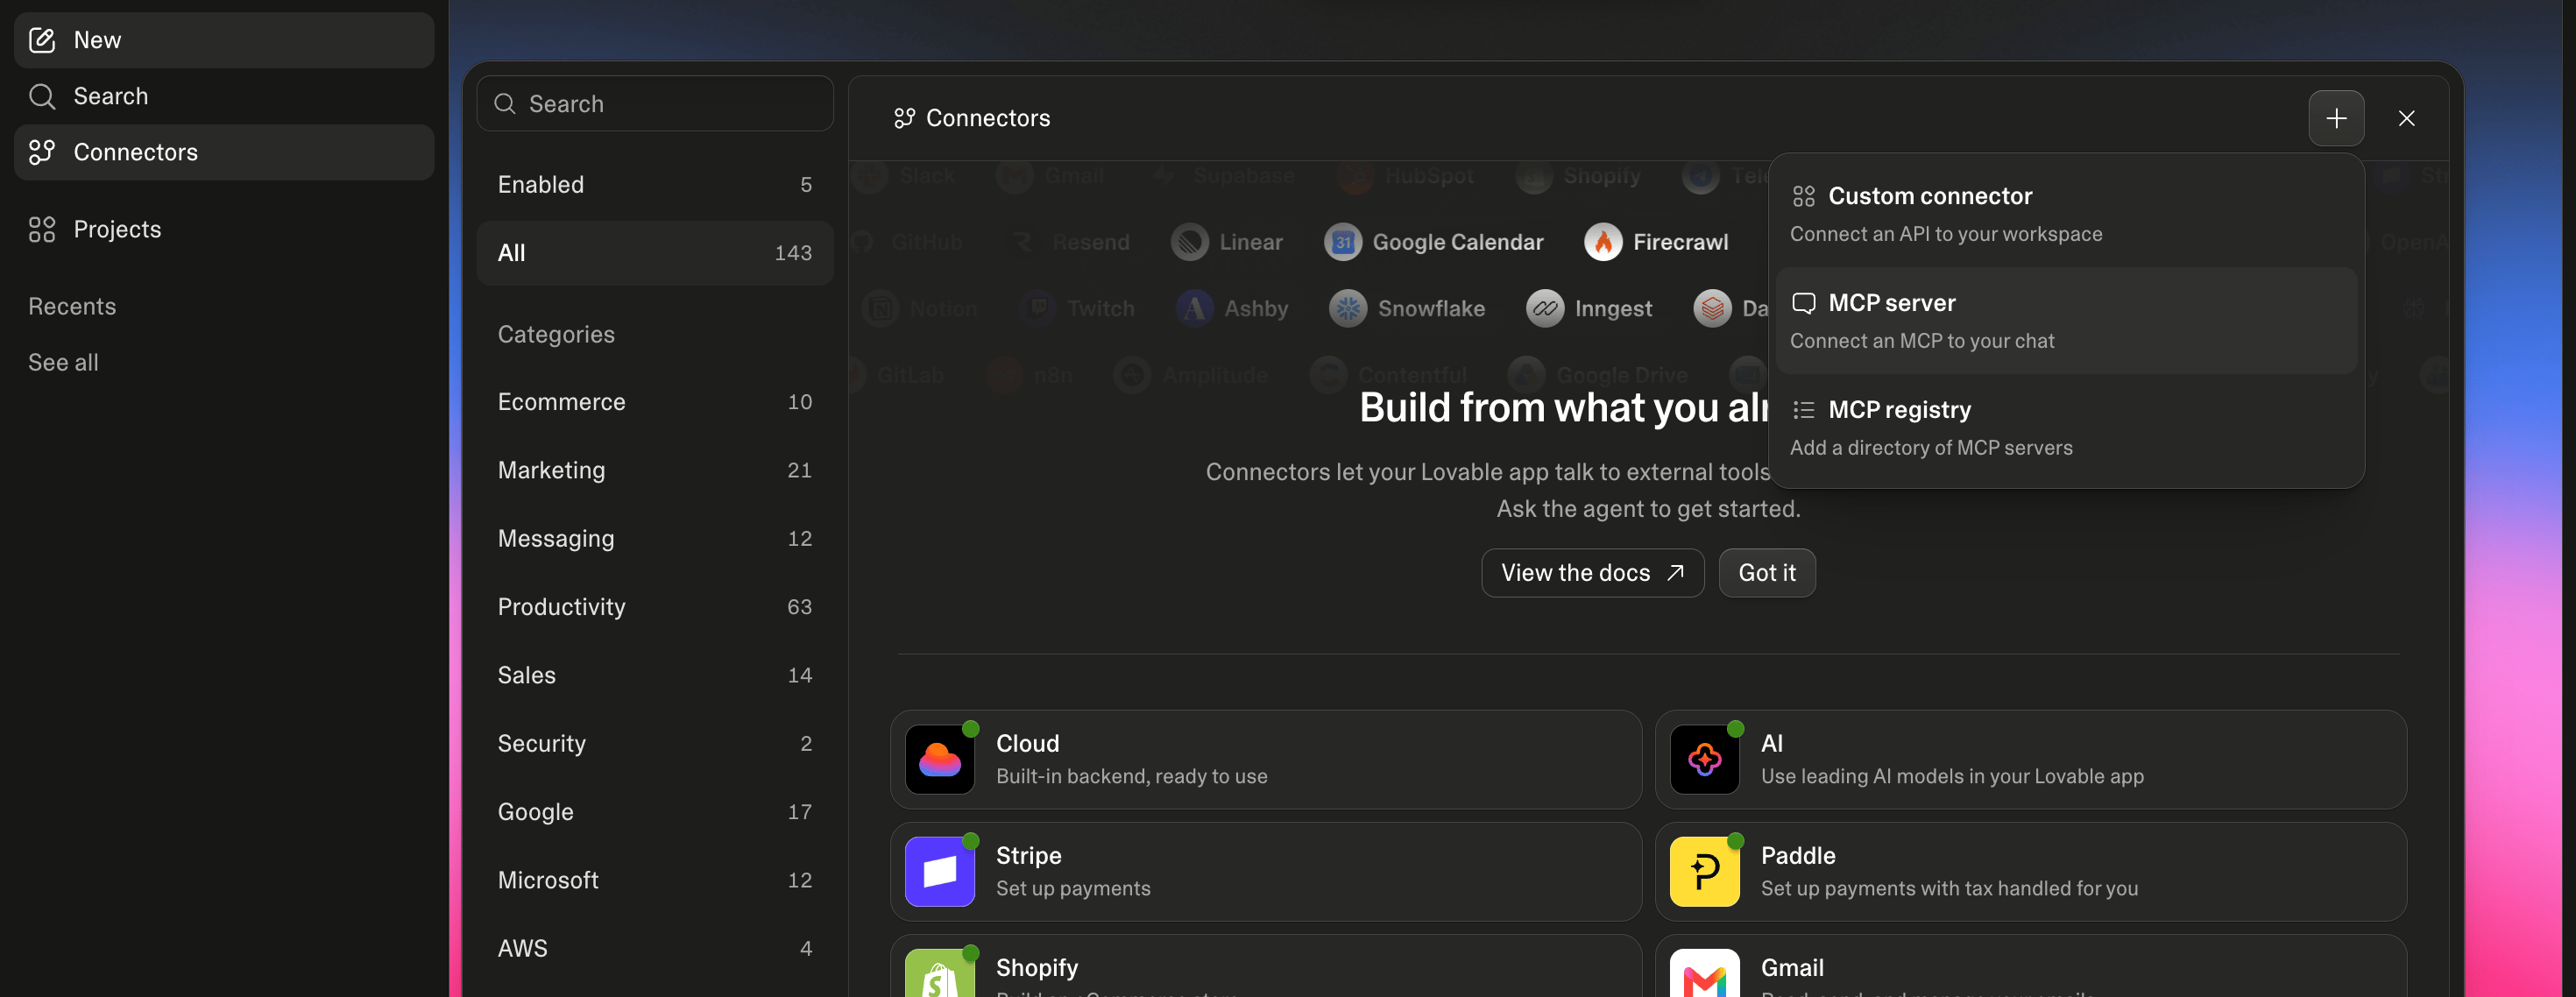
2
Add the SuprSend MCP server
Enter 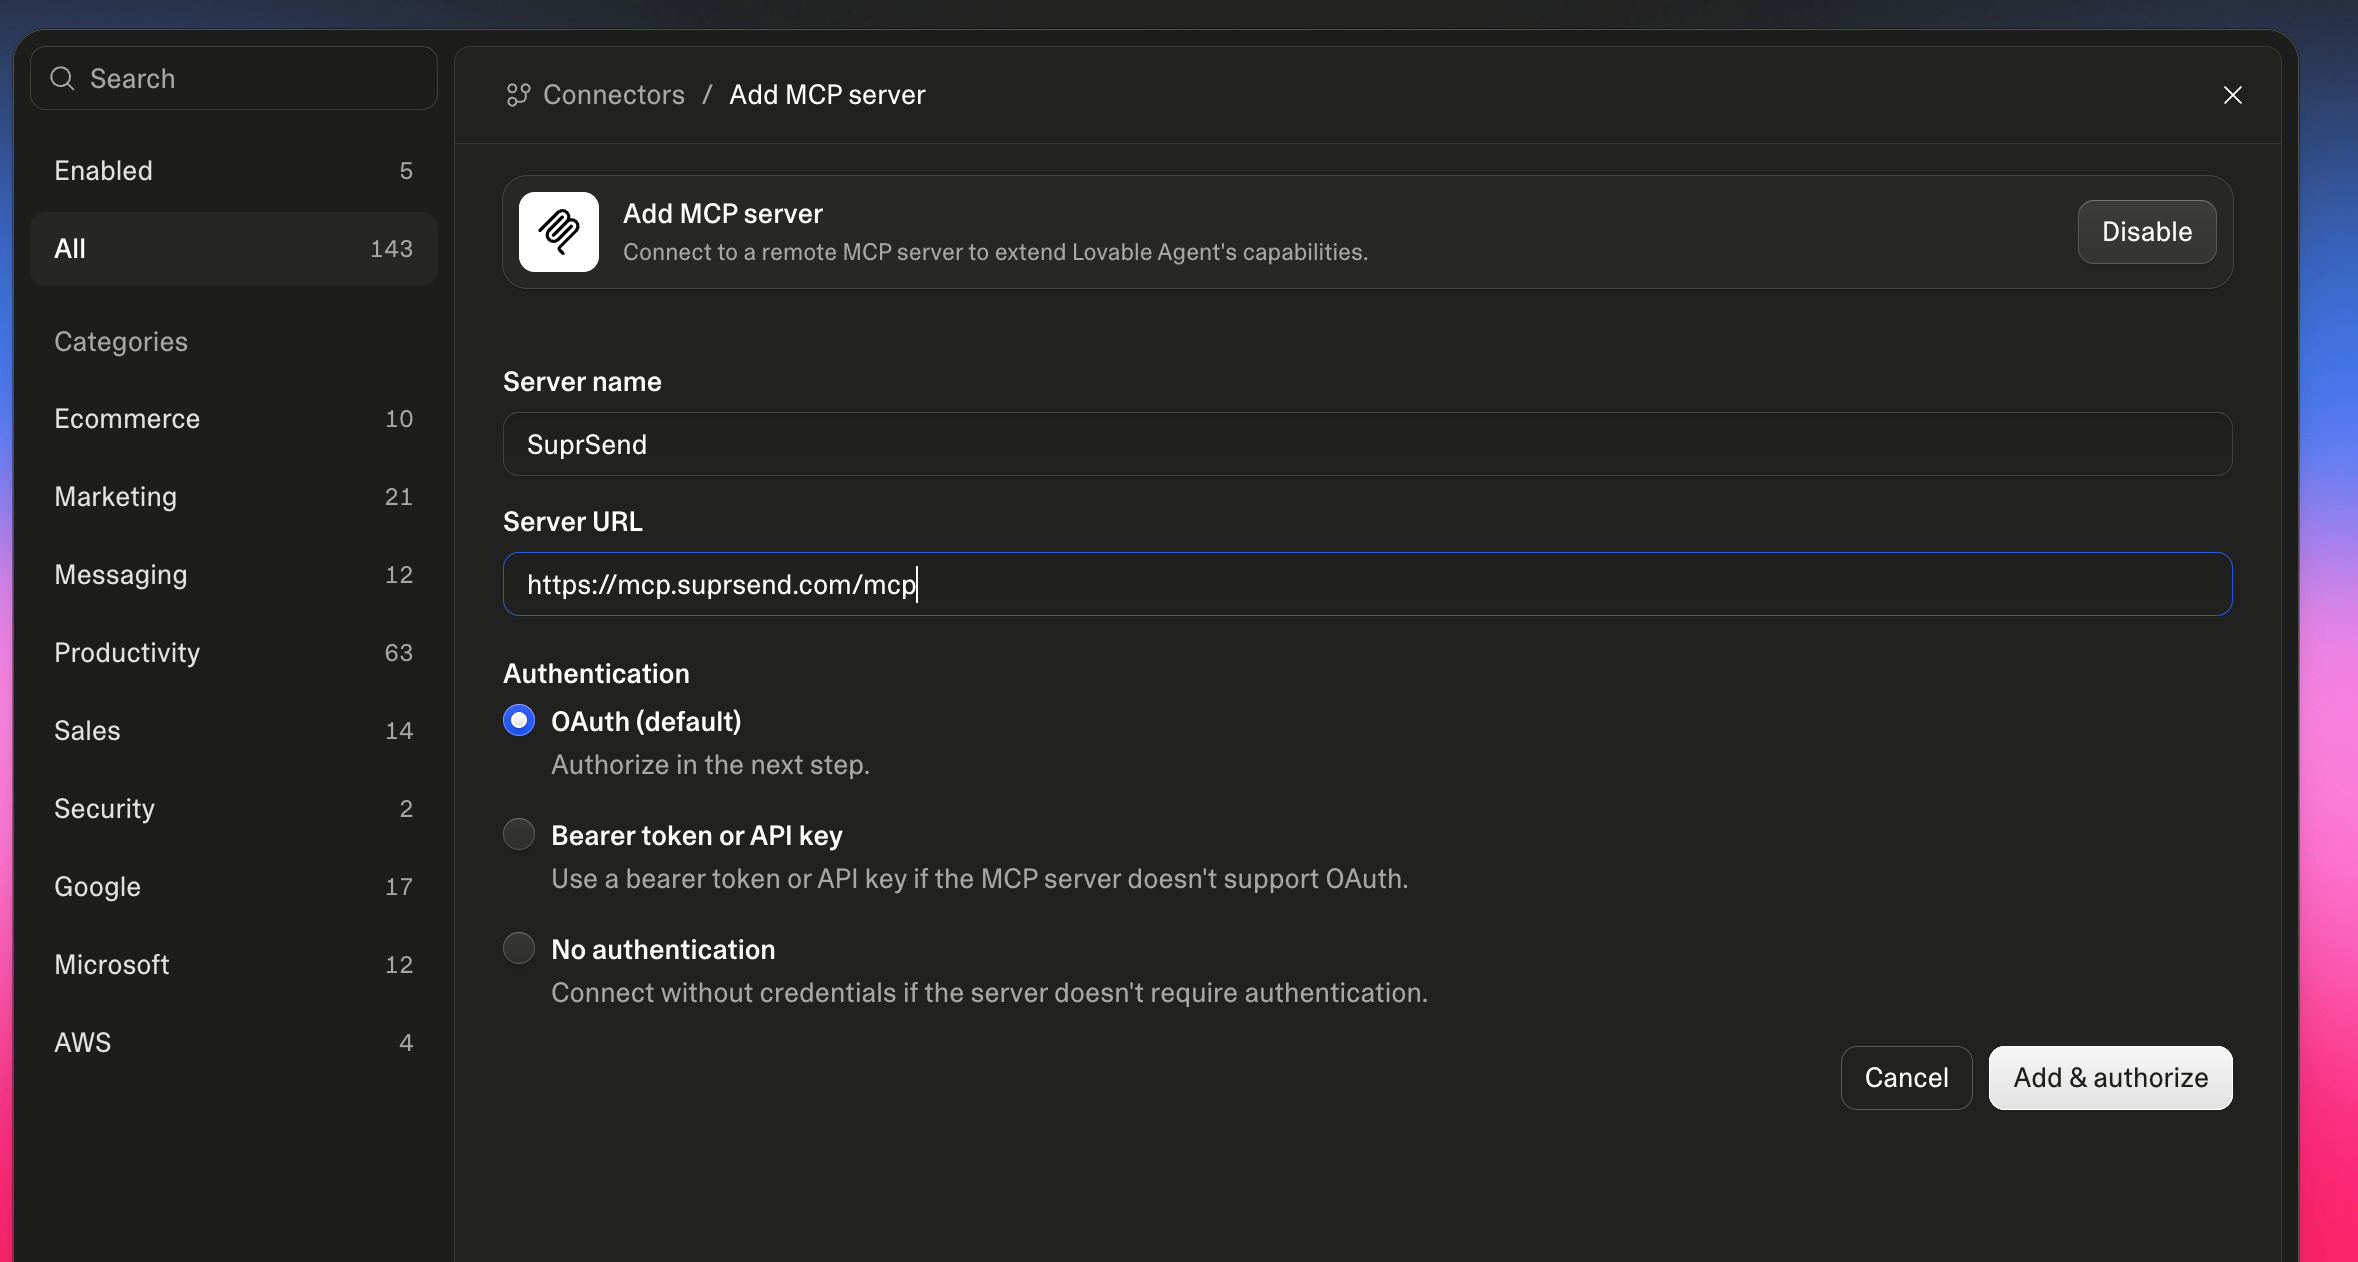
SuprSend as the Server name and https://mcp.suprsend.com/mcp as the Server URL. Keep OAuth (default) selected.3
Sign in with your SuprSend account
Click Add & authorize. Sign in with your SuprSend account. The agent gets the same permissions your role has in the SuprSend dashboard. Each teammate adds the server with their own account.
4
Verify the connection
In Lovable’s chat, ask:Lovable answers with your SuprSend workspaces.
Pin a workspace and restrict tools
By default, Lovable can use every workspace and tool your role allows. To keep it on one workspace, or to give it only the tools a job needs, use one of these URLs as the Server URL:-
Pin a workspace by adding its slug to the path. The agent then can’t switch to another workspace:
-
Restrict tools with
?tools=, a comma-separated list of tool names or groups:
Troubleshooting
Server shows disconnected or refuses the connection
Server shows disconnected or refuses the connection
Check the workspace slug in the URL. It must match a workspace in your SuprSend account exactly, for example
staging, not the workspace’s display name. A slug that doesn’t exist fails with 403 workspace_forbidden. To see your slugs, remove the slug, reconnect, and ask: “List my SuprSend workspaces.”Tool list
Every tool, grouped by category, with read vs write labels.
Prompt cheatsheet
Ready-to-use prompts to get started fast.