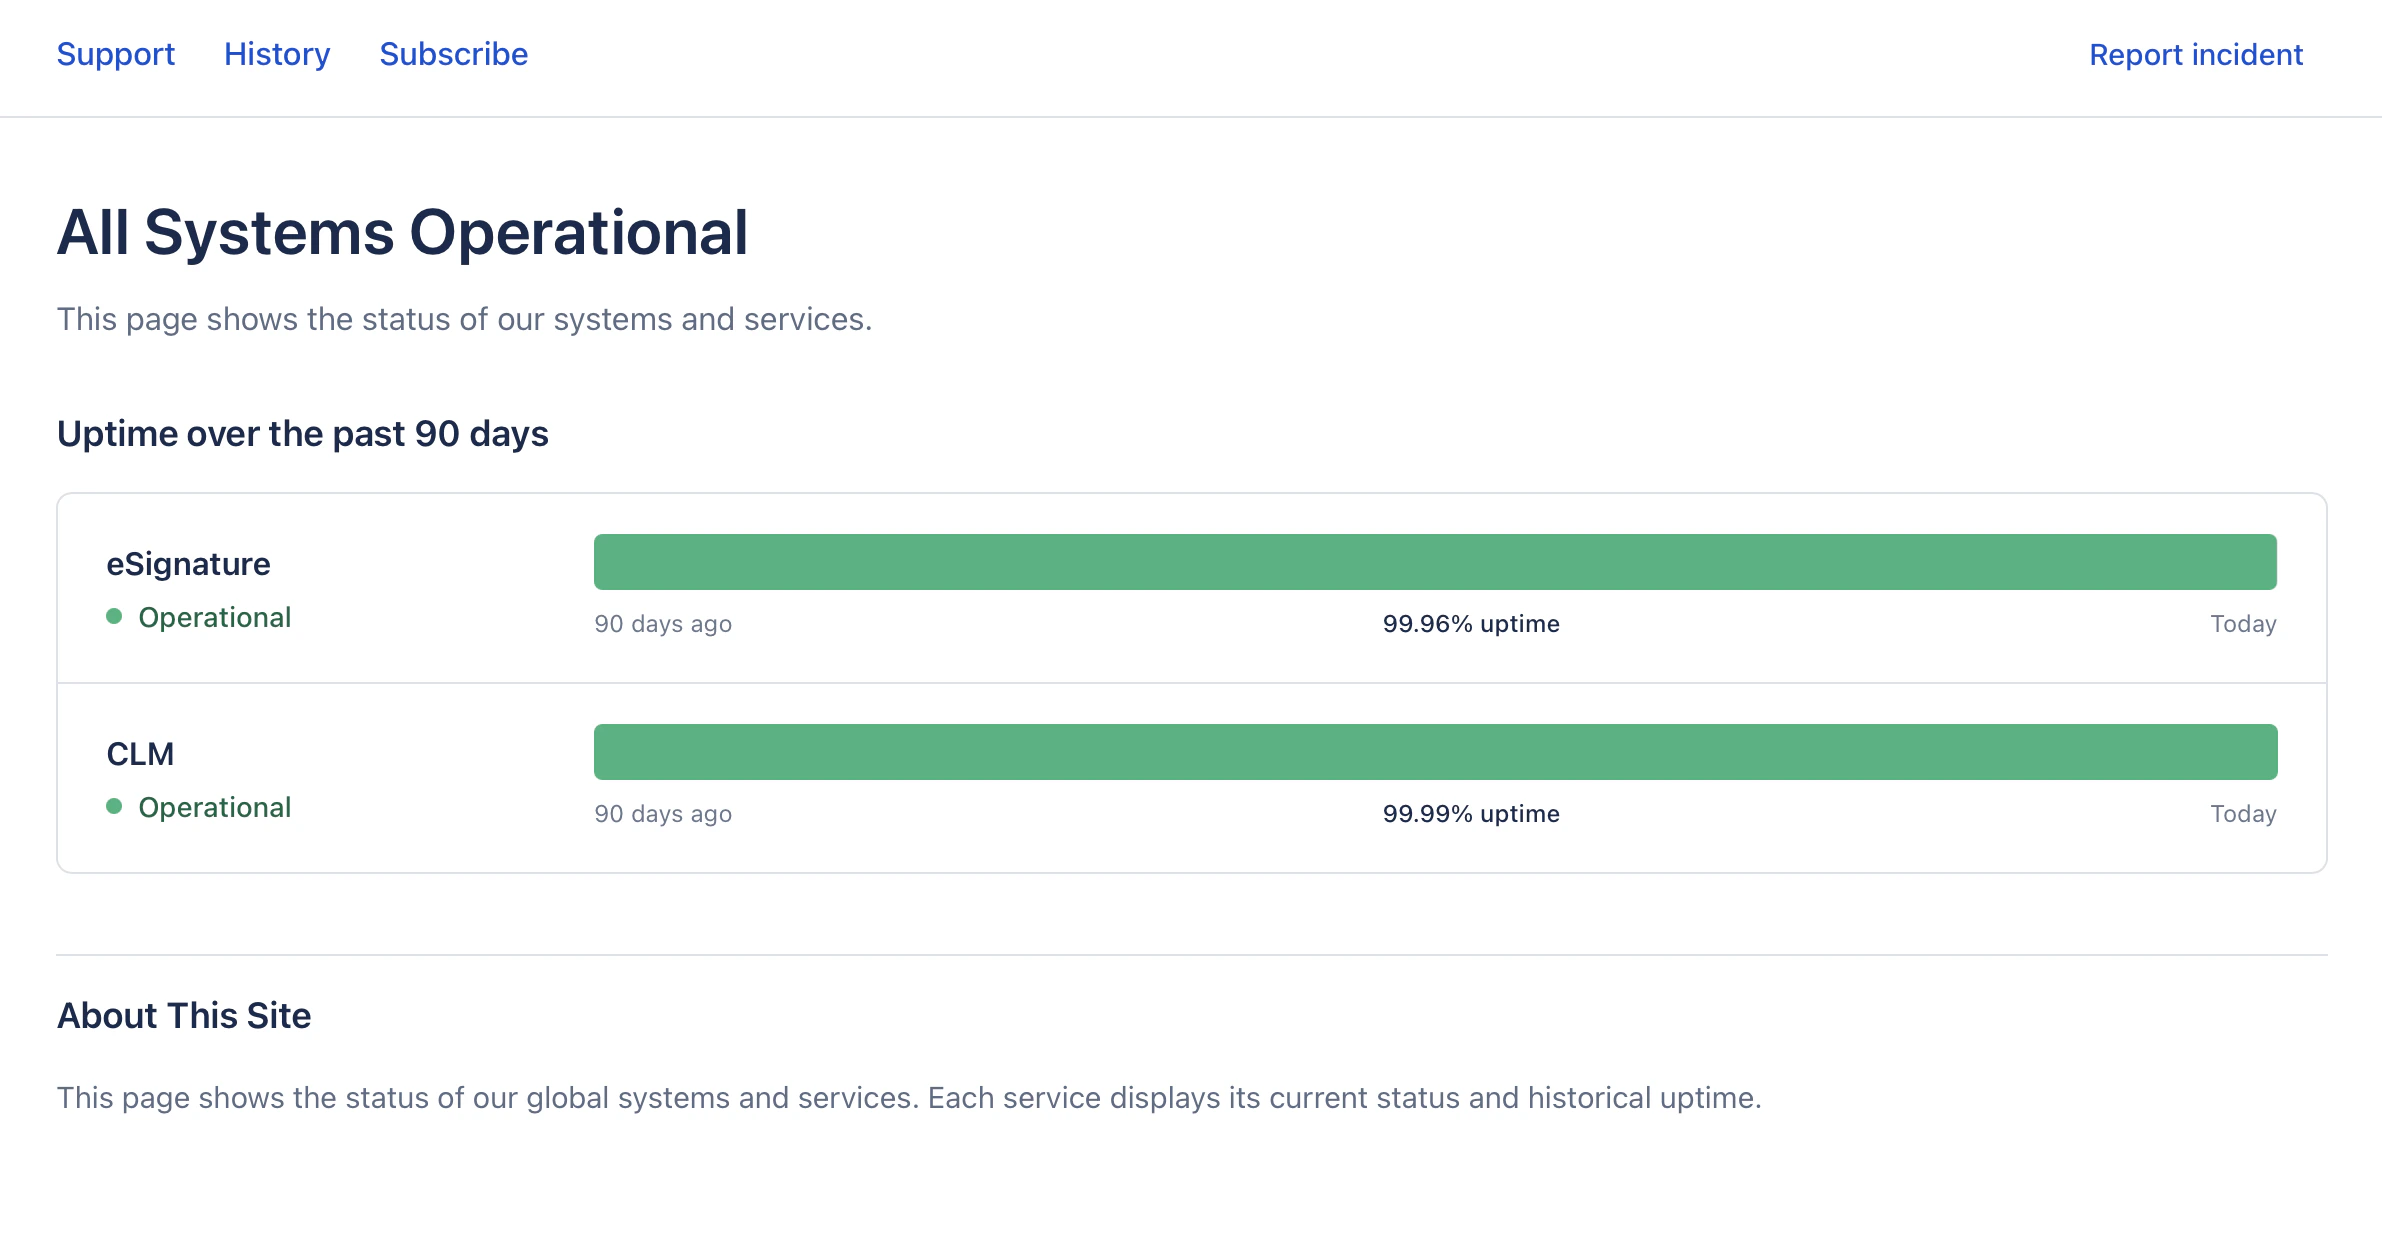
Status Page
Status page built with React and Vite, with SuprSend integration.
Try it out | GitHub code repository
Try it out | GitHub code repository
Follow these steps in order. You’ll set up SuprSend, create dashboard assets, then run the prompts so your AI assistant can build the app. By the end you’ll have a working status page with subscribe, category selection, and incident reporting.
Step 1: Setup SuprSend MCP Server
Start by setting up SuprSend MCP Server in your AI coding assistant. Once MCP Server is setup, you can just copy and paste the prompts below to build the entire application step by step.Step 2: Get Workspace and API Keys
Get workspace key and API key for the backend. Add them after Prompt 1 creates the project.- Open SuprSend Dashboard → Developers → API Keys.
- Copy workspace key and API key (generate one if needed).
.env as SUPRSEND_WORKSPACE and SUPRSEND_API_KEY. Don’t commit .env.
Step 3: Setup in the SuprSend dashboard
Create these in the SuprSend dashboard (same workspace as Step 2).3a. Create preference categories
Set up your preference categories using the root category → section → sub-category structure. Create one root category (e.g. “Status updates”), then add sections and sub-categories under it. Publish the structure.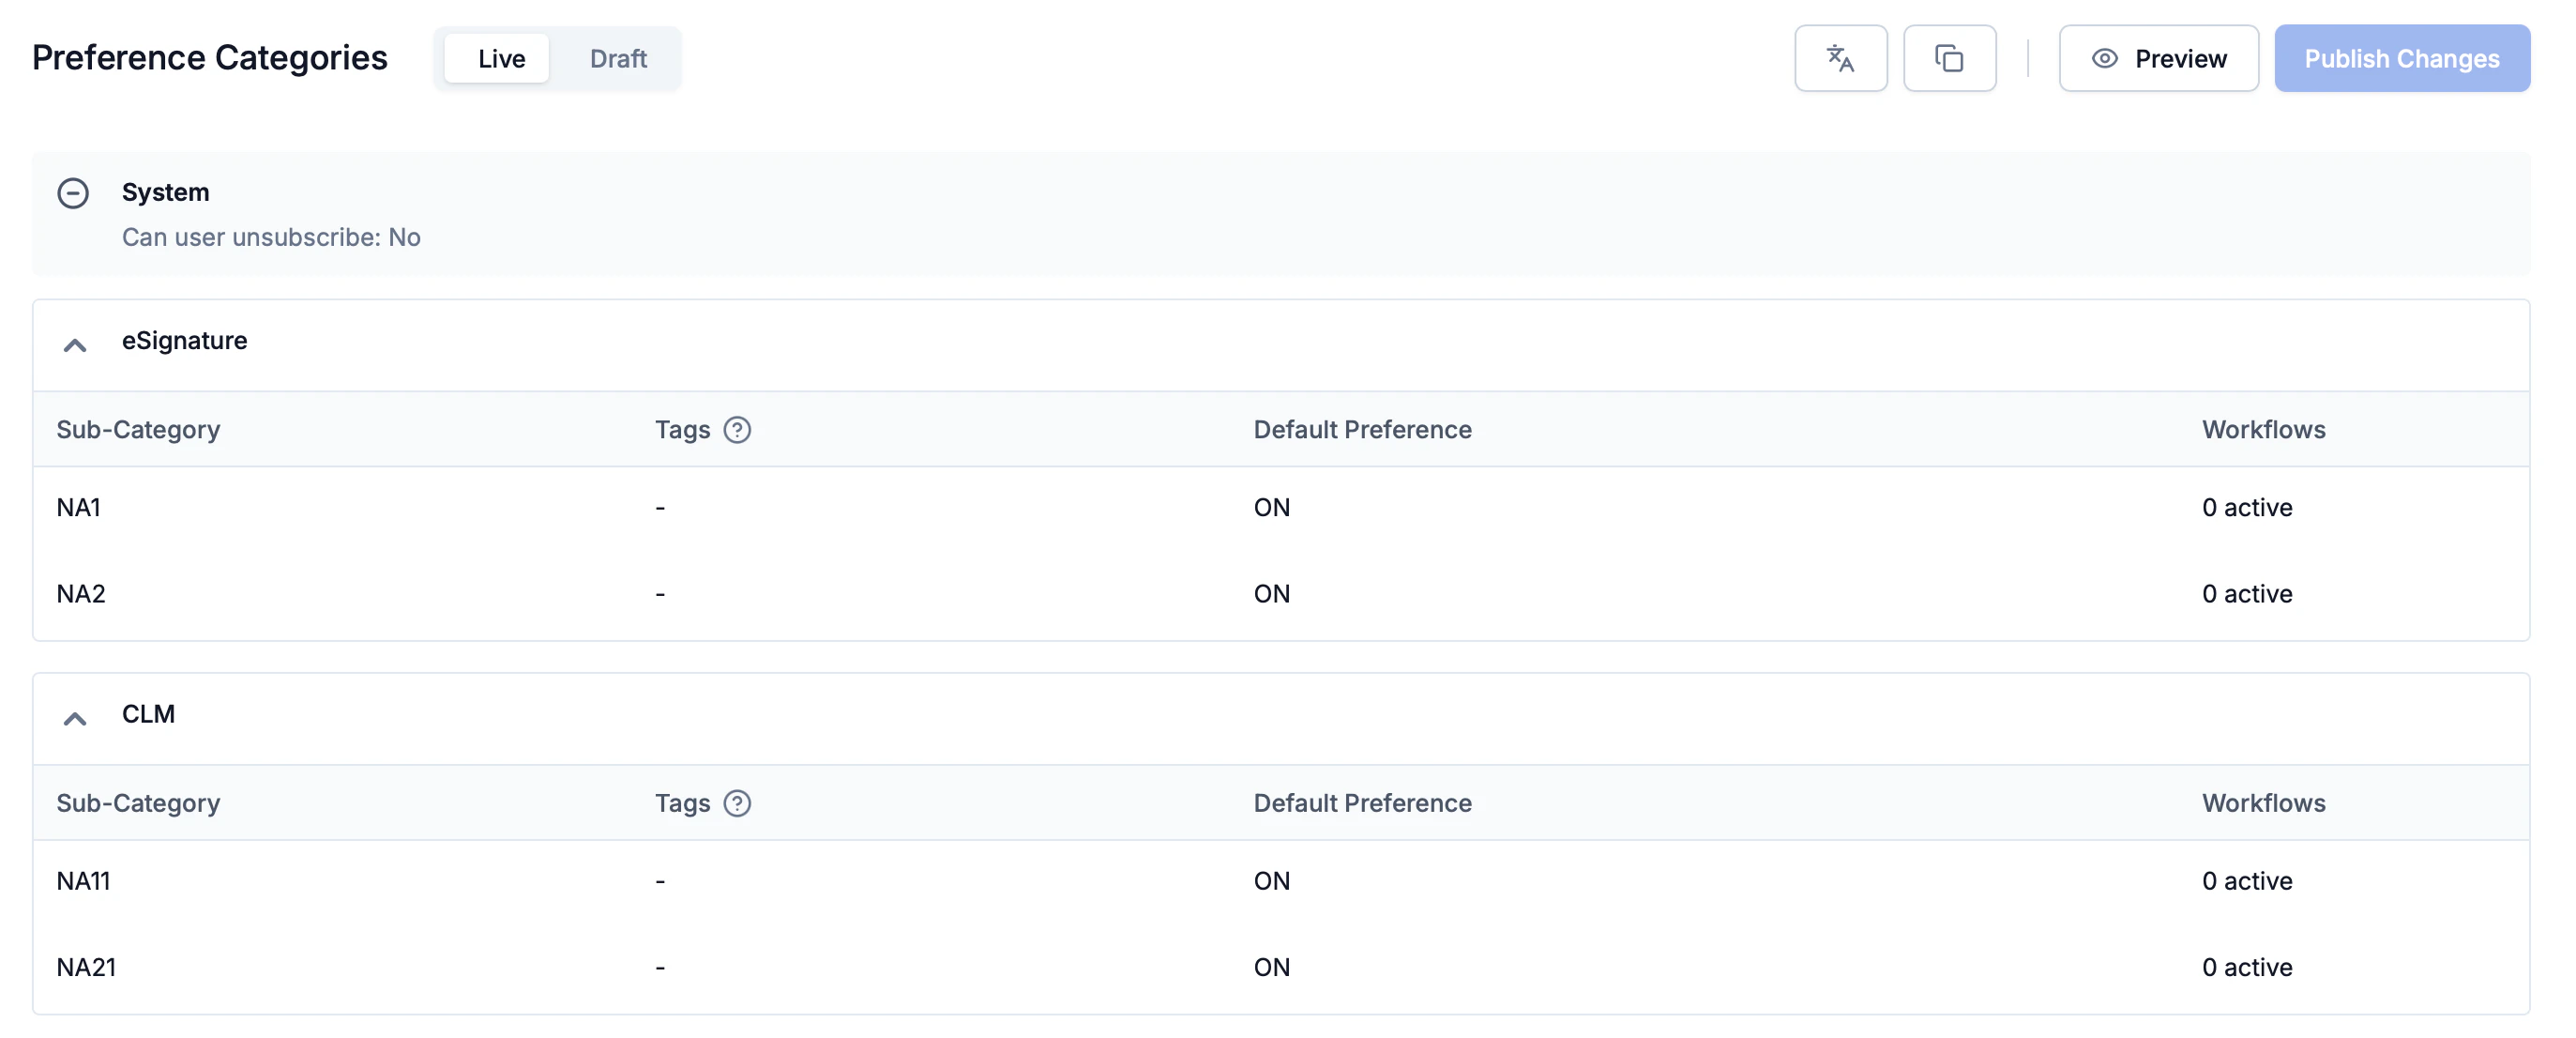
3b. Create objects
Create an object for each section and sub-category using the same slug as the category. These objects are used for subscriptions and trigger targeting.3c. Create the template
Create templatestatus-incident-email with Email and SMS variants. Use variables (e.g. component_name, incident message). Publish the template.
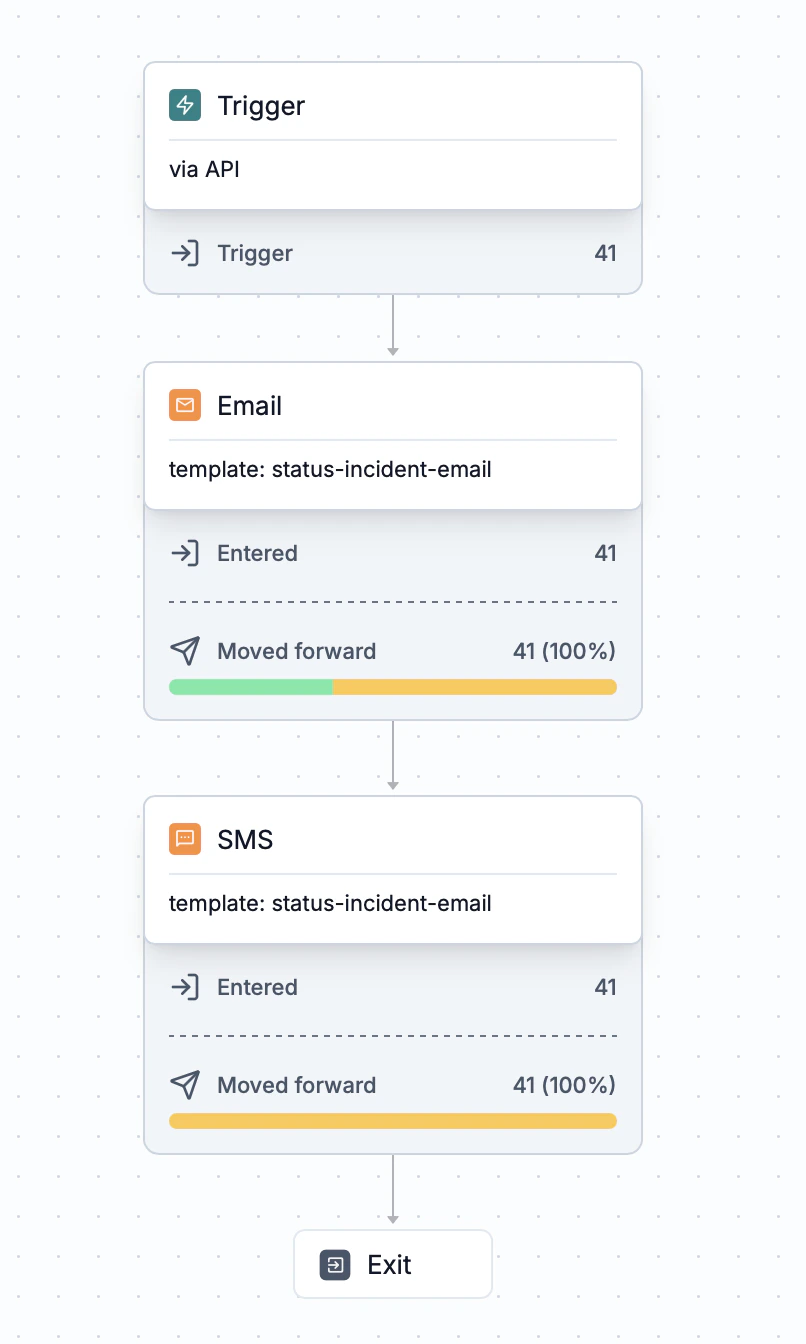
3d. Create the workflow
Create workflow with slugstatus_incident (API trigger). Add Email and SMS nodes with the template. Commit the workflow.