Add APNs configuration on SuprSend dashboard
On the SuprSend dashboard, go to vendor page from side panel, select iOSpush and fill in below details. You’ll get all these information from Apple developer account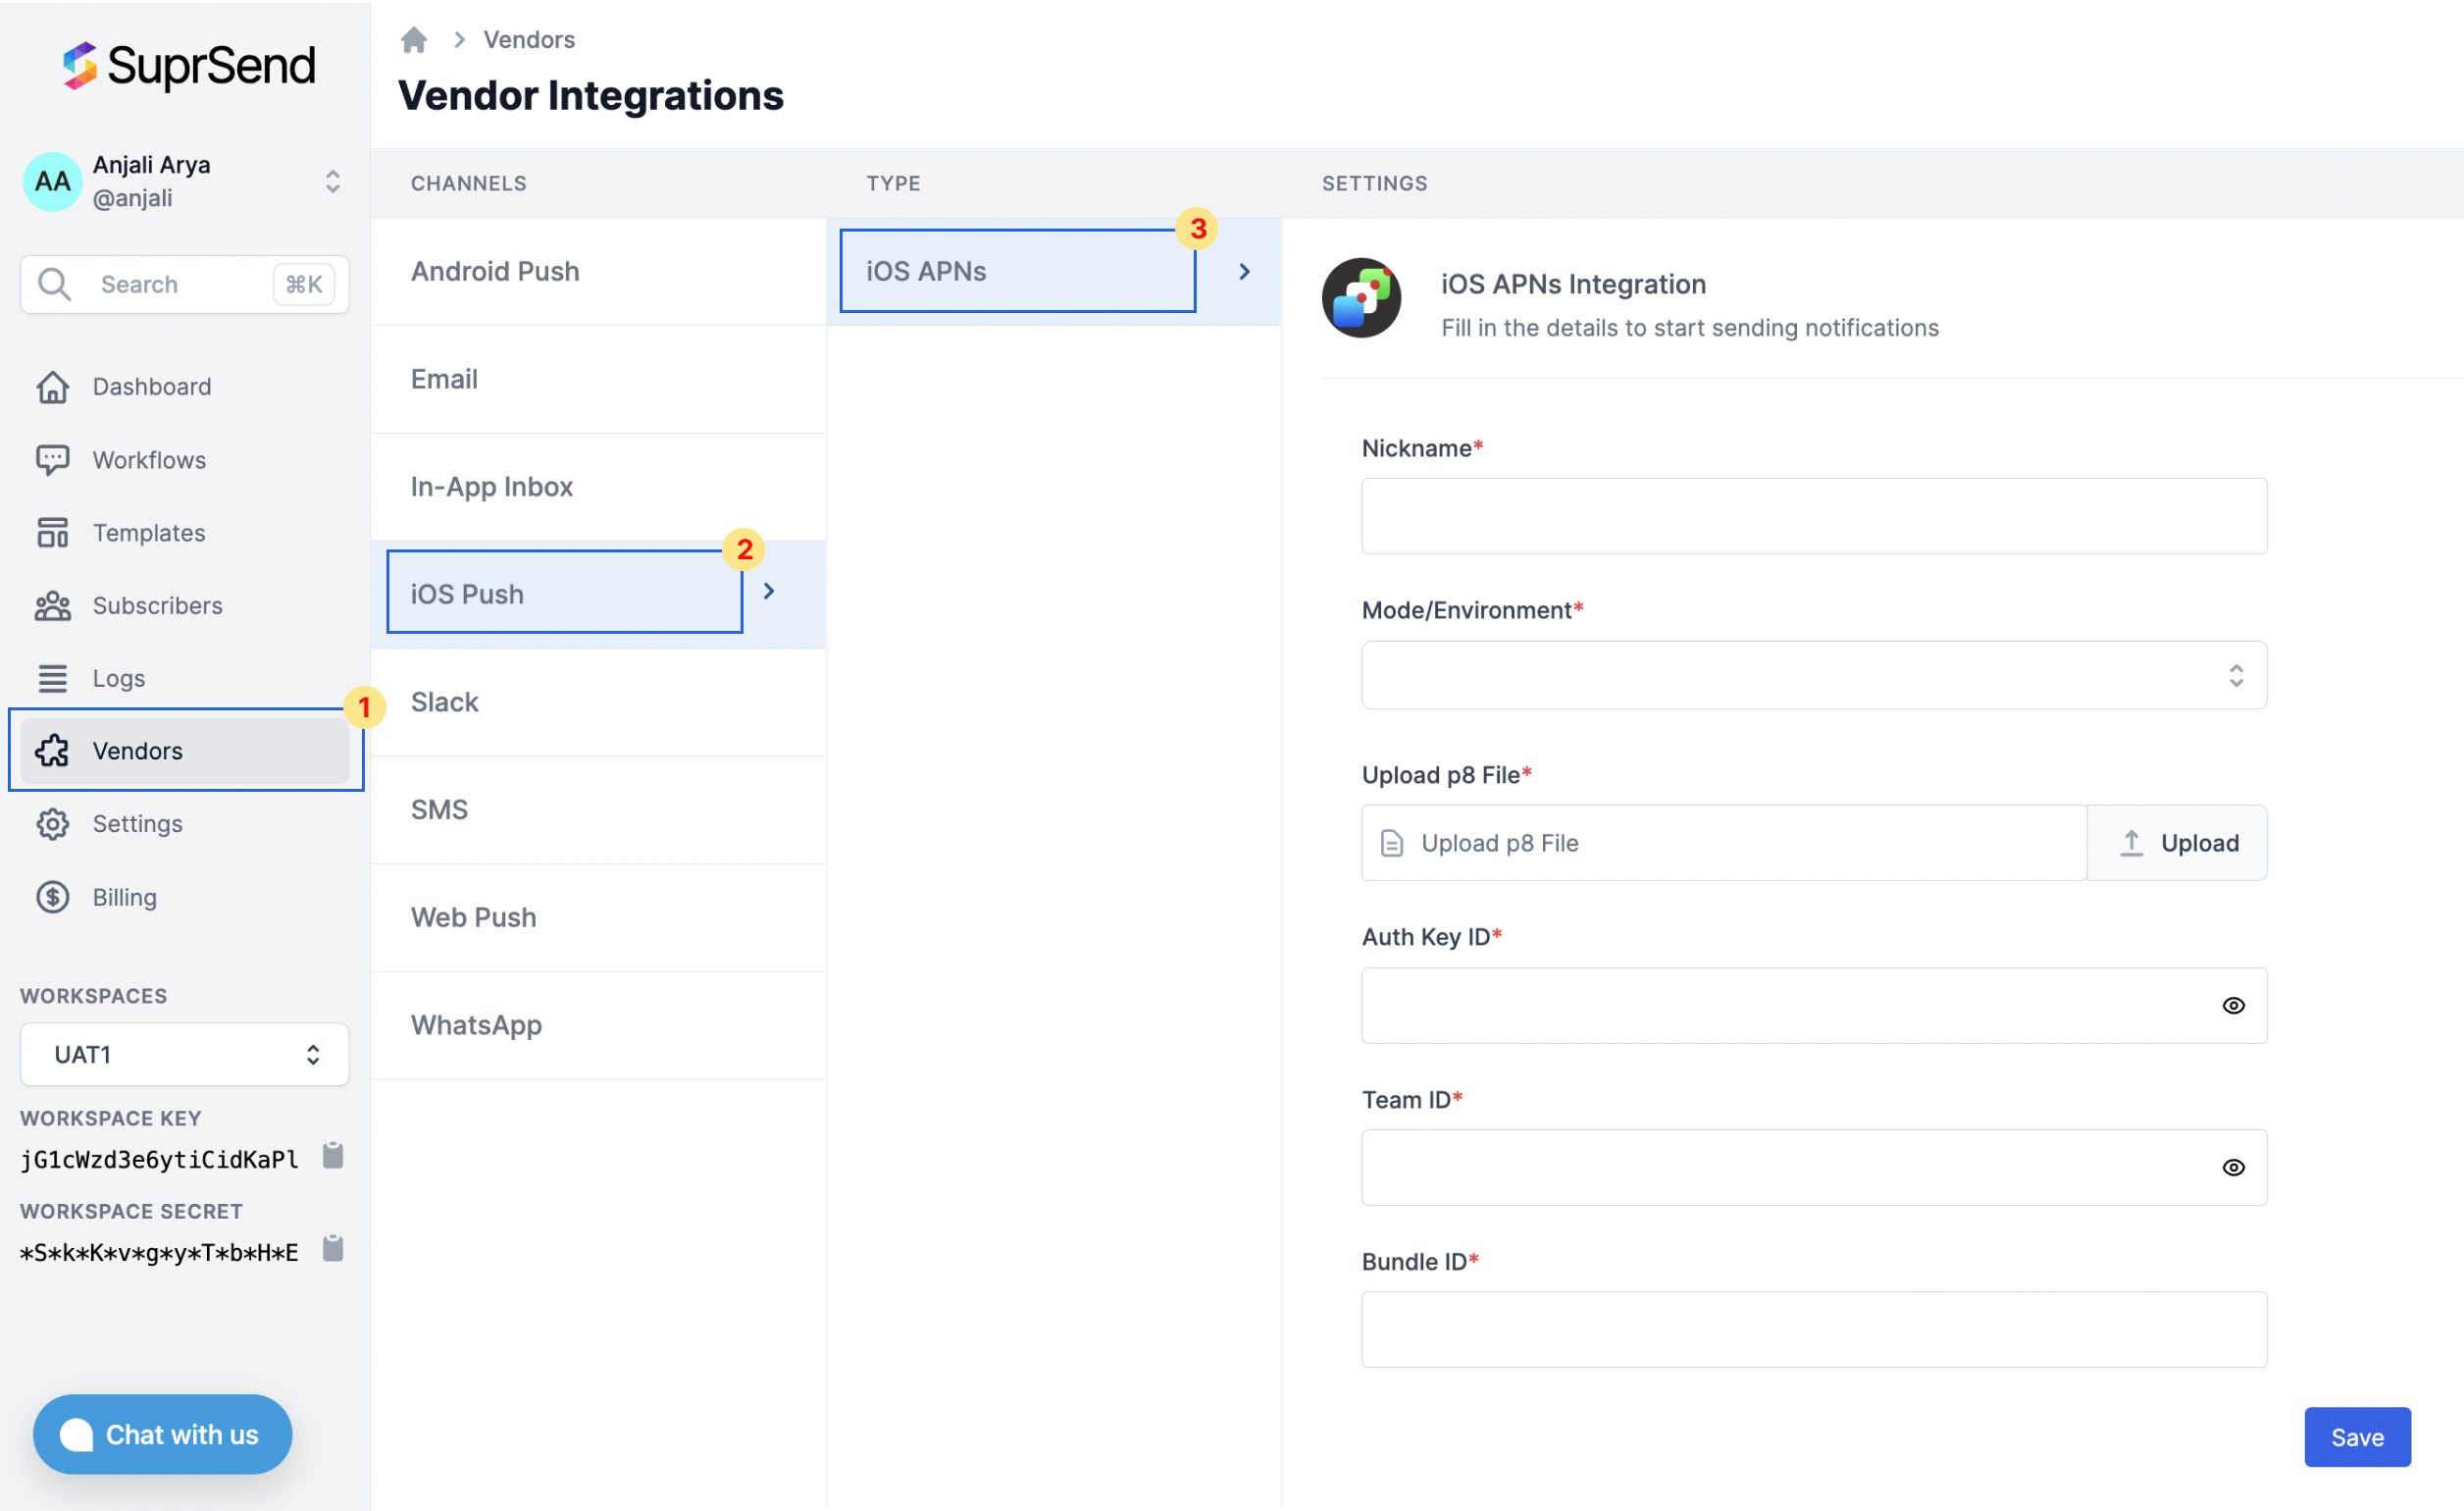
Generate .p8 key file and Auth key ID
1
To generate a .p8 key file, login to your Apple developer account page
To generate a 
.p8 key file, login to your Apple developer account page, then select Certificates, IDs & Profiles.2
Select `Keys`
Under Certificates, IDs & Profiles section, select “Keys”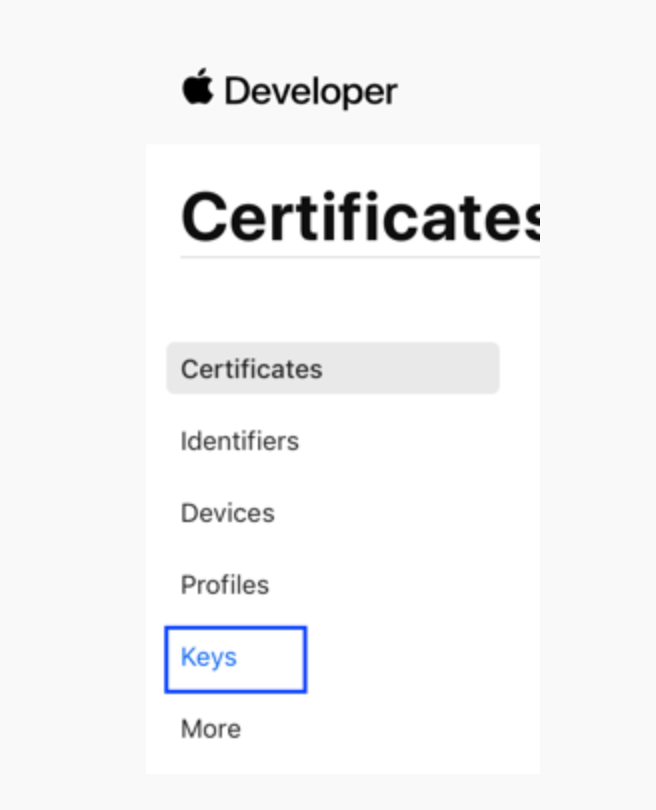
3
Add a new key
Click on “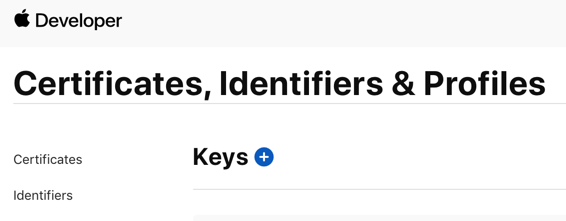
+” button next to keys to add a new key4
Type in your key name and check the Apple Push Notification service
On the new key page, type in your key name and check the Apple Push Notification service (APNs) box, then click “Continue” and “Register”.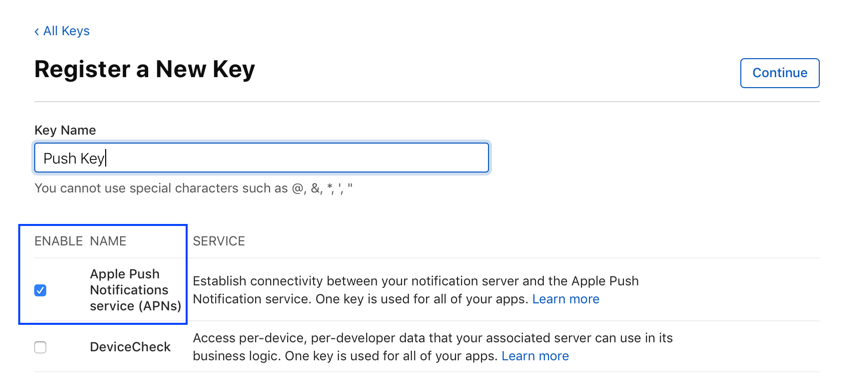
5
Download the p8 key file
Once the key is generated, 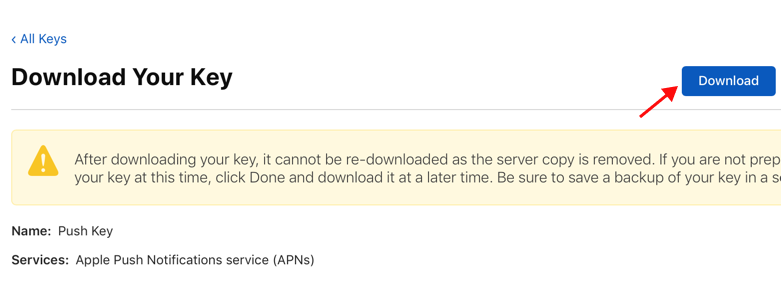
download the p8 key file by clicking on “Download”**AuthKeyABCD1234.p8**, the **ABCD1234** is the Key ID for this key, add this key ID in Auth key ID field on Vendor configuration page
How to get team ID
You can get team ID from your Apple developer account membership page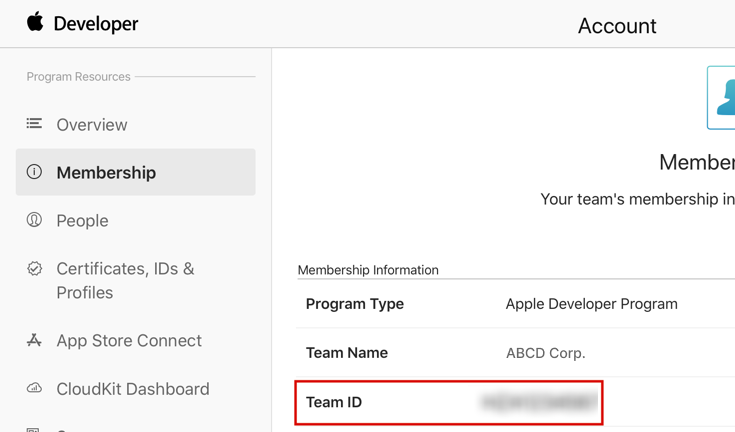
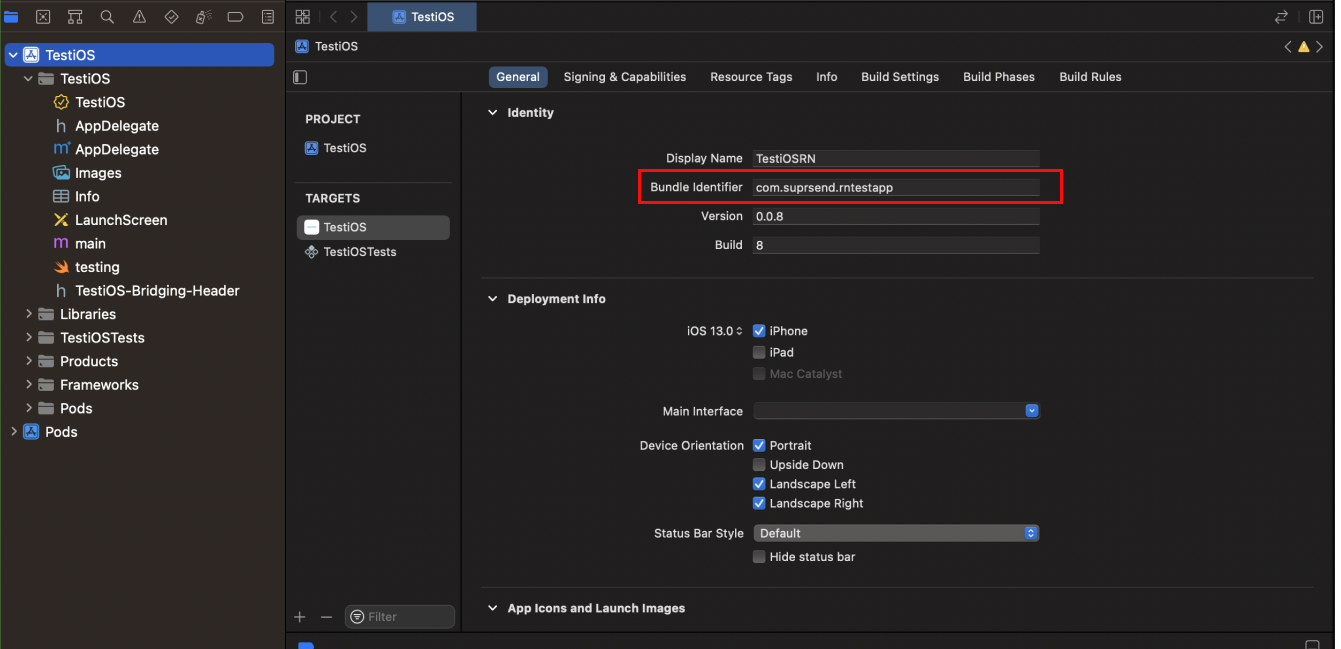
How to get bundle ID
You can get this ID from your app project