workflows.trigger endpoint or via event trigger. In SuprSend, we refer events as user-initiated actions, such as social media interactions, or system-generated events like pending payments. User needs to be created beforehand for event based triggers.
Direct API trigger is a straightforward way to get started, as you can include recipient channel information directly in the API call and doesn’t require prior user creation to initiate the notification.
Triggering workflow via API
It is a unified API to trigger workflow and doesn’t require user creation before hand to trigger notification. Recommended for platforms transitioning their existing notifications to SuprSend. If you are using our frontend SDKs to configure notifications and passing events and user properties from third-party data platforms like Segment, then event-based trigger would be a better choice.
Python Backend SDK
Node Backend SDK
Java Backend SDK
Trigger Workflow HTTP API
Backend SDK with Golang
Sample payload
Here is a sample payload of direct API triggerTo prevent automatic creation of an actor, or recipient (user/object) in SuprSend (the case where they already exist in your system), you can use the
"$skip_create": true flag.This can be applied inside the actor, individual user recipient objects, or object recipient objects.Identifying recipients inline
One of the benefits of using direct workflow trigger is that you can identify recipients inline. You can include recipient channel information, their channel preferences, and their user properties along with the workflow trigger. Upon triggering the workflow, the recipient will be automatically created in the SuprSend database in the background. This facilitates dynamic synchronization of your user data within SuprSend and eliminates the need for any migration efforts on your end to start sending notifications from SuprSend. You can also use recipient properties in your template as$recipient.<property>.
This is how the complete recipient payload with look like
Add user communication channel
Sending notification to multiple recipients
Recipients in workflow call is an array ofdistinct_ids or recipient objects. You can pass up to 100 recipients in a single workflow trigger. SuprSend will internally convert it into multiple workflow triggers, one for each recipient in the array.
We recommend you to use lists and broadcasts to send notifications to a user list larger than 1000 users. This approach allows for bulk processing within SuprSend, resulting in significantly faster delivery compared to individual workflow calls. Sending individual workflows to a large set of users may introduce delays in your notification queue and is not an optimized way of handling bulk trigger.
Sending cross-user notifications
In scenarios where you need to notify a group of users based on another user’s action, such as sending a notification to the document owner when someone comments on it, you can specify the actor in your workflow call. This allows you to use actor’s name or other properties in your notification template. Actor properties can be included in the template as$actor.<property>.
Sample template with actor and recipient properties:
Event based trigger
It is a cleaner way of triggering notifications where your user sync is separate and events are generated from multiple sources, backend systems, Frontend applications (user actions on the platform) or CDP platforms like Segment.Please Note that the user profile should be created beforehand for
distinct_id passed in your event call. If user is not present, it will discard the event call.Object triggers are not currently supported in event. Please get in touch if you have this requirement.Python Backend SDK
Node Backend SDK
Java Backend SDK
Go Backend SDK
Trigger Event HTTP API
JavaScript Frontend SDK
(Web)
Kotlin Frontend SDK
(Android)
React Native Frontend SDK
(App)
Flutter Frontend SDK
(App)
Segment
Customer Data Platform (CDP)
Triggering workflow using google sheets
This can be used by growth or product teams to trigger one time notifications for lead generation, sales cold messaging or to send announcements and product updates. We do not recommend sending more than 10,000 notifications using google sheets as each row in google sheet trigger converts to 1 workflow request and might take a lot of time to process. Also, since triggers via google sheets are generally promotional notifications, we recommend using one of the promotional sub-categories to trigger this notification. Read more about categories and how they impact your send latencies. Here’s a step-by-step guide on how to send notifications using google sheets:1
Create a template group on SuprSend account.
All the static content can be designed on the template, and all the variable data defined within
{{...}} will be passed from the Google Sheet at the time of trigger.2
Create a google sheet with following data.
Each row in the sheet corresponds to one recipient.
-
distinct_idcolumn- this is the unique identifier of the user who needs to be notified. -
Dynamic data columns- you need to create one column each for the dynamic data (aka variables) in your template. Note that variable names are case sensitive.
If this is the template content:Hi {{name}}, your {{Event}} is scheduled at {{Schedule}}. See you there., you’ll have to create a column for each template variable -name,Event, andschedulein your sheet. -
User Channels columns- Next, create columns for user channel details. These channel columns are necessary to pass channel information that may not be present in the user profile.
It’s always a good practice to include channel information if you’re unsure of its presence in the user profile. You can pass channels asWAfor whatsapp,Emailfor email andSMSfor SMS.
For WhatsApp and SMS, you need to enter country code in front of the mobile number as+917123xxxxxx. -
SuprSend Statuscolumn- Fill the valueTBTin rows for which you want to trigger the notification. Once, the notification is triggered, the status changes toOK.\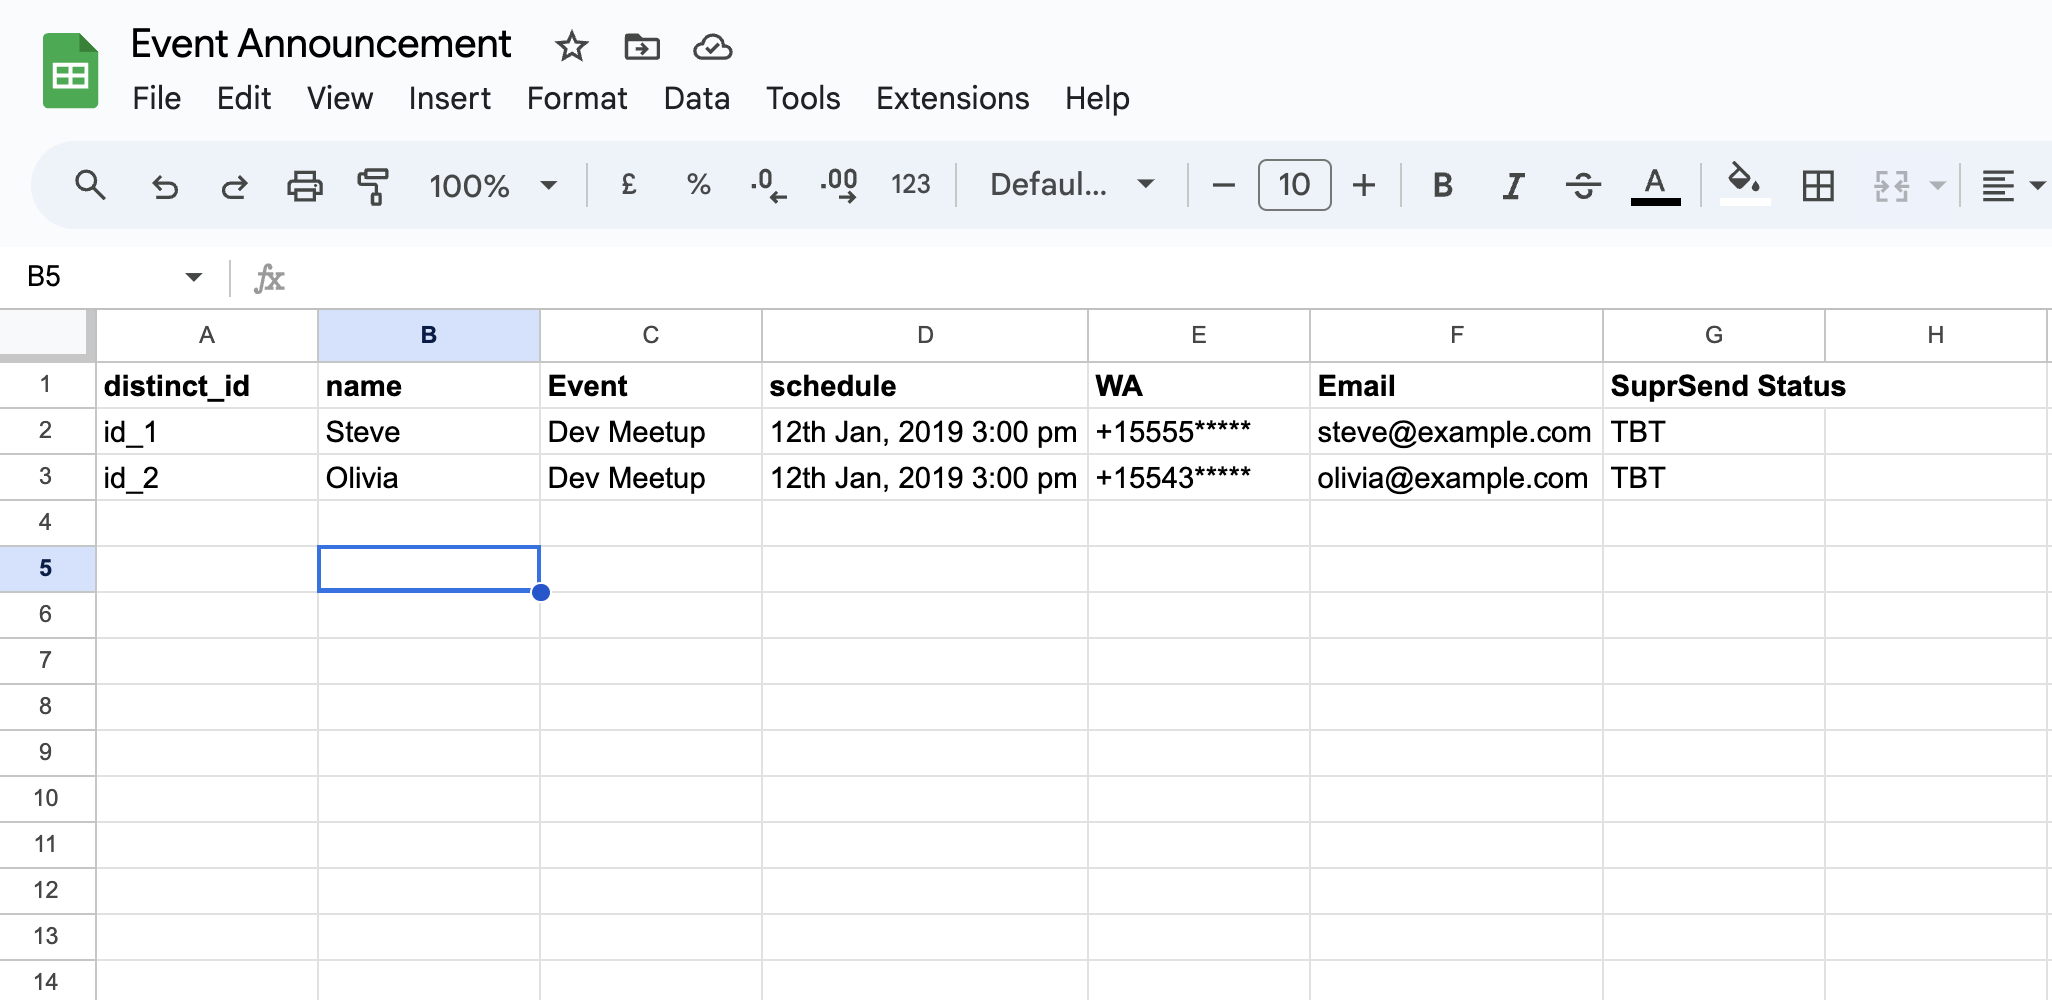
3
Go to the Google Sheets Navbar
In the Navbar of Google Sheets, click on 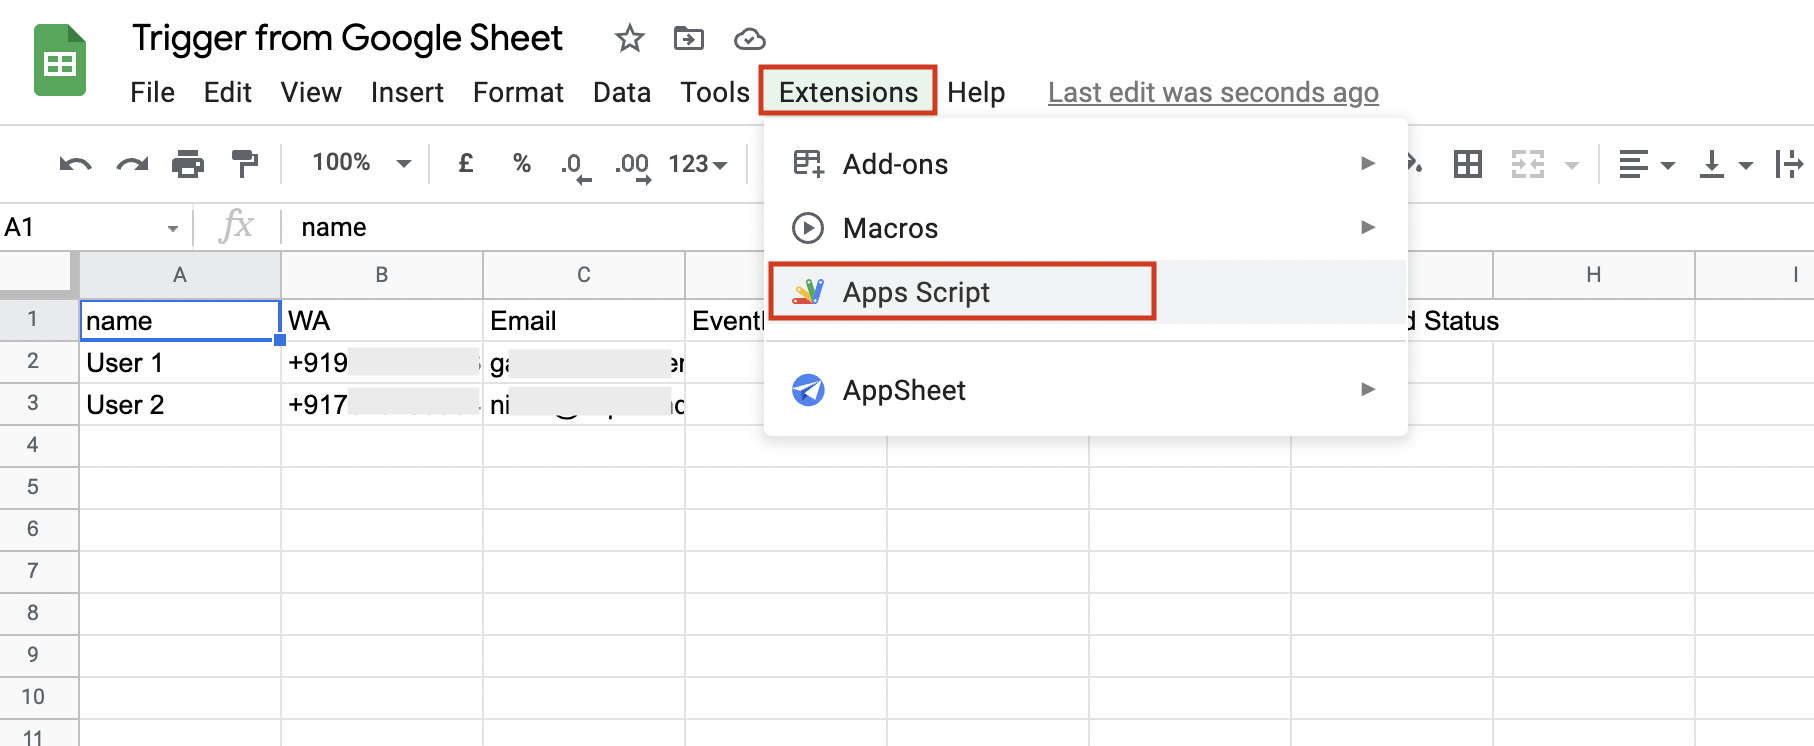
Extensions and select Apps Script4
Remove the default information in the Apps Script
It will open Apps Script in a new tab. Remove the default information present in the editor, and copy-paste the following in the editor.You’ll find following information to be added in your script from SuprSend dashboard.
5
Save the Script - Close the Tab - Reload your Google Sheets Page!
After reloading, you will find a new option named “SuprSend” in the navigation bar. On clicking it, you will see the option to Trigger SuprSend Workflow. On triggering, the script will pick up all the rows which have valuein the column name “SuprSend Status”, and will make an API call to SuprSend. For the successful API call, the status will change to 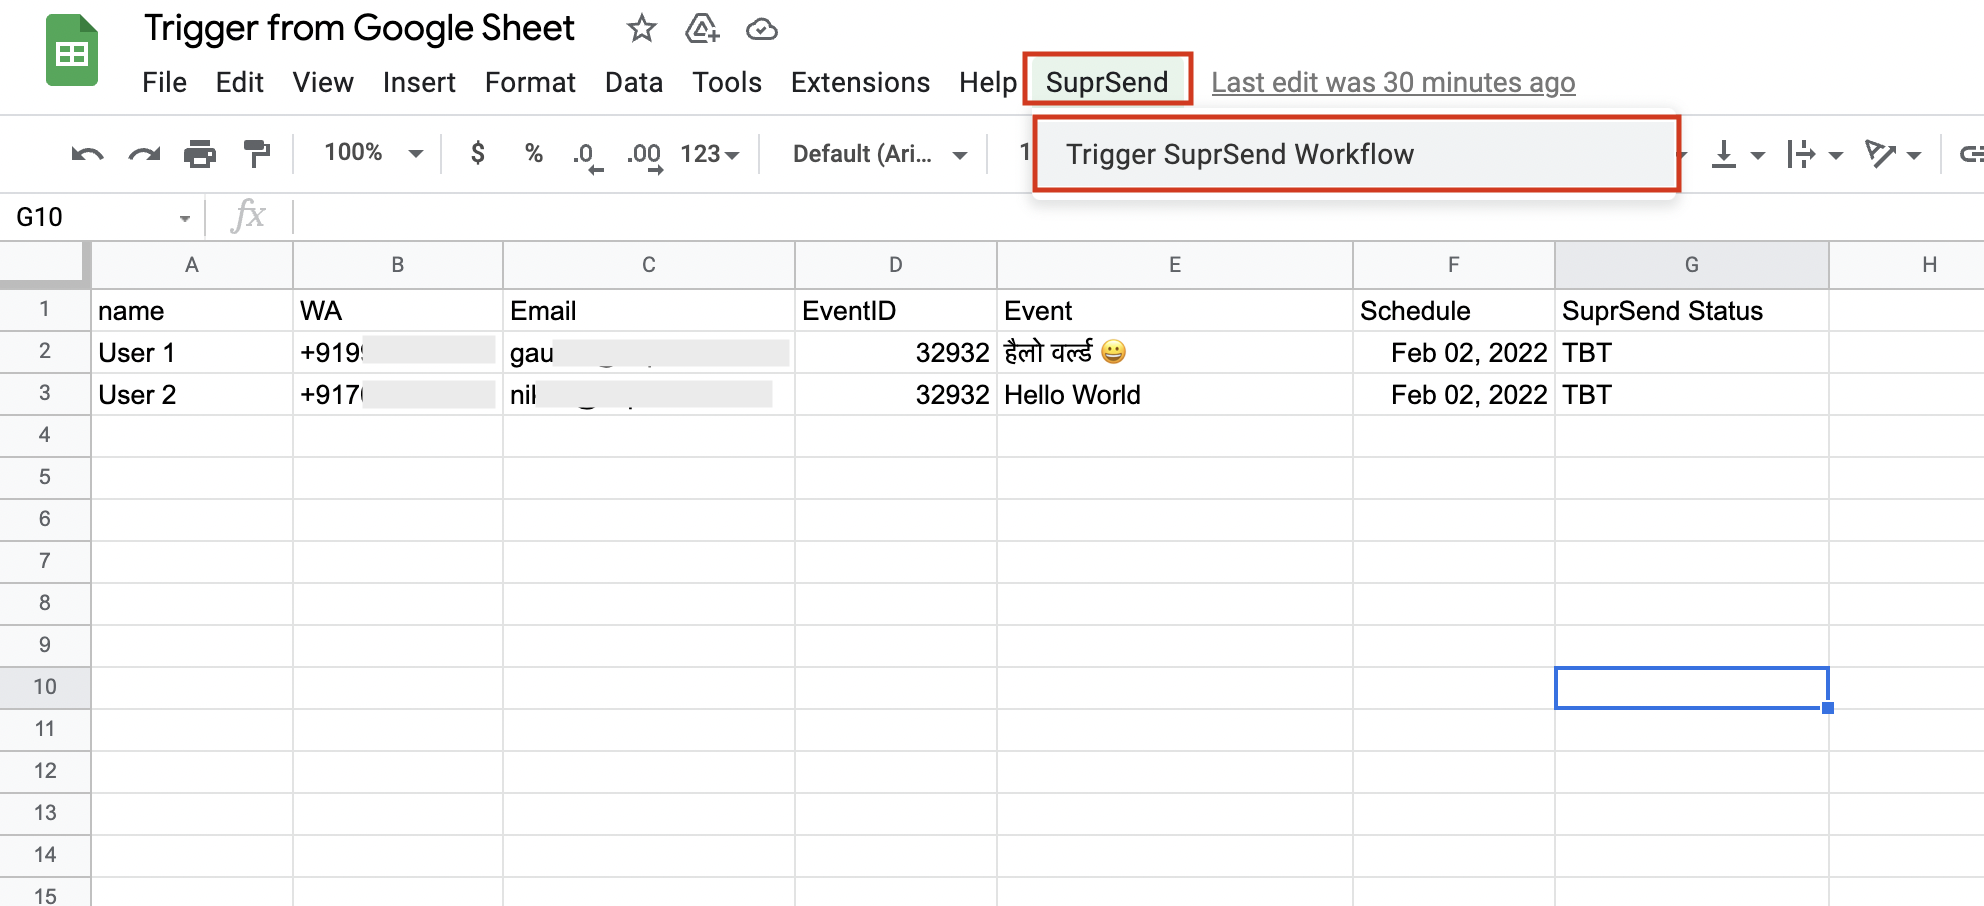
OK.6
Check the Status
You can check the status of your notification trigger on the 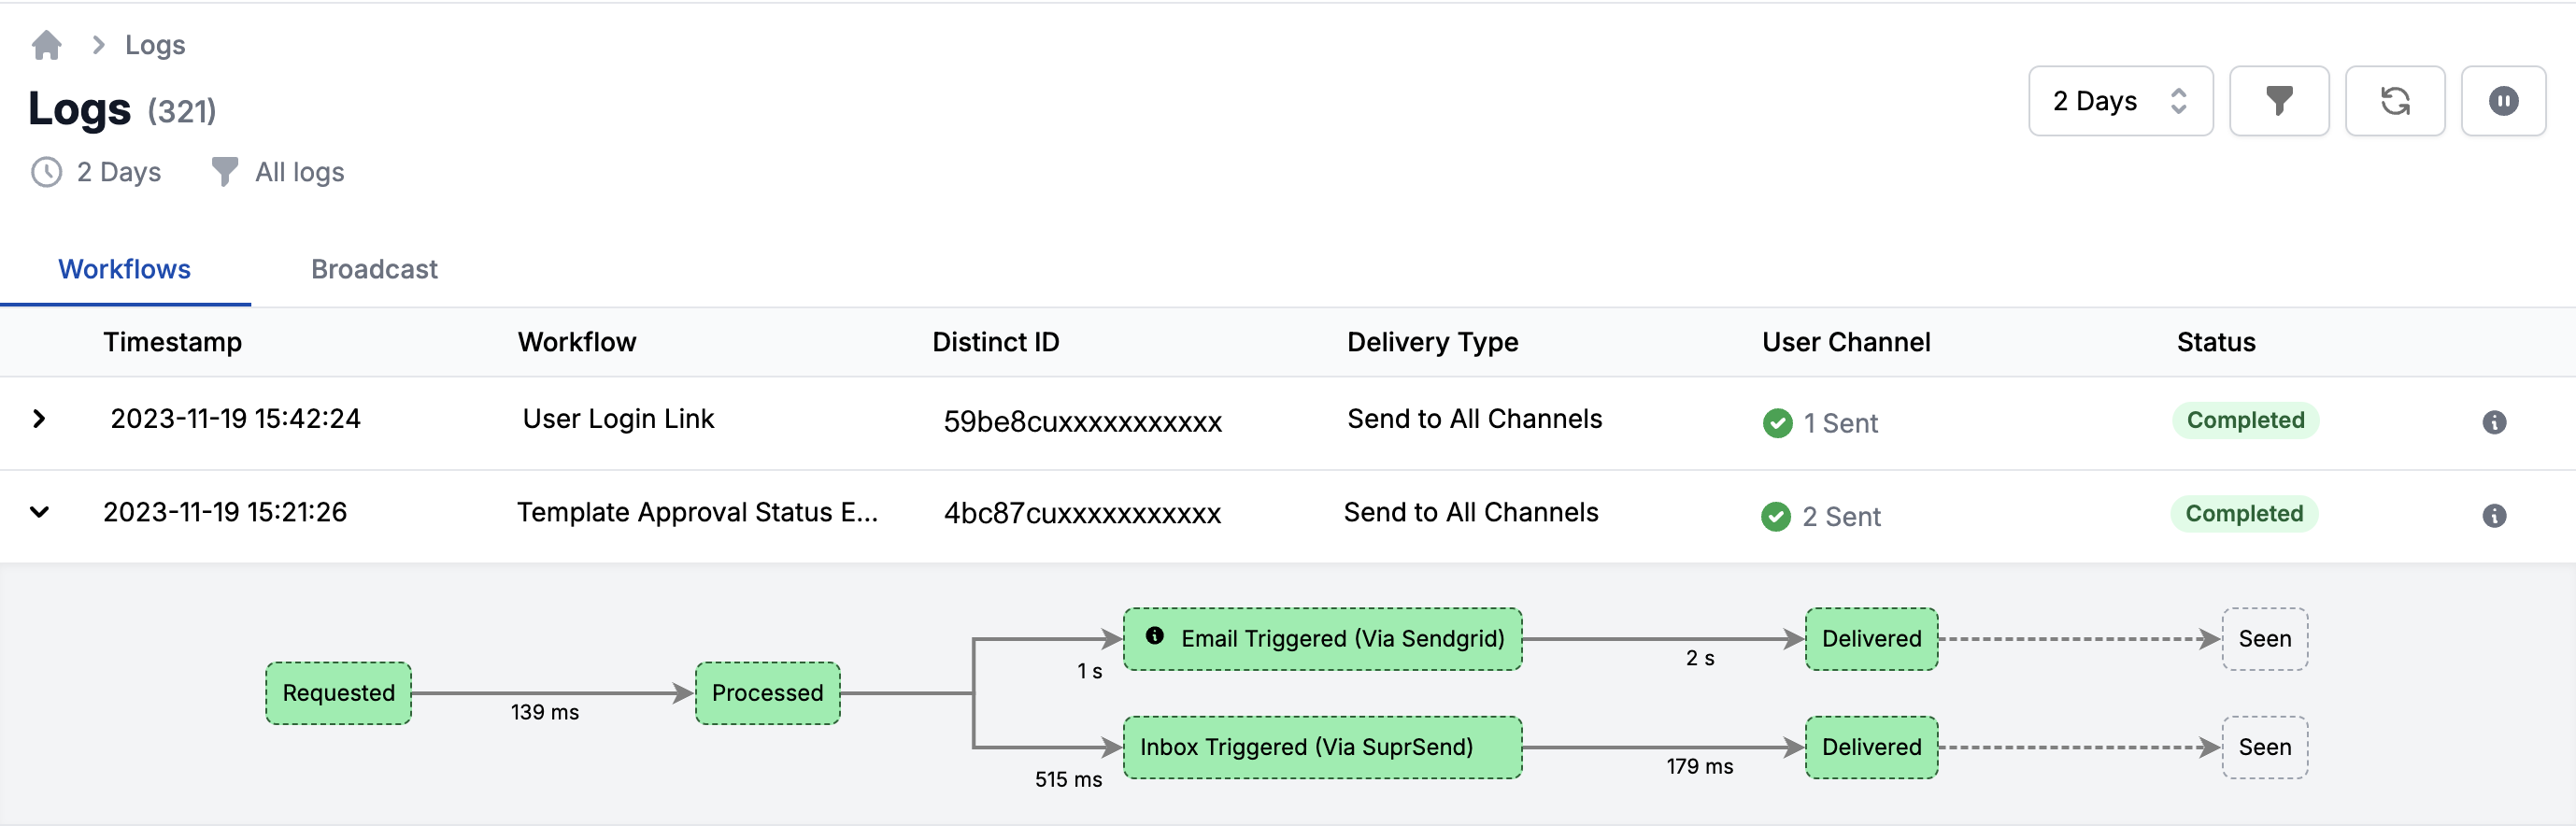
Logs page.