Trigger: Initiates the workflow
Trigger: Initiates the workflow
Trigger node initiates the workflow and delivers the first notification. You can trigger a workflow through an event call or a direct API call to SuprSend. Events fall into three categories:1. External actions performed by users on your platform, such as
post like or new comment. To track these actions, integrate the frontend SDK into your product or use the backend SDK or HTTP API.2. User entering or leaving a list, such as when users unsubscribe from a topic. These events fire automatically when you add a list entry/exit trigger node to a workflow using a SuprSend-managed list.3. Internal trigger from backend logic, based on data or state changes like shipment out for delivery or job closed.Functions: Logical steps in the workflow
Functions: Logical steps in the workflow
Branches: Splits execution in conditional branches
Branches: Splits execution in conditional branches
Split the workflow into parallel flows where the user follows one branch based on a condition. for example, the wait until branch holds the user until they meet the required condition.
Delivery: sends notification
Delivery: sends notification
Delivery Nodes represent the final send steps that deliver notifications to users. Templates define the content of each notification. You can send notifications through a single channel, multi-channel, or apply channel routing for sequential delivery across multiple channels.
Create workflow
In SuprSend, you can group multi-channel and multi-stakeholder notifications in a single workflow, by considering the workflow as a sequence of notifications. One example of a multi-channel, multi-stakeholder workflow involves sending a series of payment reminders to a company’s users.- The system sends the first reminder to the account admins via email.
- The second reminder reaches both the admins and the finance team of the company-first via Inbox, then via email if the notification isn’t seen on Inbox.

Payment Reminder workflow
Preference categories
Each workflow connects to a preference category, which helps group related workflows. Users can manage their preferences across these groups. For instance, you can group all shipment-related messages under the categoryDelivery updates, allowing users to turn off email alerts and receive them only via push notifications.
This preference setting automatically applies to all workflows under the category Delivery updates. Learn more about preference categories here.
Version control for workflows
The system first saves all workflow changes in a draft version and only makes them live after you commit the updates. This approach lets you confidently update workflows without affecting any that currently run in production.
Trigger workflow
Workflows created on SuprSend dashboard can trigger via an event call or via a direct API call.via workflow API
via workflow API
For transactional use cases such as One-Time Password (OTP), authentication, and verification notifications-where you must provide dynamic user channel information or sensitive data at the time of sending-you can include all data and recipient information in a single API request. This method doesn’t require creating a user beforehand to trigger the notification, making it ideal for migrating existing notifications to SuprSend. Below is an example payload that demonstrates a dynamic workflow setup for an OTP notification.
Event based Trigger
Event based Trigger
Below is a sample event call to trigger the payment reminder workflow. You can trigger these events by integrating one of the frontend or backend SDKs, or by integrating with your Customer Data Platform (CDP) like Segment and mapping the events passed through these platforms as your workflow trigger.
User profile should be created in SuprSend for passing in event call:You must create the user profile beforehand for the
distinct_id passed in your event call. If the user isn’t present, the event call discards it.Send notification using Google Sheets
Send notification using Google Sheets
You can also configure your one-time notifications using google sheets. Refer step-by-step guide to configure workflows using google sheets here.
Track or debug workflow run
For each workflow run, you’ll see a detailed log capturing the state and response of each workflow step as they’re sent. You can refer to error guides to understand the errors and see how to resolve them.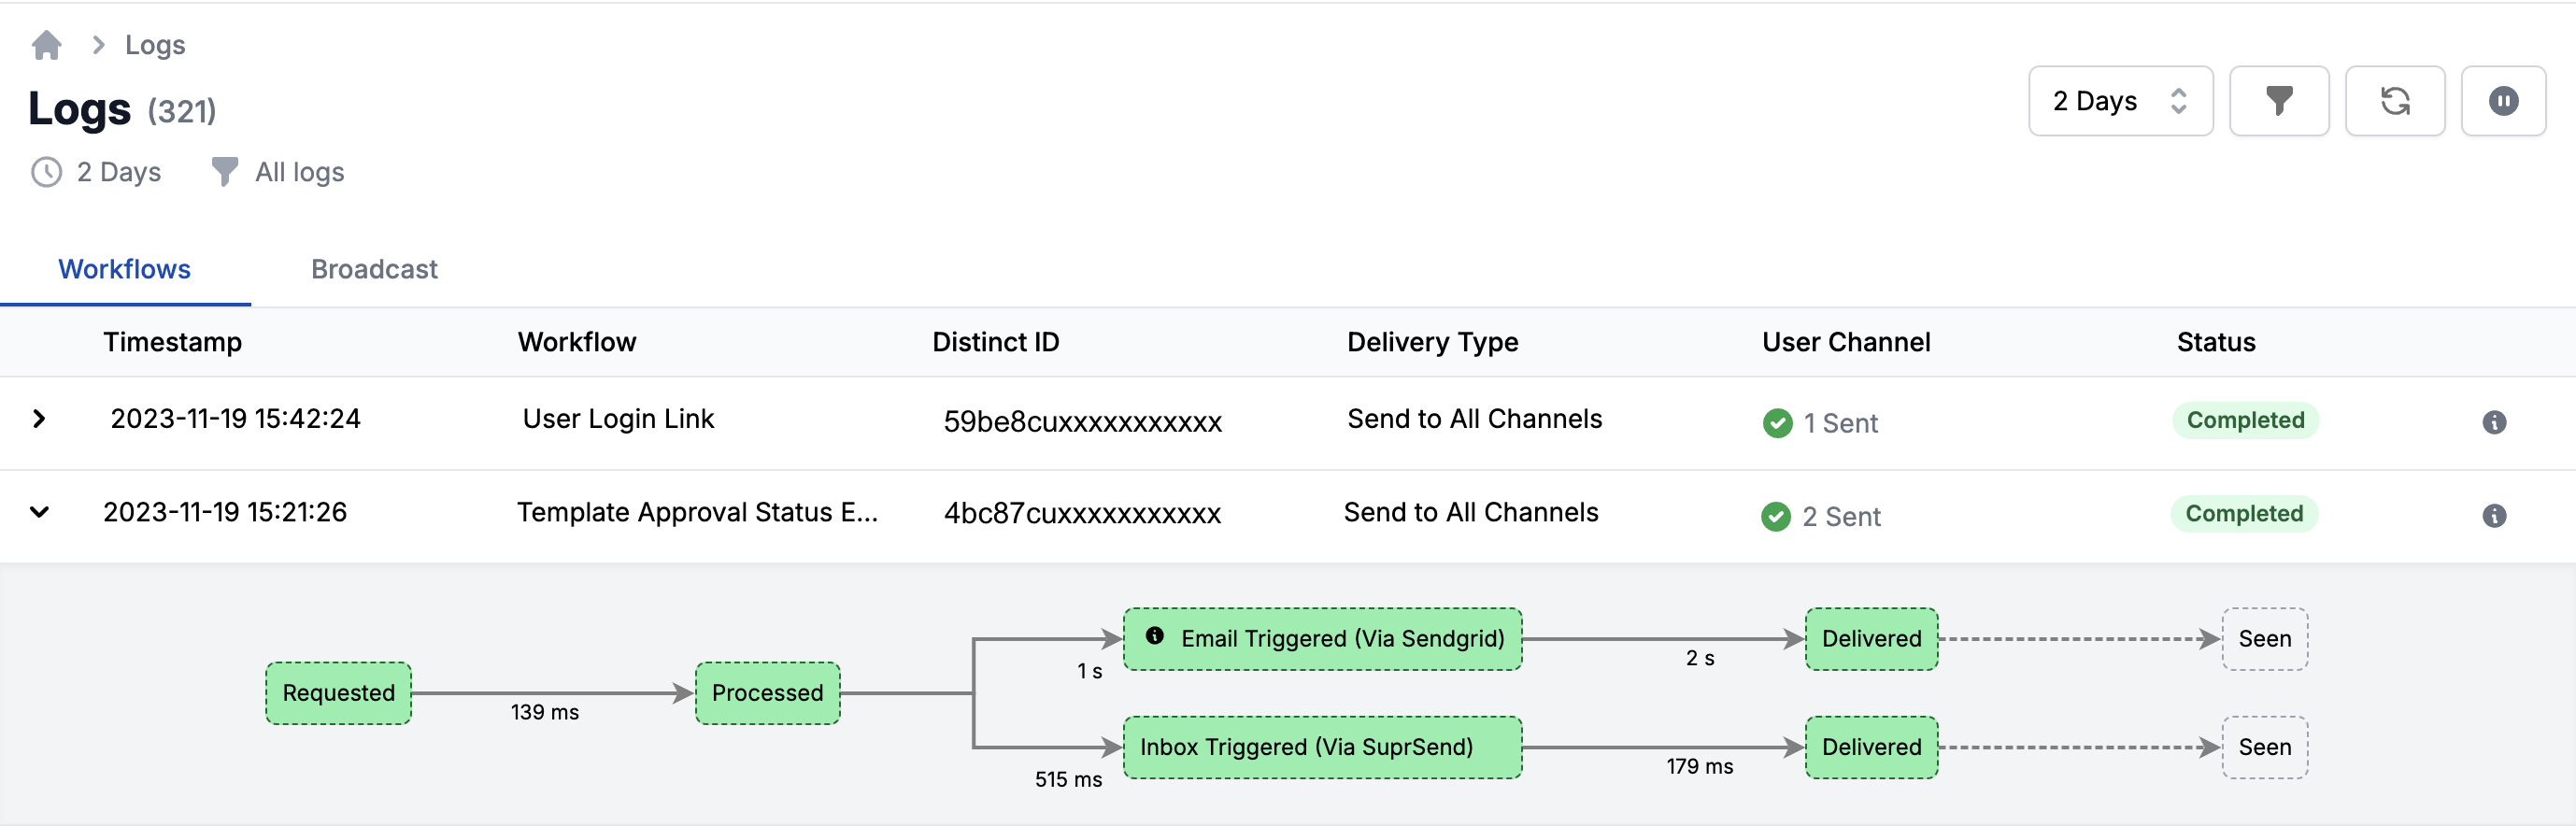
Analyze notification performance
SuprSend provides comprehensive analytics to track the performance of your notifications. You can track delivery, seen, and clicks across all channels in a single graph, identify the best-performing channel, and see how users interact with the notification. You can also retrieve the notification data in your data warehouse for internal analysis and reporting using the S3 connector.
Configure SuprSend webhook in vendor dashboard to track delivery data 👍Ensure to include the SuprSend webhook callback URL in your vendor dashboards for WhatsApp, Short Message Service (SMS), and email. This enables tracking of delivery, seen, and click statuses for display in logs and analytics.For real-time updates to your system, you can also add your webhook endpoint as an outbound webhook in SuprSend. SuprSend processes data received from your end-vendors in a standard format, eliminating the need to adapt your system for different vendor data structures.
Per-tenant workflow
Tenants represent a segment that a user belongs to. These can include organizations, teams within an organization, subsidiary companies, or different product lines within the same business. While SuprSend doesn’t directly associate workflows with tenants, you can dynamically passtenant_id in your trigger to send a notification for a tenant. This picks the properties corresponding to that tenant for custom notification content and considers per-tenant preferences when executing the workflow. Read more about tenant workflows here.