Maintaining separate vendor config for marketing vs product notifications
Maintaining separate vendor config for marketing vs product notifications
For Email and SMS channels, vendor is configured at root-category level. This is done to solve for the following use cases:
- Many companies separate promotional and transactional traffic to ensure that opt-outs from promotional messages do not impact critical system notifications.
- SMS vendors may also expose different APIs for system messages (for example, OTPs) versus marketing messages. When you send notification in a sub-category, vendor config is picked from the root-category that sub-category belongs to.
For Email and SMS, ensure a vendor is configured for the category used in the workflow; otherwise, delivery will fail.
Picking the right notification queue
Picking the right notification queue
We maintain separate notification queues for different preference categories to ensure that marketing and promotional notifications don’t delay system or time-sensitive notifications.
Applying user or tenant preference
Applying user or tenant preference
You can create sub-categories for different types of notifications and give your users and tenants the option to set their notification preferences at the category level.
When a workflow is executed, it resolves the final preference against the workflow category and sends the notification accordingly.
See how to set it up in the next document.
Mental model
Preference categories use a functional hierarchy: Root-category → Section → Sub-category
Example structure:
When users visit their preference page, they see sub-categories organized under sections. Root-categories control delivery behind the scenes but aren’t shown to users.
Root-categories
SuprSend has three root-categories - System, Transactional, and Promotional - which define latency and queueing behavior. Sub-categories are always created inside one of these three. How it works:- Notification queues and vendors are inherited from the root-category at sub-category level
- User or tenant preferences are applied at the sub-category level
- Root-categories are not shown to users-only sub-categories appear on preference pages
System
Essential notifications that users can’t unsubscribe from. Common examples: OTP, Forgot Password, Incident reportsTransactional
Notifications sent in response to user actions or transactions. Common examples: Payment confirmation or reminders, Booking confirmation, Post shared/liked, Balance alerts, Account updatesPromotional
Notifications sent to promote products or re-engage users to your platform. Common examples: Newsletters, Announcements, Product updates, Sales/events, Deals and discounts, Price drop alertsIf you’re sending a broadcast, send it in the promotional category so that these bulk notifications don’t consume pipeline resources needed for product alerts. This keeps marketing notifications from impacting the latency of your transactional and product alerts.
Sections and Sub-Categories
Sub-categories
Sub-categories are where notification preferences are applied. This is what appears on the preference page and what users can opt in/out of. Assign category slug to the workflow. You’ll get the slug by clicking on the sub-category on Preference page.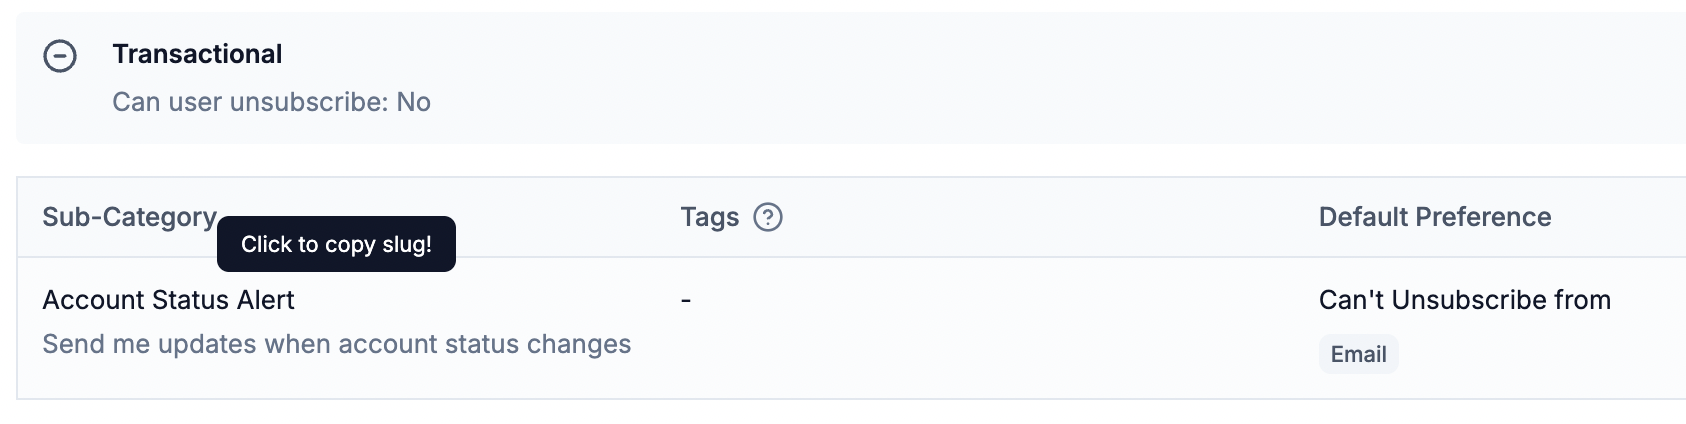
Sections
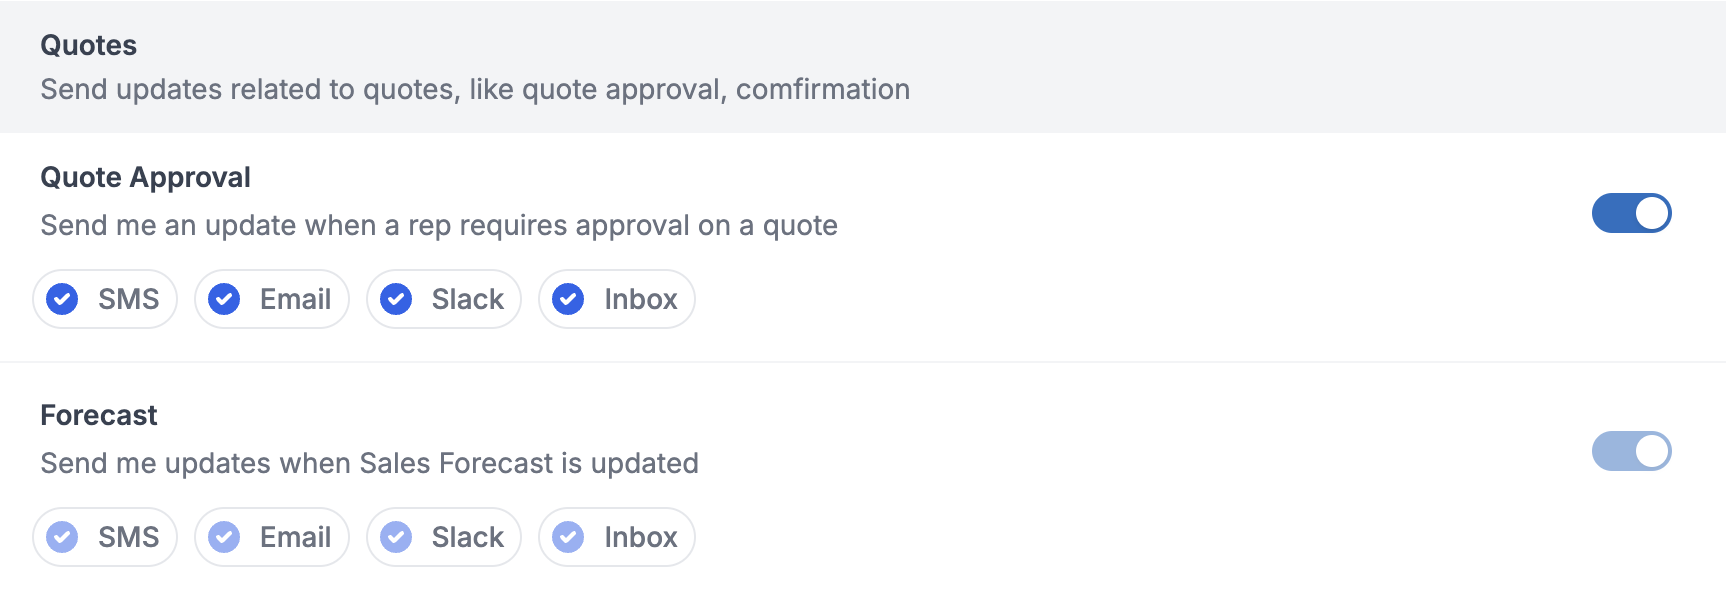
These are used to organize related sub-categories on the preference page. Think of them as folders that help users find notifications more easily. They are just used for visual grouping and are not used to apply preferences. Example:Quotes is a section containing the Quote Approval and Forecast sub-categories:
Default preferences
Default preferences determine how users receive notifications when they haven’t set their own preferences. Configure these at the sub-category level when setting up categories. Preference modes:- On: Users receive notifications by default
- Off: Users must opt in to receive notifications
- Can’t Unsubscribe: Users cannot fully opt out (required notifications)
Digest schedule
A digest schedule lets users pick how often they receive batched notifications for a sub-category (for example, Instant, Daily at 9 AM, or Weekly on Monday) right from their preference page. You define the available cadence options; the option a user selects drives the workflow Digest node at send time. To send on the schedule a user picks, add a Digest node in the workflow linked to this category and set its schedule type toPreference Category on UI and category_digest_schedule in management API. SuprSend batches notifications using the option the recipient selected (or the default), always in the recipient’s timezone.
For the available options, edit policies, and full configuration, see the Create/Update Category API and the Digest node guide.
Condition properties
Condition properties are custom, configurable values you attach to a sub-category and then reference inside workflow branch conditions or trigger condition. Use them to control when a category’s notifications are sent — for example, a minimum severity, an alert threshold, or which user roles should be notified. Reference a property in a workflow as$category.properties.<key>. For example, to send only when a recipient’s role matches the value configured on the category:
- Let users set a threshold so they’re notified only when a value crosses a limit they choose.
- Let users pick a minimum priority or severity for the alerts they want to receive.
- Drive workflow branching from per-user, per-category settings without storing them on the user profile.
Setting per-user and tenant preferences
Users and tenants can set their notification preferences at the sub-category level. Users can opt in or out of specific sub-categories, channels or channels within a category, and tenants can set default preferences that apply to all their users.- Tenants can override the default sub-category preference for their entire user base at the tenant level.
- Users can override the tenant-level preference for themselves at the user level.
- Once a tenant or user overrides a sub-category preference, changes to the default preference in that sub-category no longer affect them.
Tags
Tags are used to filter categories on the preference page. Common usecases are to filter categories based on user role or department. Tags added at the section level are inherited by all sub-categories inside that section.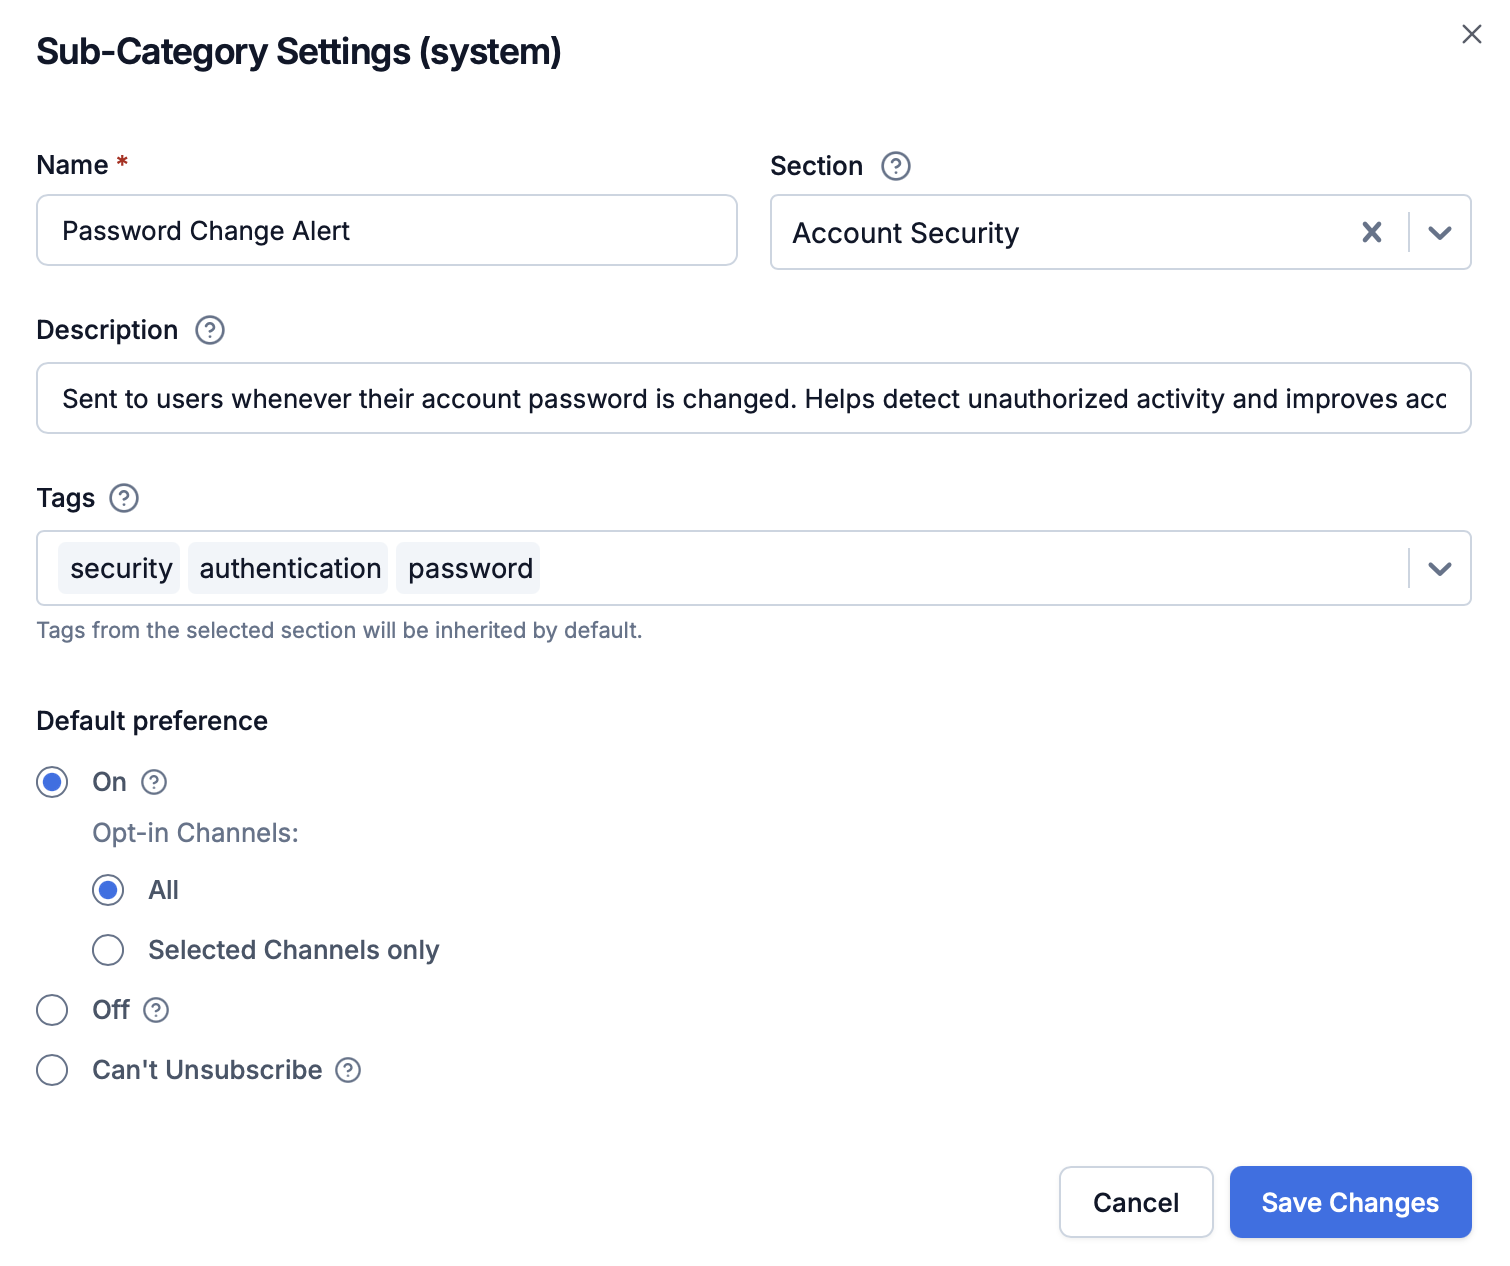
Tags do not impact delivery logic or preference rules - they are only used for filtering and organizing the UI. Even if a category is hidden from the user on the preference page due to tag filters, the user can still opt in/out via API, and notifications will still be sent if the default preference is set to opt-in.
Category translations
This feature is only available for Enterprise plan customers or the ones who have enabled translation feature in their account.
.json translations for each locale. Translations go live immediately after upload-no commit or publish required.
How it works:
- English (
en) is always available as the base language and is auto-generated from the category names and descriptions you define. - You can download en.json file, translate it into your desired locale and upload it back.
- While loading preference page, pass the locale parameter to the API or preference SDK and the translations will be loaded for that locale.
- If a translation is missing for a specific locale or key in the passed locale, the system automatically falls back to first regional locale, and then to English.
Example: User’s locale is set tolocale=es-ARand translation is missing for one of the categories ines-AR.json, it will look for translation of that category first ines.json, then falls back toen.jsonif needed.
Related documentation
- Manage Categories and Preferences - Complete guide to setting up and managing categories and preferences
- User Preferences - Overview of how preferences work