Prerequisites
Understanding the basics of workflowsCreating a new workflow
Select the button on the workflow page to create a workflow from scratch or select a workflow from our sample library.- Pass workflow name and category. Choose a relevant name initially as it determines the related workflow slug, which cannot be modified later.
- Preference Category is used to apply user preferences to the workflow. While creating the workflow, you can select any preference category and adjust it later if needed.
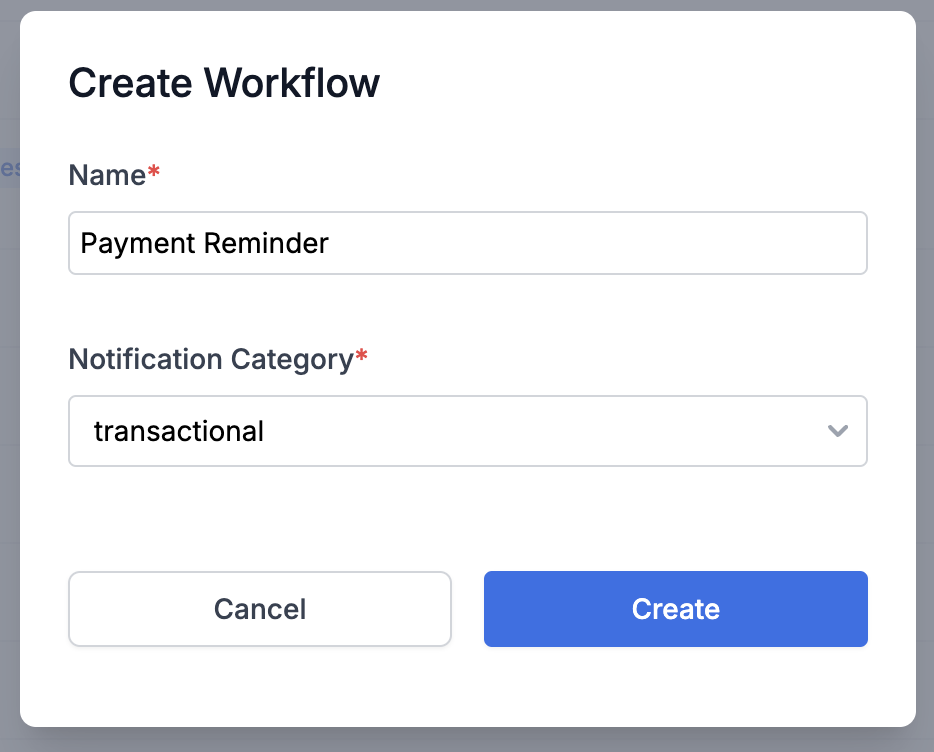
- After entering the required details, click on
Createbutton to create a new workflow in draft state. You’ll see the created workflow on top of the listing page, click on it to start editing. - Next, add relevant nodes to your workflow and edit workflow settings.
- Once you’ve finalized your edits, remember to make the workflow live. If you don’t want to make your changes live right away, you can
exit edit modeand come back later to commit the changes. Rest assured, your modifications will remain saved in the draft state until finalized.
Designing workflow
Workflows enable you to build complex notifications by defining whom to notify, when, and through which channels. A workflow requires a trigger node to initiate it and a delivery node to send the final notification. Additionally, you have functional nodes that add logic, branch nodes to split execution based on conditions, and data update nodes to modify or add data and assets in SuprSend. We’ve explained and listed down the available workflow nodes below.1. Trigger node
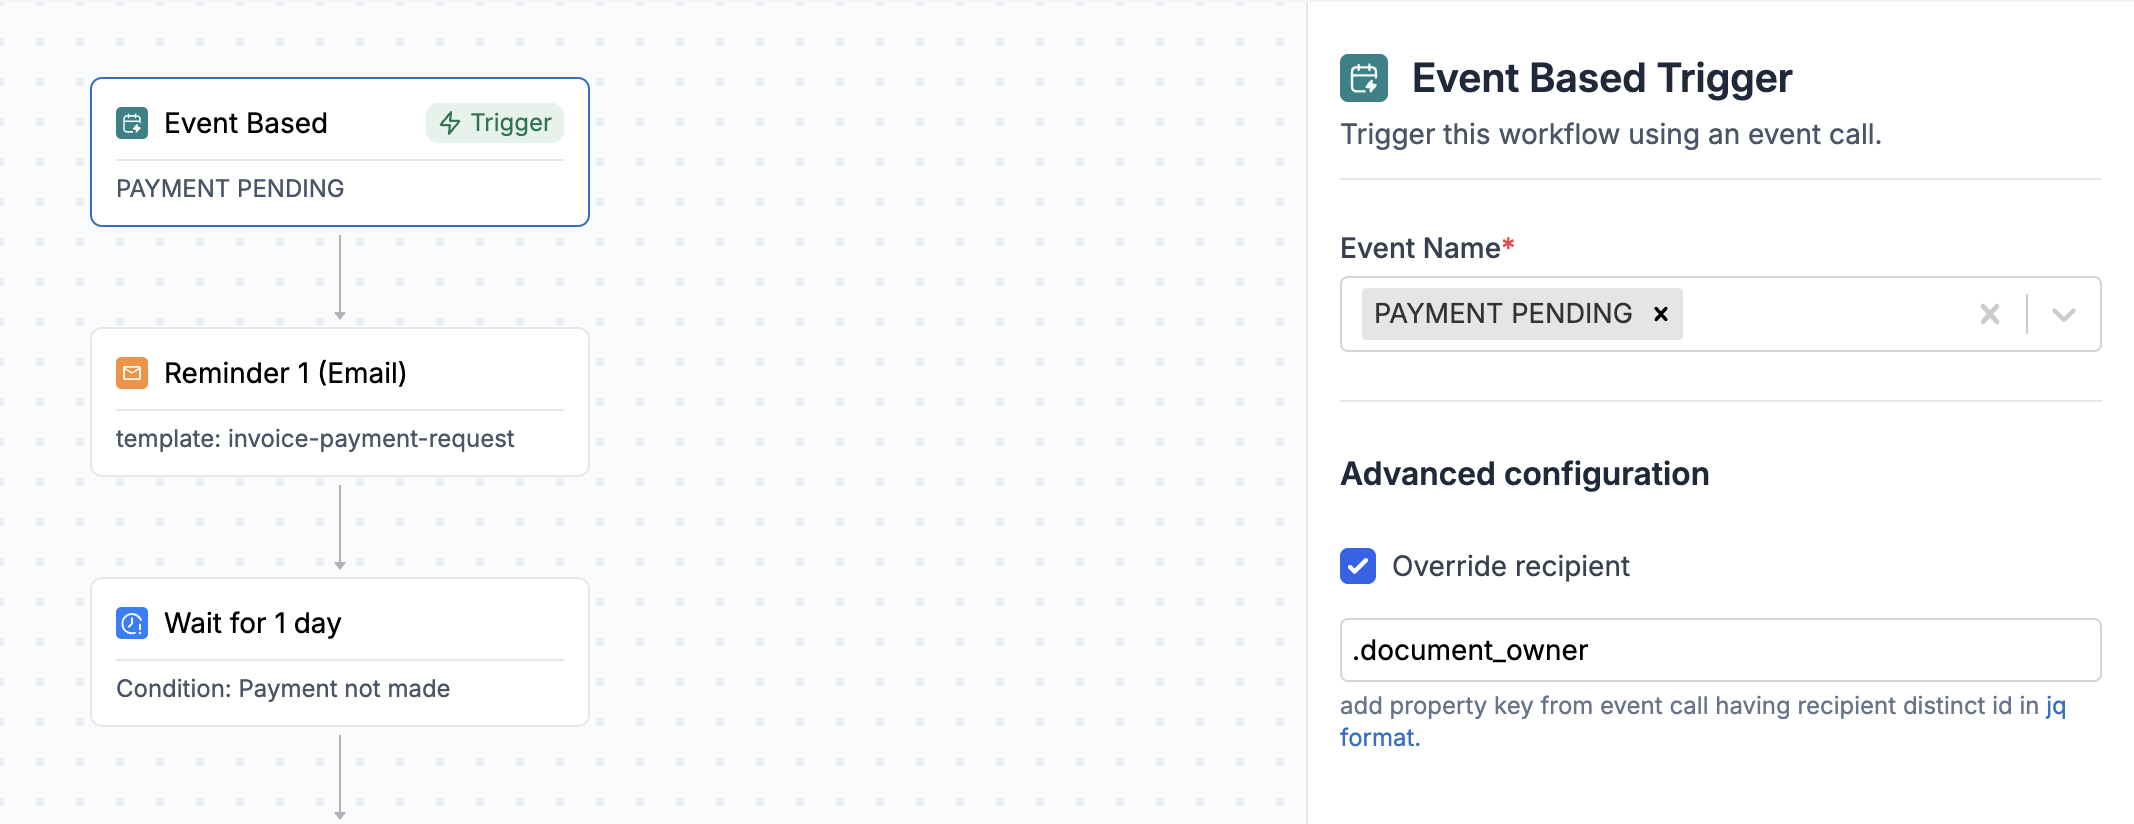
It is the first step of your workflow and contains information about what initiates the workflow, and related conditions. There are 3 types of workflow triggers possible:- List entry / exit: Starts the workflow when a user enters or exits a list.
- Event Stream: Starts the workflow when one of the linked events is sent to SuprSend.
- Workflow API: Here, you explicitly call a workflow using its workflow-slug, specifying the workflow and recipients directly in the API request.
2. Delivery nodes
These nodes are the final steps in the workflow, responsible for delivering notifications to users. Here’s a list of available delivery nodes:Single Channel
Send notification on one of the channels (Email, SMS, WhatsApp, Inbox, Mobile Push, Web Push, Slack or MS Teams).
Multi-Channel
Send notification across multiple channels at once.
Smart Channel Routing
Send notification across multiple channels sequentially with a delay until user engages with one of the channels.
Webhook
HTTP API request to notify an endpoint such as your CRMs, chat platforms or internal systems.

3. Function nodes
Functions are logical steps in your workflow. We currently support the following functions:Delay
Halt workflow for an interval before proceeding to the next node.
Batch
Aggregate multiple triggers into a single consolidated notification.
Digest
Batch multiple alerts and send a summary at a recurring schedule.
Time Window
Send notification in a given time schedule or in user’s timezone.
Data Transform
Transforms existing workflow data and creates / modifies variables.
Invoke Workflow
Trigger another workflow using current workflow data.
4. Branch nodes
Branches split the workflow execution into parallel flows. We currently support the following branches:Wait Until
Halt workflow until a condition is met or a specific time interval is reached.
Branch
Route notifications through different workflow routes based on conditions.
5. Data update nodes
These Nodes are used to bring in, modify or update data within workflow. Available data update nodes are:Fetch
HTTP API request to GET data from an external endpoint to use in workflow.
Update User Profile
Update recipient or actor within the workflow before sending them notification.
Add / Remove user from list
Dynamically add or remove recipient or actor in/from the list.
Update Object Subscription
Dynamically add or remove recipient or actor in/from the object subscription.
Workflow settings
This is where basic workflow details like name, description and tags go. You can also define workflow-level conditions like throttle here. Below is a list of workflow configurations and their descriptions: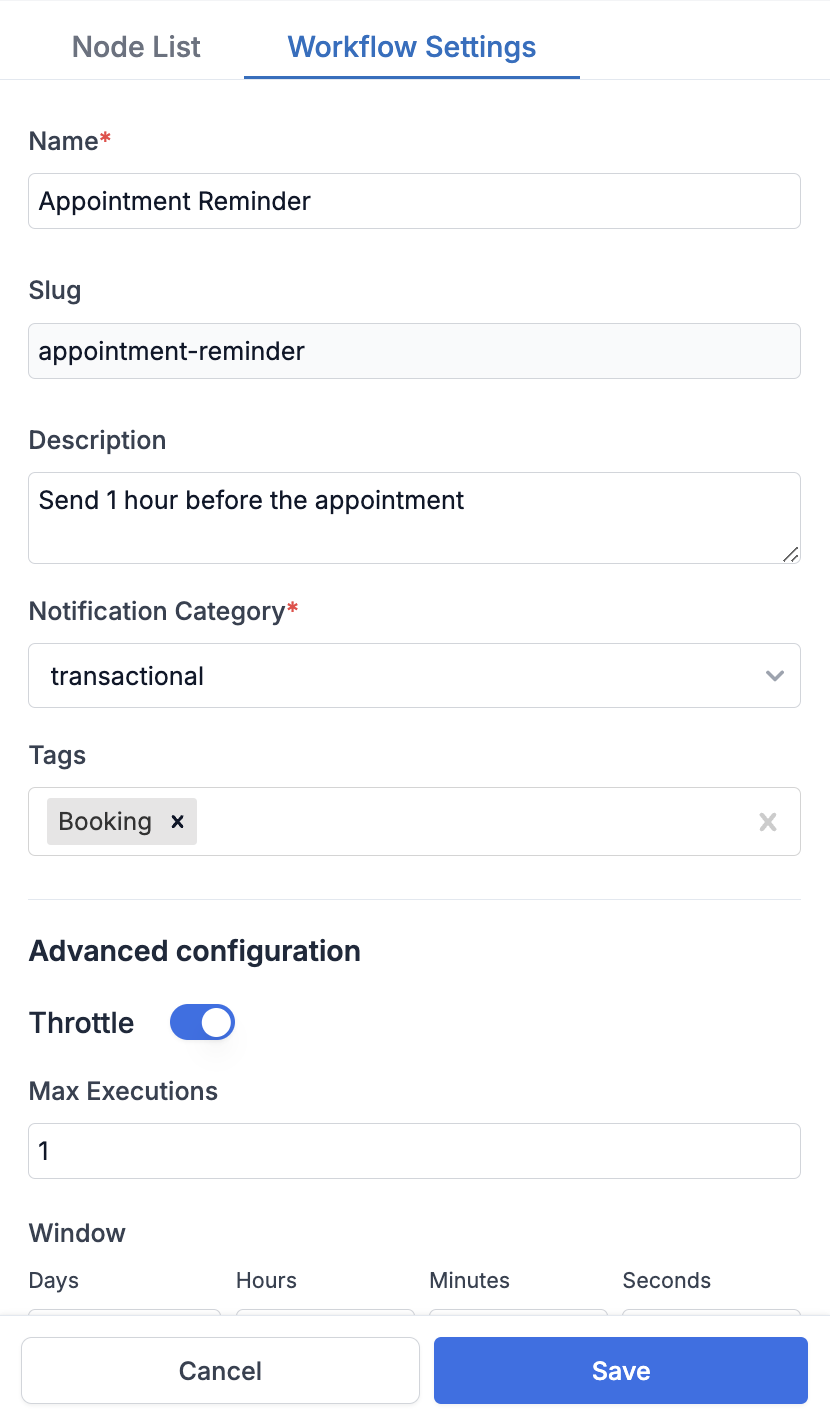
Change node name and description
To modify the name and description of a node, select theedit metadata option from the burger menu on your node form. Choose a descriptive name that clarifies the function of the step, and we suggest including node type in the name for easier identification. In the description field, provide a concise explanation of the logic and important elements of the node. For instance, in a send node, you can specify the template being used or provide details about the list of users who will be notified if it differs from the actor.
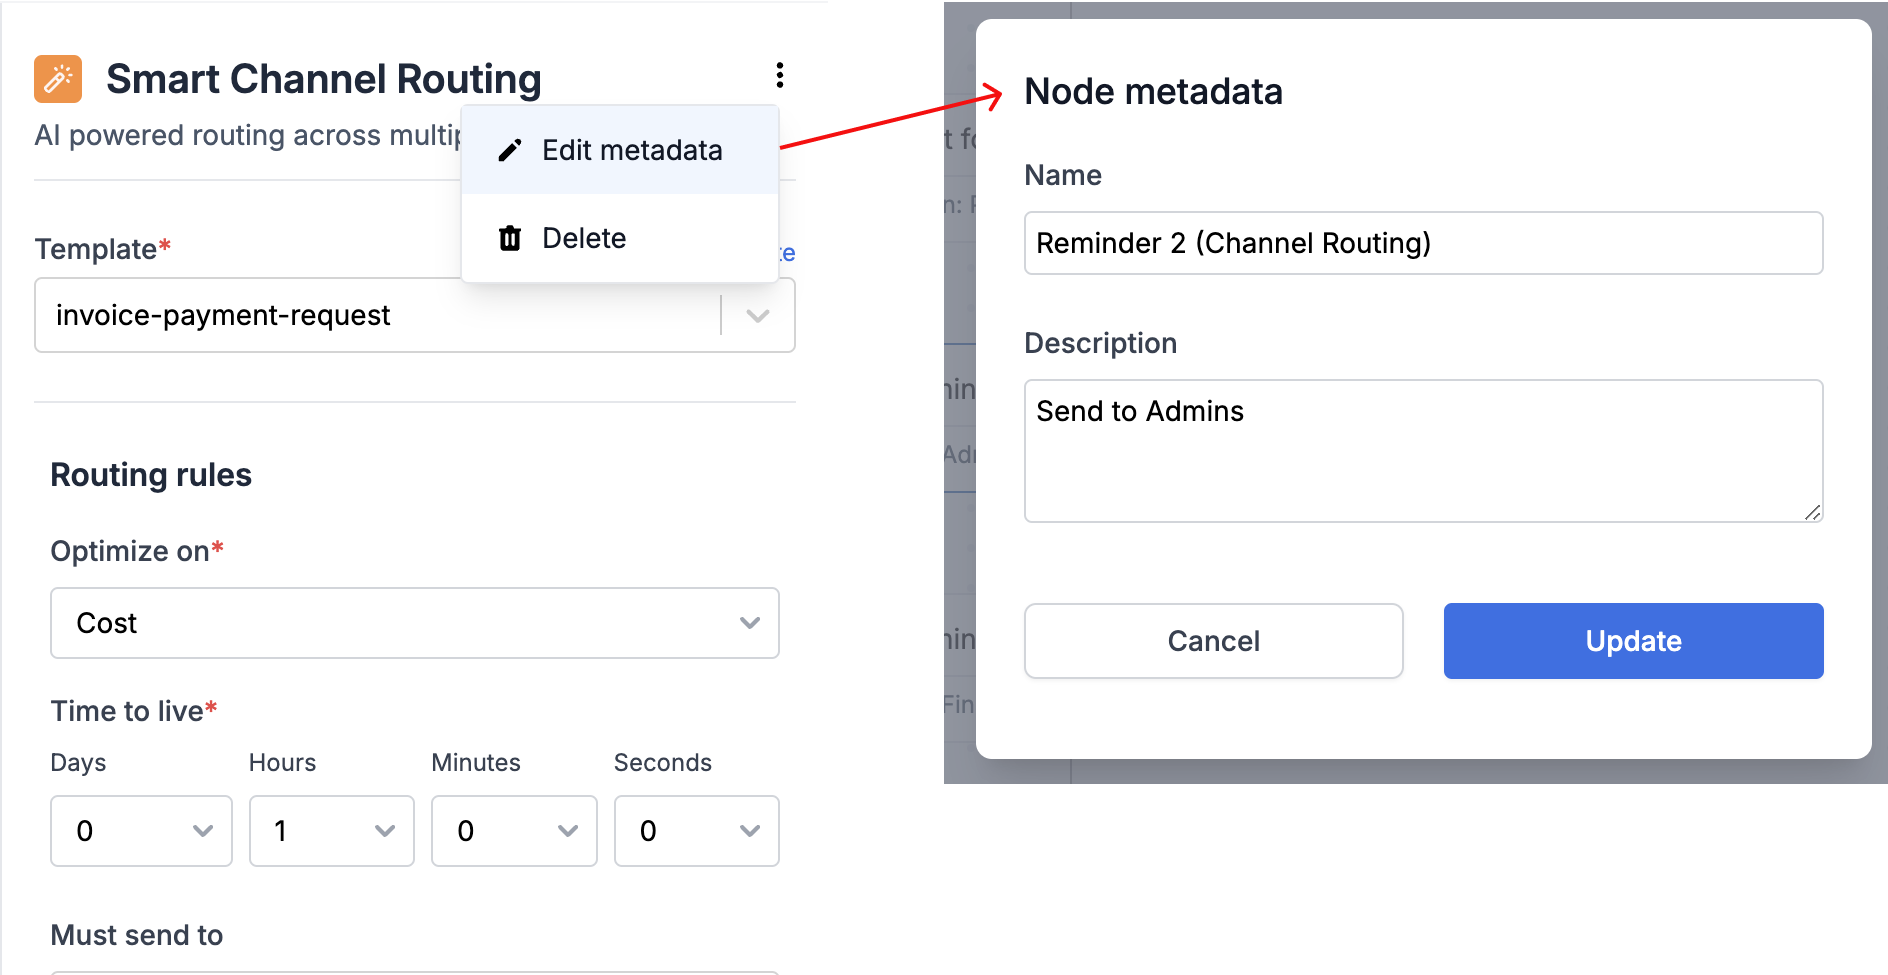
Delete Node
If you want to remove a node from the workflow, click on thedelete option from the burger menu on your node form to delete it.
Cloning a workflow
We recommend designing and testing workflows in staging workspace first before pushing it to production. You can use clone functionality to duplicate workflows across workspaces or to avoid creating similar workflows from scratch. To clone a workflow, just click the clone button on workflow details page in view mode. Please note that you won’t see this option while editing the workflow. Once cloned, your workflow will appear as a draft in your chosen destination. You can then commit it to make it live.
Disabling a workflow
You can disable a workflow from the workflow details page to stop it from accepting new triggers without deleting its design or history. Disabling is reversible, you can re-enable the workflow at any time and it will resume accepting triggers immediately.Disabling only blocks new triggers, in-flight runs continue to completion.Any workflow runs that were already in progress when you disabled the workflow (e.g., waiting on a delay, batch, digest, or wait until node) will continue executing through their remaining steps and deliver as designed. Only new triggers received after the workflow is disabled are blocked.