
Keystone
GitHub code repository
@suprsend/node-sdk, @suprsend/react, @suprsend/react-editor.
What the app does
Companies use Keystone to run their projects. Each project has people on it, each in a role, and what you can see and change depends on that role. Use Viewing as in the top bar to switch between people.How Keystone maps to SuprSend
One SuprSend account holds the whole product. Each customer is a workspace of its own, with its own keys, people, templates, workflows and delivery logs. Inside a workspace, each project is two records with the same ID: a tenant, which carries the project’s notification settings, and an object, which carries its team. A person is a user subscribed to that object with arole, so one person can hold a different role on each project. Notifying the object reaches everyone on the project, and each workflow’s conditions decide who actually receives it.
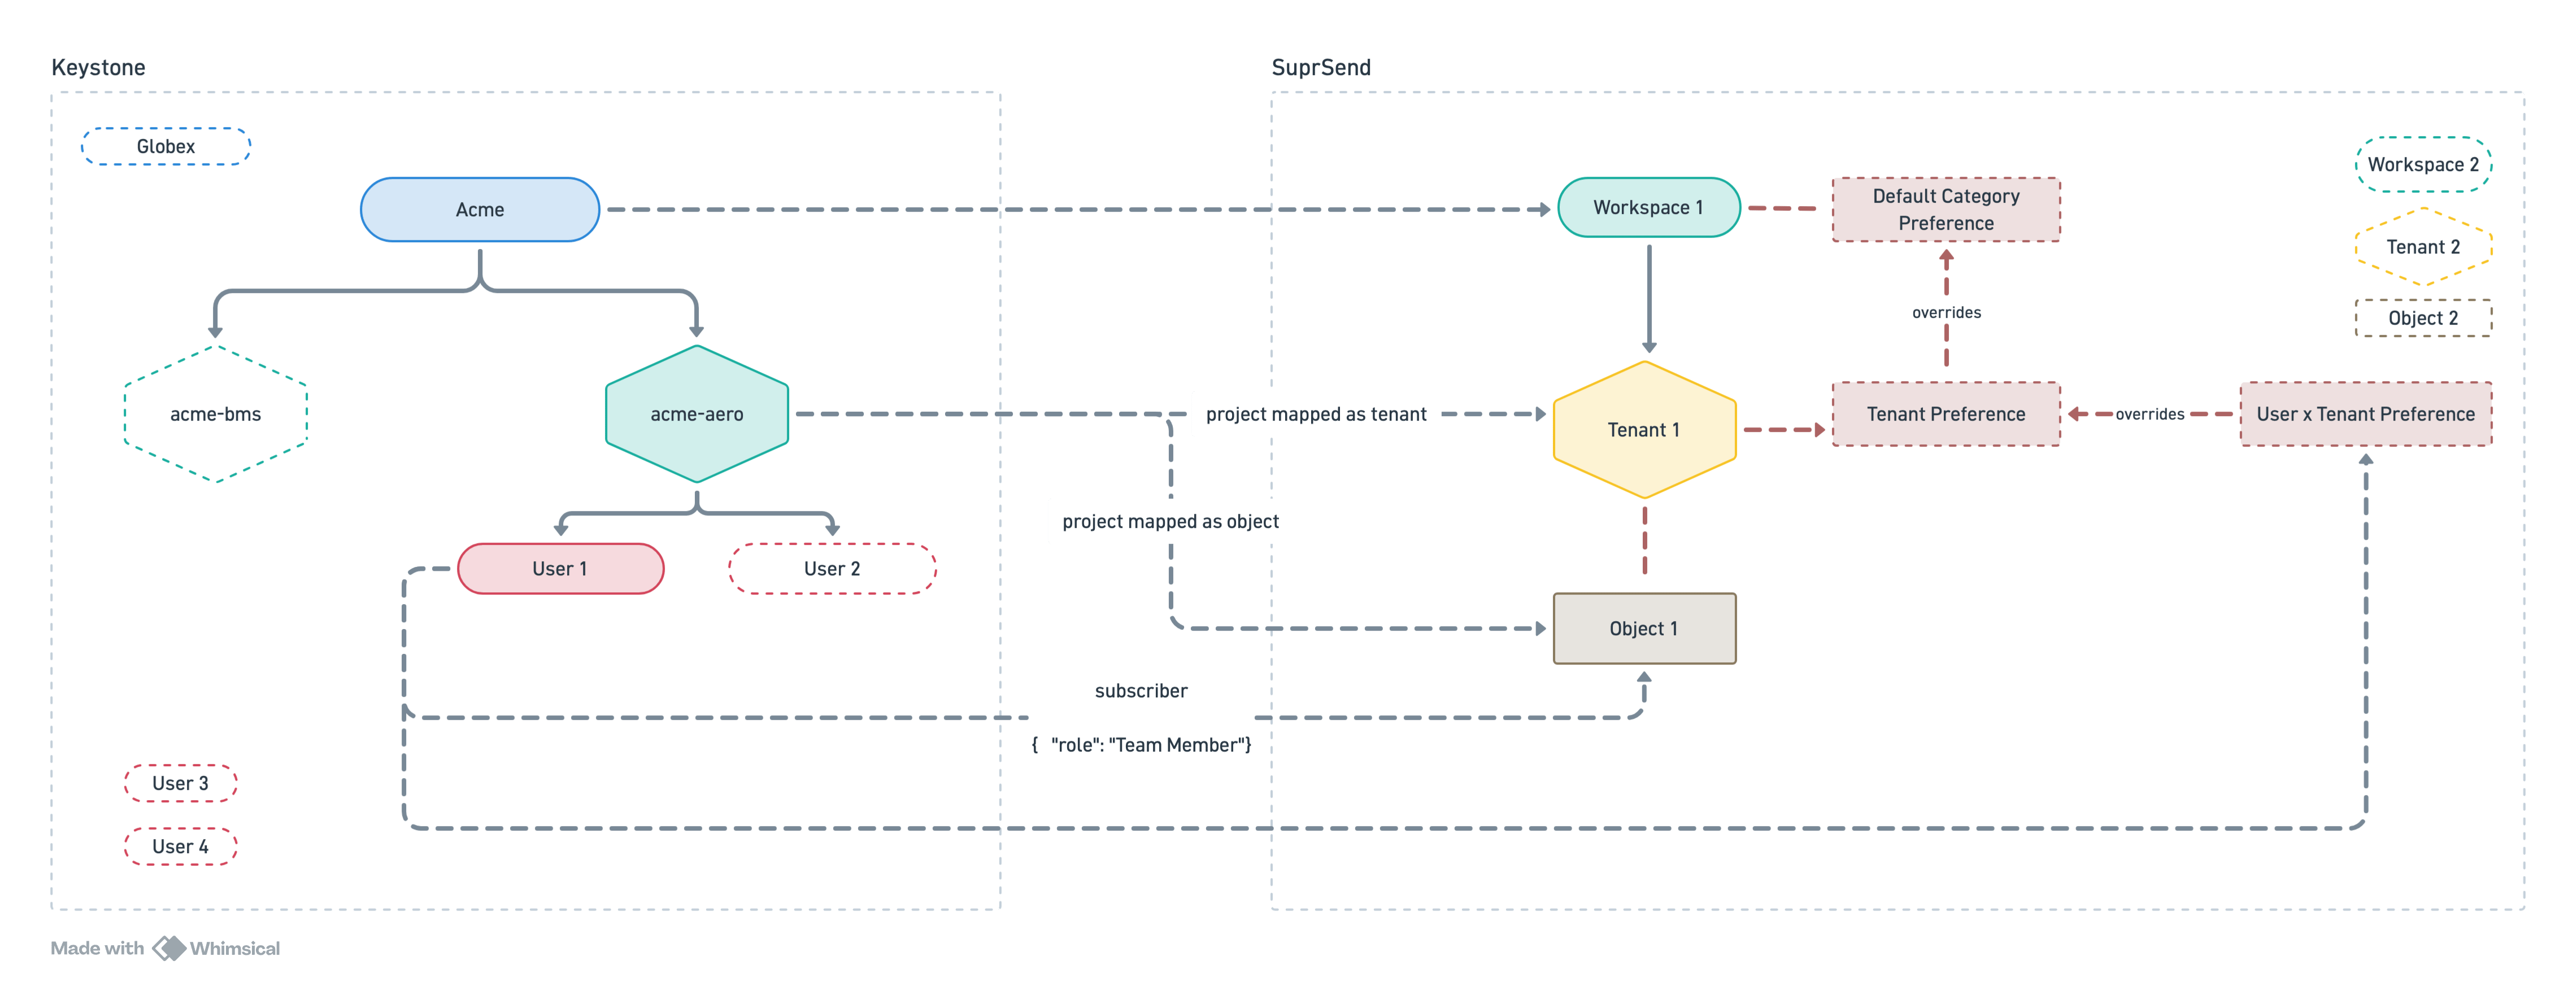
App structure
The repository is organised like this:Run it locally
Prerequisites: Node.js 20.9+ and a SuprSend account. Sign up free at app.suprsend.com.Install
Create the workspaces
SUPRSEND_SERVICE_TOKEN..env.local.Paste the remaining keys
<WS> is ACME or GLOBEX.Use the ready-made notifications
suprsend/. Push them and both workspaces have something to send from the first minute. Preview first, then push:Run
Add your starting data
Next, add the people and projects the app works with. Both are stored in SuprSend, and the app reads them from there.Add people in SuprSend
u_dana_carter, an email, and a name property such as Dana Carter.The name property is what the app shows, so set it for everyone.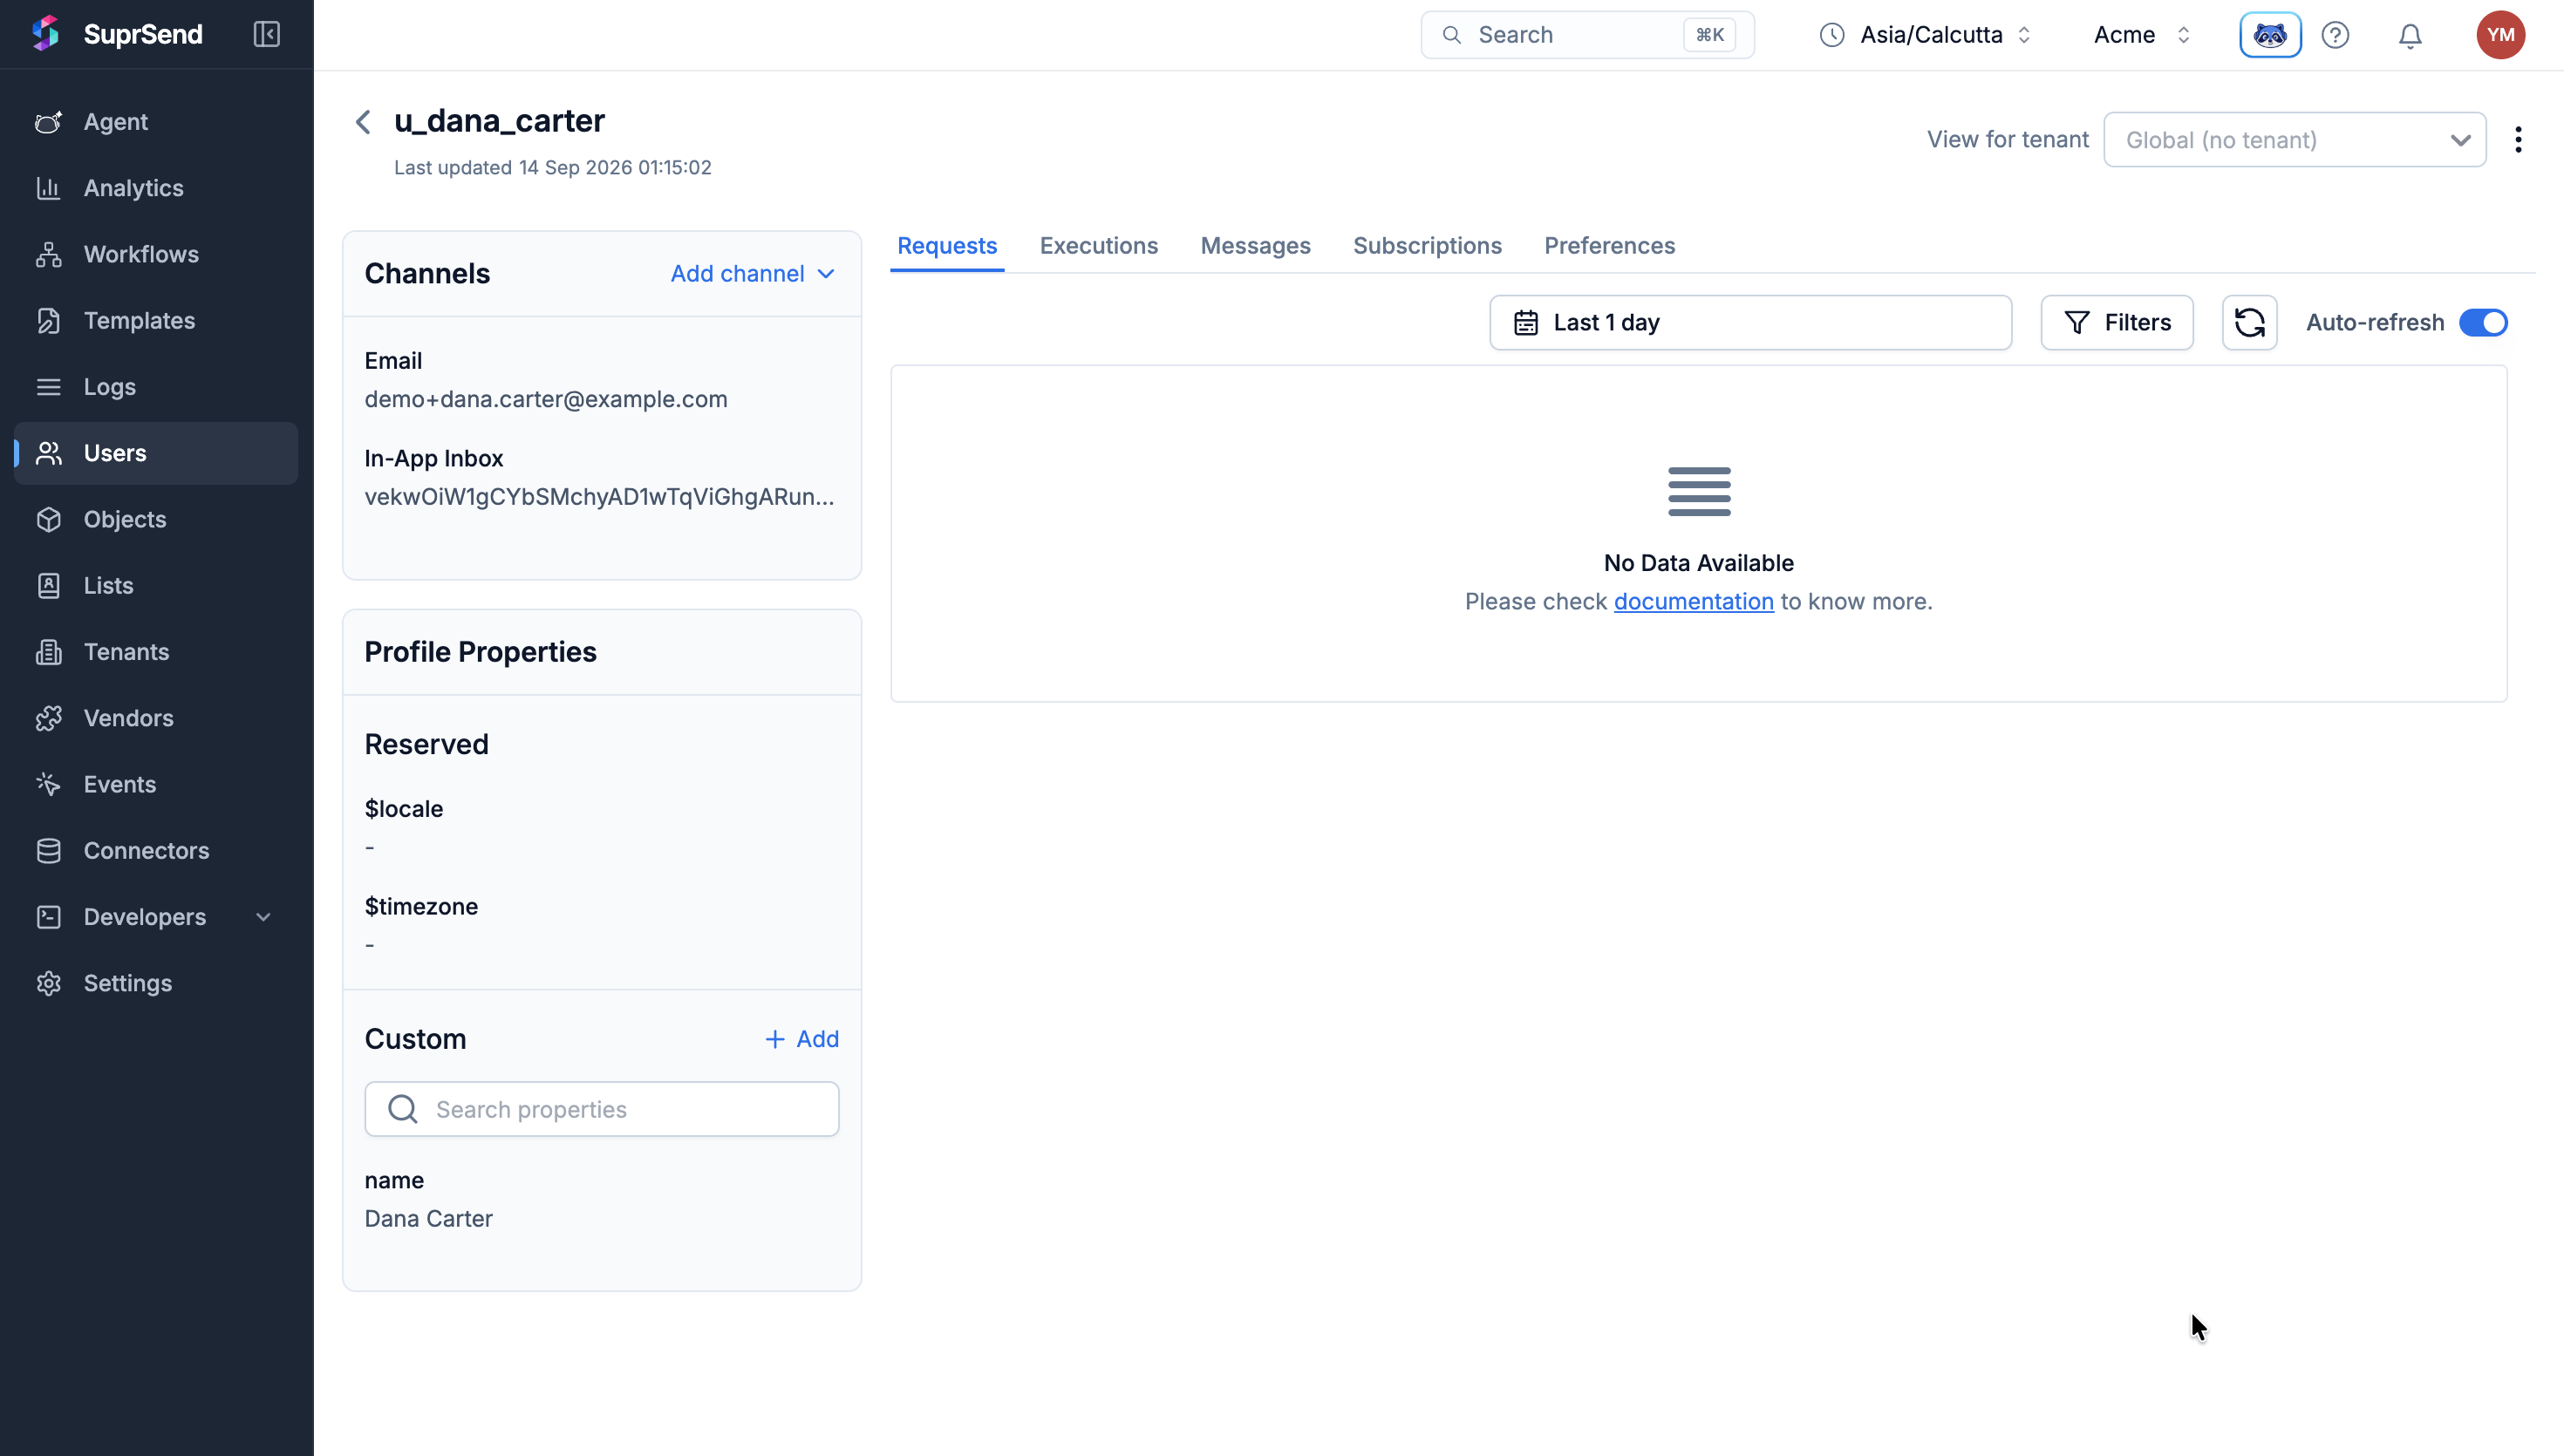
A person in the SuprSend dashboard, with an email and a name property
Set the customer's brand
{{$brand.*}}, so emails carry the customer’s own name and colours. A new project copies the brand as it is created.The brand is stored on the workspace’s default tenant, which you can also see in the dashboard under Tenants.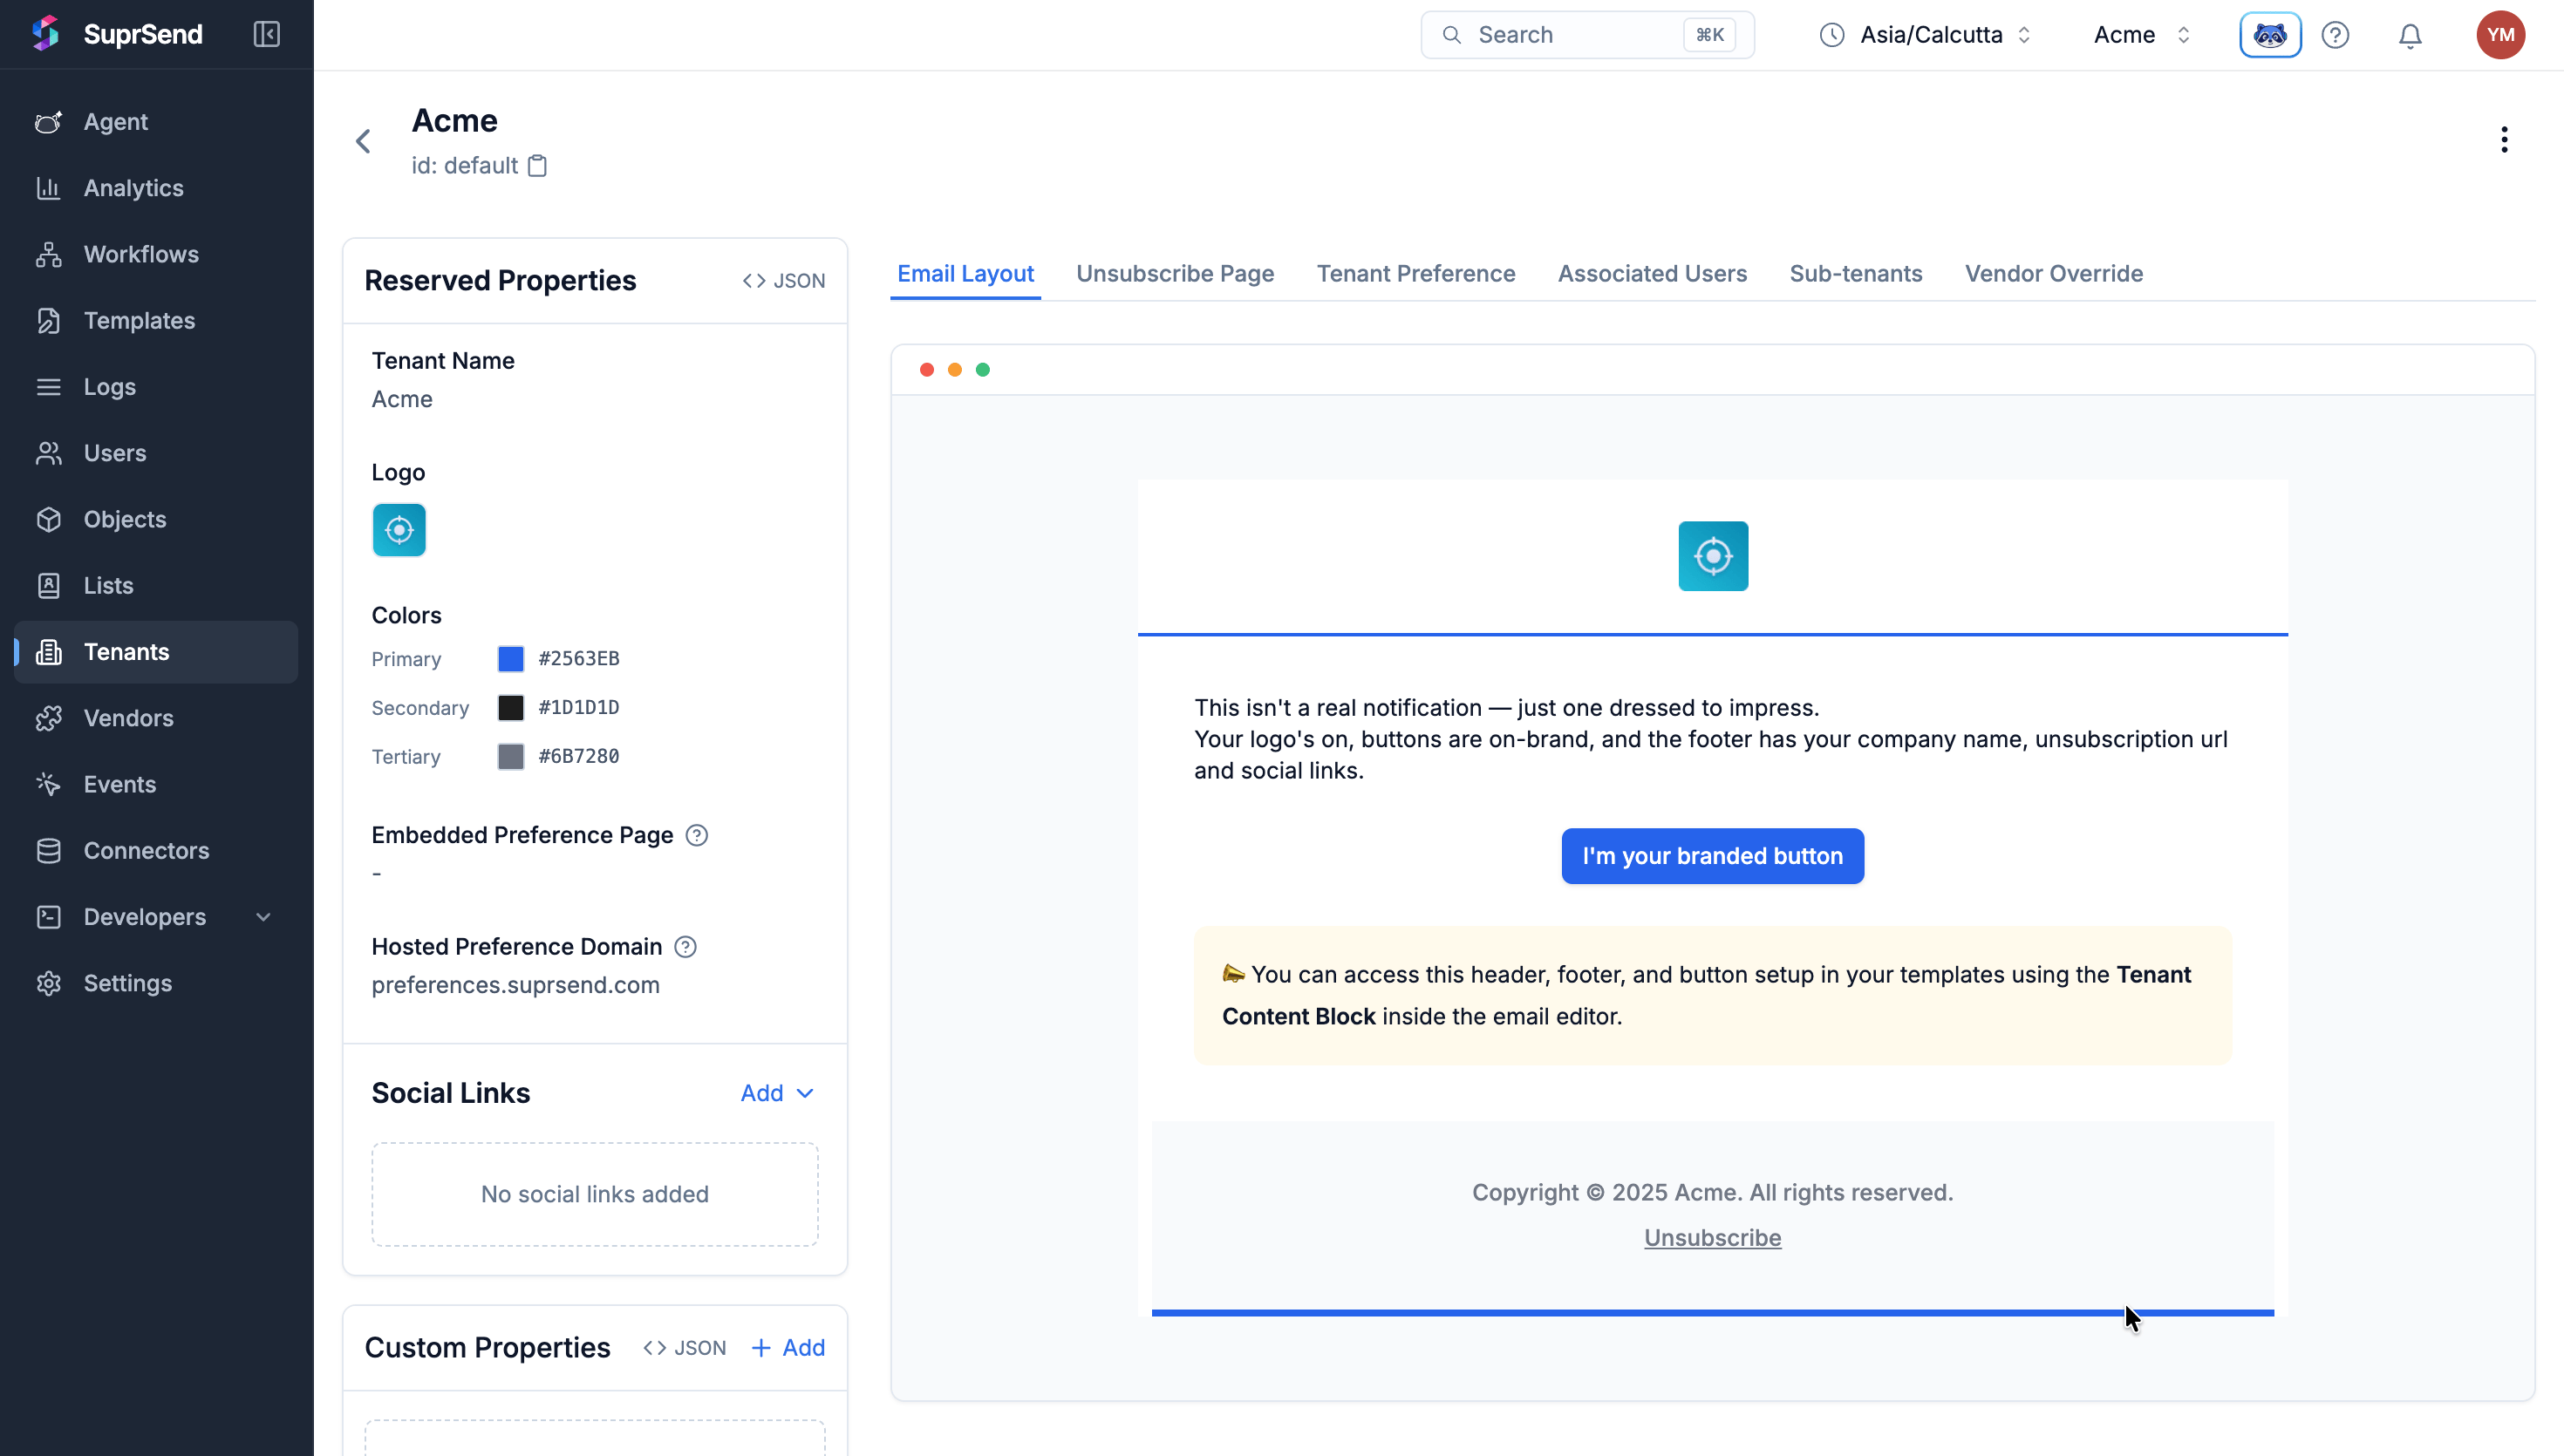
Acme's brand on its default tenant in the SuprSend dashboard
Create a project
Check it works
- On the project page, change the state from In-flight to Paused.
- Open Viewing as and pick the Team Member. Open the bell: the notification is there.
- Switch Viewing as back to Admin and open Administer → Logs. The same send is listed with its status.
App navigation
Top bar
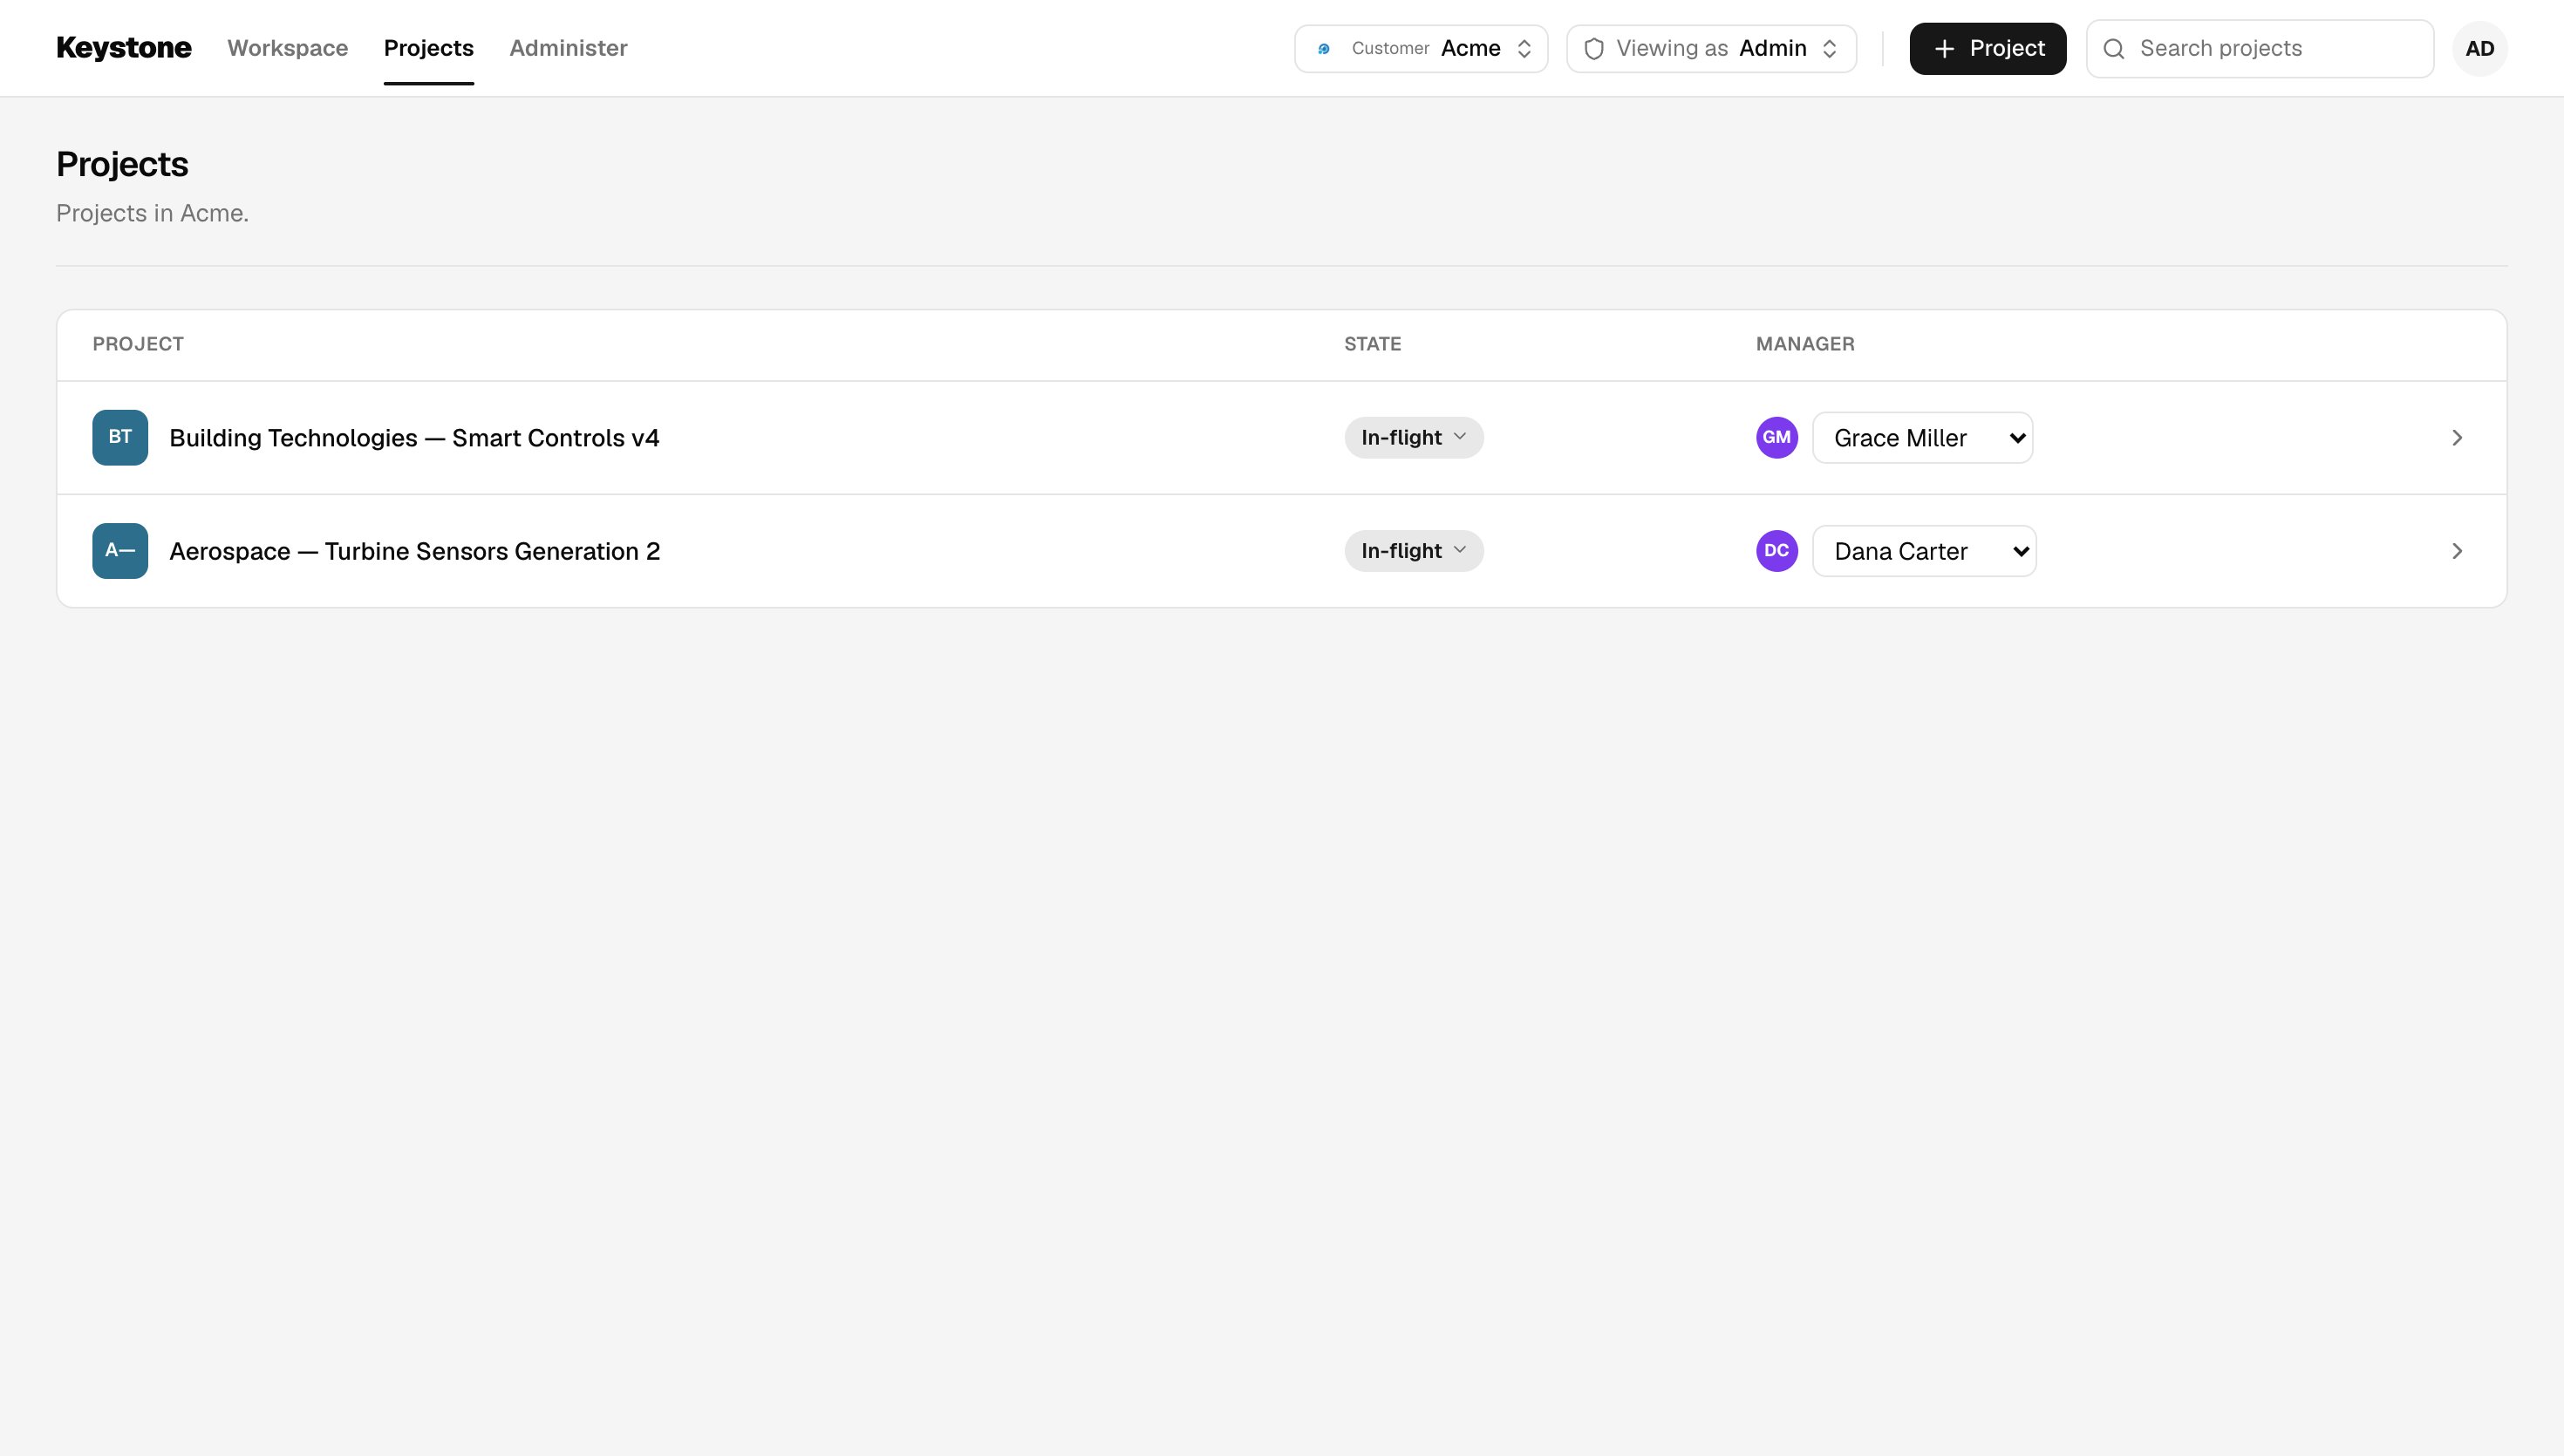
Project screens
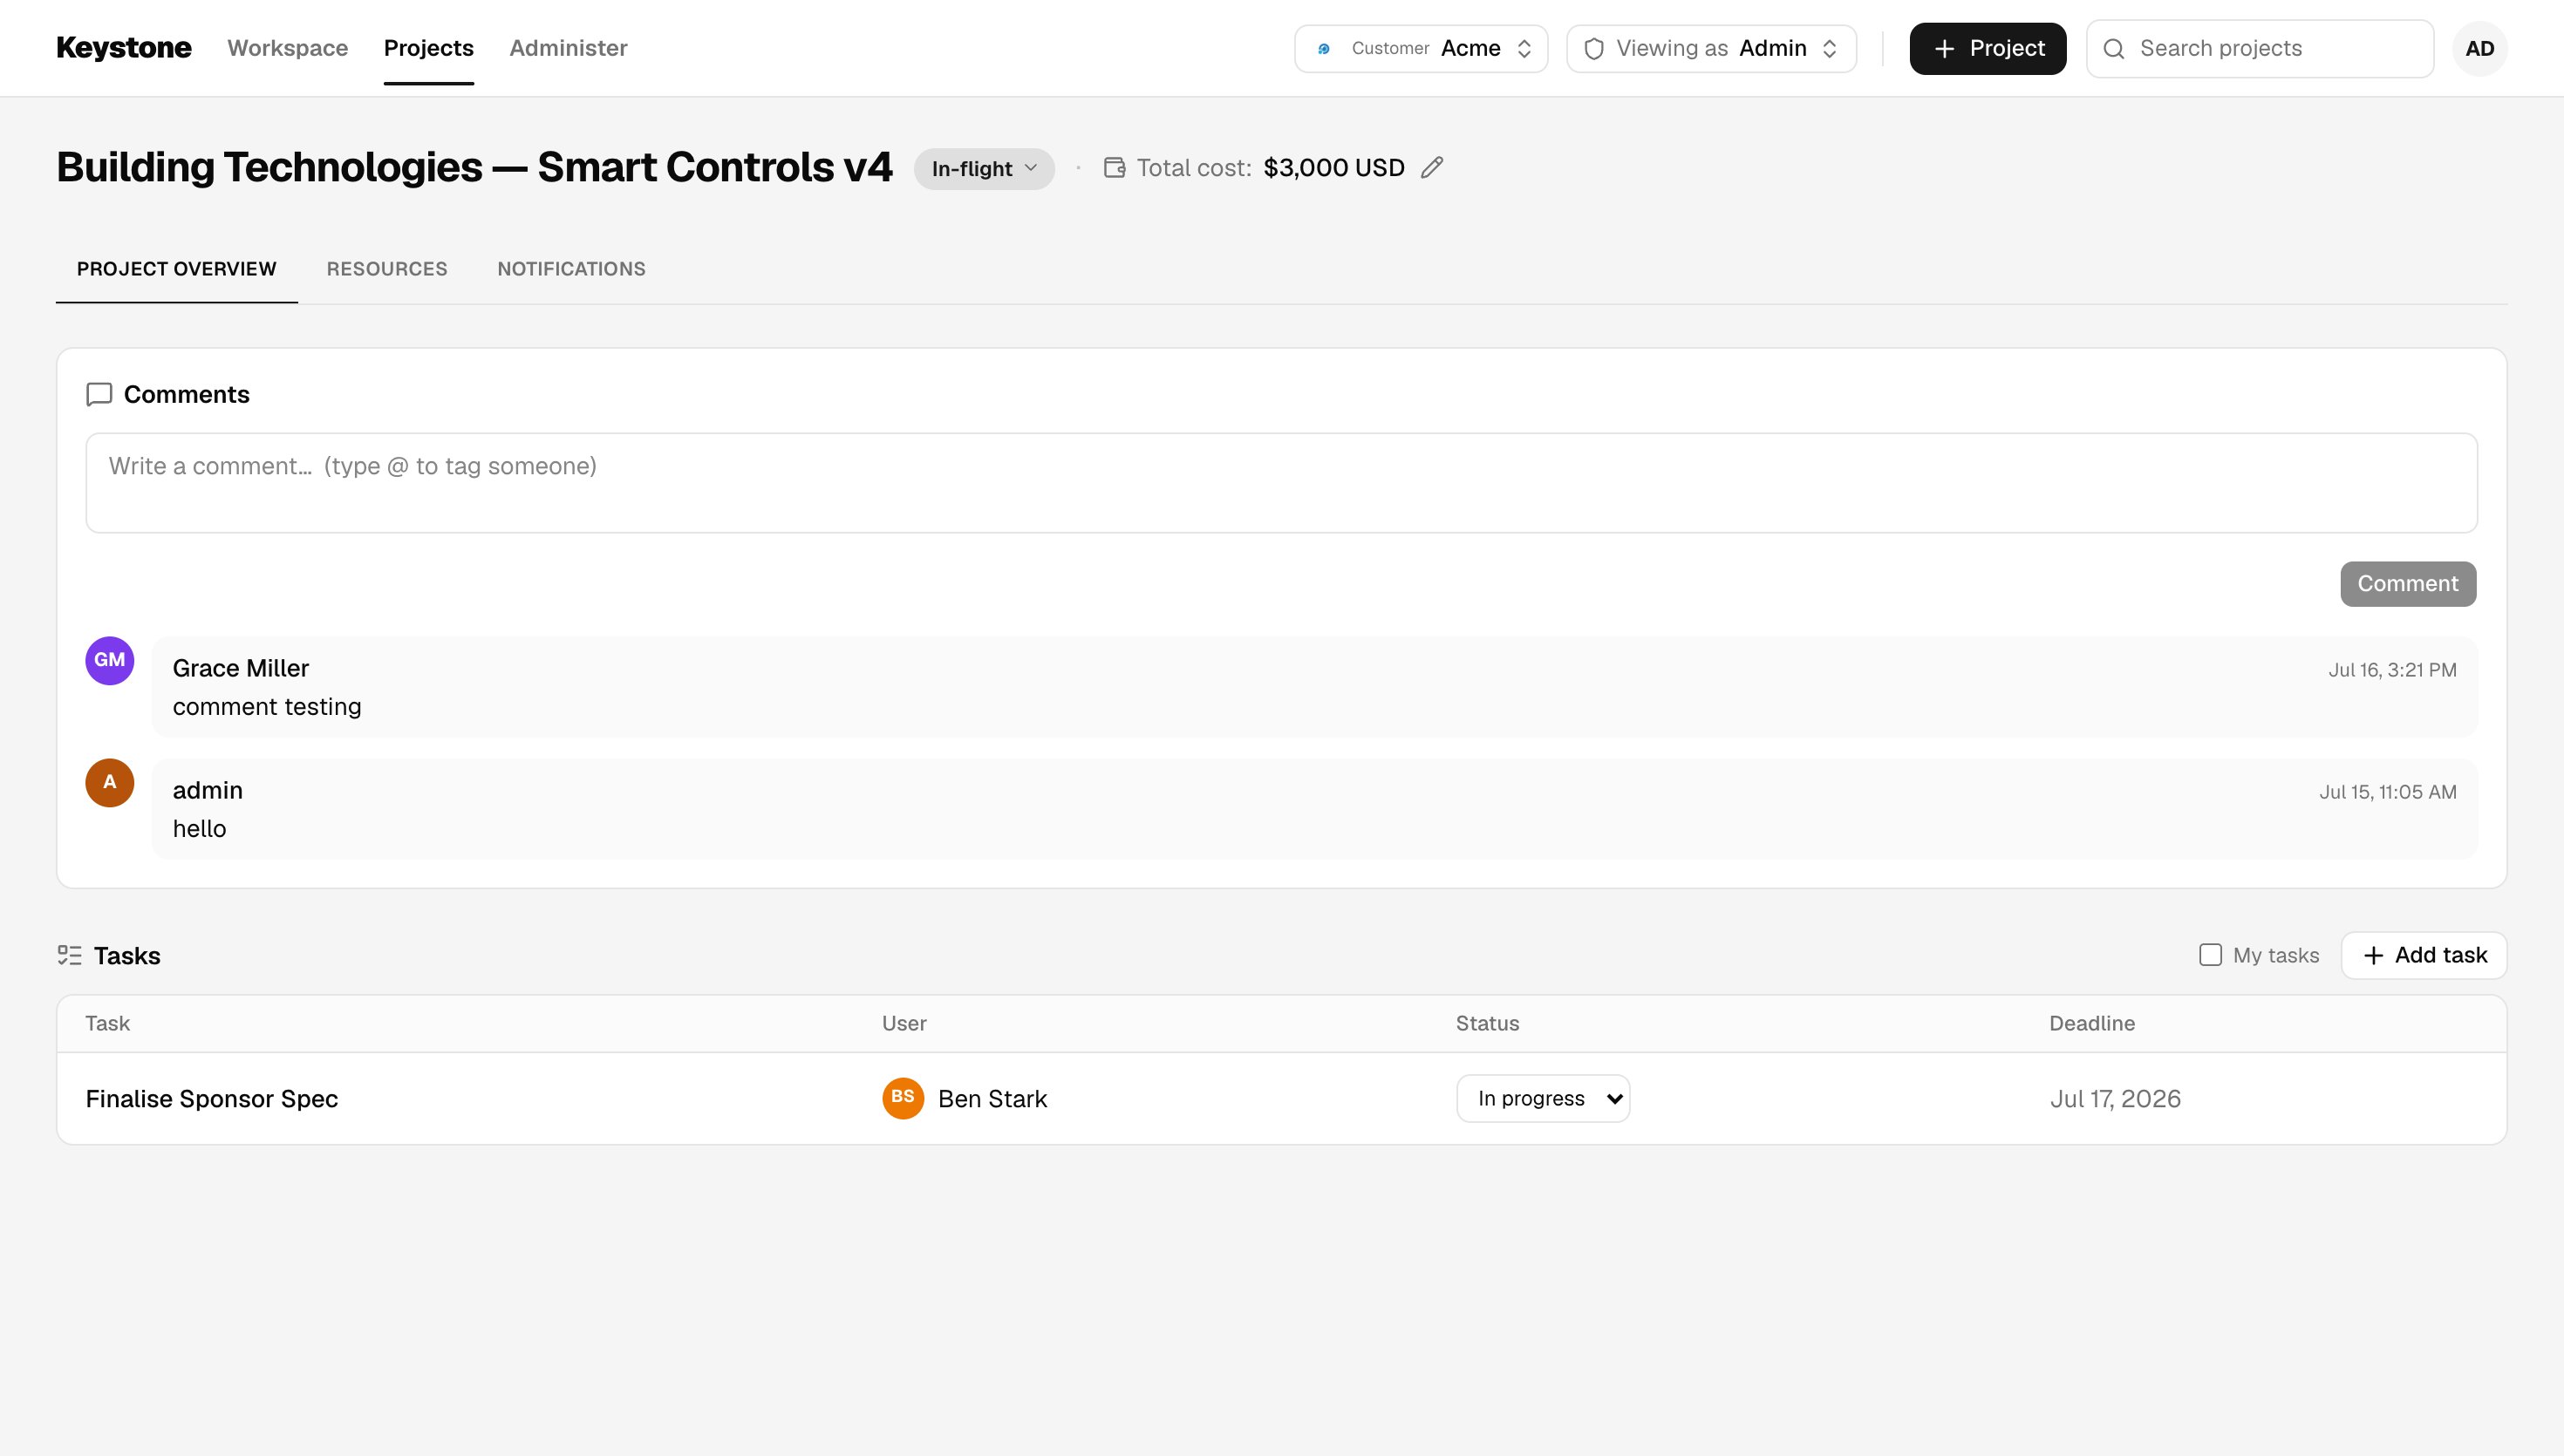
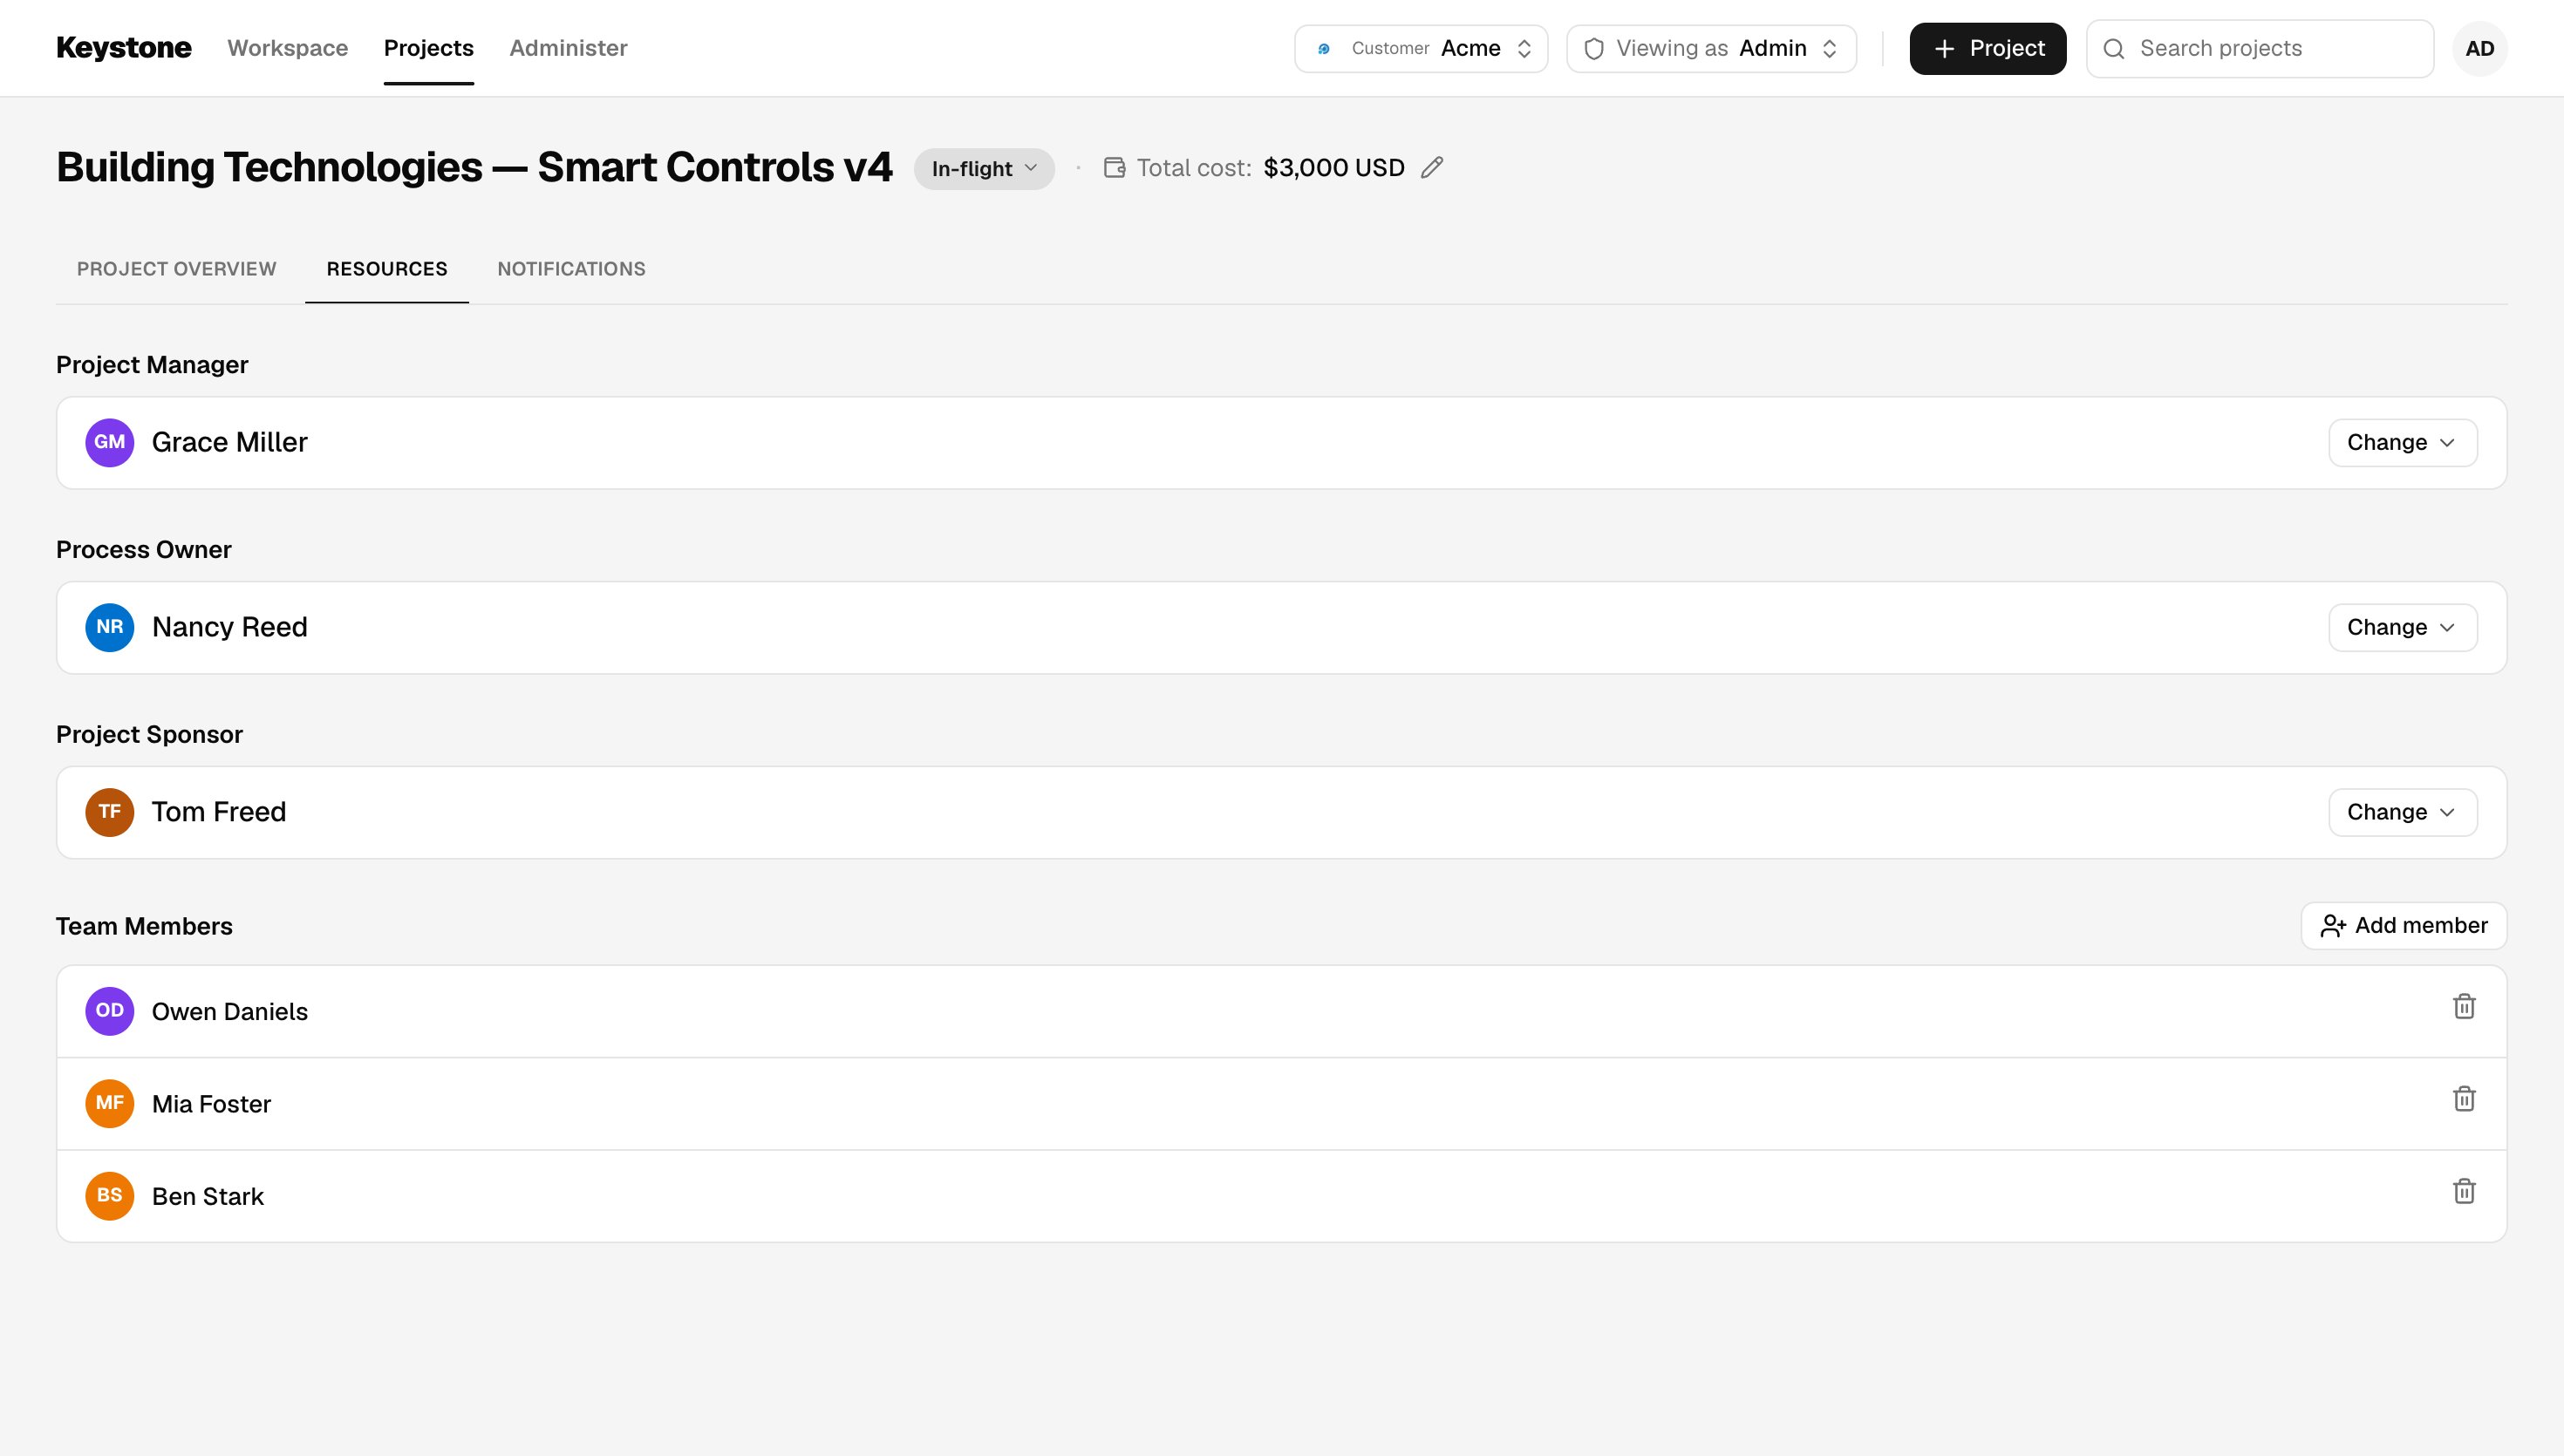
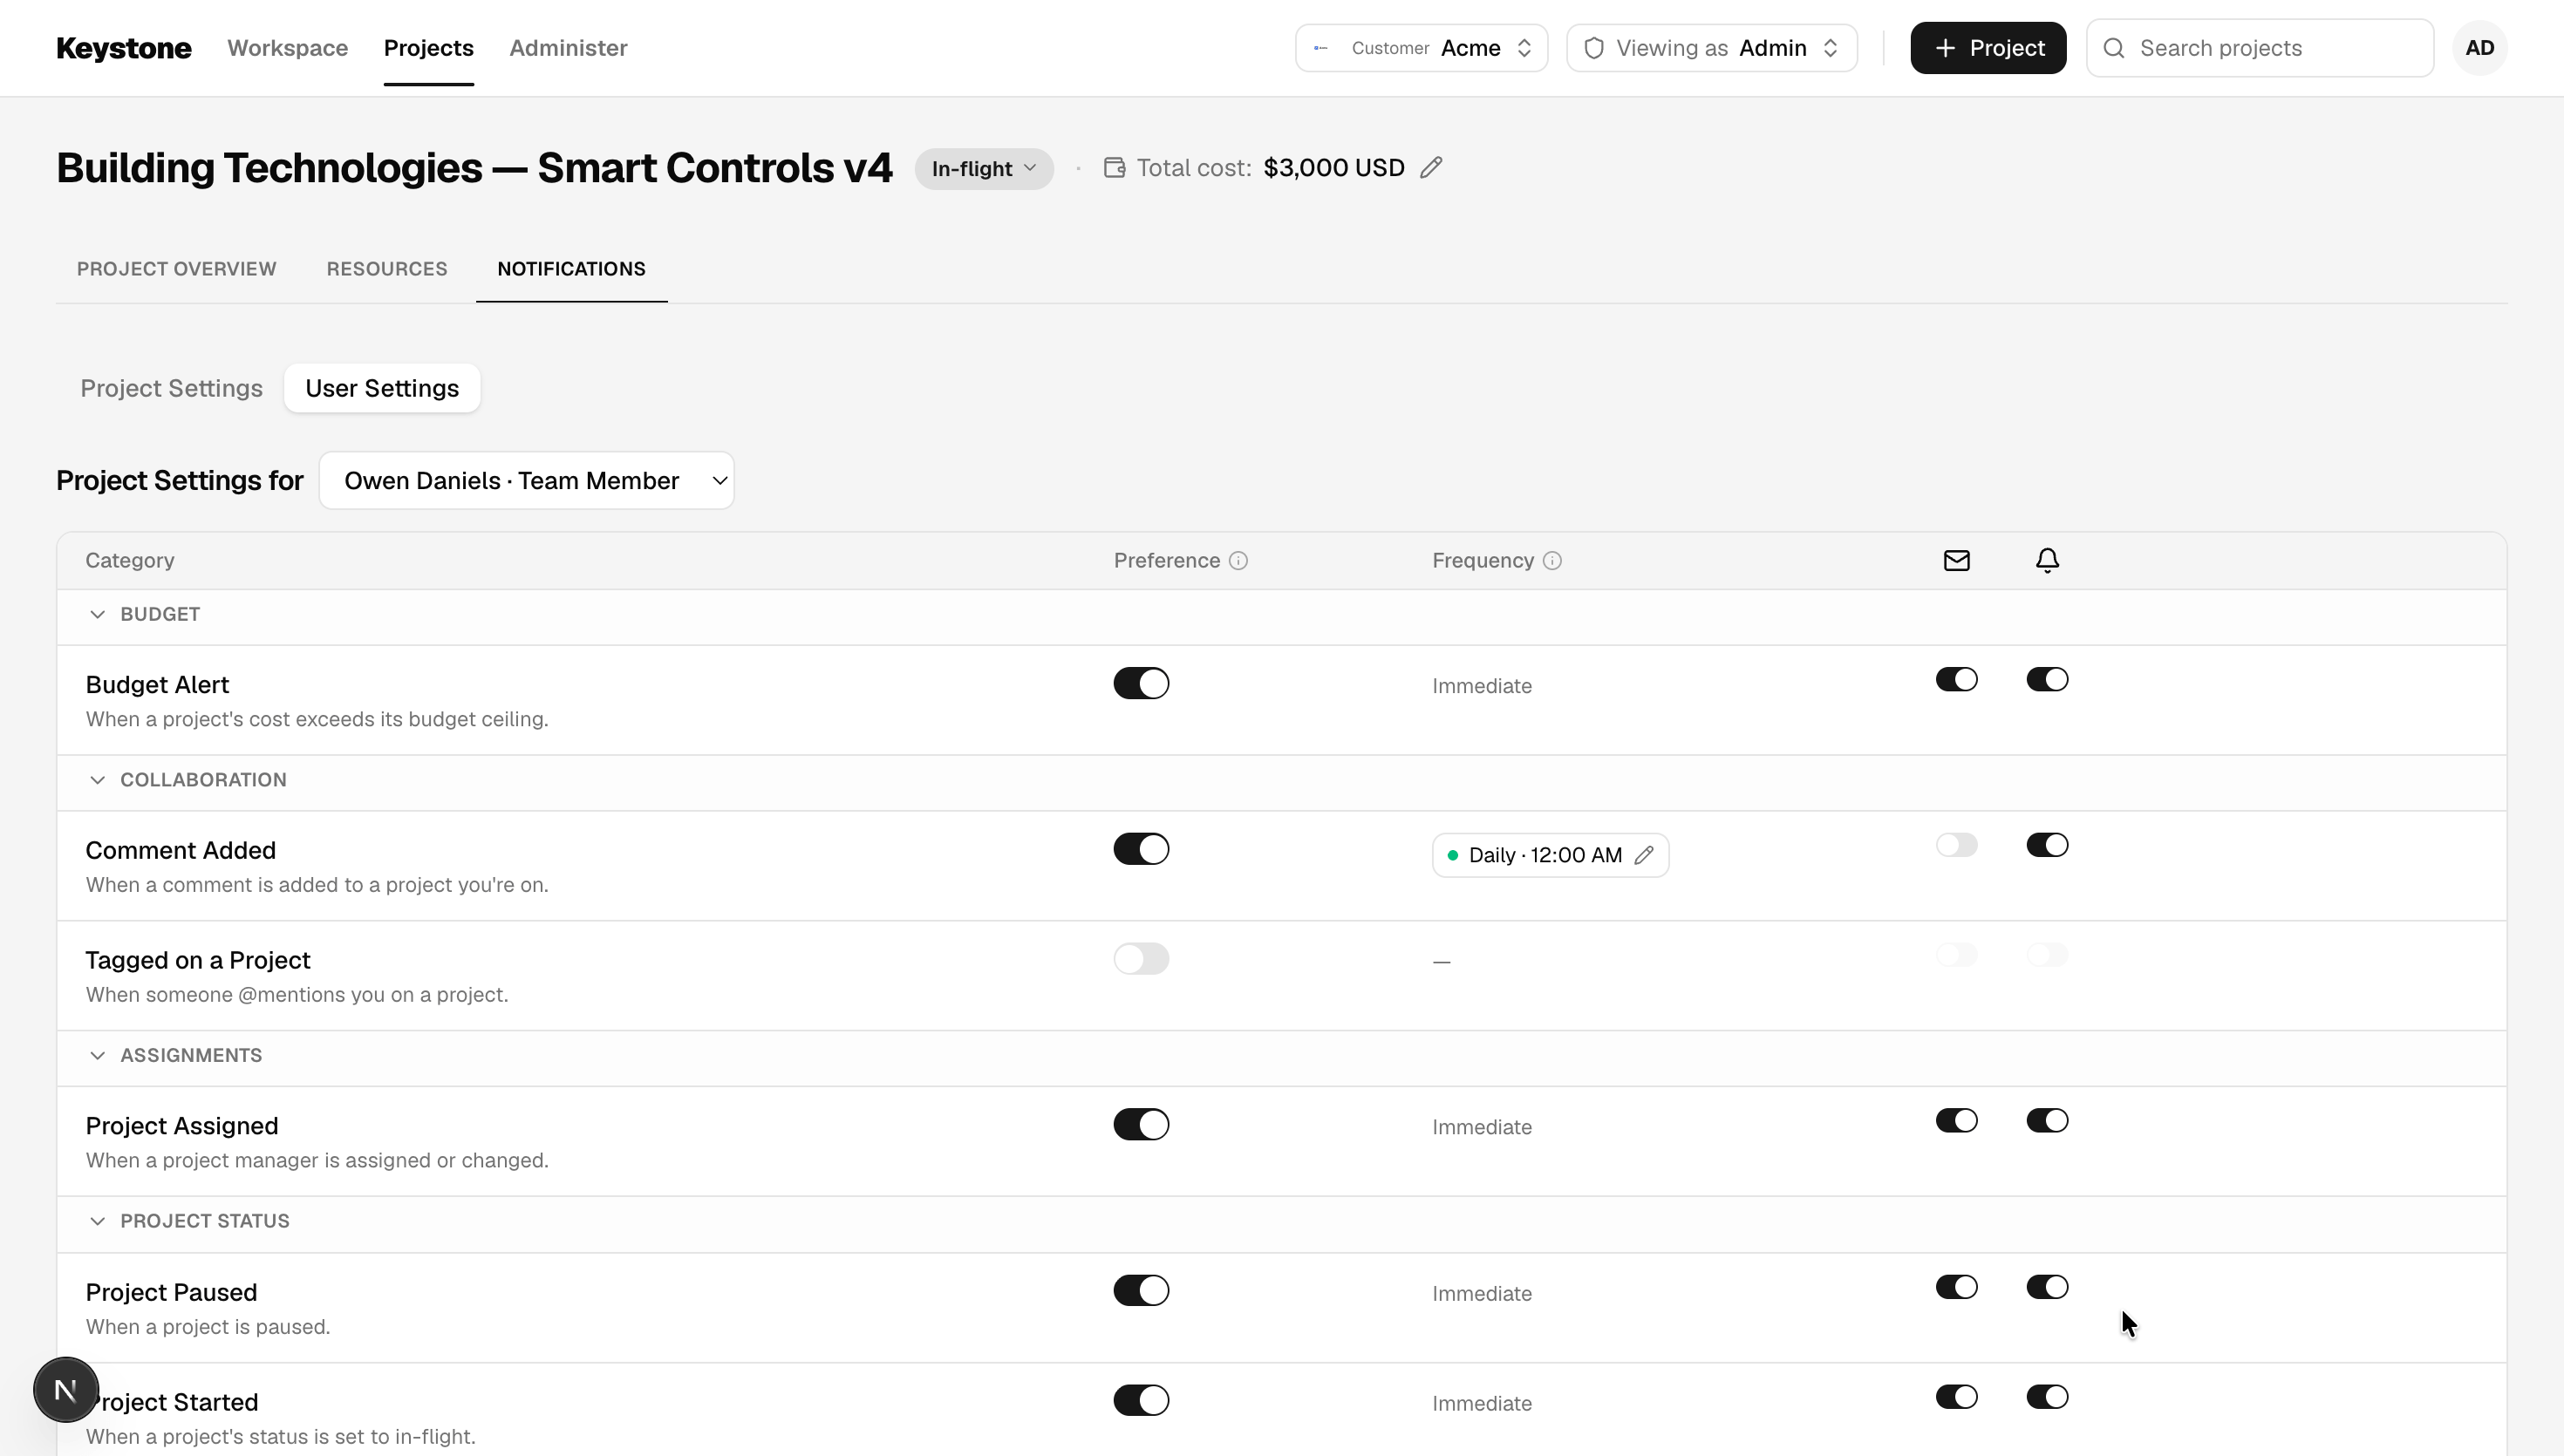
- Projects
- Project Overview
- Resources
- Notifications
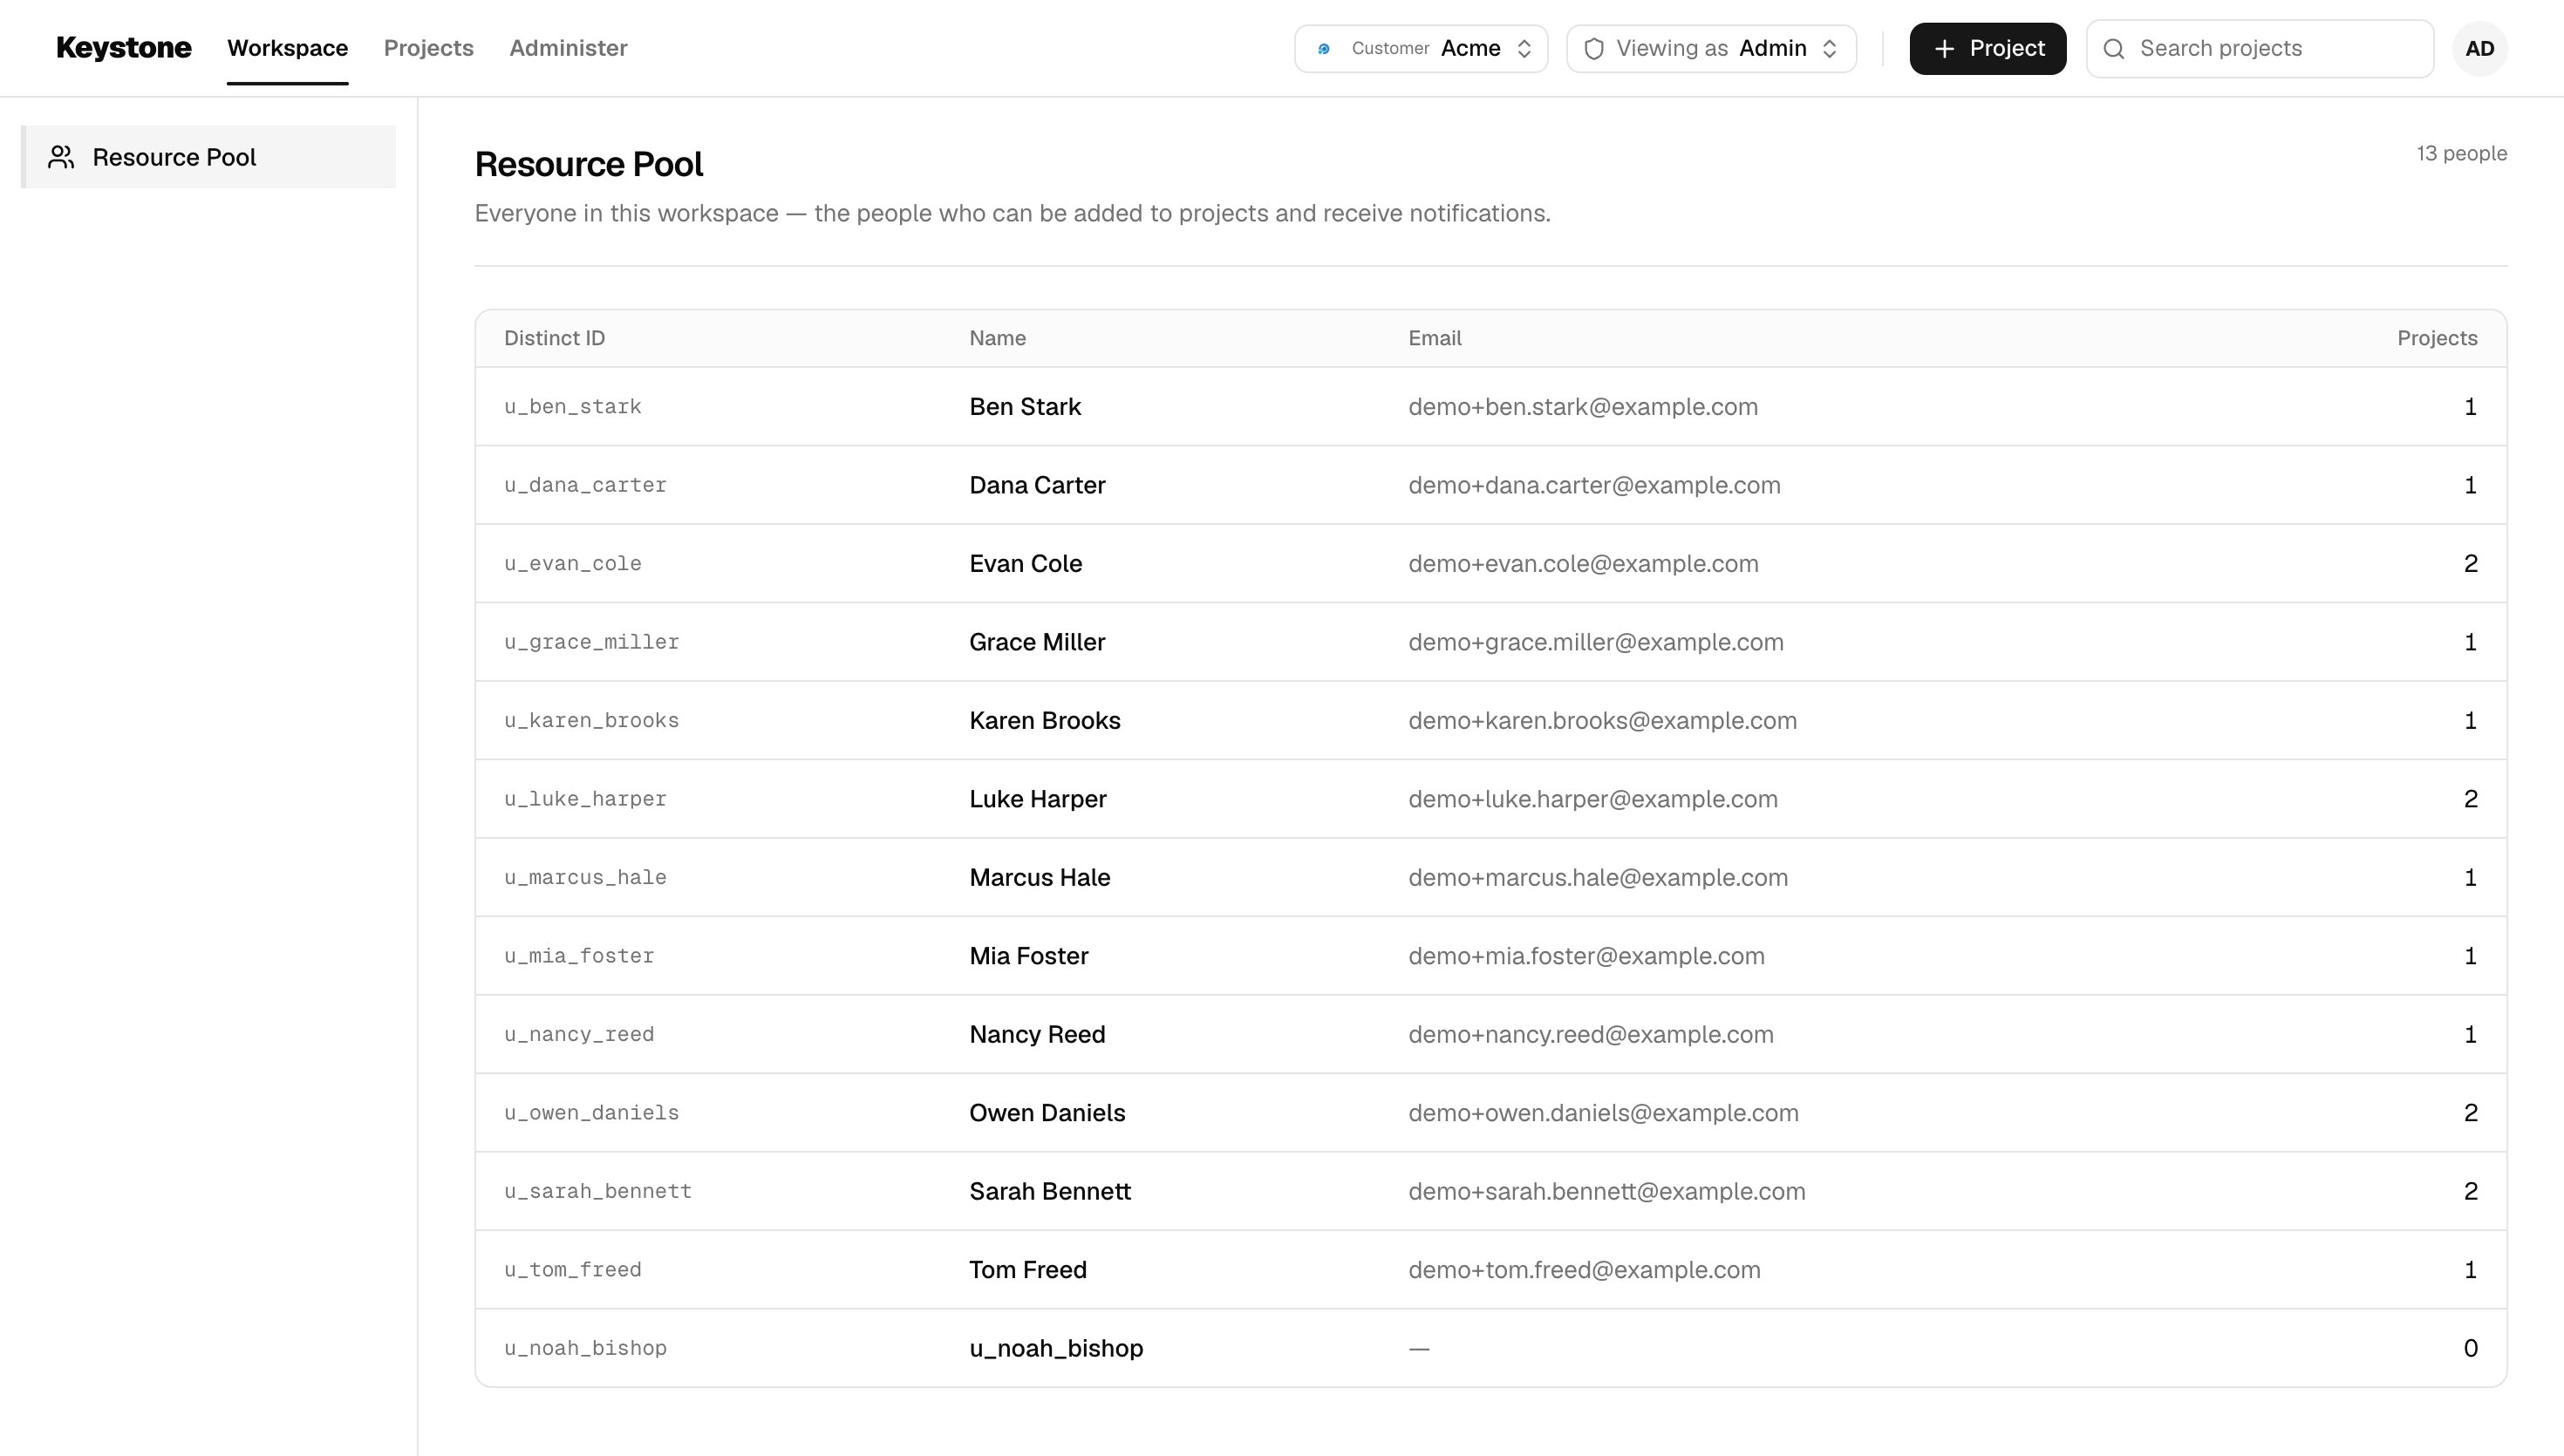
- Resource Pool
Administer screens
Admins see these screens.- Preferences
- Message Templates
- Template editor
- Brand
- Logs
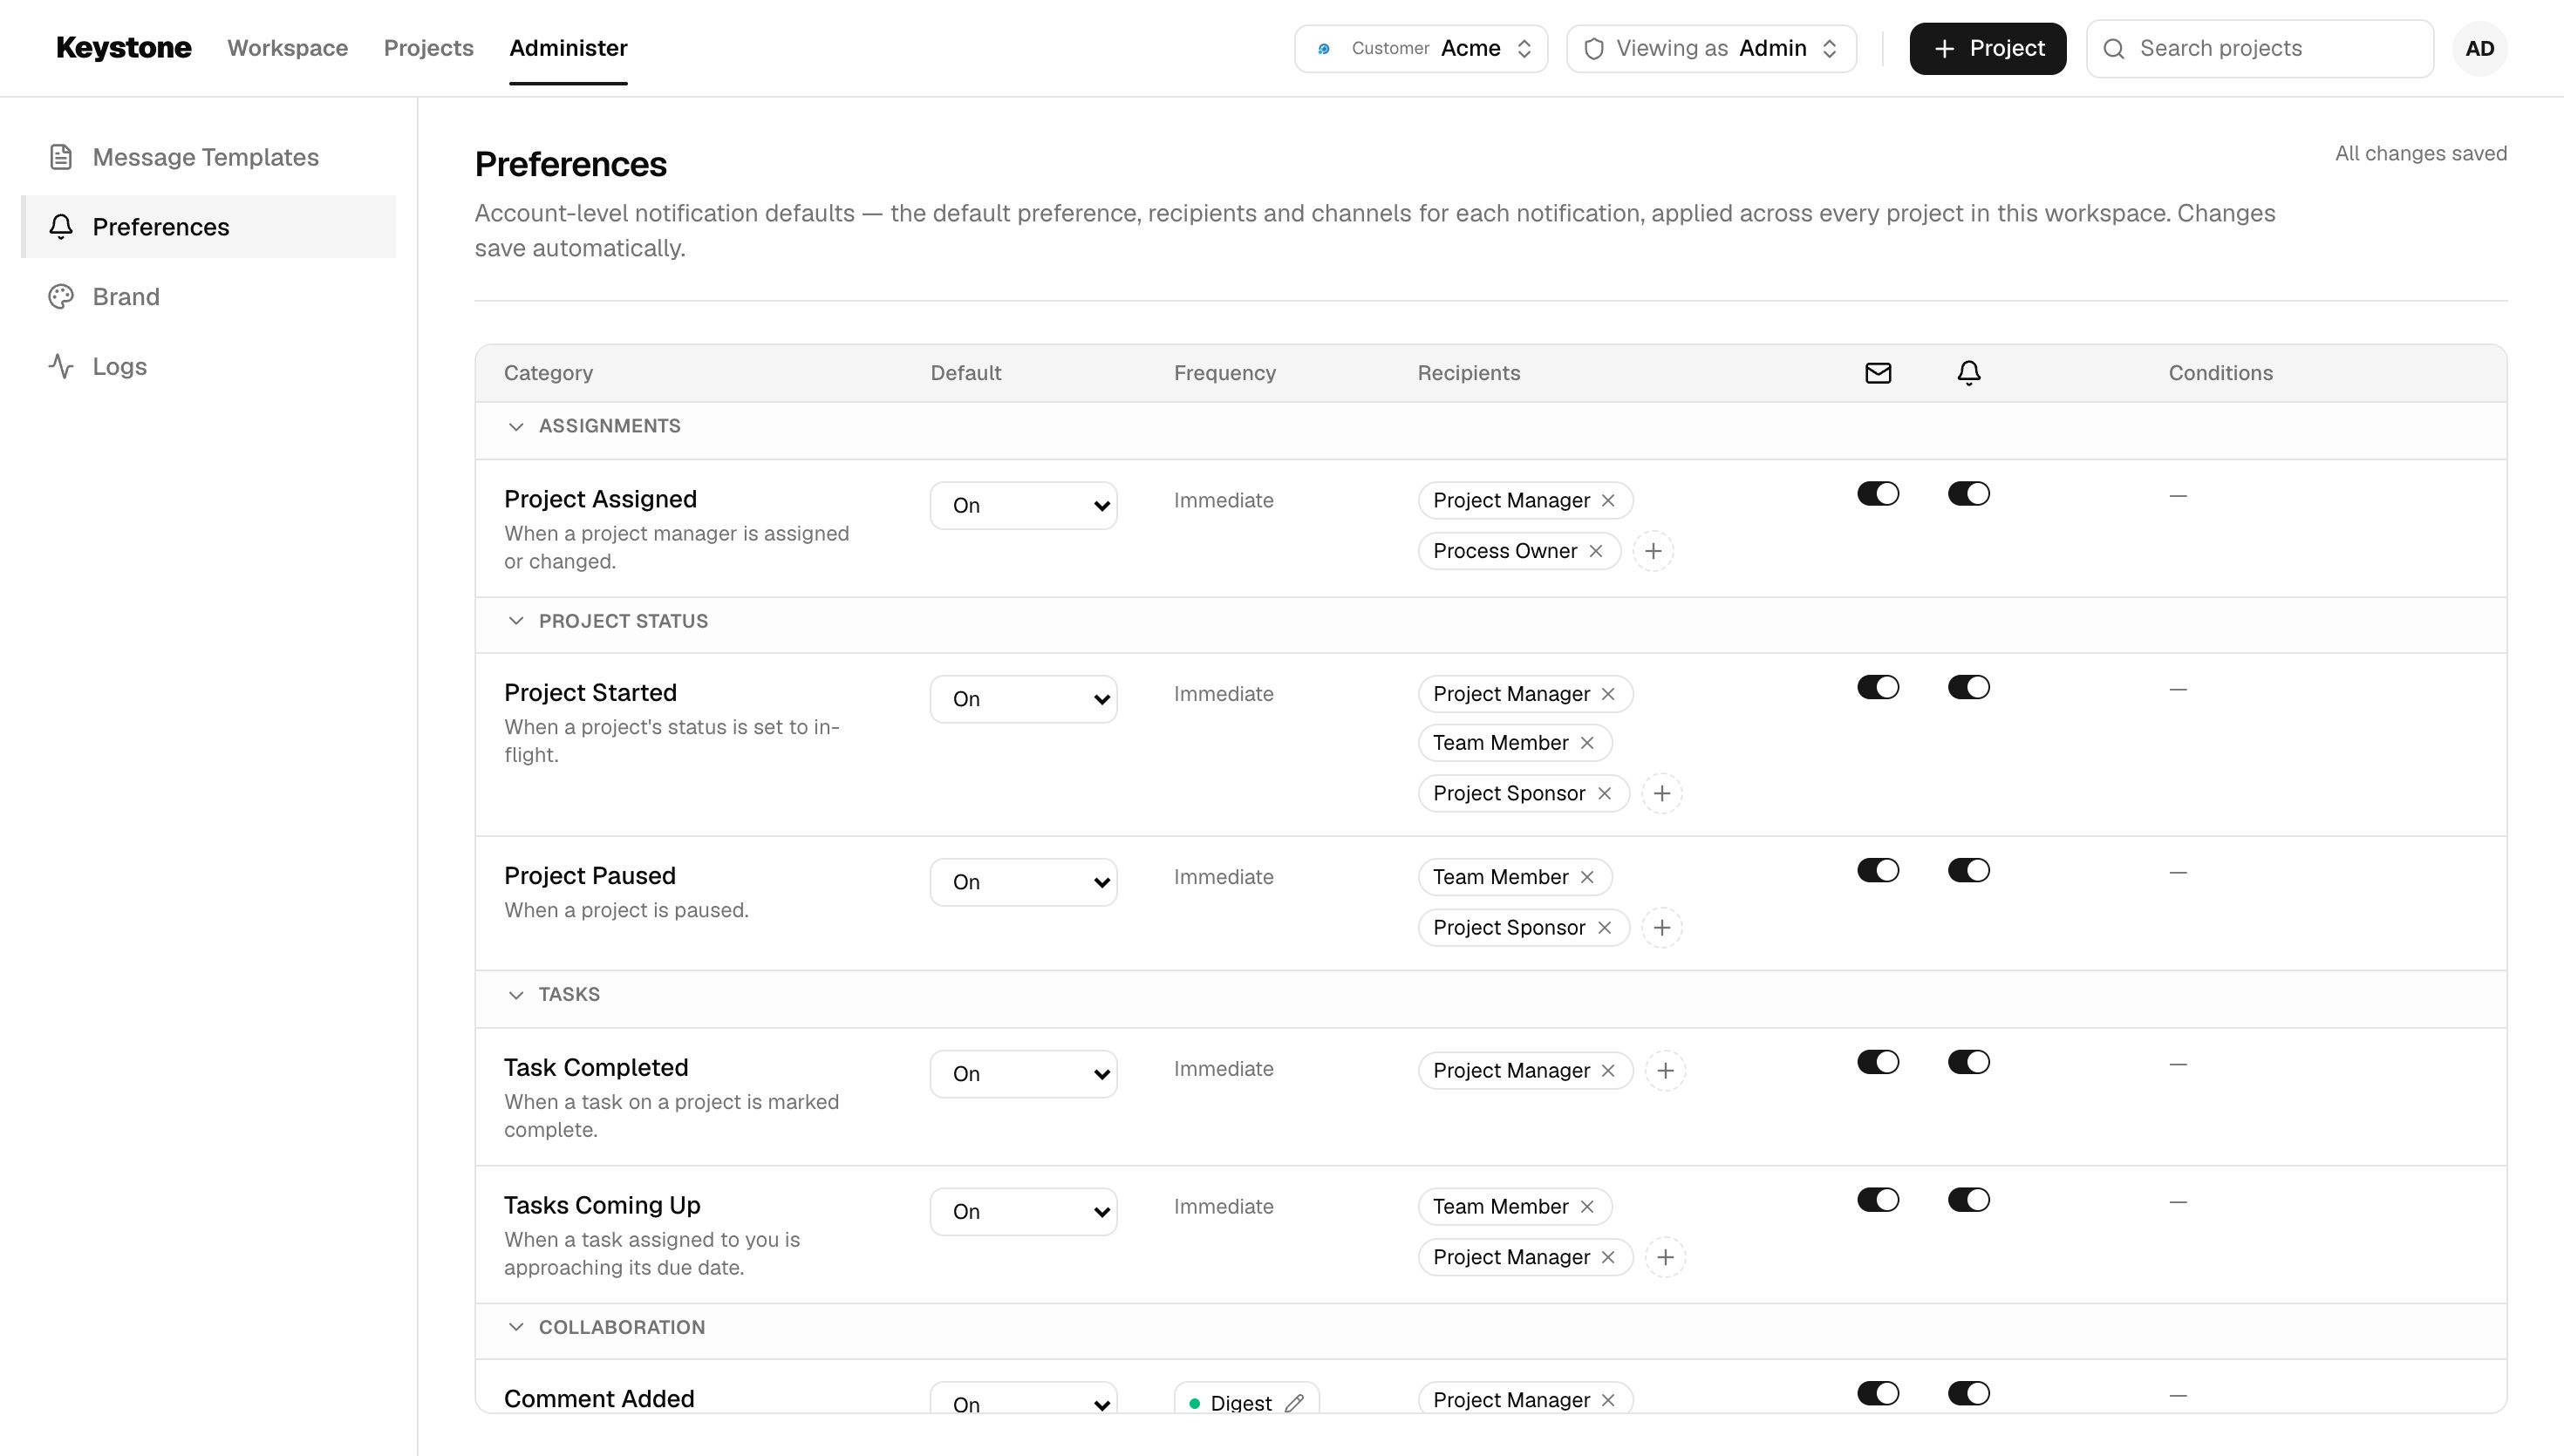
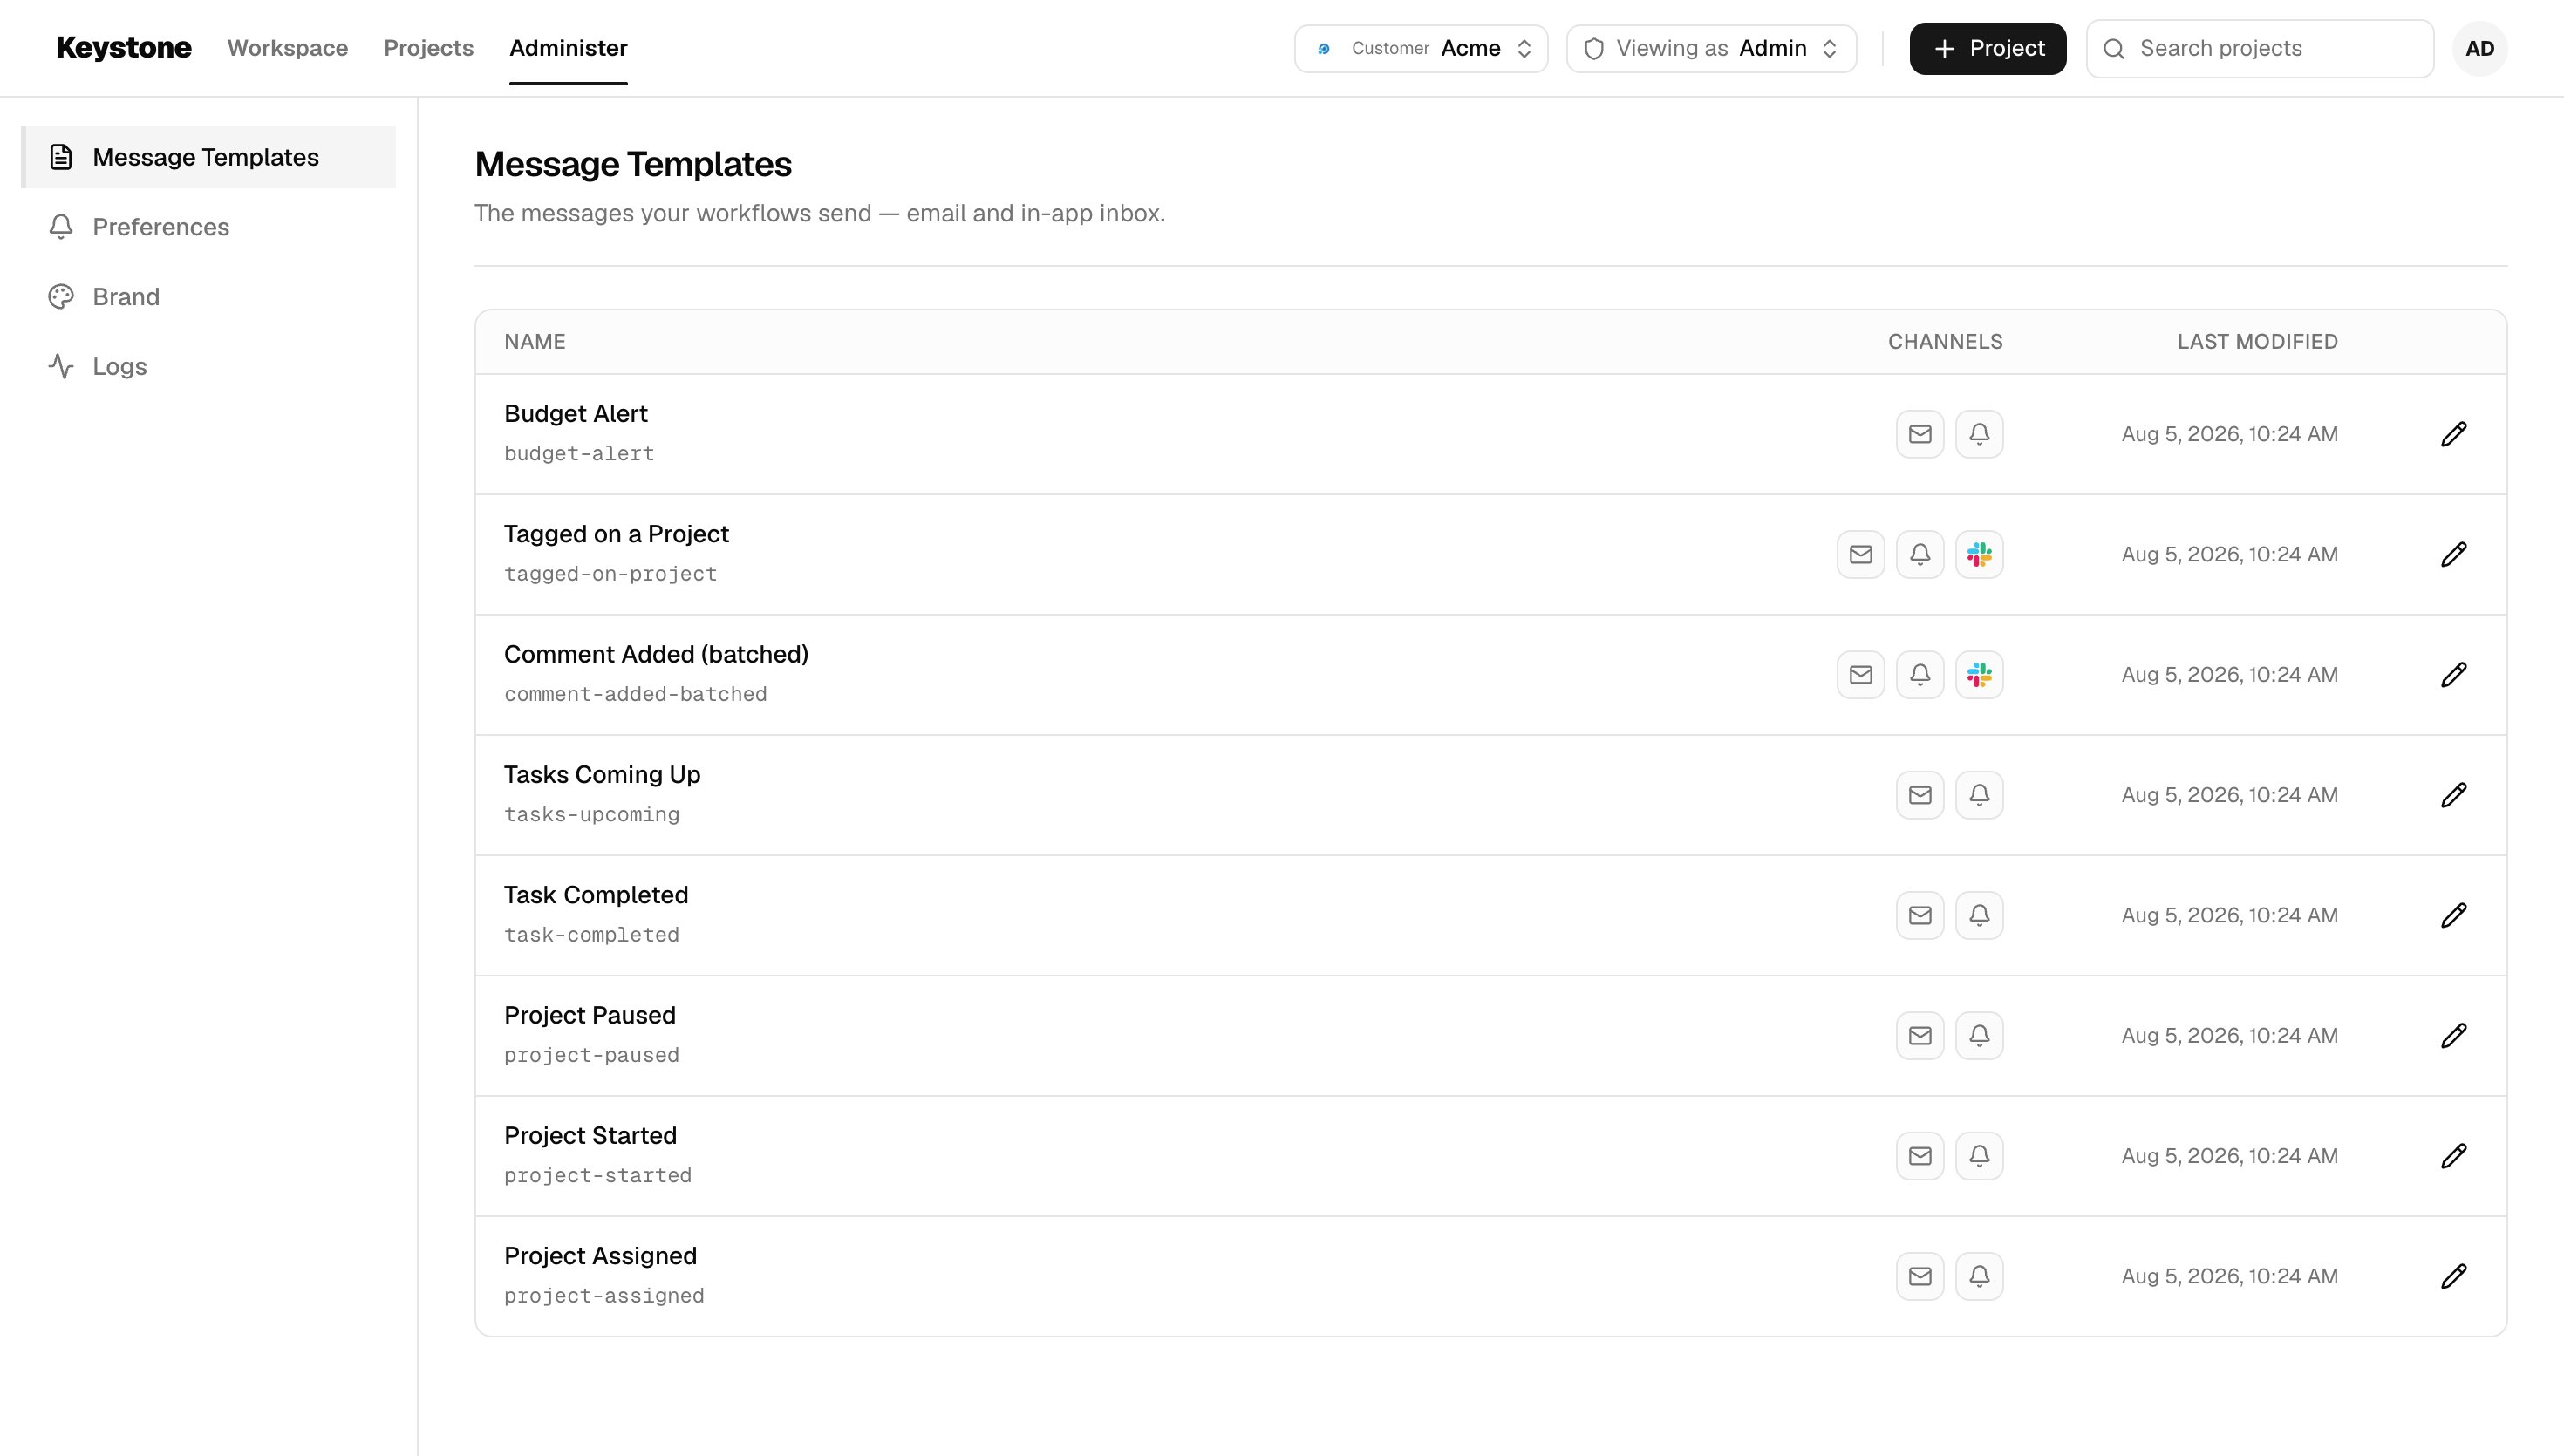
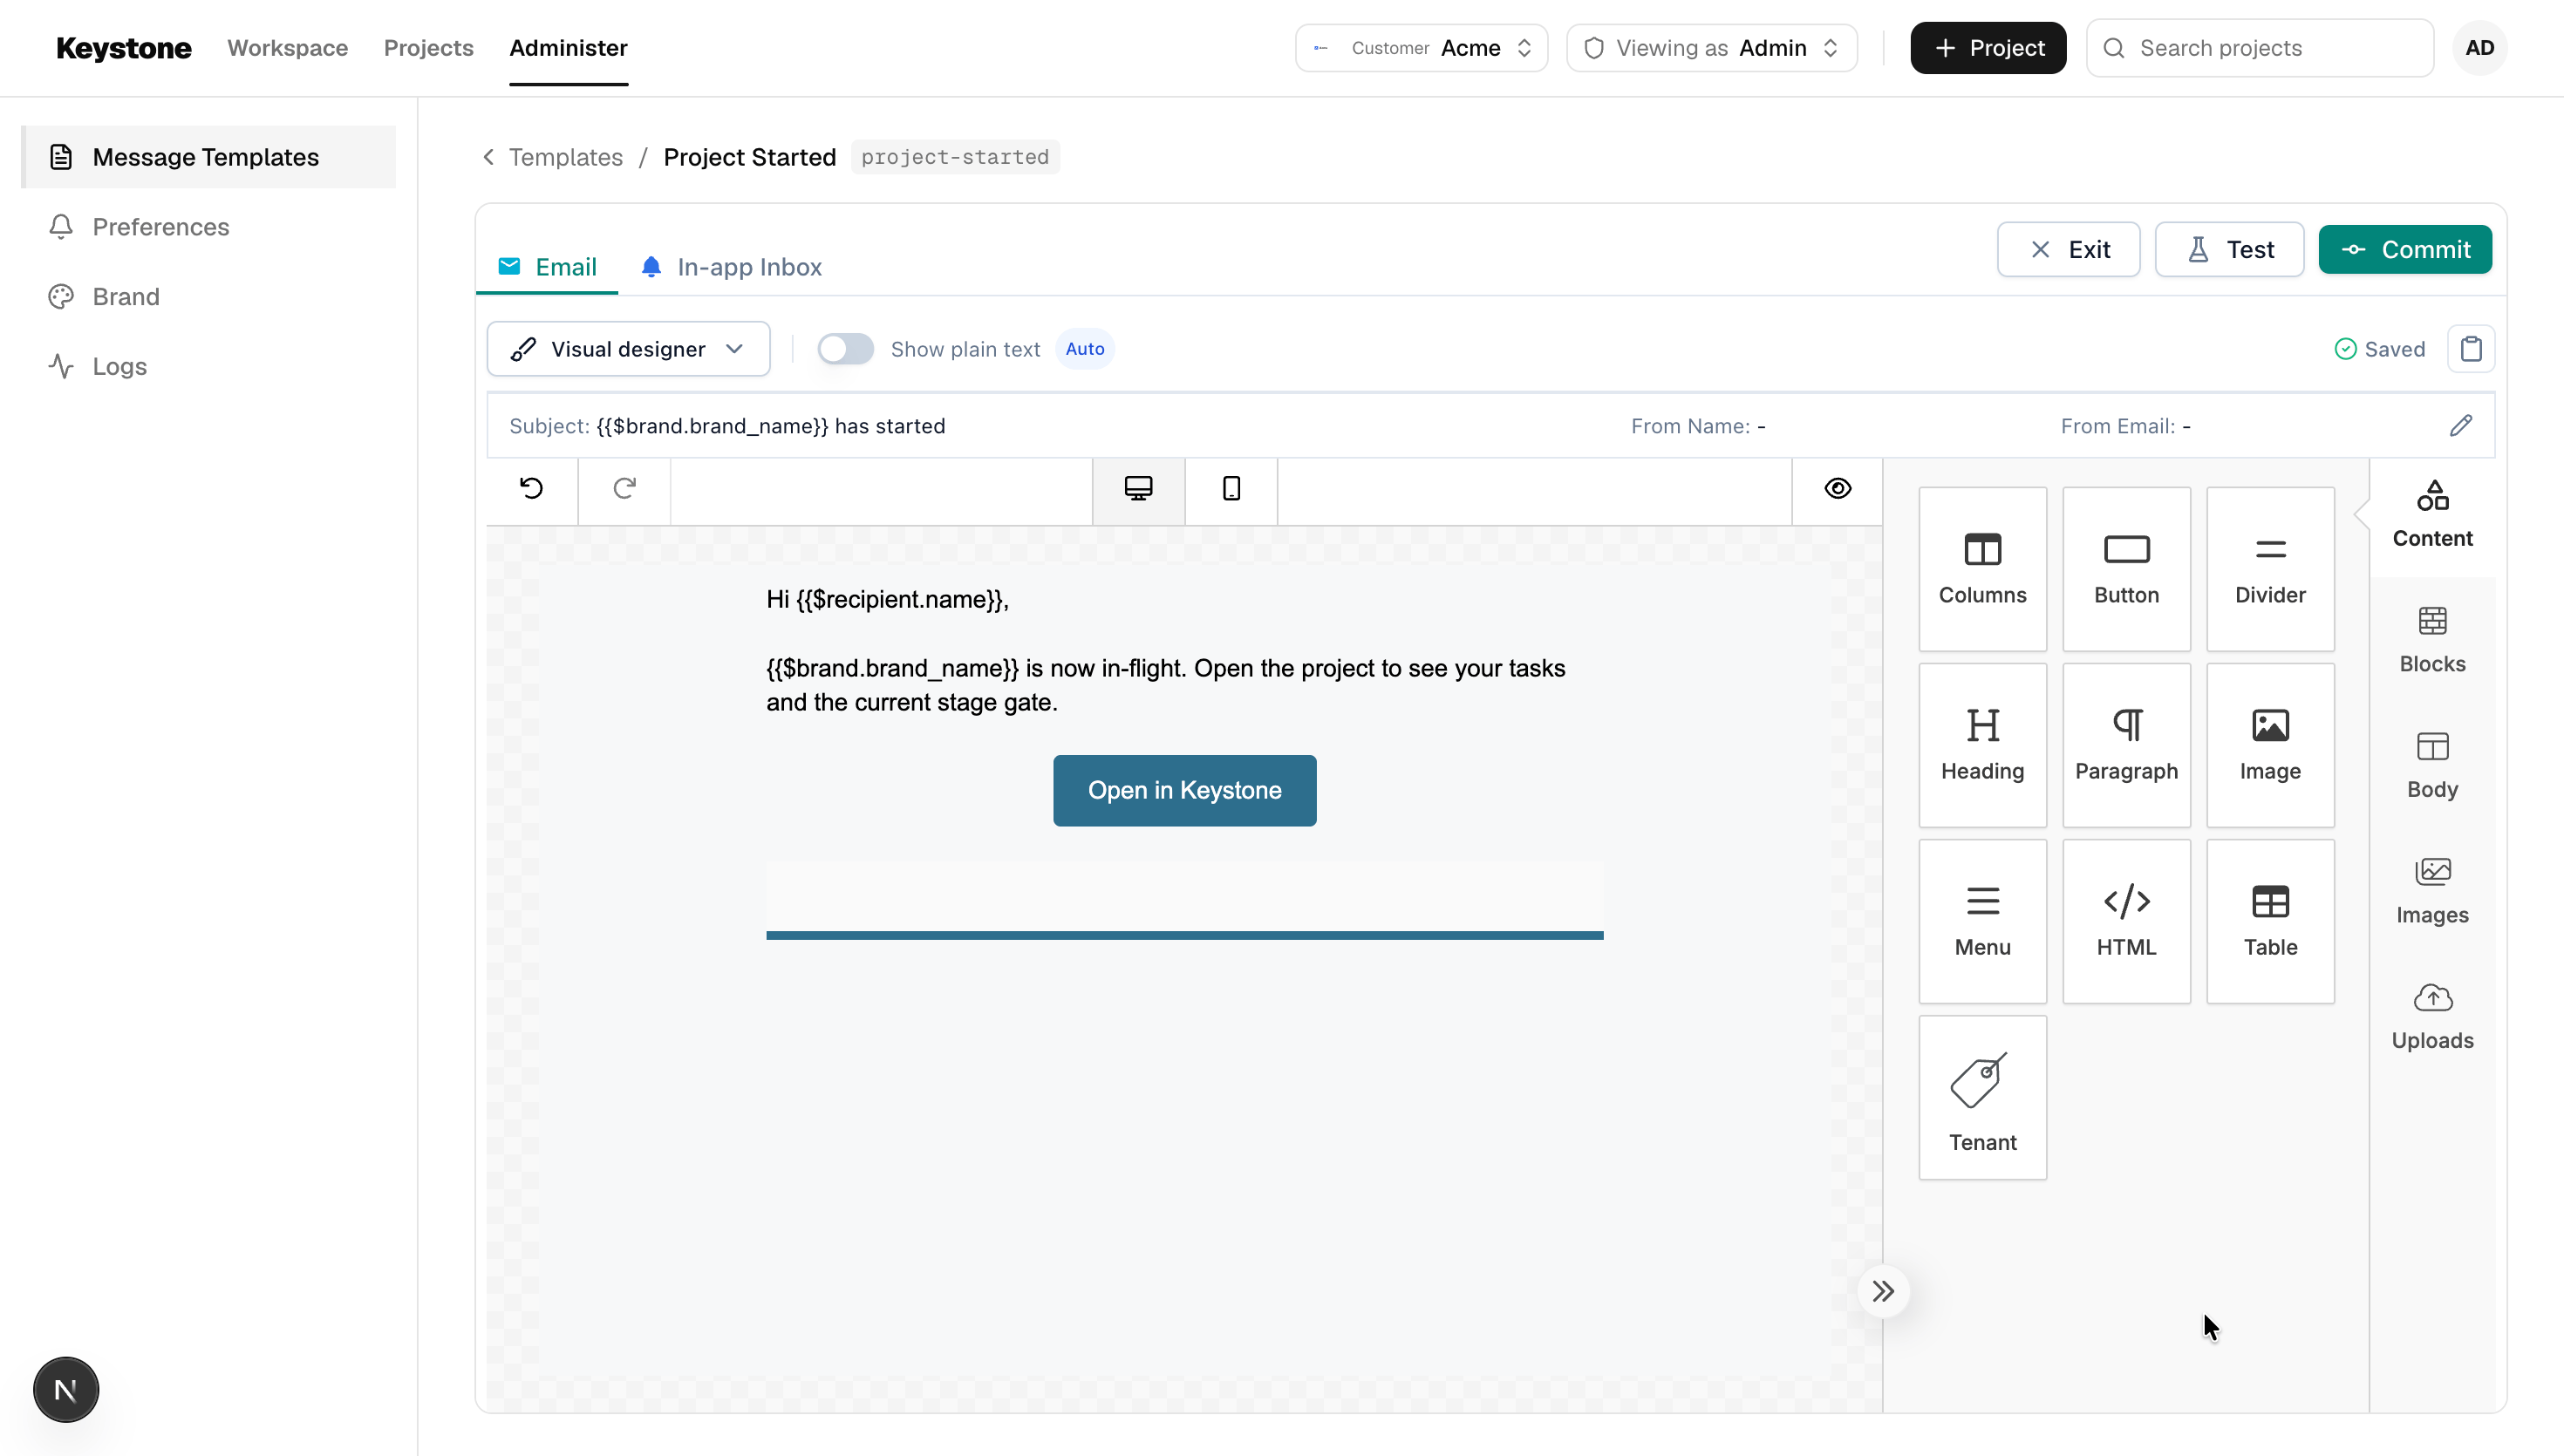
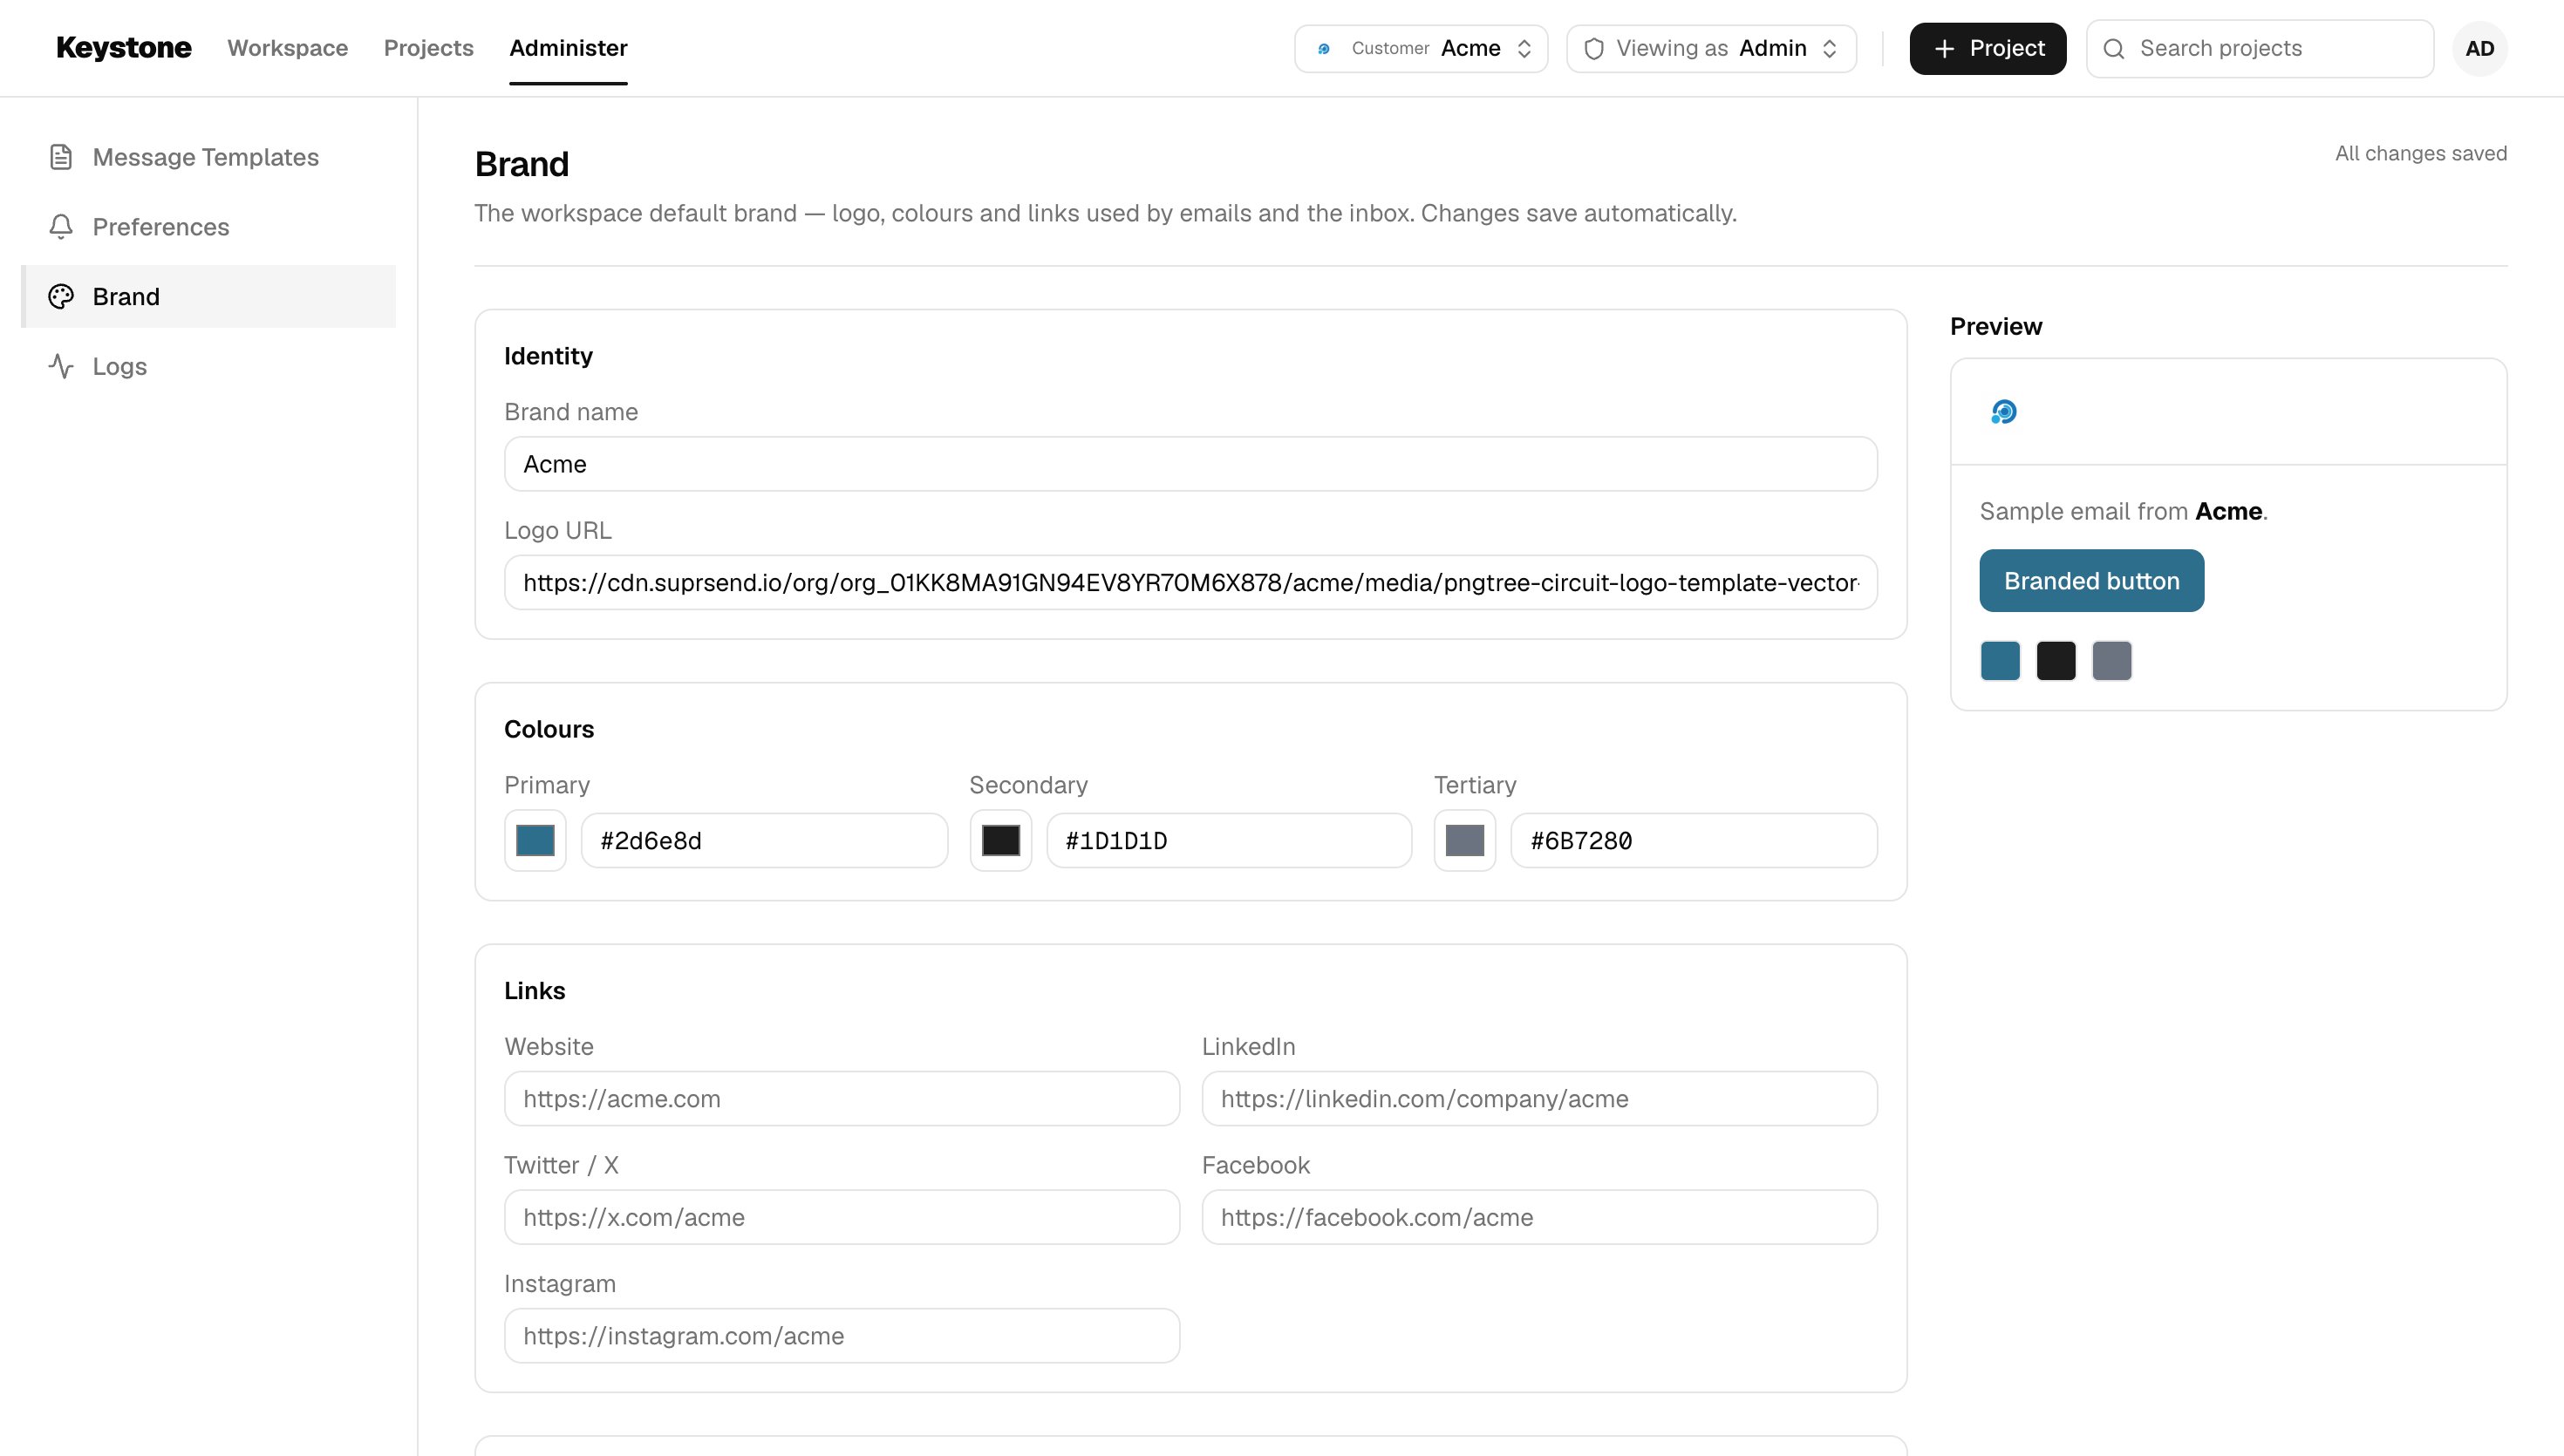
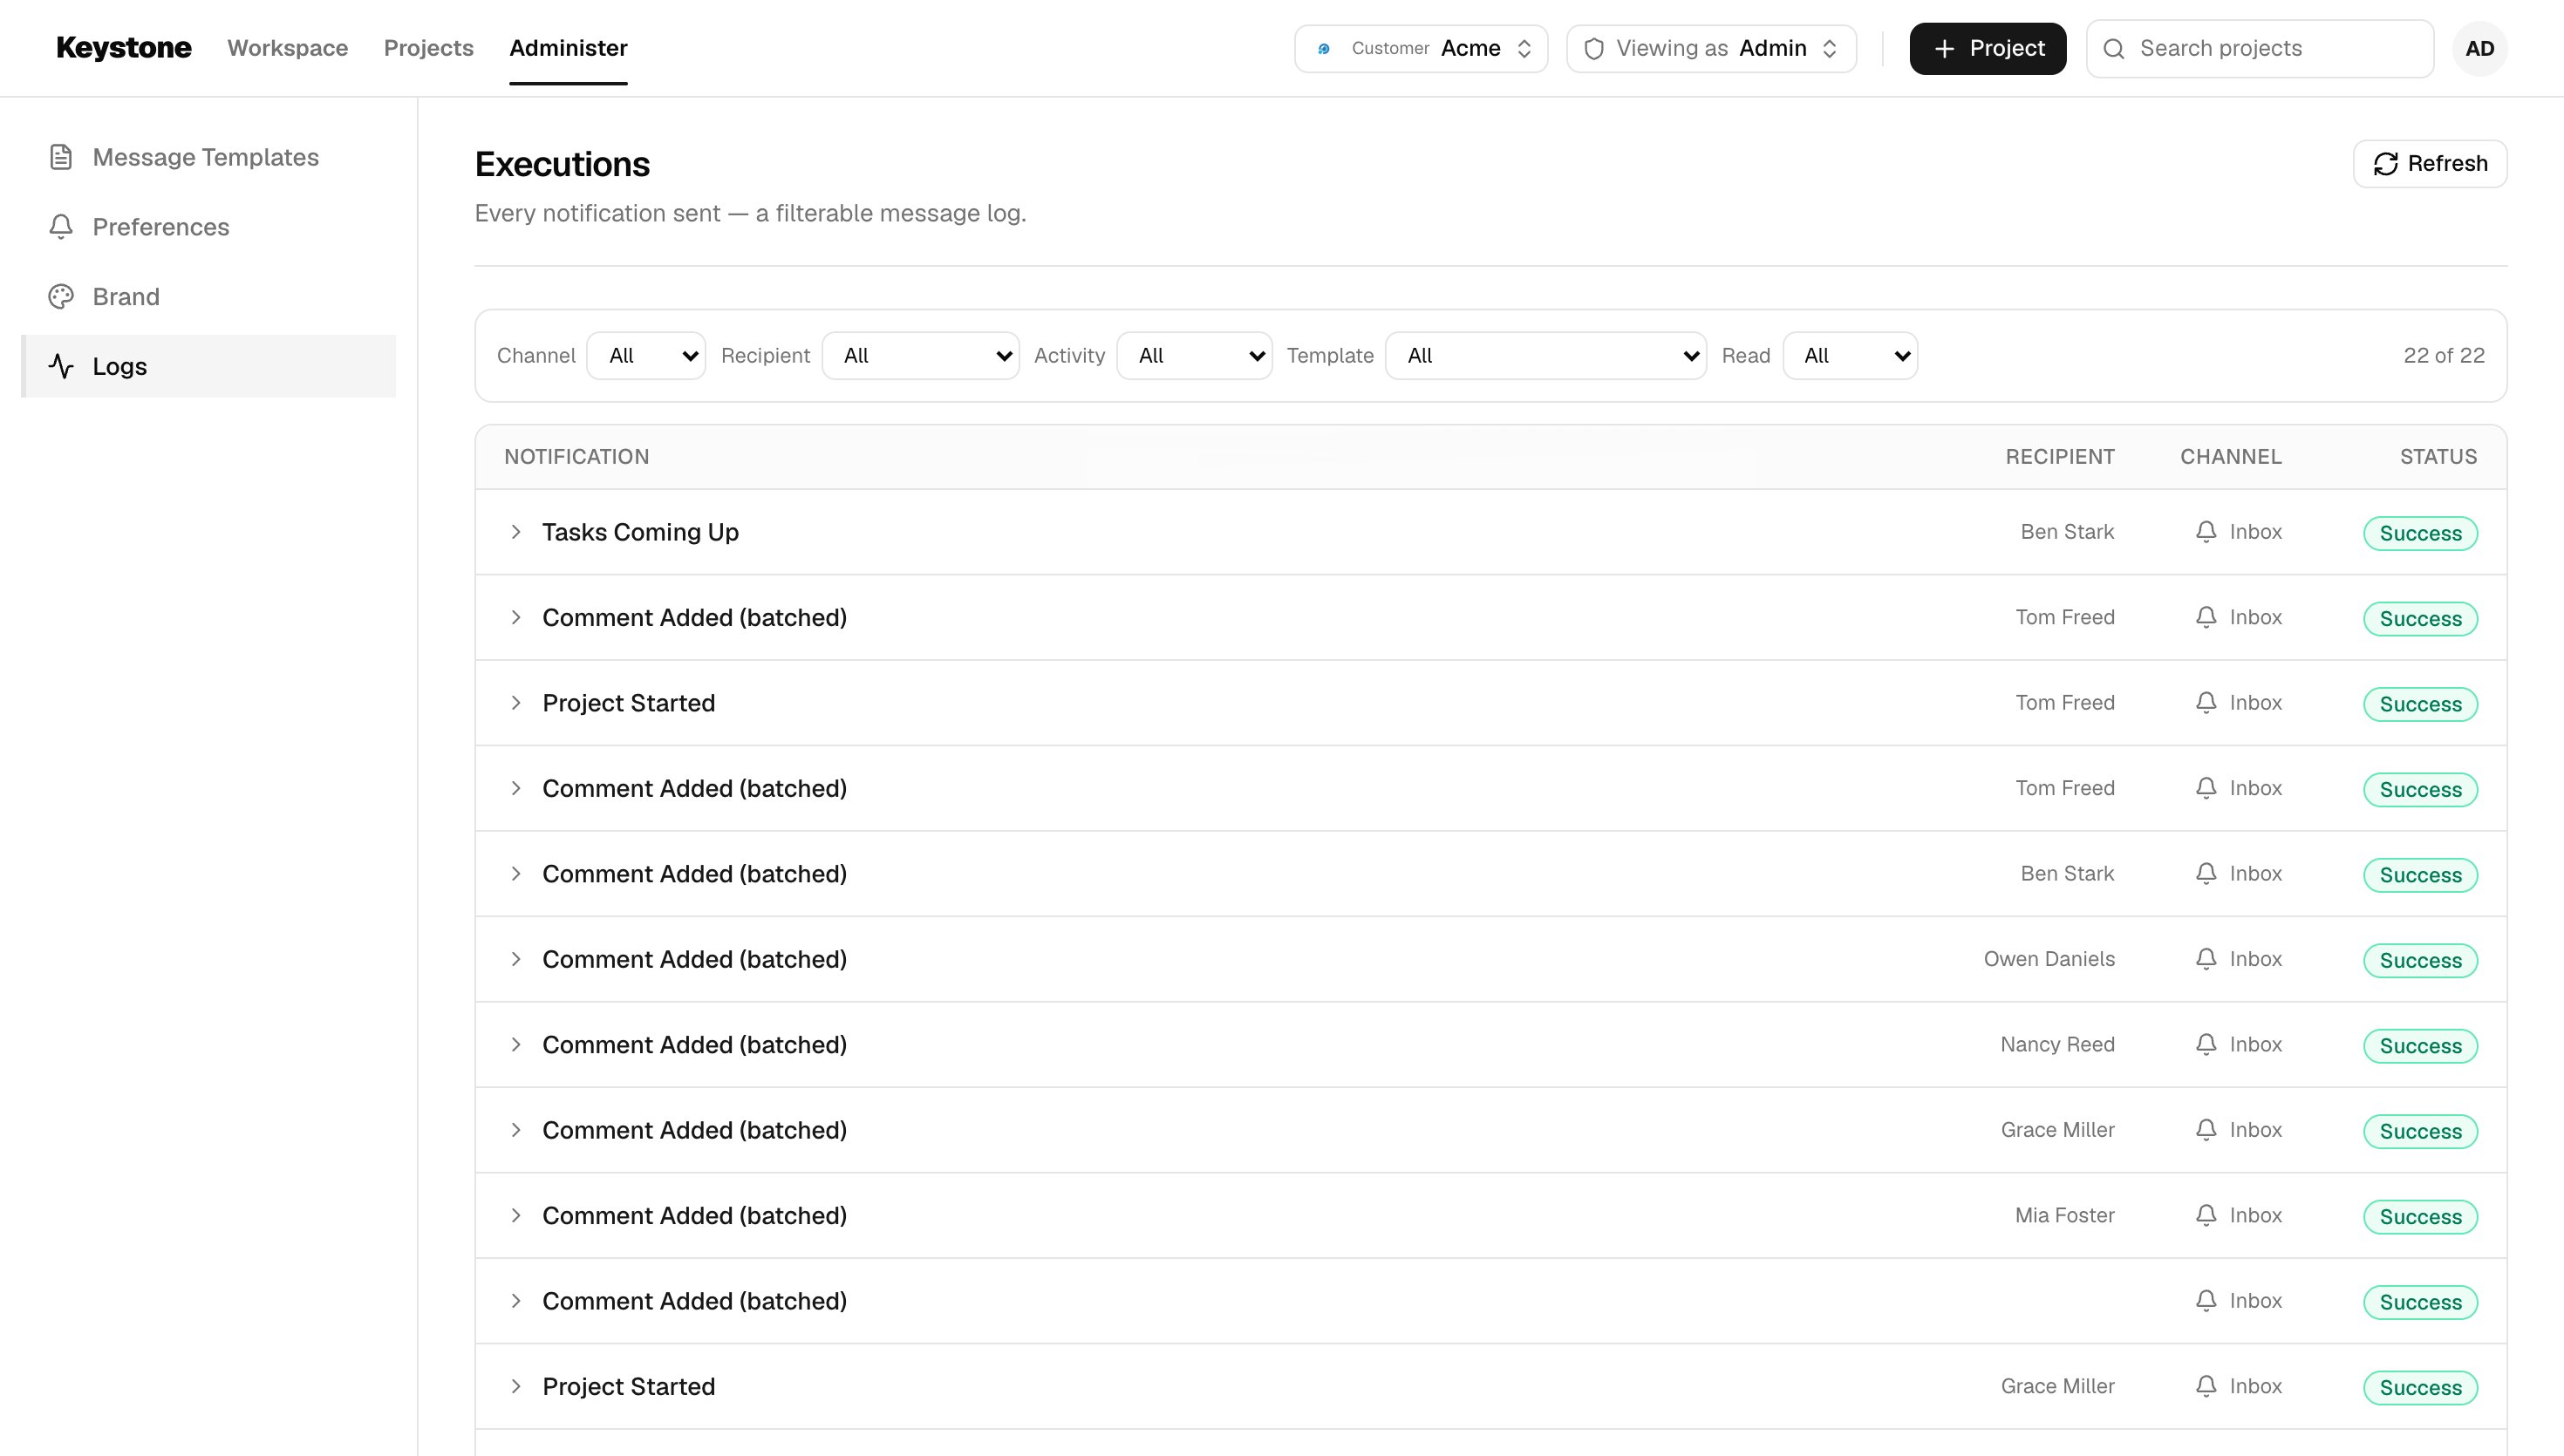
Inbox
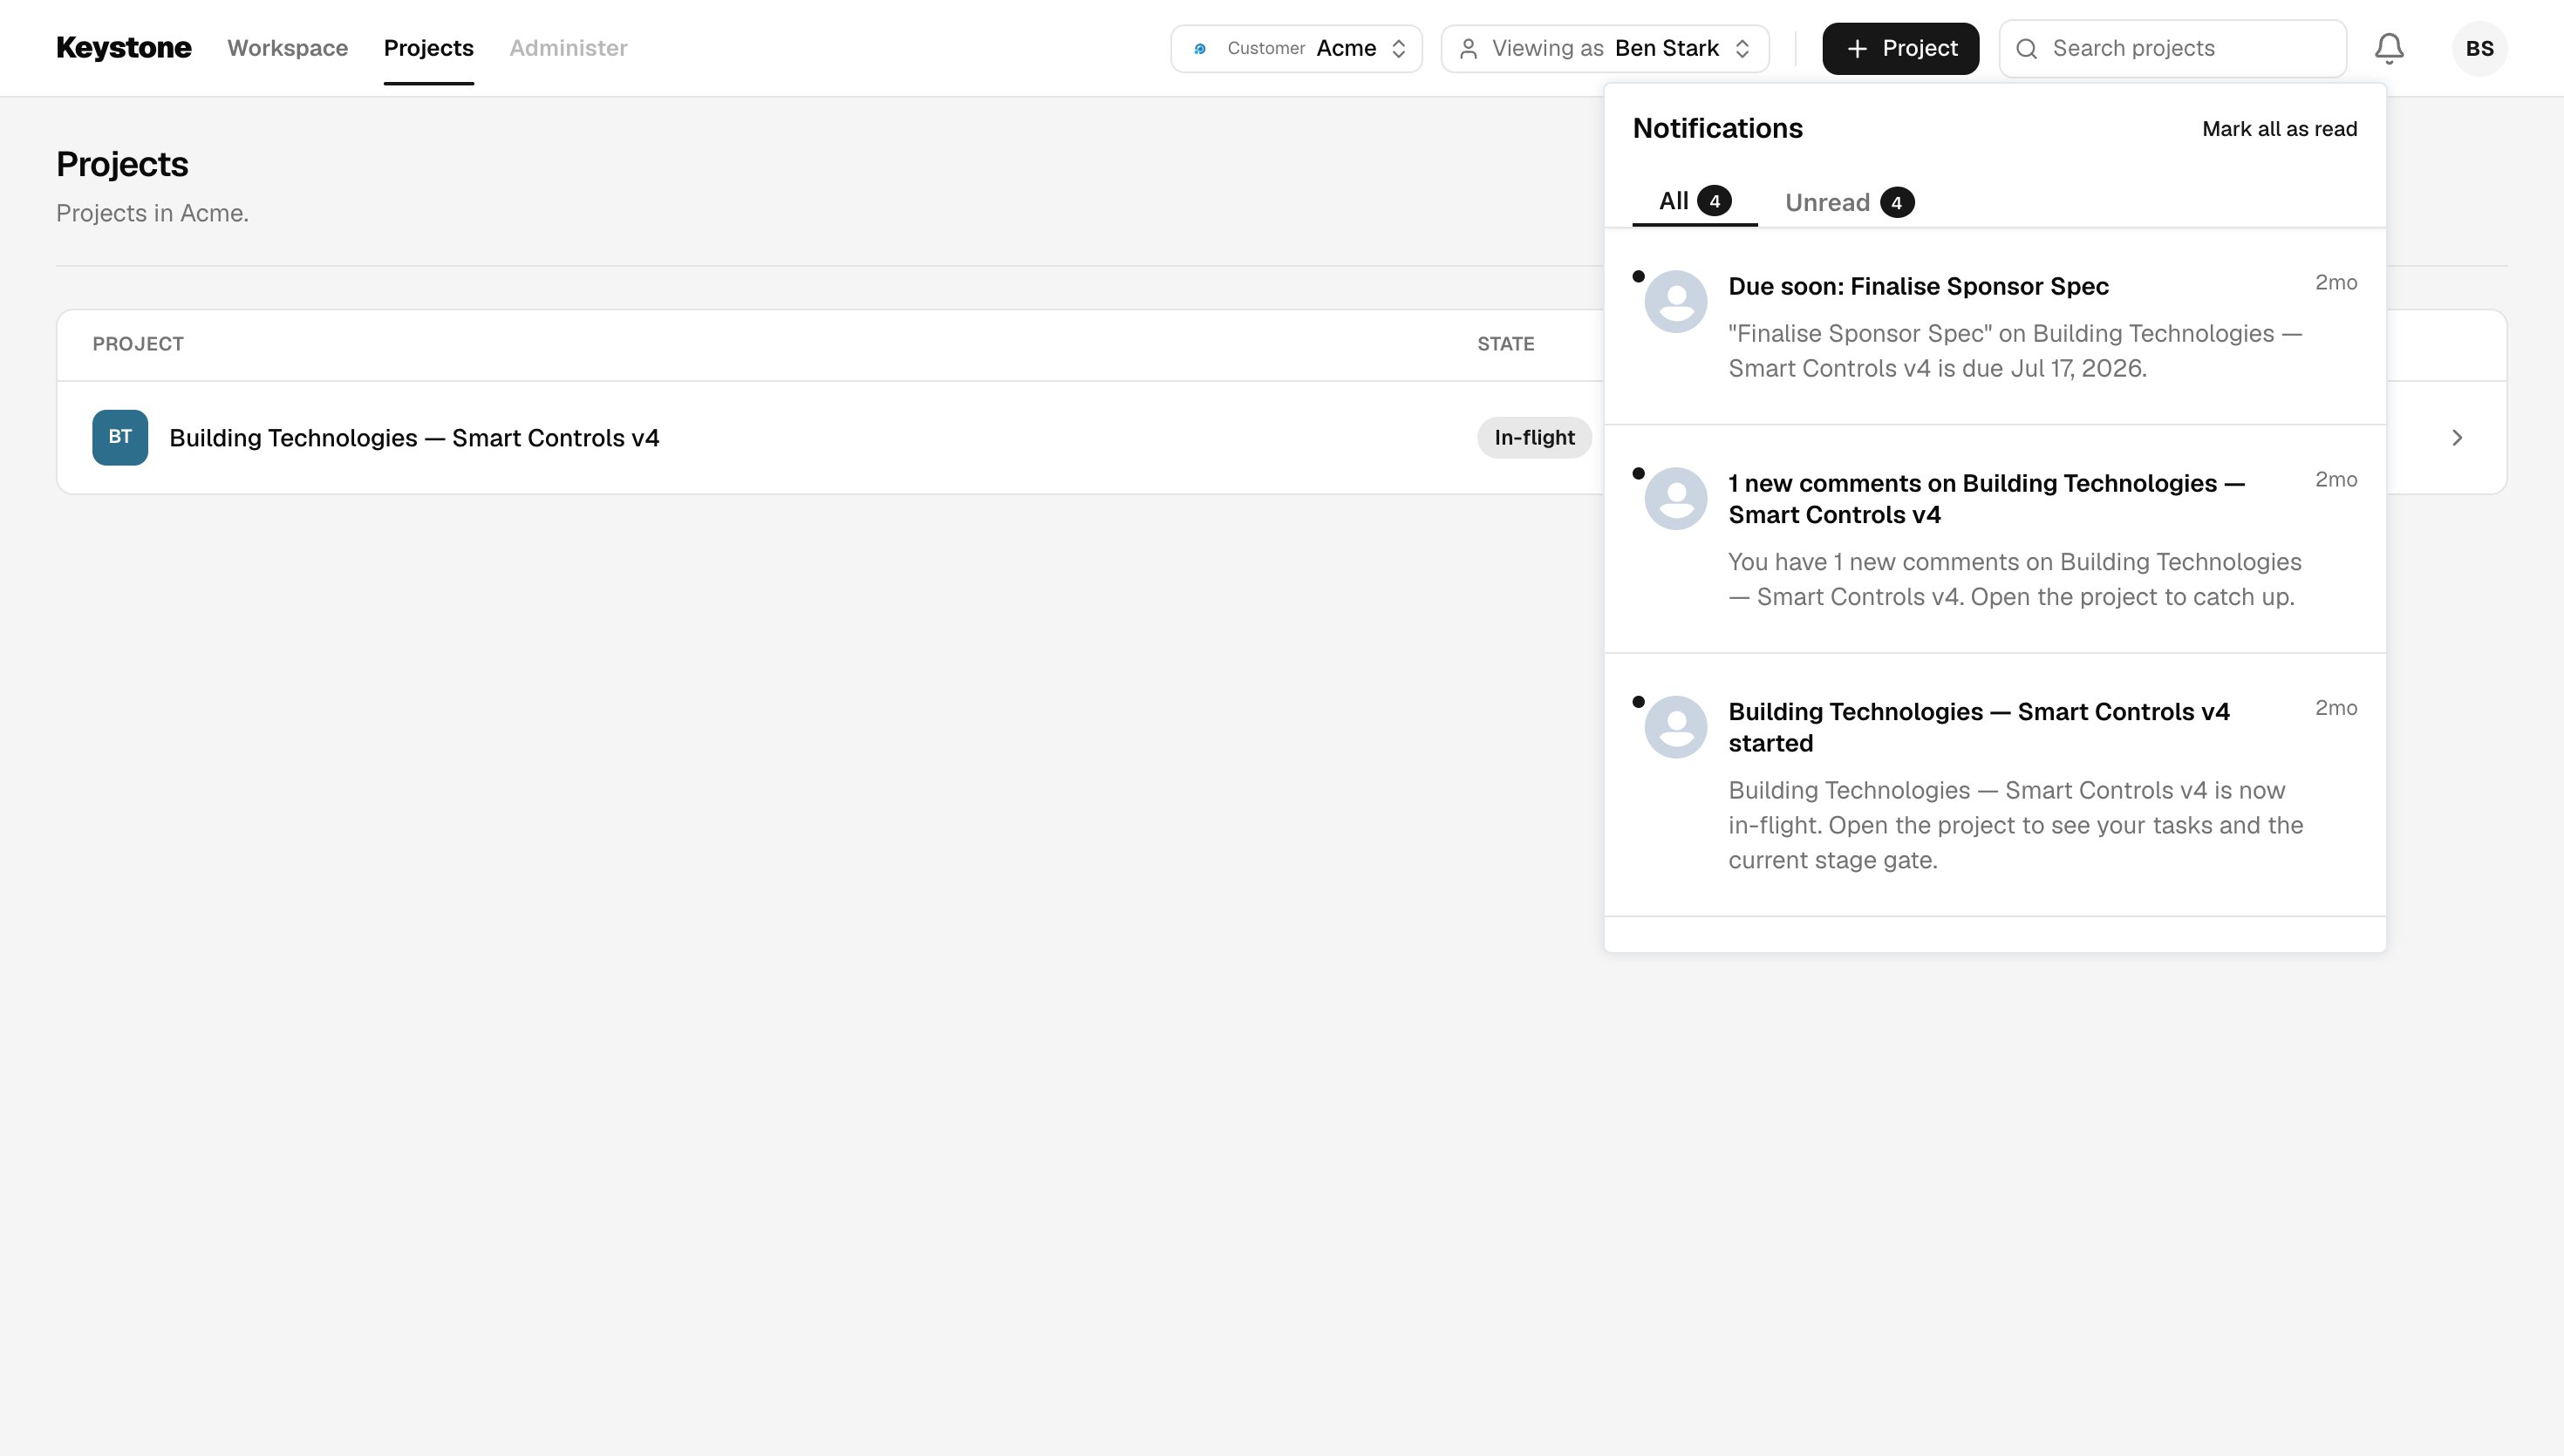
How each screen talks to SuprSend
The path every screen takes
SuprSend’s backend APIs authenticate with the workspace key and secret, which belong on the server. So every call runs there: open Resources, the browser asks the Keystone server for/api/admin/project-members, and that route calls SuprSend and returns the result.
For you that means all SuprSend code lives in app/api and lib/server, and the screens call the app’s own routes. The exception is SuprSend’s browser components — the inbox and the template editor — which call SuprSend themselves using a short-lived token the server signs for them.
Hub REST is SuprSend’s REST API on hub.suprsend.com. Keystone calls it directly for project and personal preferences.
Which API each screen uses
How one trigger reaches the right people
Keystone names the project object as the recipient and passes the project astenant_id. SuprSend works out who receives it:
$recipient.subscription.role with the roles the category targets. That is how one trigger reaches only the Project Manager for a completed task, but the whole team for a started project. Change the roles on the Preferences screen and delivery follows.
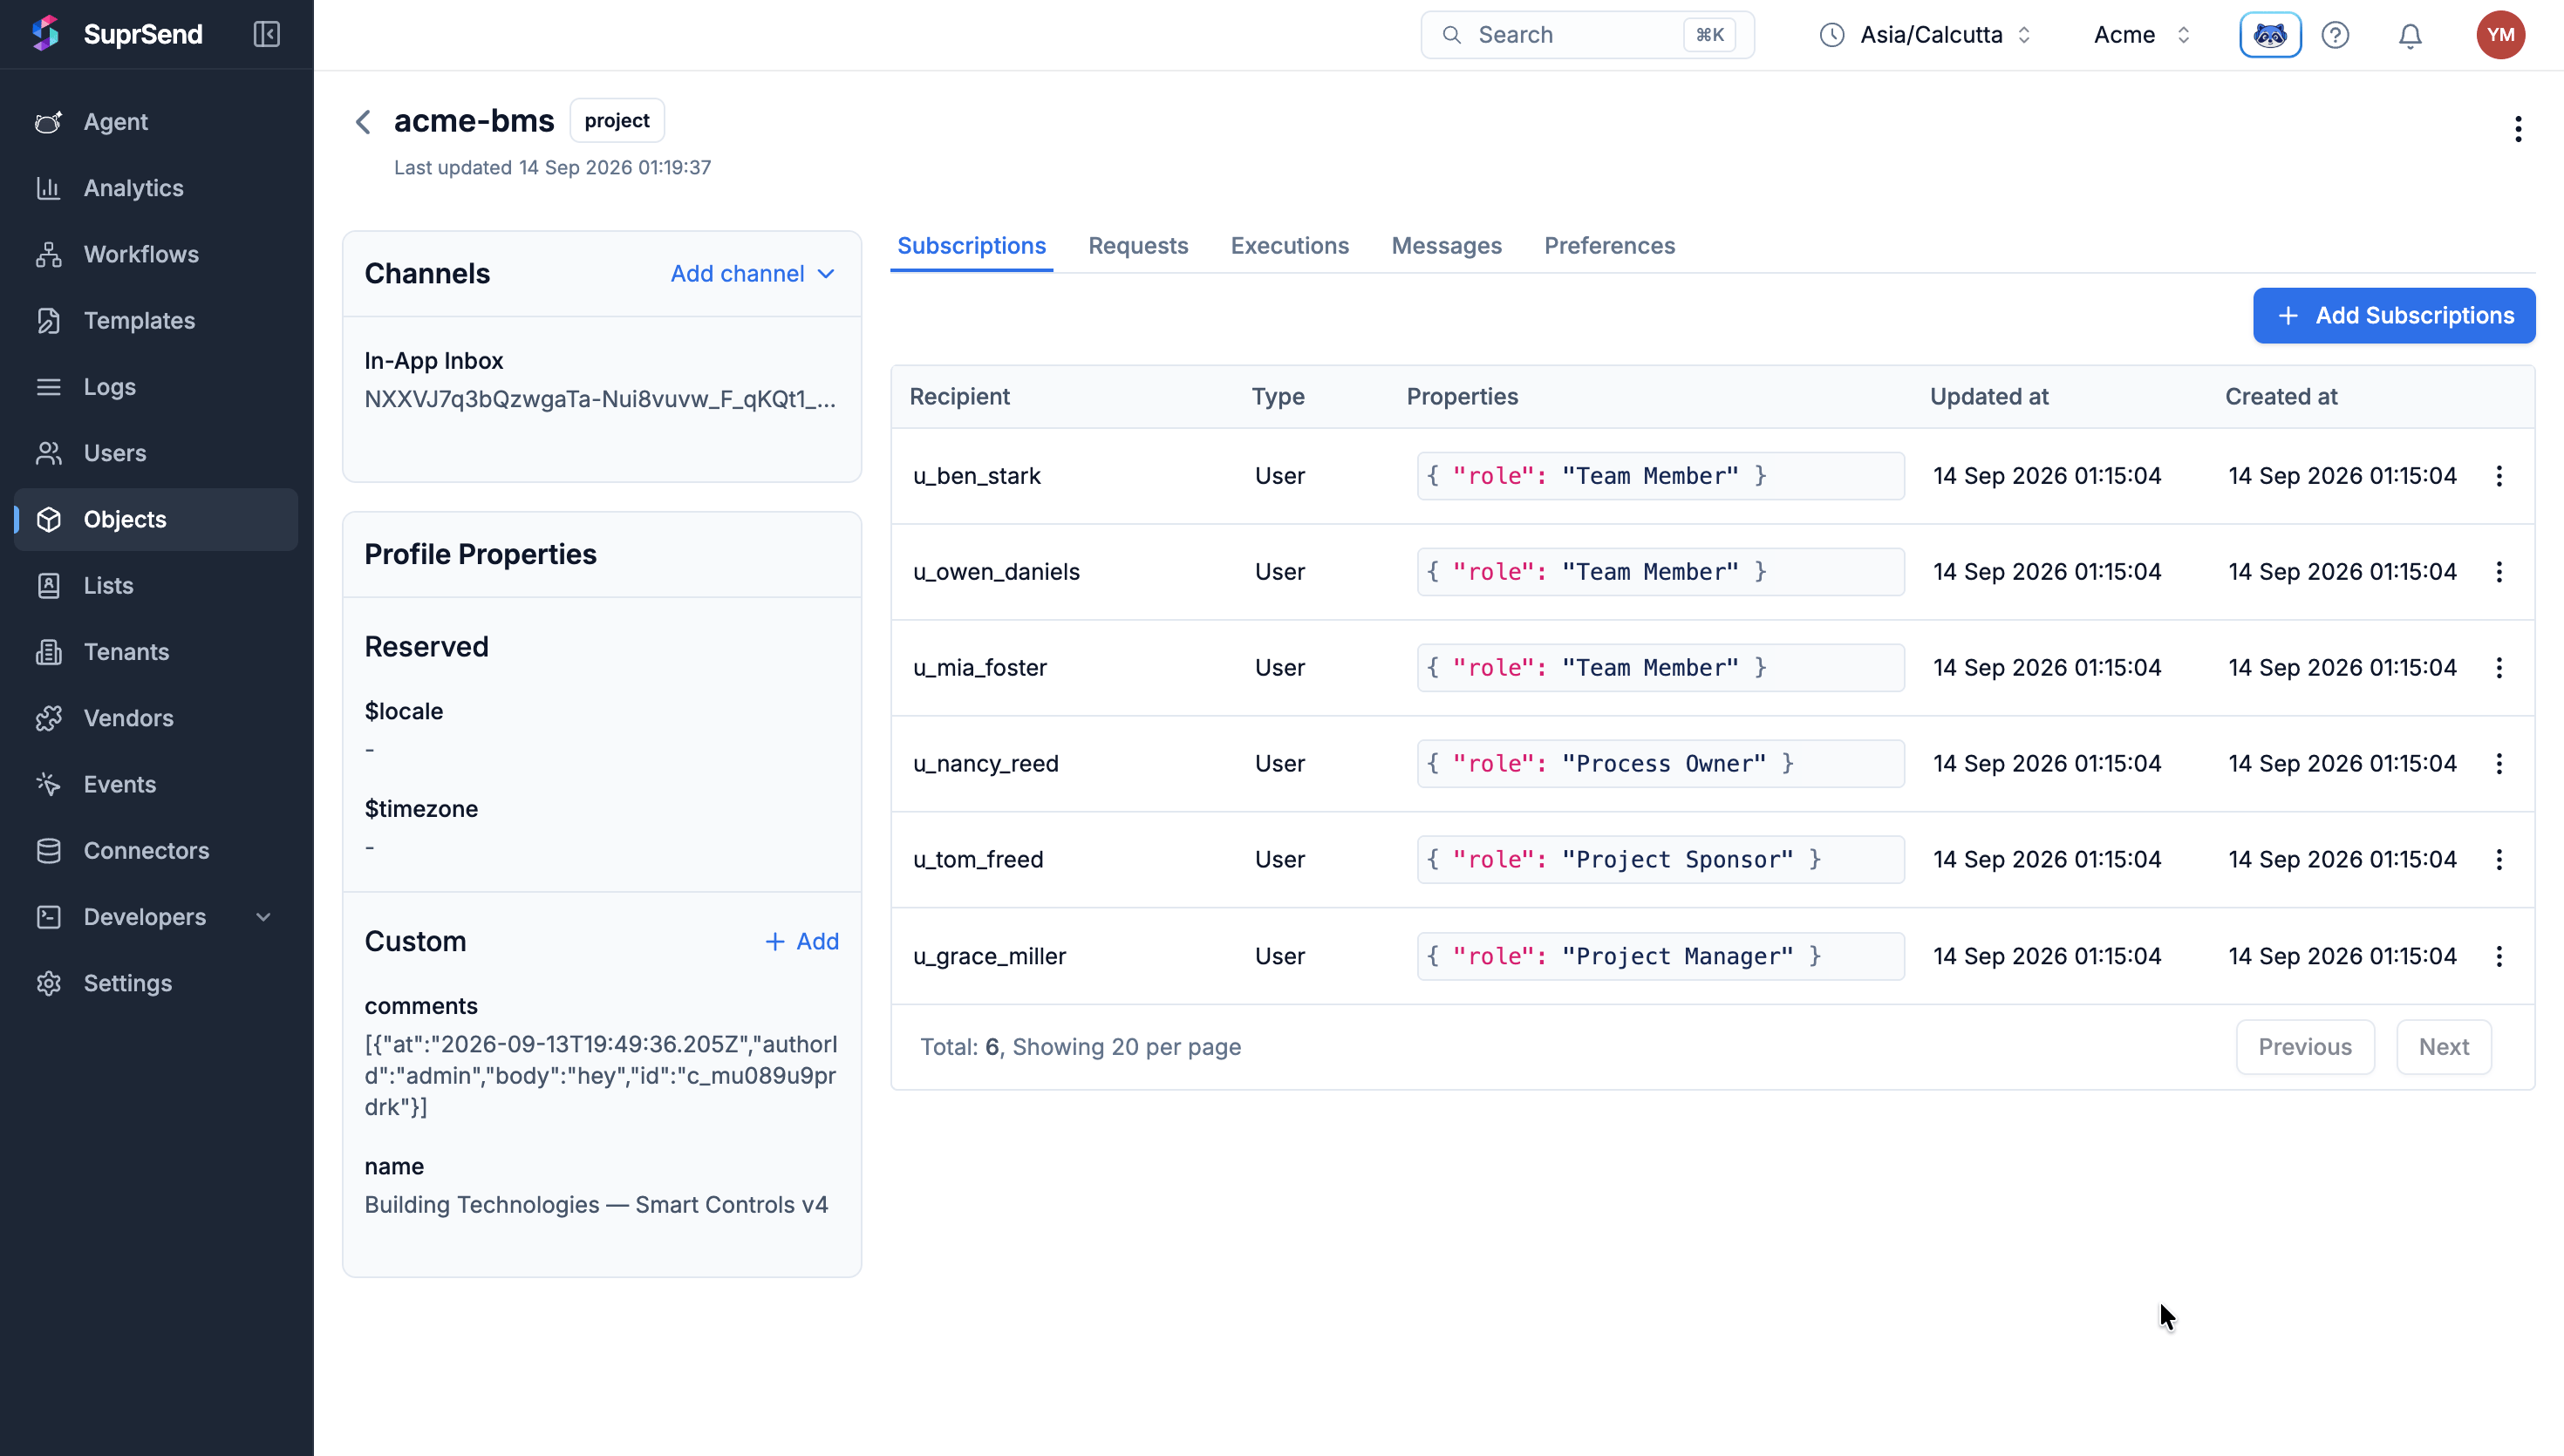
A project object in the SuprSend dashboard. Each member is subscribed with a role
project_link, which points back at the project’s page in the app.
Two calls that use the REST API
- Project and personal preferences: both come from the REST API, called directly from
lib/server/. Project settings are signed with the workspace key and secret; a person’s own settings use a token signed for that person. Use the same approach when you need them. - Preference categories: a save sends the whole category tree. The app reads what is live, applies your one change to it, and sends all of it back, so every other category stays as it was.
How the inbox and editor get their token
Change or extend it
Add a customer workspace
Everything here is configuration.- Create the workspace in the dashboard.
- Add its keys to
.env.localunder a new prefix:SUPRSEND_INITECH_WORKSPACE_KEY,NEXT_PUBLIC_SUPRSEND_INITECH_PUBLIC_KEY, and so on. - Restart the dev server. The app reads the workspace list once per process.
- To give it notifications, run
npm run push:assets -- <workspace slug>.
Add a role
A role lives in three places:Edit templates, workflows or categories
Edit the files insuprsend/, then push. Push to one workspace by naming it:
workflow or category in the same command.
Add a notification
- Add its category, template and workflow to
suprsend/, then push. - Trigger it from an API route.
lib/server/hub.tswraps the three calls Keystone uses:triggerObjectWorkflowfor a whole project,triggerWorkflowfor one person, andtrackEventfor event-triggered workflows.
Add a channel
Set up the channel’s vendor in SuprSend, then add that channel’s content to the template, both in the dashboard. Every template covers email and inbox, and two also carry Slack content.Check your changes
Deploy
The app runs anywhere Next.js runs, for example Vercel. Add the same variables from.env.local to the deployment.
Put a password on it. Set DEMO_PASSWORD and every page and API route asks for it (proxy.ts). A deployed demo reads and writes your real SuprSend account.
Reusing this pattern in your own product
Two routes sign the tokens that SuprSend’s browser components need. In Keystone, anyone can pick who they are with Viewing as, so both hand a token to whoever asks. Your product knows who is signed in, so tie both to that session before you ship them.actor cookie the browser sets, so check the signed-in user’s role in every route under app/api/ before you ship.
Troubleshooting
"No workspace connected"
"No workspace connected"
SUPRSEND_<WS>_WORKSPACE_KEY matches a workspace in your account and _WORKSPACE_SECRET is set. Fix the keys, then restart the dev server."Couldn't list SuprSend workspaces"
"Couldn't list SuprSend workspaces"
SUPRSEND_SERVICE_TOKEN is wrong or expired. Create a new one in Account Settings → Service Tokens."node: bad option: --env-file", or Next.js refuses to start
"node: bad option: --env-file", or Next.js refuses to start
.env.local through --env-file. Upgrade Node.js.Inbox or template editor doesn't load
Inbox or template editor doesn't load
ws_signk_… ID. Use the signing_key_… UID.“public key not configured” — NEXT_PUBLIC_SUPRSEND_<WS>_PUBLIC_KEY is empty for this customer.No bell — the bell shows when you view as a project member with a project open."A Project Manager is required."
"A Project Manager is required."
People show as IDs instead of names
People show as IDs instead of names
name property. Add it in the dashboard, or the app falls back to the distinct ID.The change saved, but nobody was notified
The change saved, but nobody was notified
One person didn't get a notification
One person didn't get a notification
No budget alert
No budget alert
@mentions are never delivered
@mentions are never delivered
tagged-on-project goes to one person, but its condition reads the recipient’s project role, which only exists when a notification is sent to the project object. There is no fix yet.Sent, but no email arrives
Sent, but no email arrives
Logs look empty or incomplete
Logs look empty or incomplete
My dashboard template edits disappeared
My dashboard template edits disappeared
npm run push:assets overwrote them. Pull before you push — see Edit templates, workflows or categories.Hosted demo returns "Locked. Enter the demo password first."
Hosted demo returns "Locked. Enter the demo password first."
DEMO_PASSWORD is set. Enter it on the gate page.