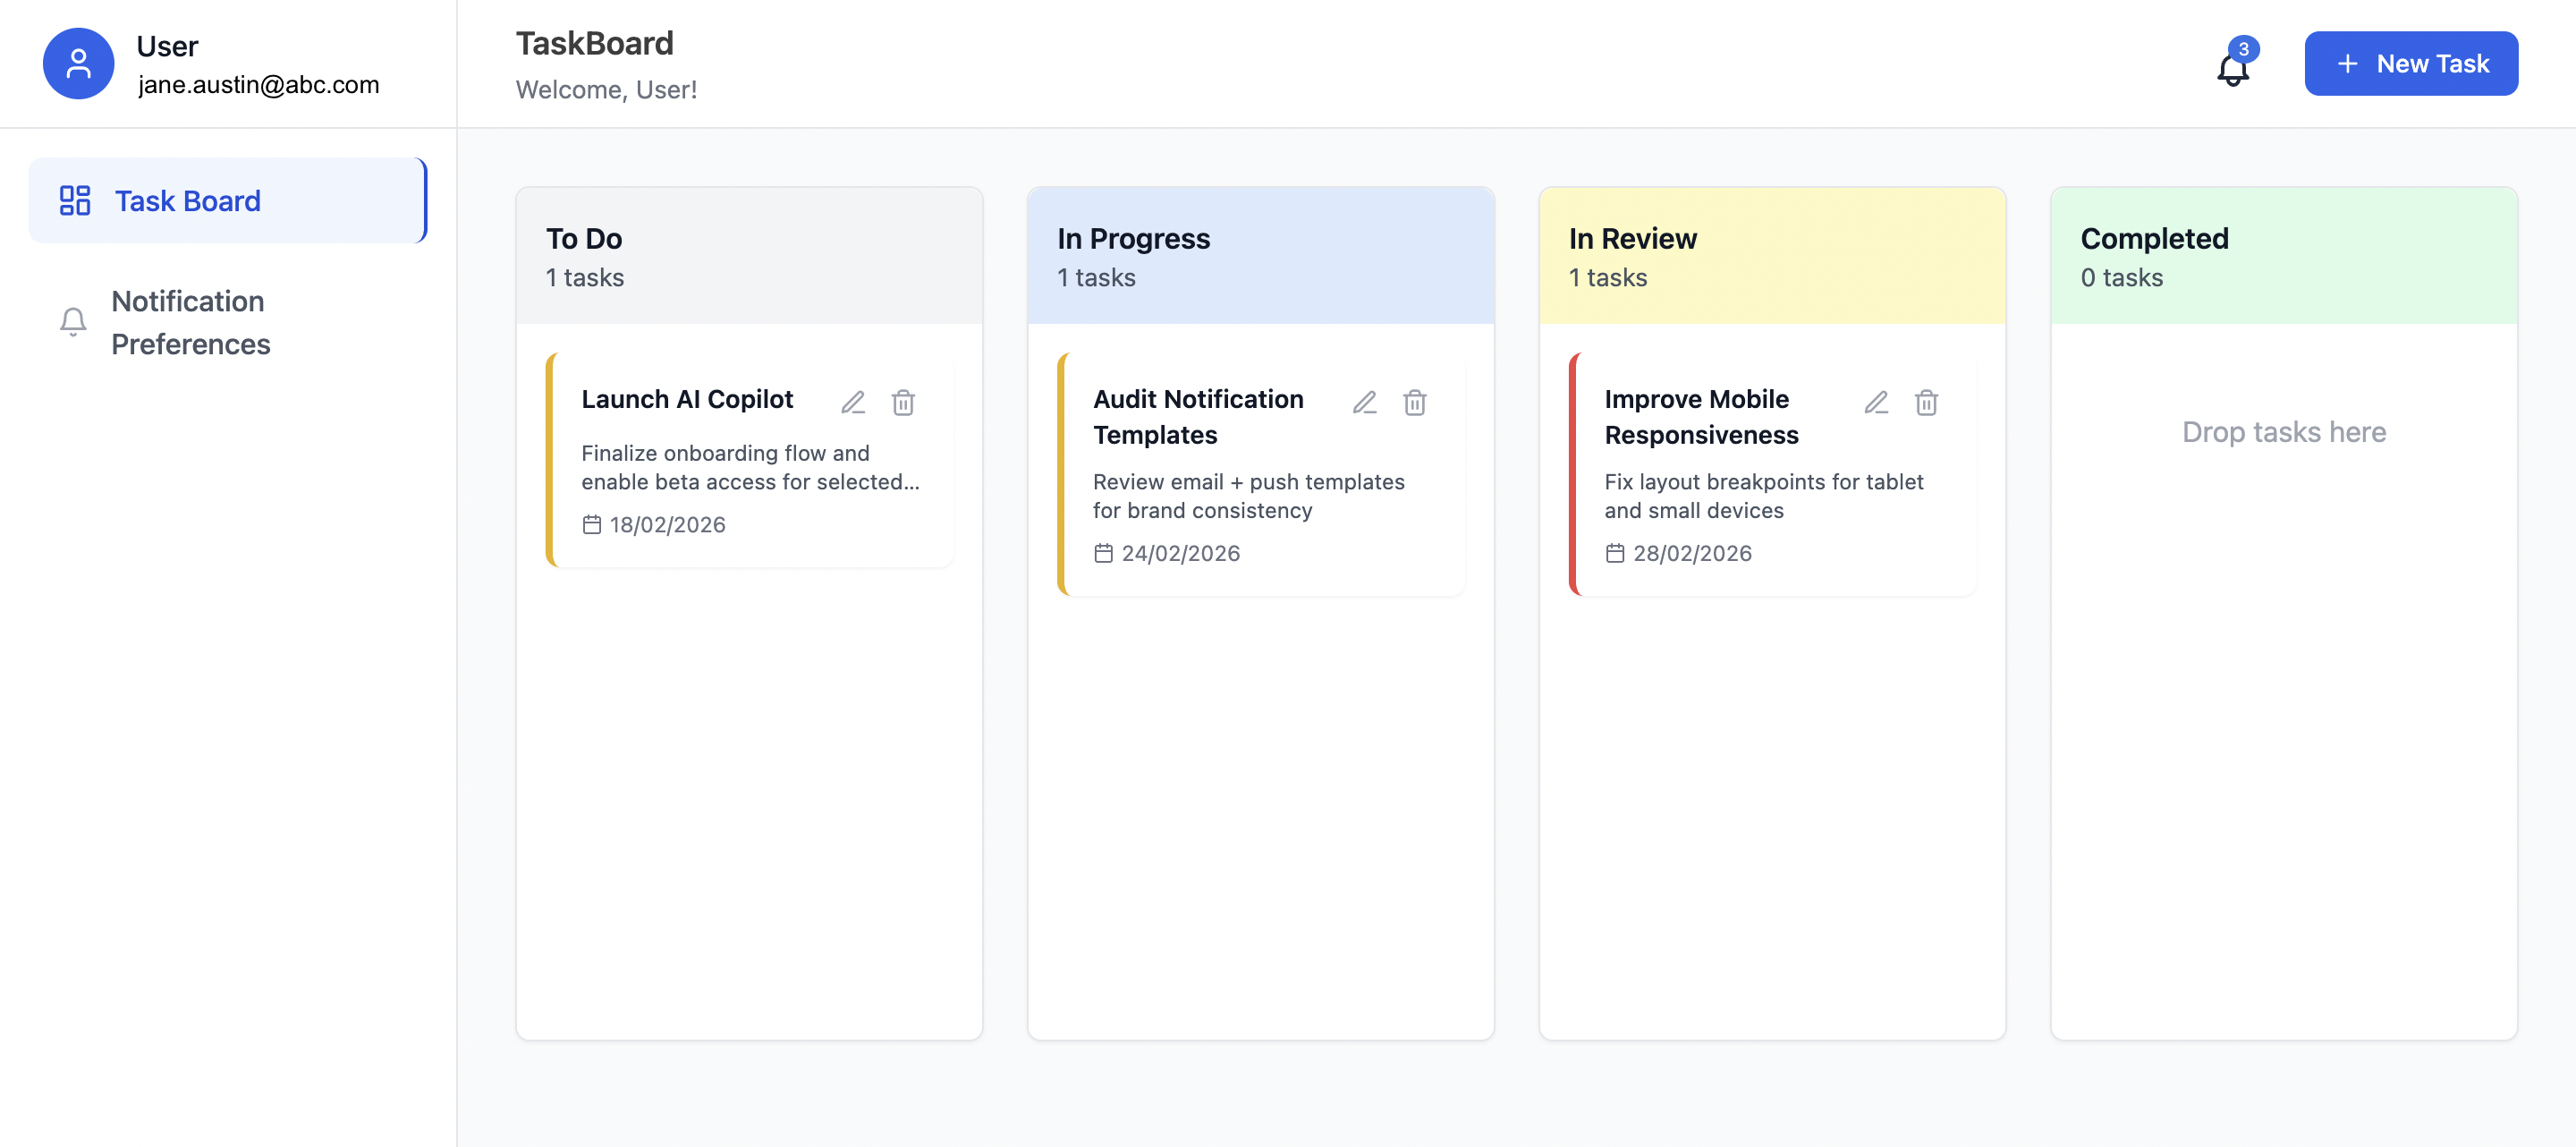
This guide shows you how to create a task management app with OTP verification, real-time in-app notifications, email notifications, and user preferences using SuprSend’s React SDK.
You can either follow this guide for exact code implementation or vibe-code this in minutes using our ready-to-use mcp prompts.
Part 1: Setting Up the Foundation
Project Initialization
Create a new React app:
npx create-react-app task-management-app
cd task-management-app
Install dependencies:
npm install @suprsend/react react-hot-toast react-switch lucide-react
For styling, we recommend Tailwind CSS. The SuprSend components work seamlessly with Tailwind.
Environment Configuration
Get your API keys from the SuprSend Dashboard and add them to .env:
REACT_APP_SUPRSEND_WORKSPACE=your-workspace-name
REACT_APP_SUPRSEND_API_KEY=your-api-key
REACT_APP_SUPRSEND_PUBLIC_KEY=your-public-key
The API key should be kept secure. In production, use a backend API to trigger workflows. See API key management for best practices.
Initialize SuprSend Provider
Wrap your app with SuprSendProvider. See the React SDK setup guide for complete initialization:
import { SuprSendProvider } from '@suprsend/react';
function App() {
return (
<SuprSendProvider
workspaceKey={process.env.REACT_APP_SUPRSEND_WORKSPACE}
publicKey={process.env.REACT_APP_SUPRSEND_PUBLIC_KEY}
distinctId={userEmail}
>
{/* Your app */}
</SuprSendProvider>
);
}
Part 2: Add Login flow with OTP email verification
With SuprSend, you can implement secure OTP verification entirely from the frontend—no backend required.
The Flow
- Generate a 6-digit OTP in your React app
- Trigger a SuprSend workflow to send the OTP via email
- User enters the OTP to complete verification
- SuprSend automatically creates or updates the user profile
Setting Up the OTP Workflow
In the SuprSend dashboard, create:
-
Email Template with slug
otp_verification
- Subject:
Your OTP Verification Code
- Body: HTML template with
{{otp}} variable
- See email template guide for details
-
Workflow with slug
otp_verification
- Category:
Transactional (important for deliverability)
- Trigger: API Trigger
- Delivery Node: Email channel
- Learn about notification categories
Implementing the OTP Flow
Send OTP when user submits their email:
const sendOTPEmail = async (email, otp, userName) => {
await fetch('https://hub.suprsend.com/trigger/', {
method: 'POST',
headers: {
'Authorization': `Bearer ${process.env.REACT_APP_SUPRSEND_API_KEY}`,
'Content-Type': 'application/json',
},
body: JSON.stringify({
workflow: 'otp_verification',
recipients: [{
distinct_id: email,
$email: [email],
name: userName,
$channels: ['email'],
$skip_create: false
}],
data: { otp, user_name: userName }
})
});
};
After OTP verification, create the user session. See user management APIs for details.
Part 3: Add Popover Inbox and Toast Notifications
SuprSend’s React SDK gives you a production-ready inbox component in a single line of code.
The Inbox Component
Add the Inbox component to your header:
import { Inbox } from '@suprsend/react';
<Inbox popperPosition="bottom-end" />
That’s it. The component handles WebSocket connections, notification state, pagination, and real-time updates automatically. See the React inbox integration guide for customization options.
Toast Notifications
Show toast notifications when new notifications arrive:
import { useFeedClient, ToastNotificationCard } from '@suprsend/react';
import toast, { Toaster } from 'react-hot-toast';
const feedClient = useFeedClient();
feedClient.emitter.on('feed.new_notification', (data) => {
toast.custom((t) => (
<ToastNotificationCard notificationData={data} />
));
});
Don’t mark notifications as “seen” in the toast handler. Let the Inbox component handle that when the user opens the popover.
See the React toast notifications guide for complete implementation details.
Part 4: Setting up Notifications in SuprSend on task actions
Instead of making separate API calls for email and in-app notifications, define a workflow once and SuprSend handles delivery across all channels automatically.
Creating Workflows on SuprSend dashboard
Create two workflows in the SuprSend dashboard:
1. Task Created Workflow
- Slug:
task_created
- Category:
Transactional (or create custom category task-updates to handle preferences)
- Delivery Nodes: Both Email and Inbox channels
- Template Variables:
{{task_title}}, {{task_id}}, {{task_priority}}, {{task_description}}
2. Task Status Changed Workflow
- Slug:
task_status_changed
- Category:
Transactional (or create custom category task-updates to handle preferences)
- Delivery Nodes: Email and Inbox
- Template Variables:
{{task_title}}, {{old_status}}, {{new_status}}, {{task_id}}, {{task_description}}
See the workflow builder guide for creating workflows.
Setting up workflow triggers in backend code
When a task is created or status changes, trigger the workflow:
const triggerWorkflow = async (workflowSlug, userEmail, distinctId, eventData) => {
await fetch('https://hub.suprsend.com/trigger/', {
method: 'POST',
headers: {
'Authorization': `Bearer ${process.env.REACT_APP_SUPRSEND_API_KEY}`,
'Content-Type': 'application/json',
},
body: JSON.stringify({
workflow: workflowSlug,
recipients: [{
distinct_id: distinctId,
$email: [userEmail],
$channels: ['email', 'inbox'],
$skip_create: false
}],
data: eventData
})
});
};
When you trigger a workflow, SuprSend automatically checks user preferences and respects opt-outs. See the workflow API reference for complete details.
Part 5: Add NotificationPreference Centre
SuprSend provides a complete preference system out of the box. Preferences are automatically evaluated when you trigger workflows—no manual checks required.
import { useSuprSendClient, PreferenceOptions } from '@suprsend/react';
const suprSendClient = useSuprSendClient();
// Get preferences
const resp = await suprSendClient.user.preferences.getPreferences();
// Update category preference
await suprSendClient.user.preferences.updateCategoryPreference(
'task-updates',
PreferenceOptions.OPT_IN
);
See the JavaScript preferences API for complete details.
Part 6: Building the Kanban Board
The Kanban board is a standard React component with drag-and-drop functionality. Integrate workflow triggers:
const handleCreateTask = async (taskData) => {
const newTask = { id: Date.now().toString(), ...taskData };
setTasks([...tasks, newTask]);
// Trigger notification
await triggerWorkflow('task_created', userEmail, distinctId, {
task_title: newTask.title,
task_id: newTask.id,
task_priority: newTask.priority
});
};
const handleStatusChange = async (task, newStatus) => {
const updatedTask = { ...task, status: newStatus };
setTasks(tasks.map(t => t.id === task.id ? updatedTask : t));
// Trigger notification
await triggerWorkflow('task_status_changed', userEmail, distinctId, {
task_title: task.title,
old_status: task.status,
new_status: newStatus,
task_id: task.id
});
};
Always wrap workflow triggers in try-catch blocks:
try {
await triggerWorkflow('task_created', userEmail, distinctId, eventData);
} catch (error) {
console.error('Notification failed:', error);
// Continue with task creation even if notification fails
}
Part 7: Production Deployment
Pre-Deployment Checklist
- ✅ All API keys are in environment variables
- ✅ Workflows are committed (not in draft mode)
- ✅ Templates are published
- ✅ Error handling is in place
- ✅ User preferences are set correctly
Deploying to Vercel
- Build the app:
npm run build
- Deploy via CLI:
vercel --prod
- Set environment variables in Vercel dashboard
- Configure routing with
vercel.json:
{
"rewrites": [
{
"source": "/(.*)",
"destination": "/index.html"
}
]
}
Post-Deployment Verification
- Test OTP email delivery
- Verify inbox notifications appear
- Check email notifications are received
- Test preference changes persist
- Monitor SuprSend dashboard for delivery logs
What’s Next?
Ready to add notifications to your app? Start with the React SDK quickstart and see how quickly you can go from zero to production-ready notifications.
Questions? Join our Slack community or Ask AI.
Build faster. Scale effortlessly. 🚀