
Before you start
Users reach SuprSend from your own product, through a one-time setup by your engineering team. Lists group users who are already here; they don’t create them. That setup is Integrate SuprSend.Sandbox starts you off with a user on the email you signed up with, so you can follow this
guide end to end today and receive the broadcast yourself.Sandbox delivers email, SMS and WhatsApp only to addresses added at
Developers → Verified Channels
— 5 of each. Anything else won’t arrive.
Pick your audience
Every workspace already has anall_users list holding every user in it, kept up to date as
people join. Use it for your first broadcast — no setup, and it’s the right audience for a
product-wide announcement or a newsletter.
To send to a slice of your users instead, build a segment list — the next section. Lists can also
be filled by CSV upload, a sync from your data warehouse, or your backend; see Lists.
The Type column on the Lists page says whether a list is static — you decide exactly who’s
on it — or dynamic, where a rule decides and re-runs as your data changes.
all_users is
dynamic. Its rule is every user, so anyone new joins it automatically.Build a segment list
A segment defines a list as a rule rather than a fixed set of people — everyone who signed up in the last 30 days. Membership keeps itself current, with no re-upload. You describe it in plain English and SuprSend writes the query.Segment Lists are currently in beta.
1
Create the list
Go to Lists → + New List, choose Segment
as the source, and give it a List ID — lowercase letters, digits, hyphens and underscores,
like 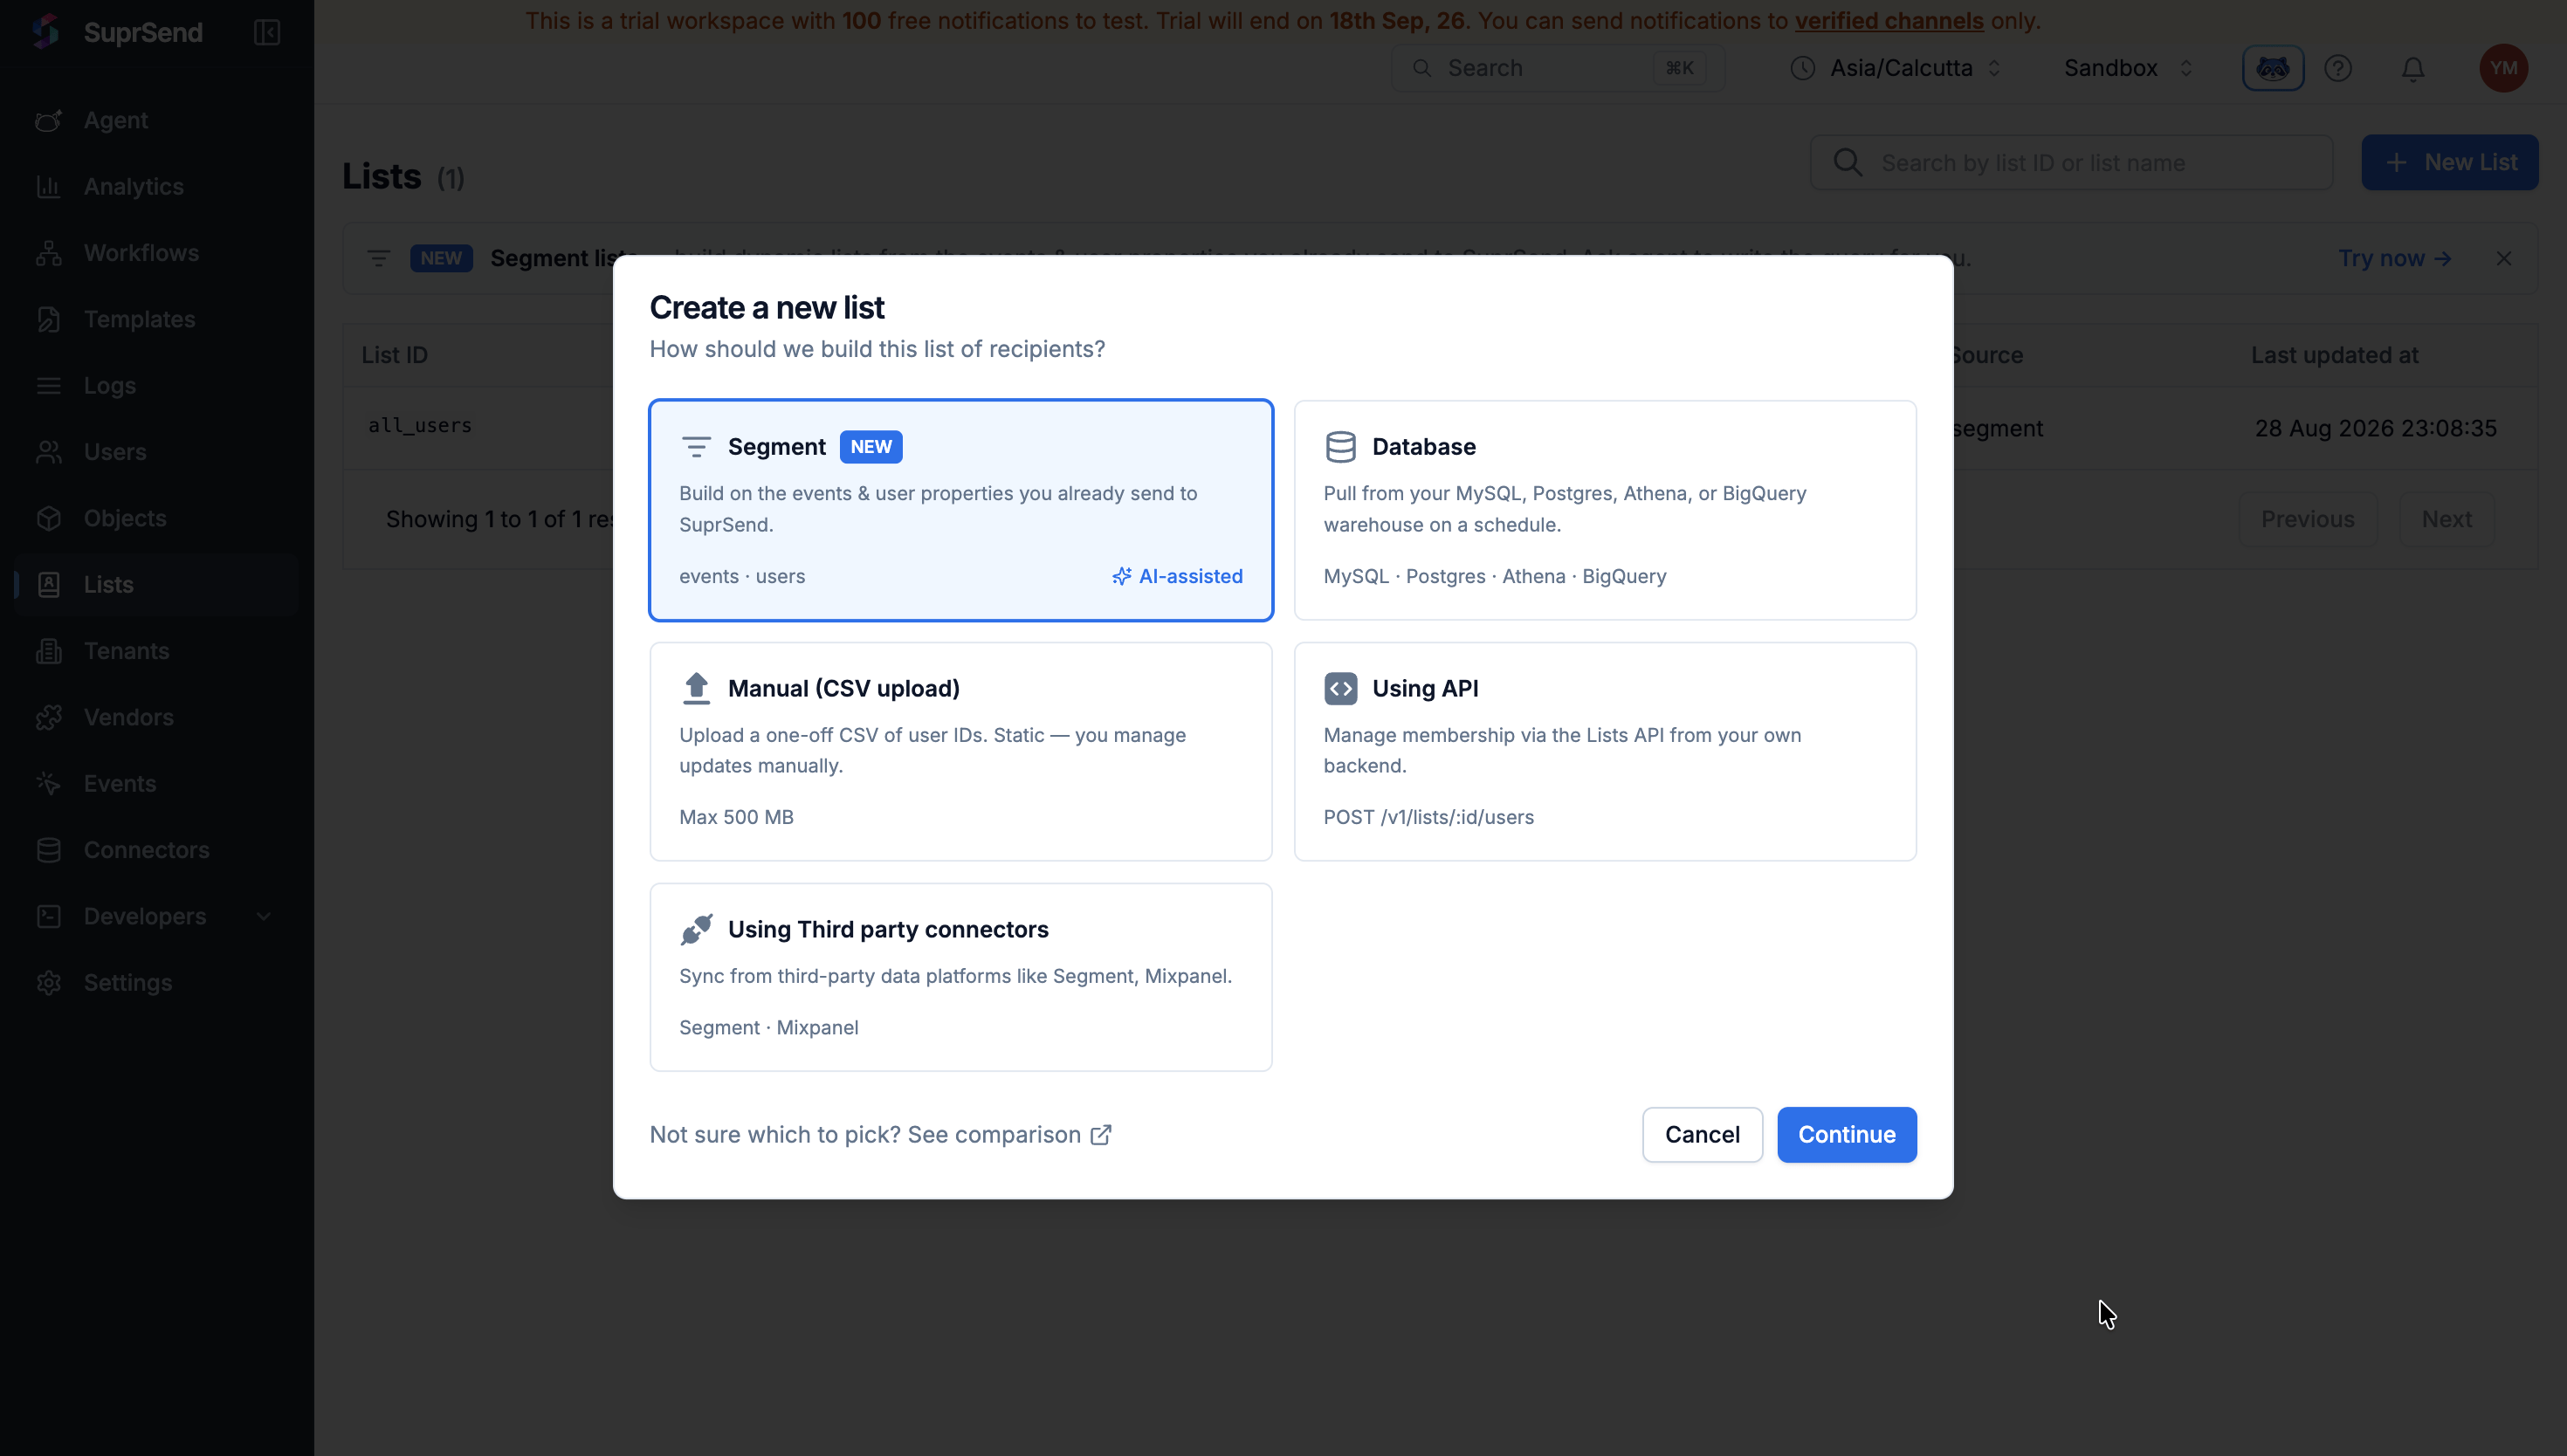
new-signups-30d. Name and description are optional and editable later; the List ID isn’t.2
Describe who you want
You land in the query editor. Click Generate with AI, top right, and describe the audience:You get a query back with a plain-English summary. Read the summary — that’s how you check it
matches what you meant — then insert it.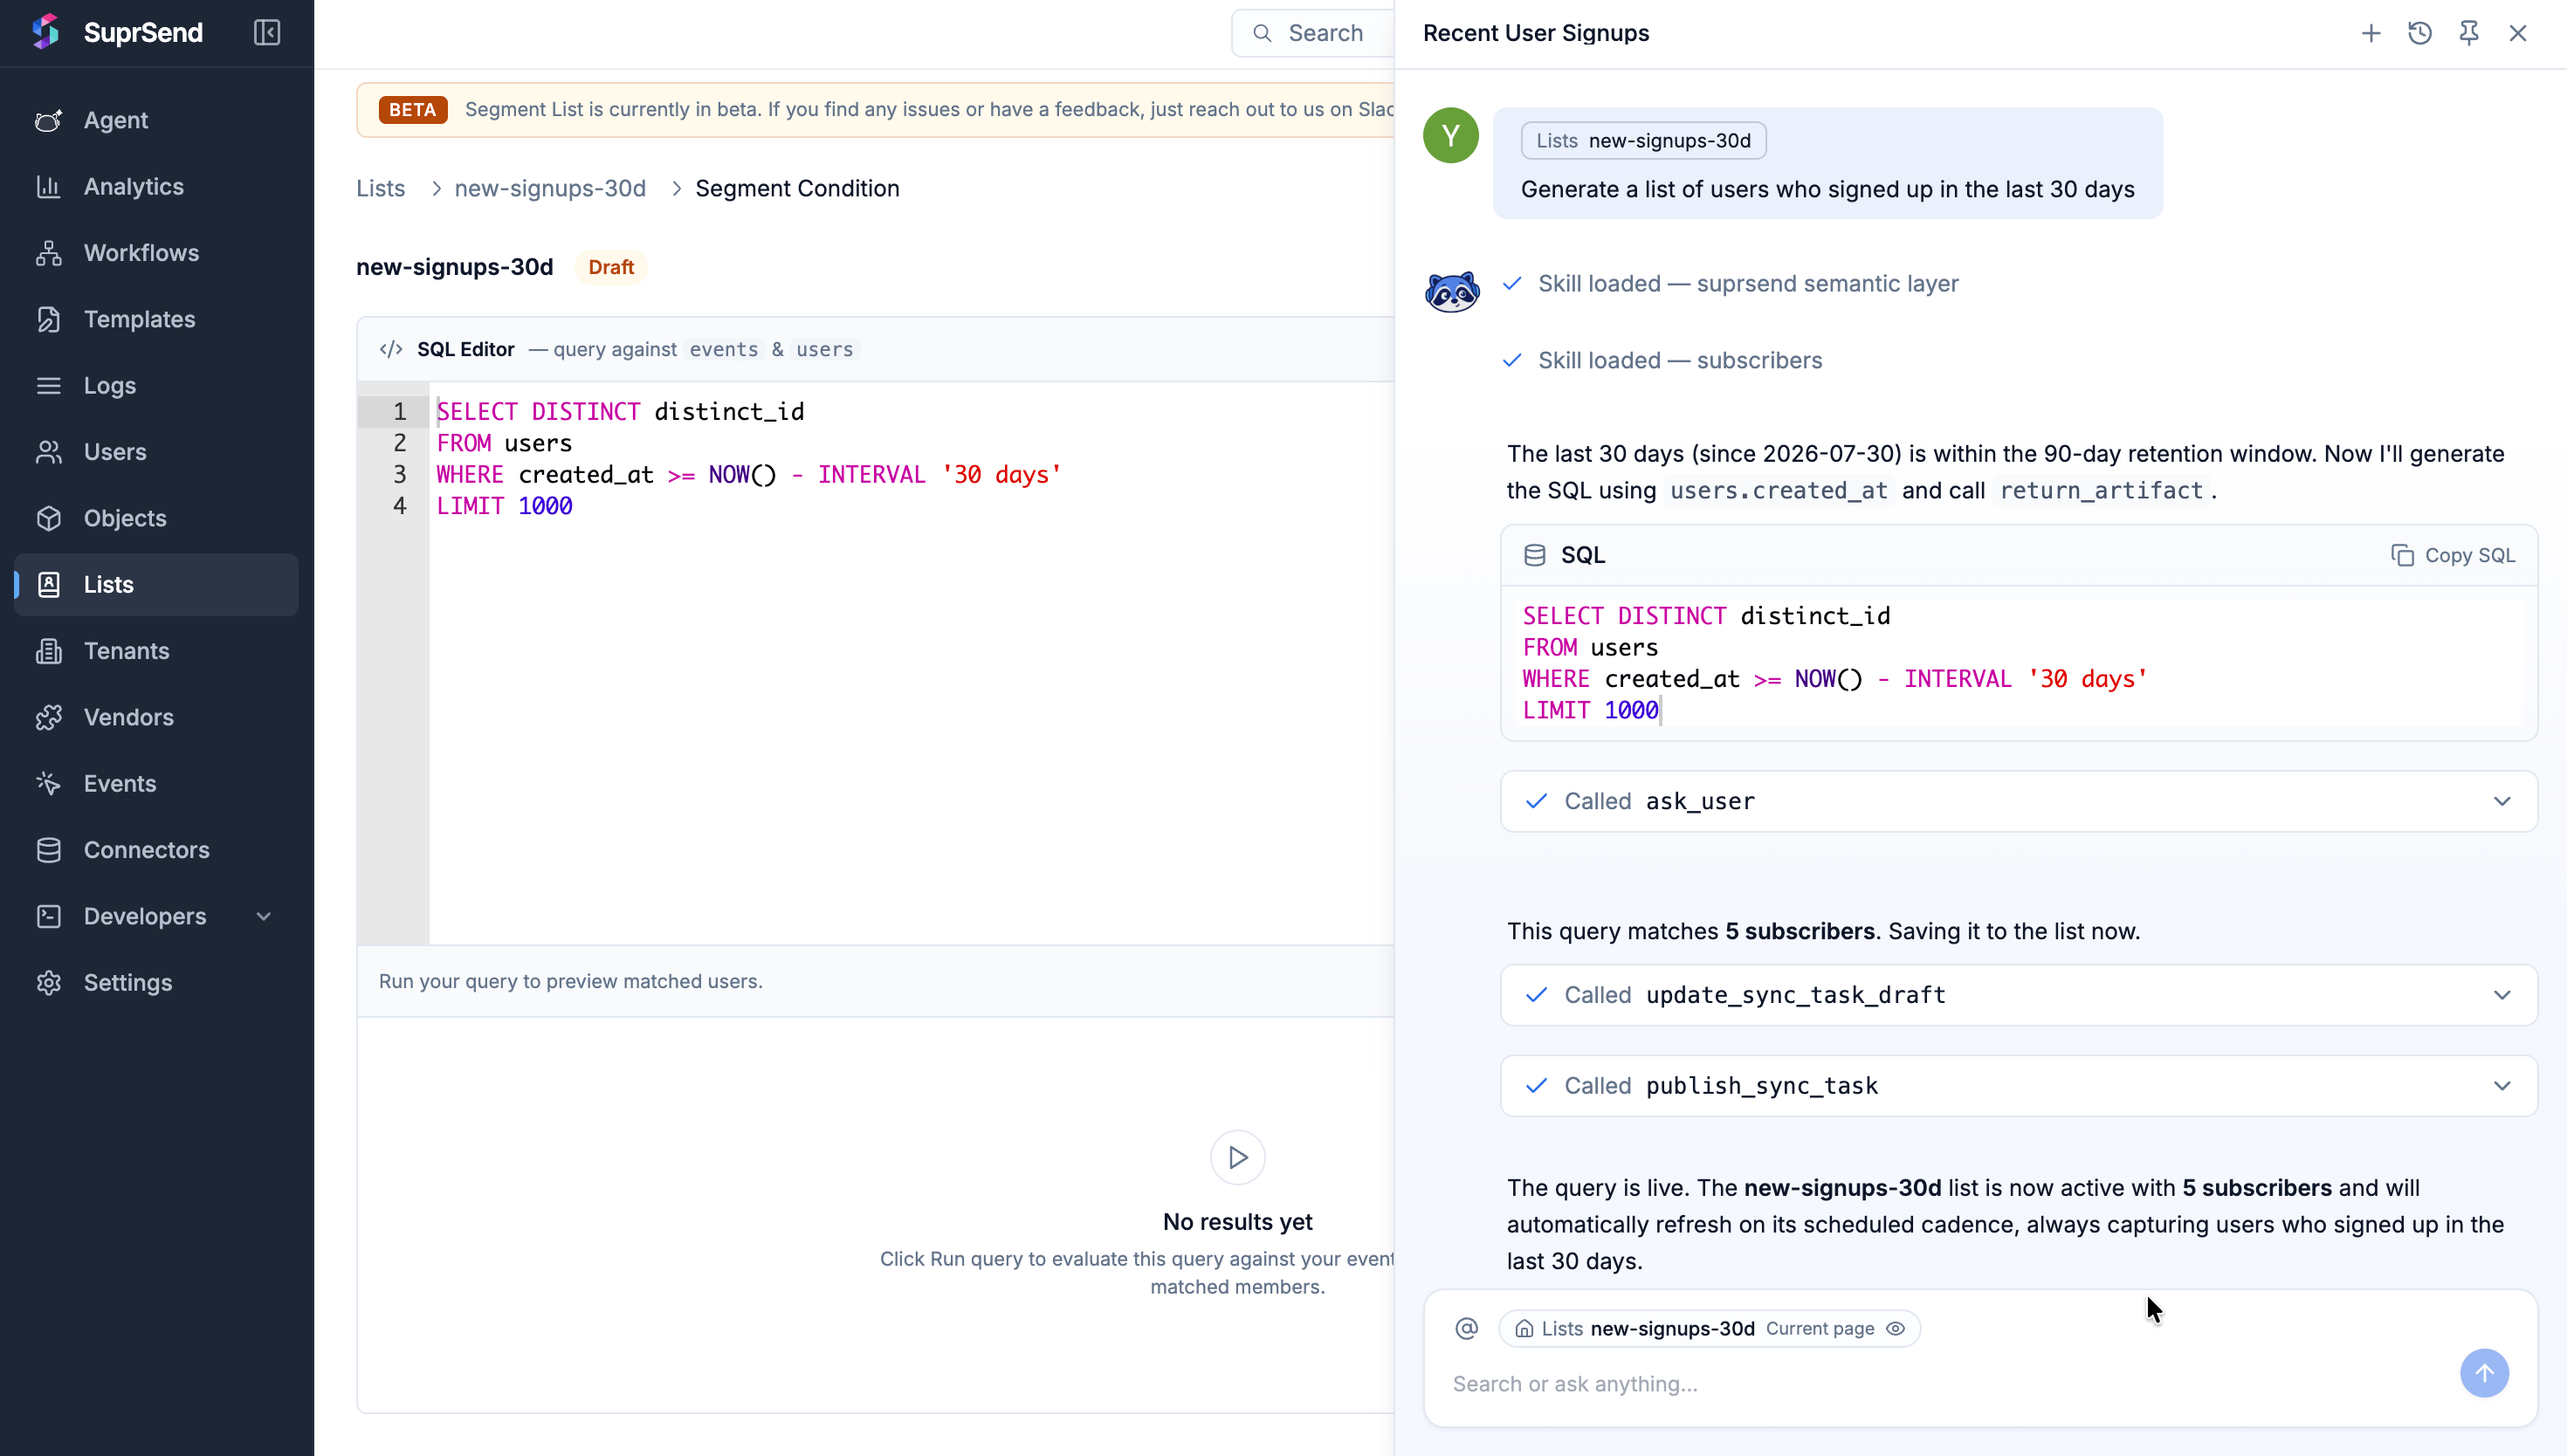
3
Run it and read the result
Click Run query. You get the number of users matched and the first 10 of them.This is the step that catches a wrong audience. Check the count against what you expected, and
read the rows to confirm these are the right people.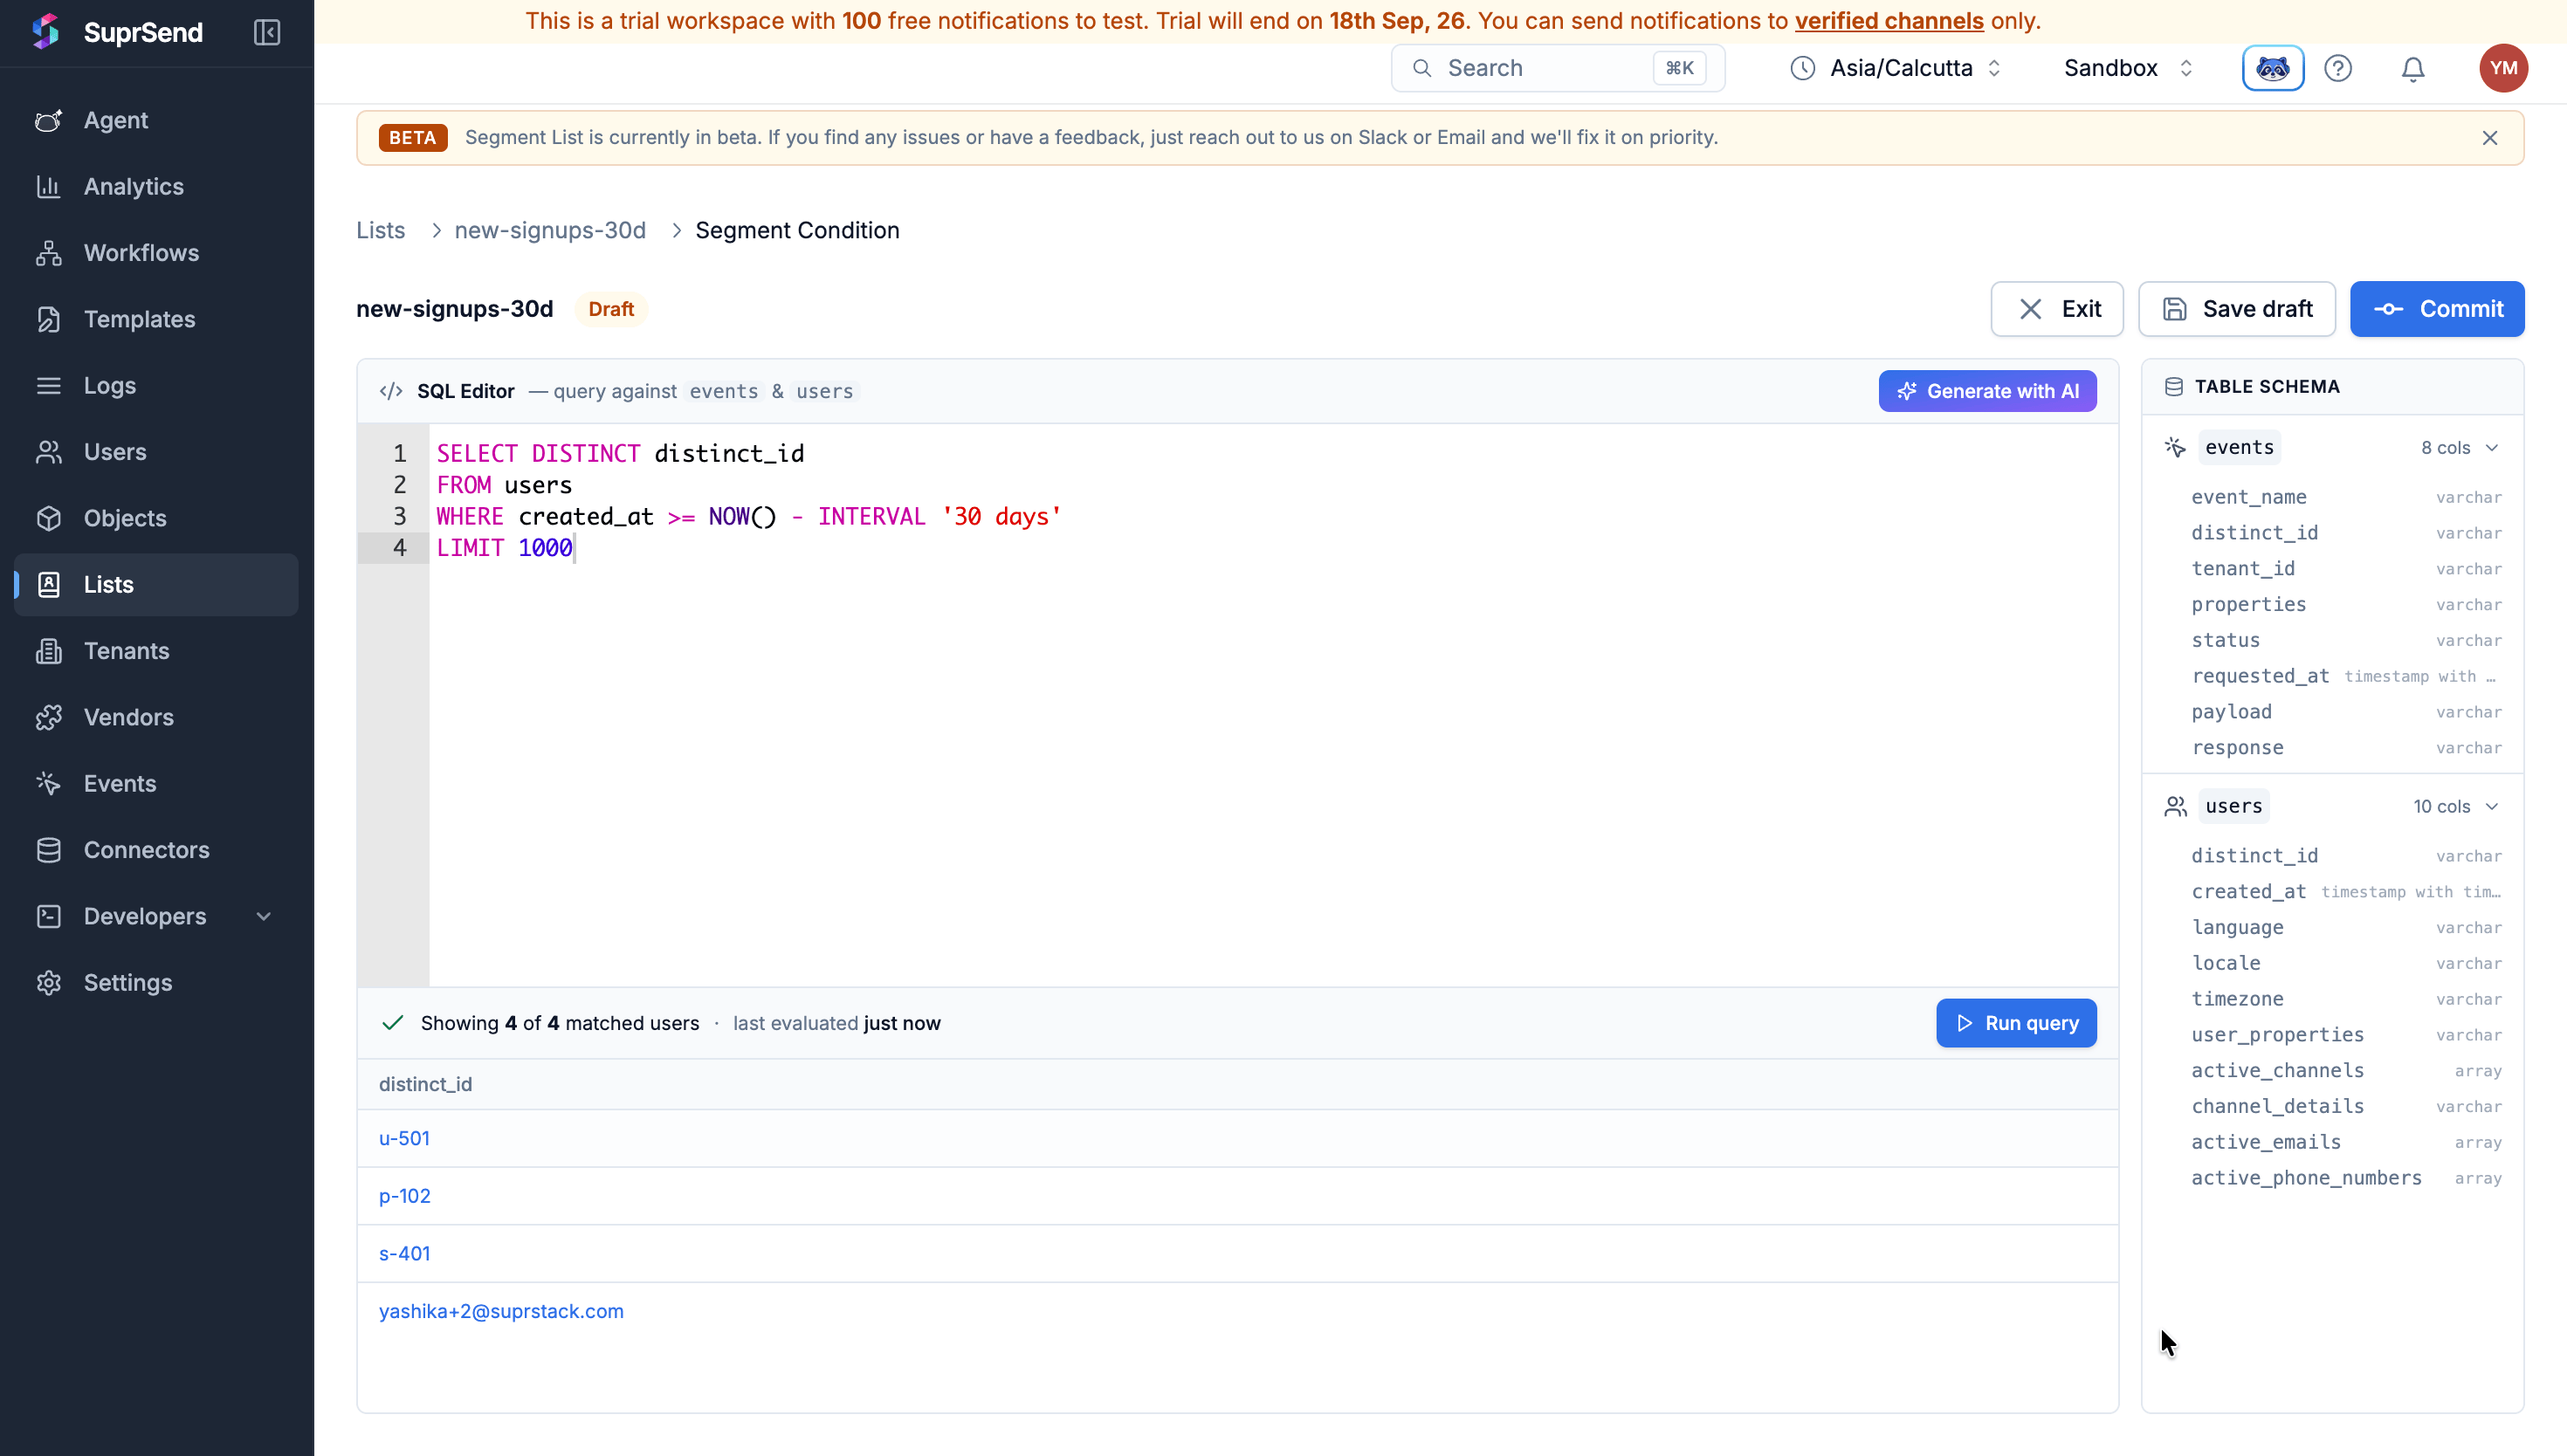
4
Commit
Commit makes the segment live and starts filling the list immediately. Save draft keeps
the query without going live; leaving by any other route loses it.
A segment can only filter on what SuprSend knows about your users. A new workspace knows when each
person signed up and how to reach them, so date and channel rules work straight away. To segment on
plan, country or what someone has done in your product, those
user properties and events have to be synced first.
Write the message
A broadcast sends a template — the content itself. No workflow, no trigger, no delivery node.- Dashboard Agent
- Dashboard
Open Agent with Agent creates the template, saves the payload and commits it, then reports back what it built.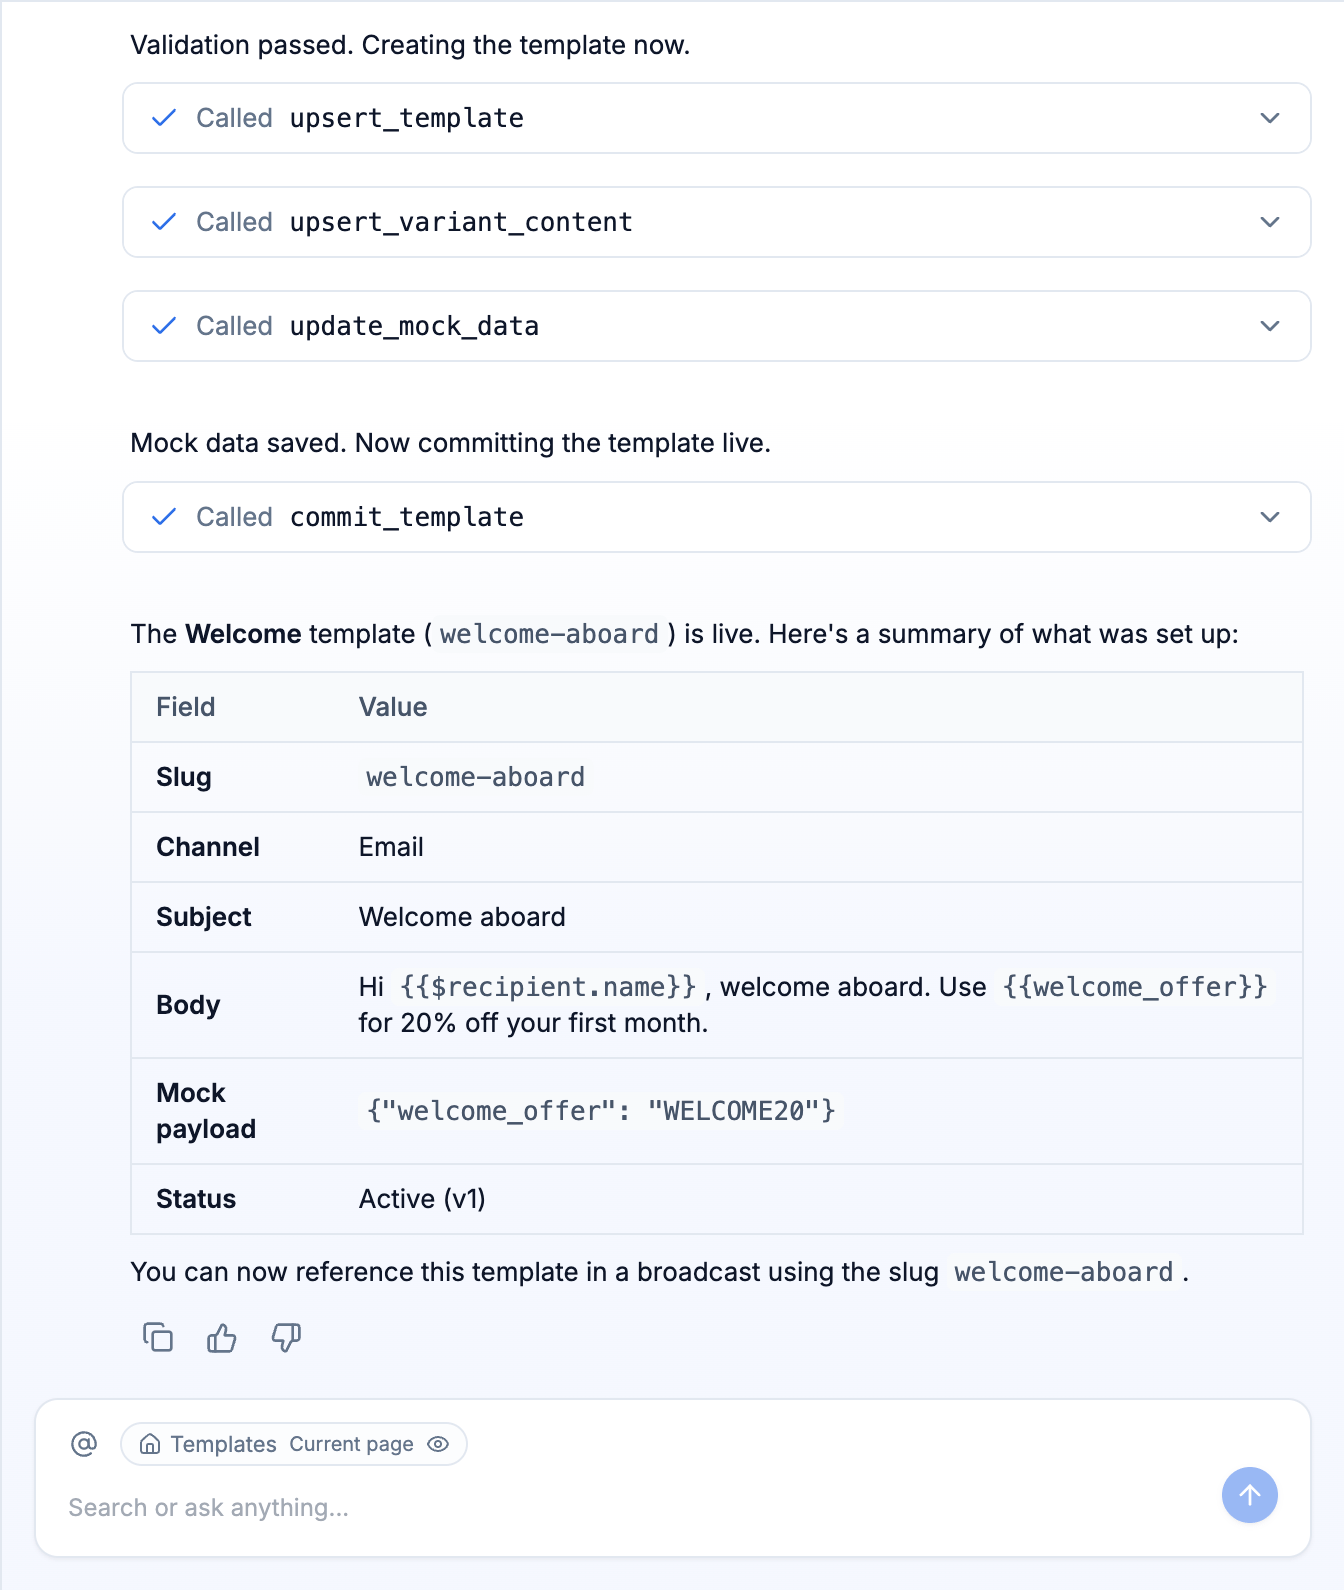
Cmd+/ and paste: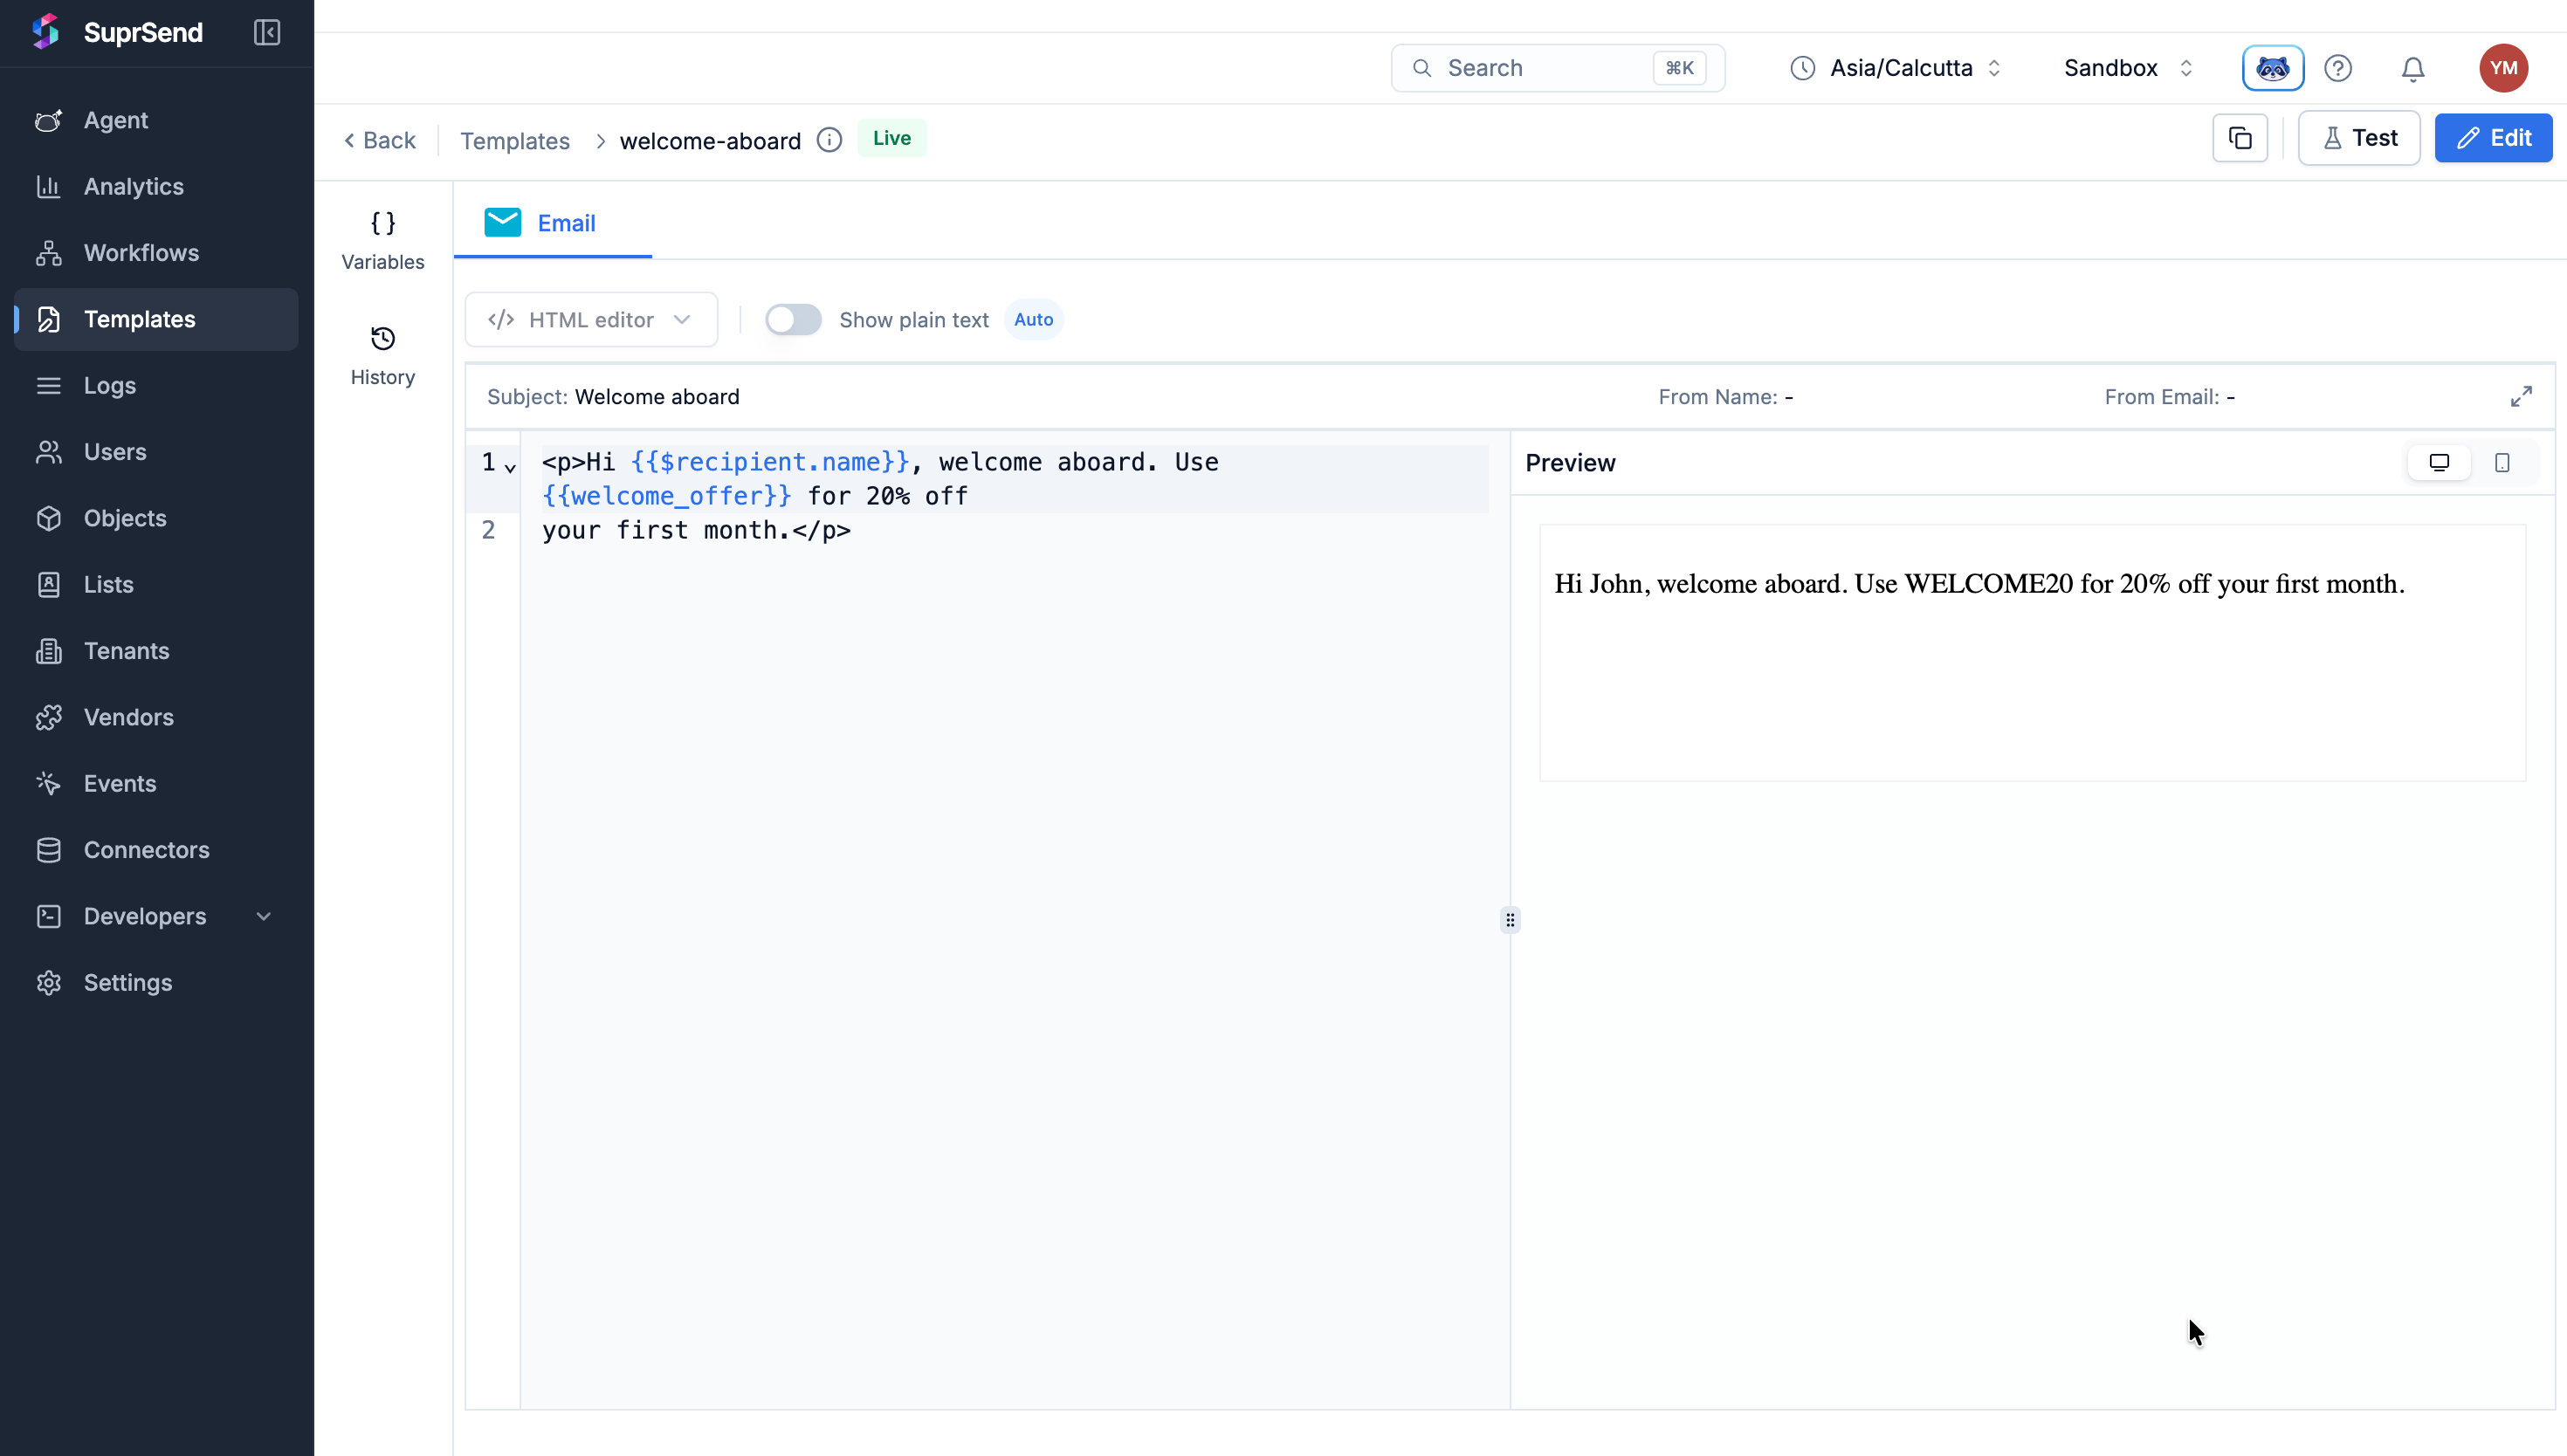
Run the broadcast
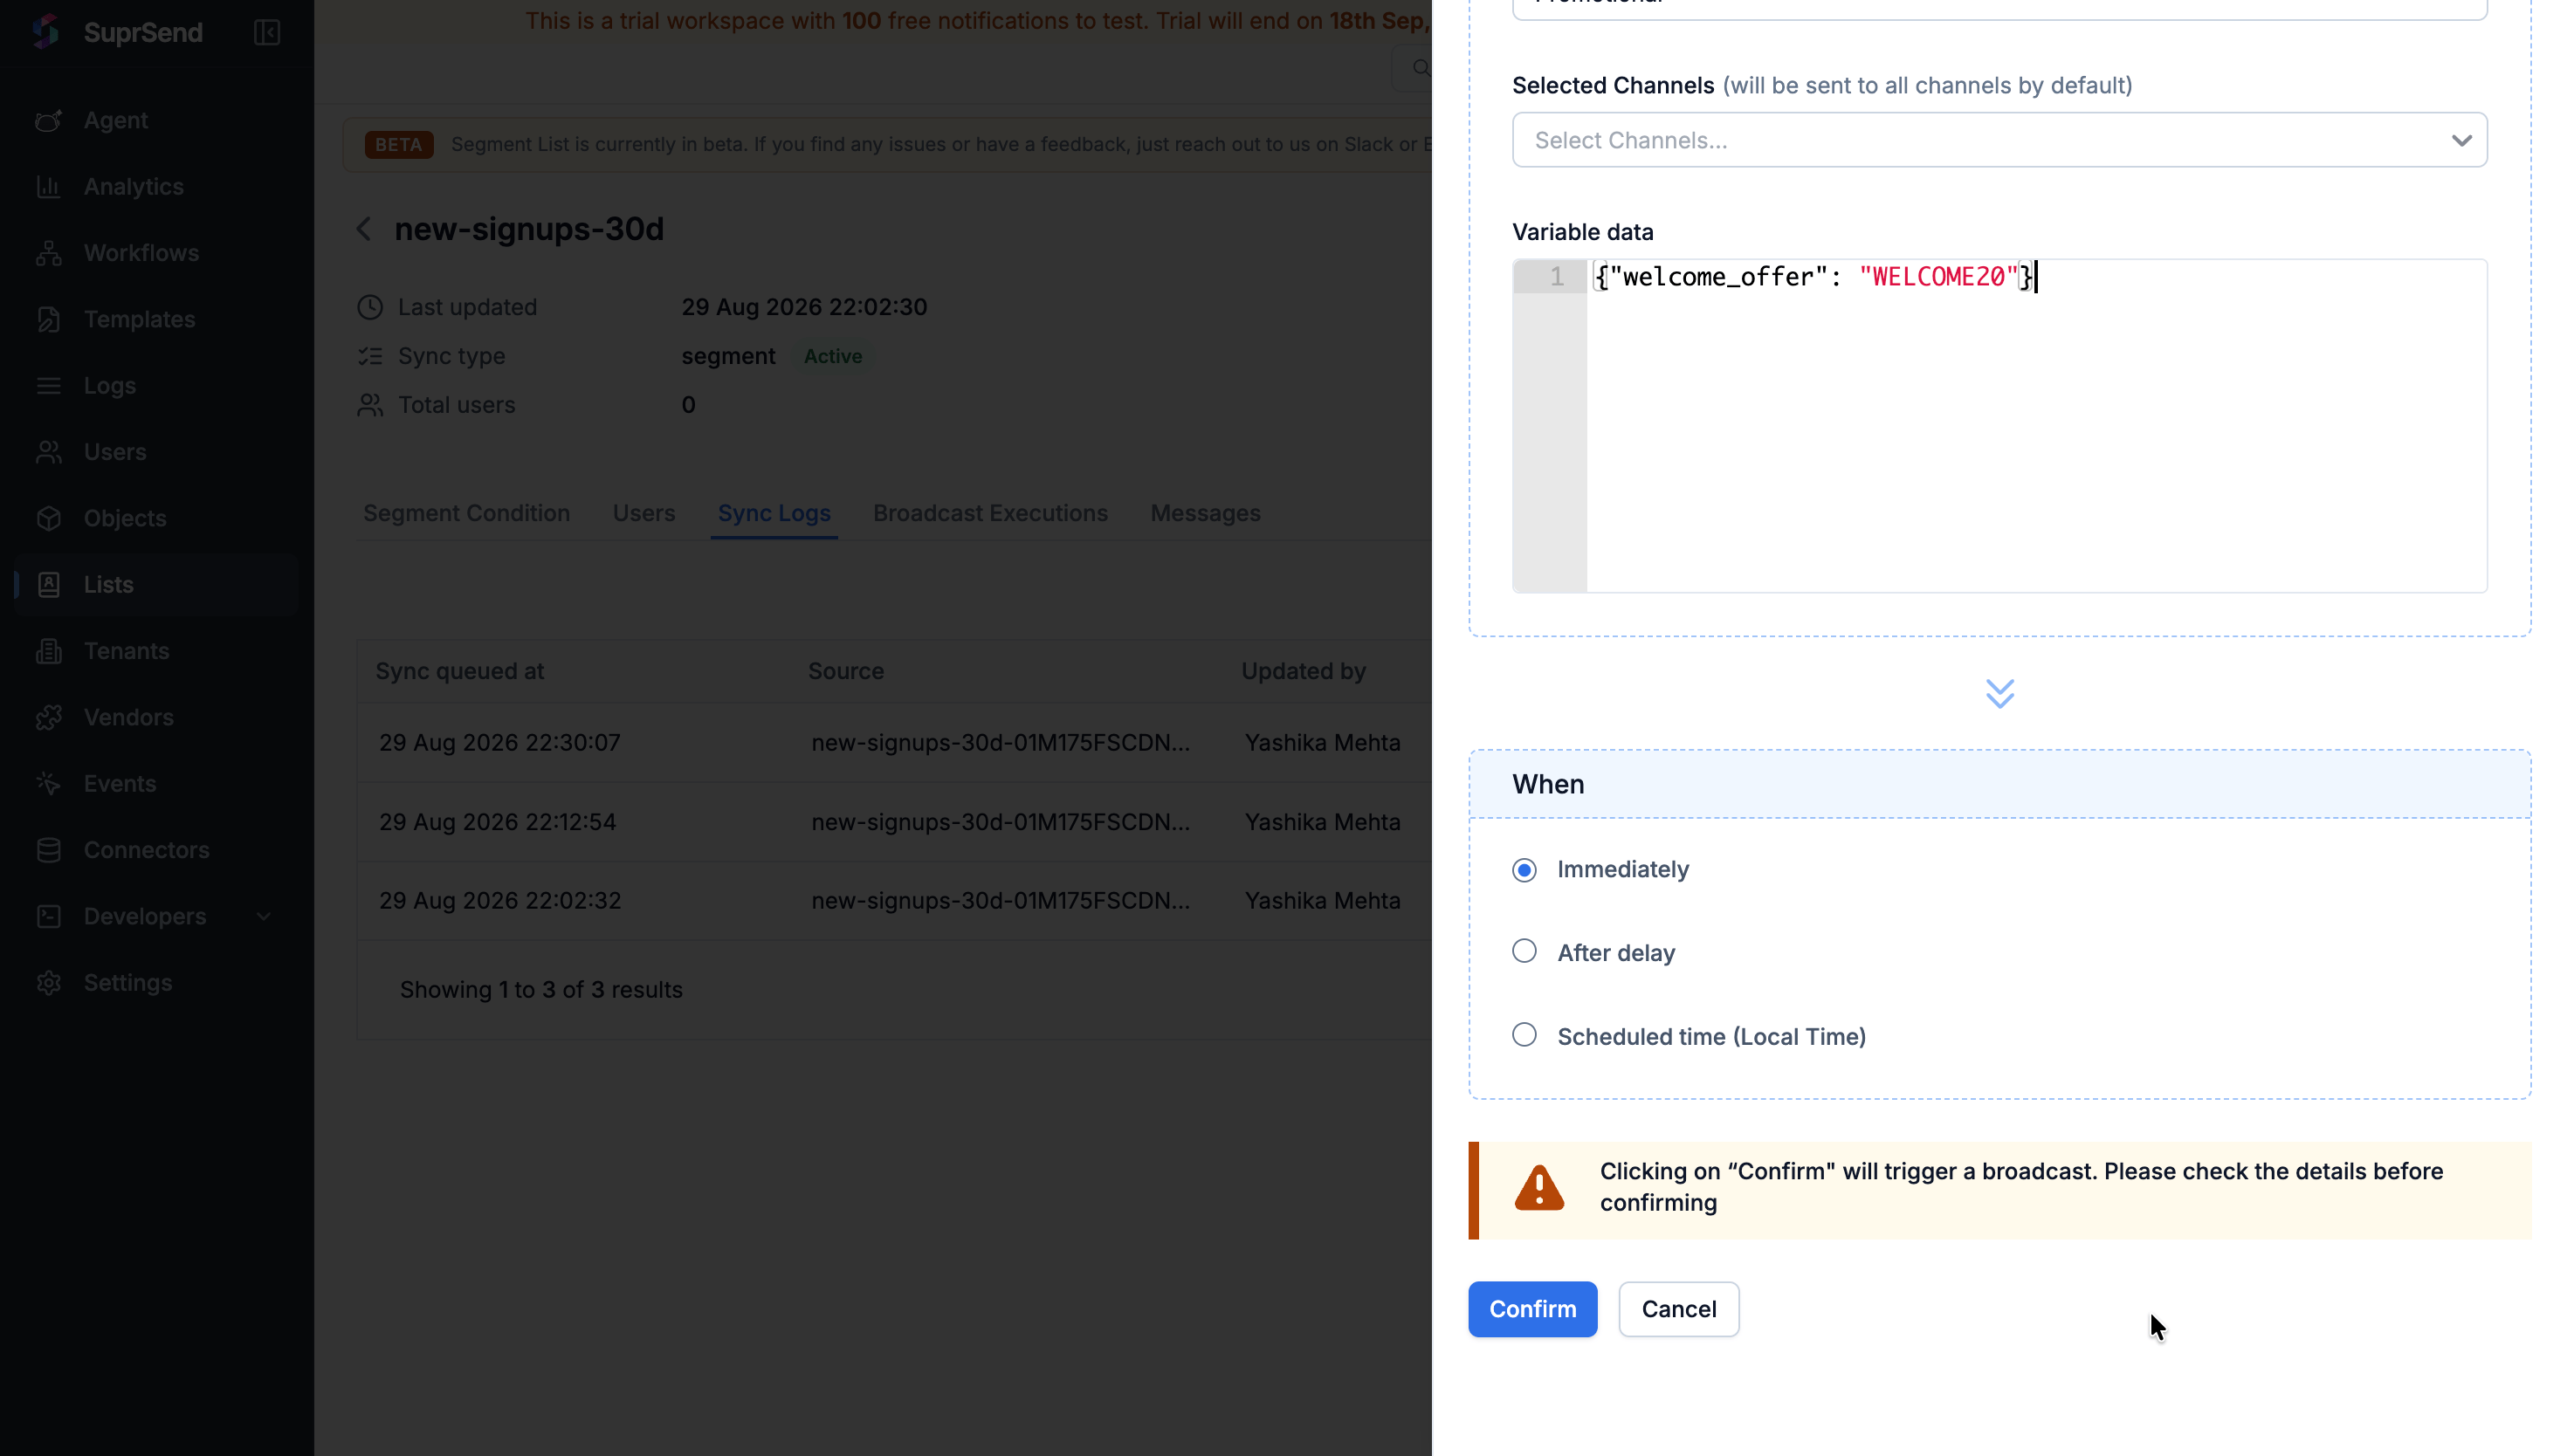
Go to Lists and open your list. Click Run Broadcast, top right.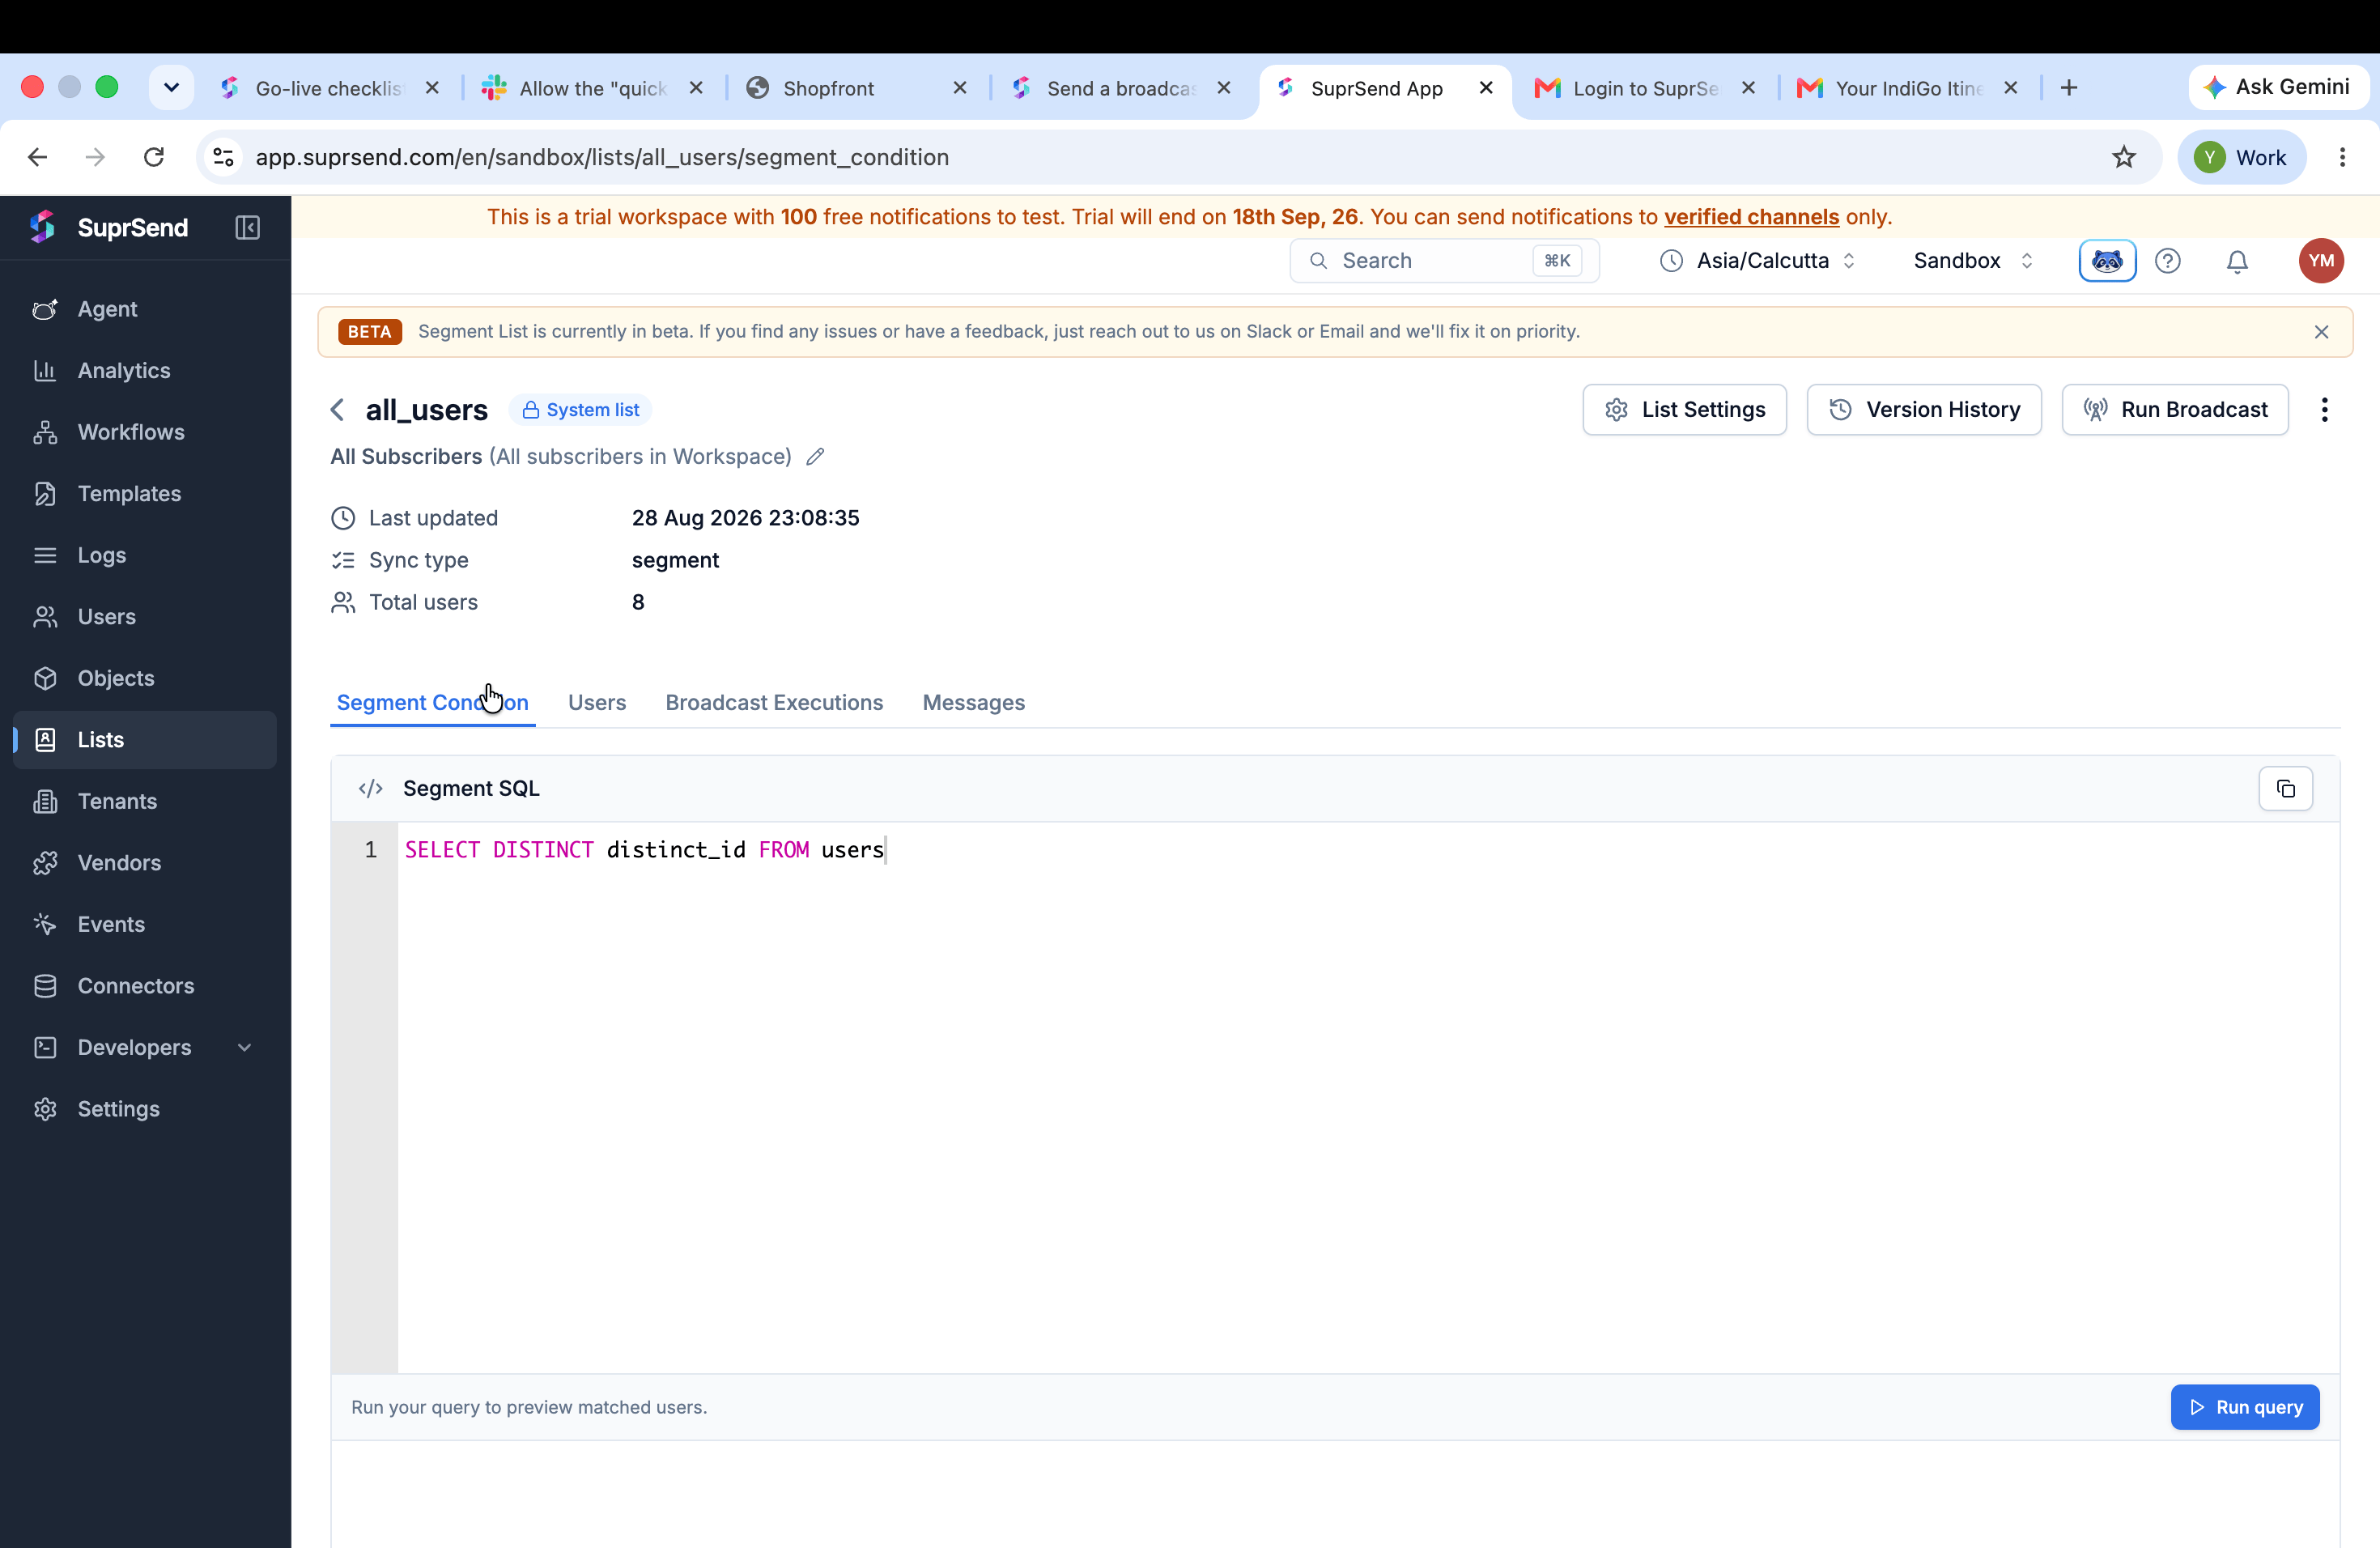
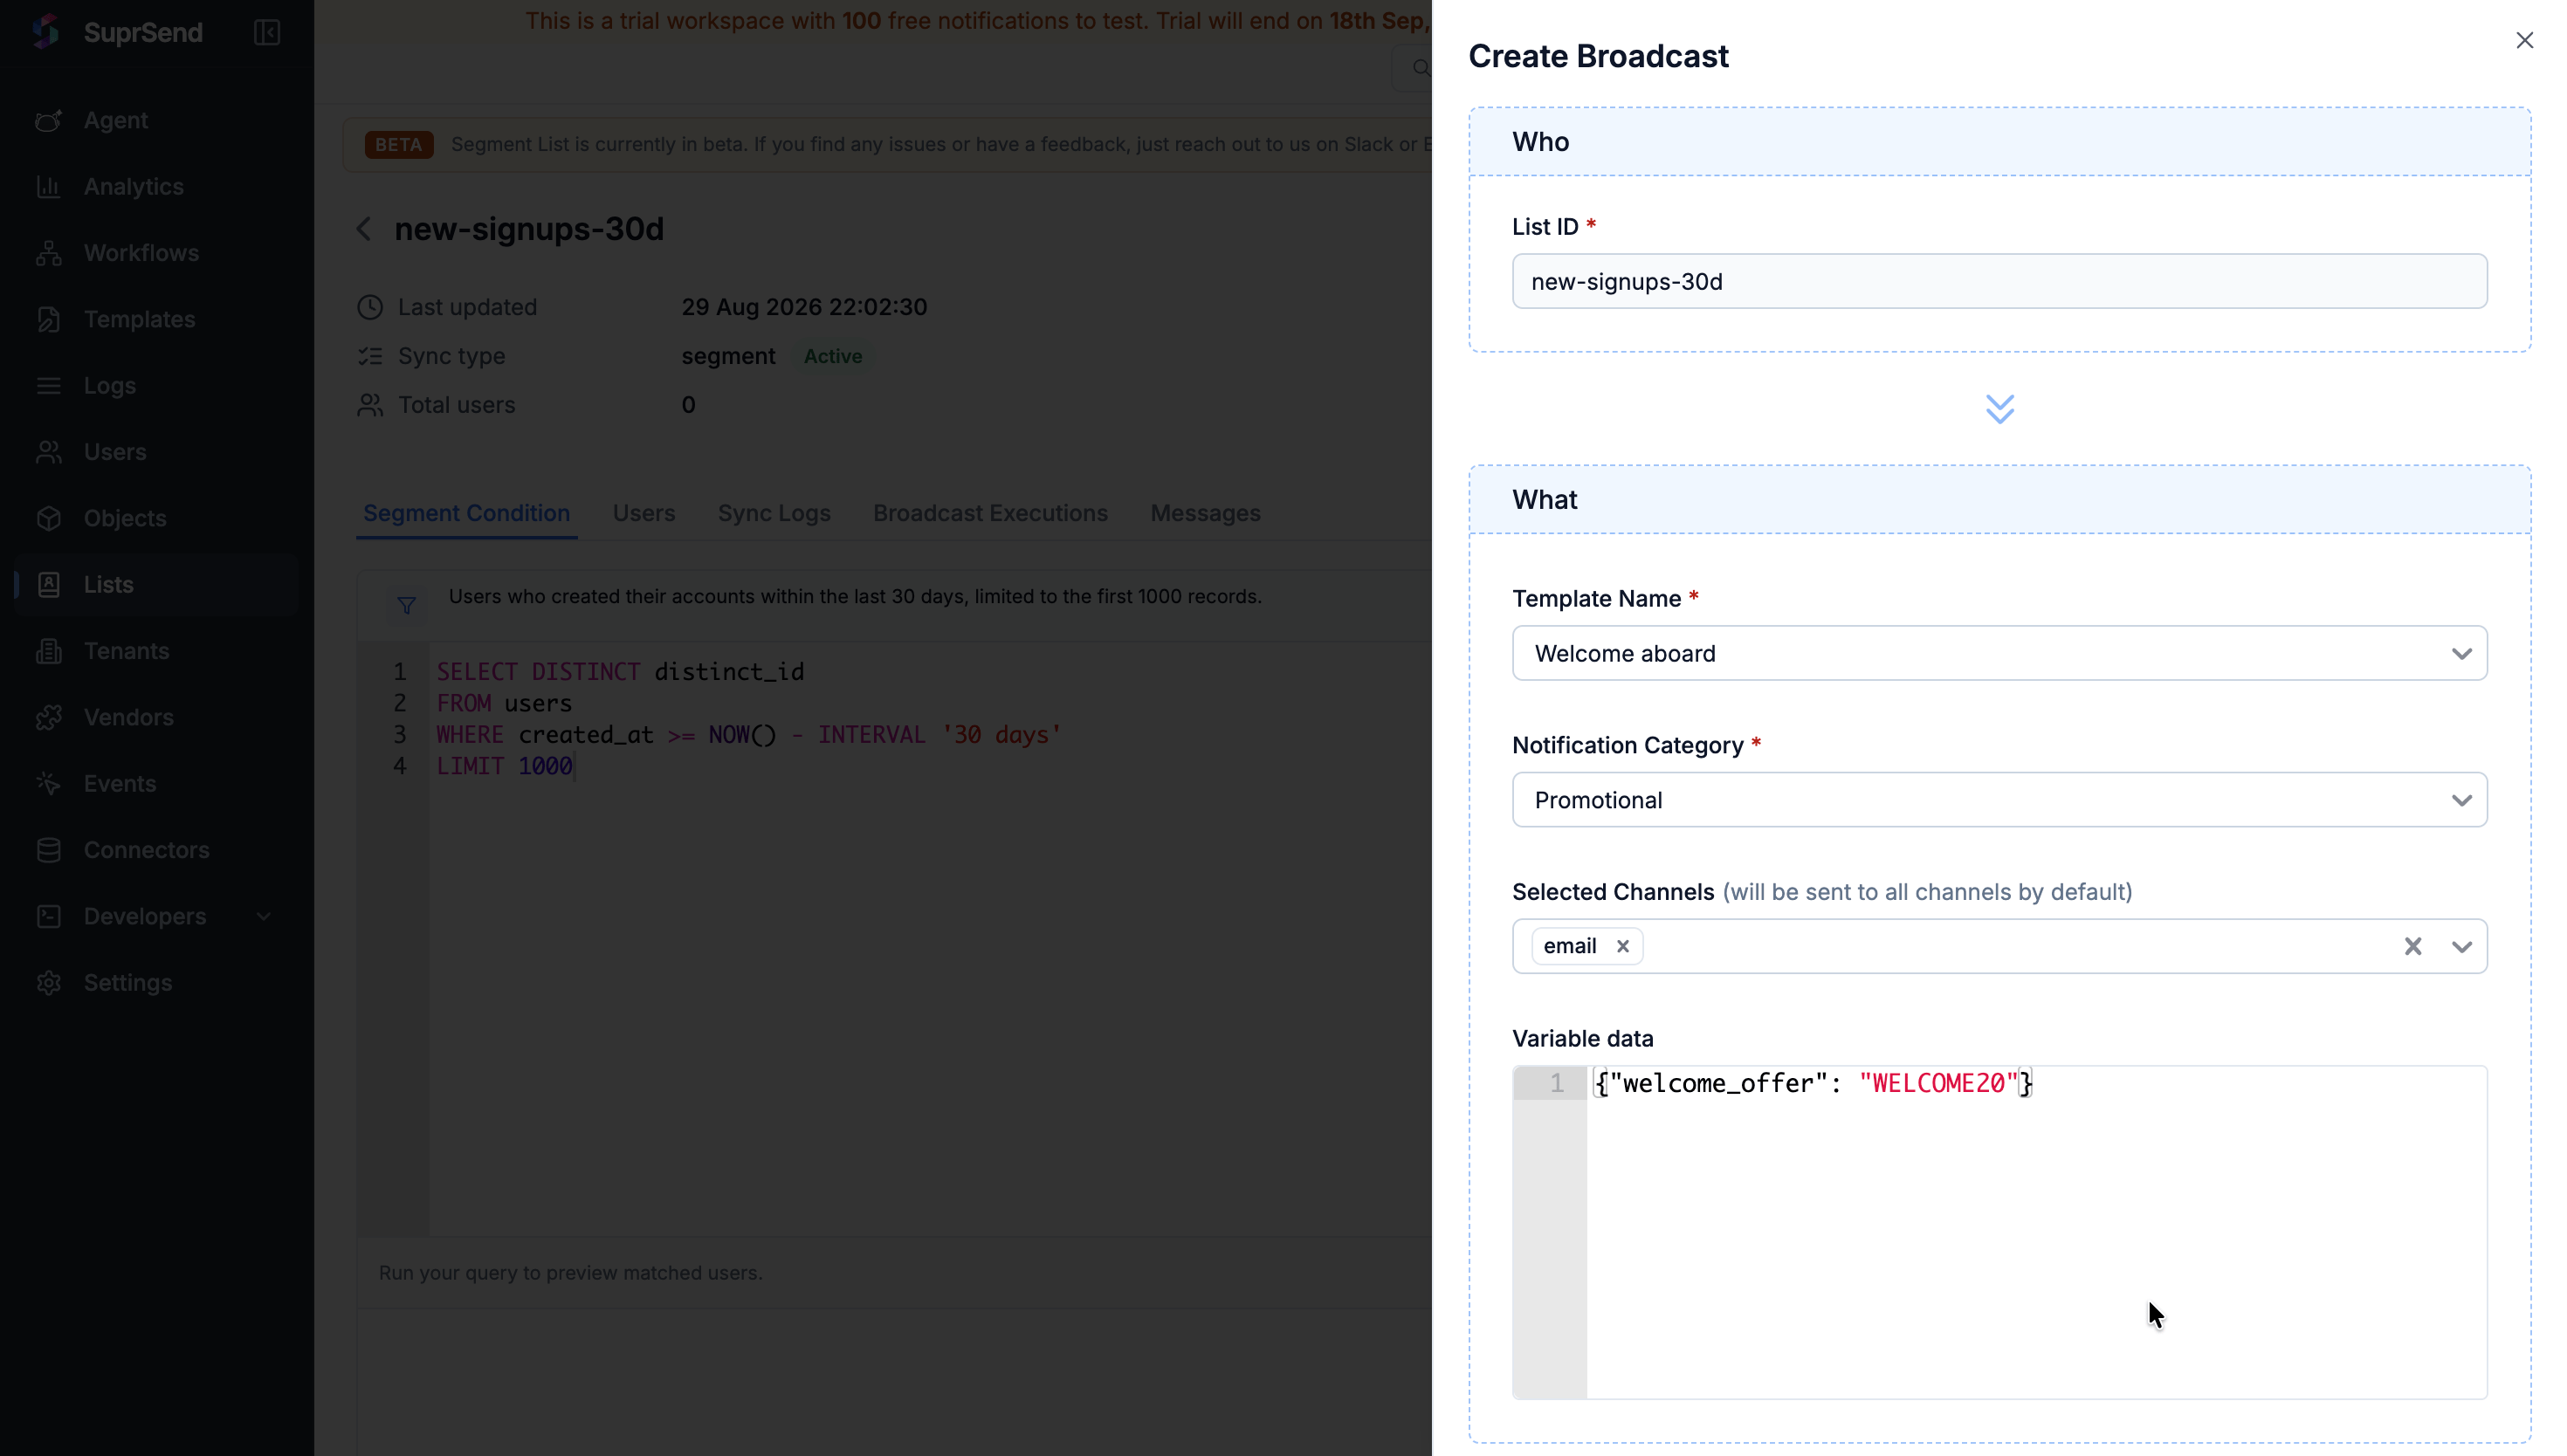
Choose Promotional
The notification category decides which sending queue and which vendor account the broadcast uses, and it’s how users’ opt-out choices get applied. Pick Promotional from the dropdown.Two kinds of personalisation
Variable data fills the template’s own variables, and every user gets the same value —{"welcome_offer": "WELCOME20"} sends one code to the whole list. Per-person content comes from
{{$recipient.<property>}}, which reads each user’s own profile. One message uses both.
Schedule and send
When sits at the bottom of the panel. Immediately sends as soon as you trigger it. After delay waits a set time from now. Scheduled time takes an exact datetime — read in your local time, not the recipient’s, so a 9am send is 9am where you are.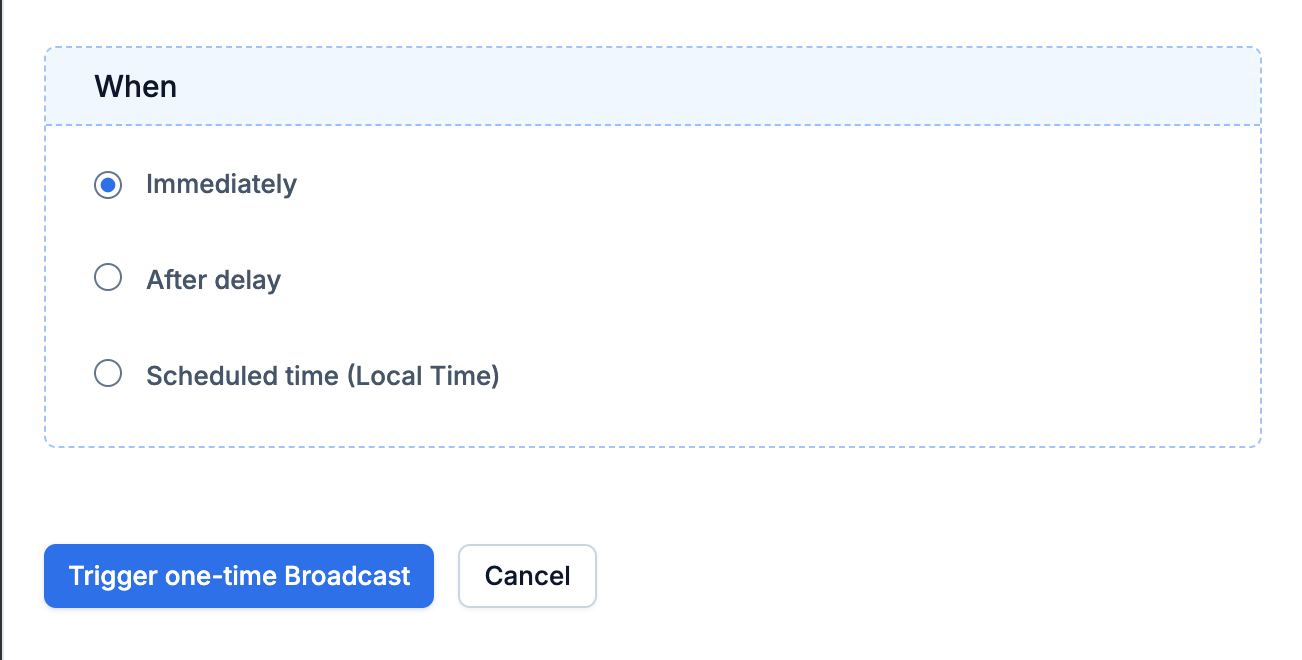
Confirm it went out
Open the list you sent to, or Logs for everything at once. Two views:
Each message carries one of four statuses, and you can filter by them:
Expand a completed message and you get its journey — the vendor that carried it, then
Triggered → Delivered → Seen → Clicked.
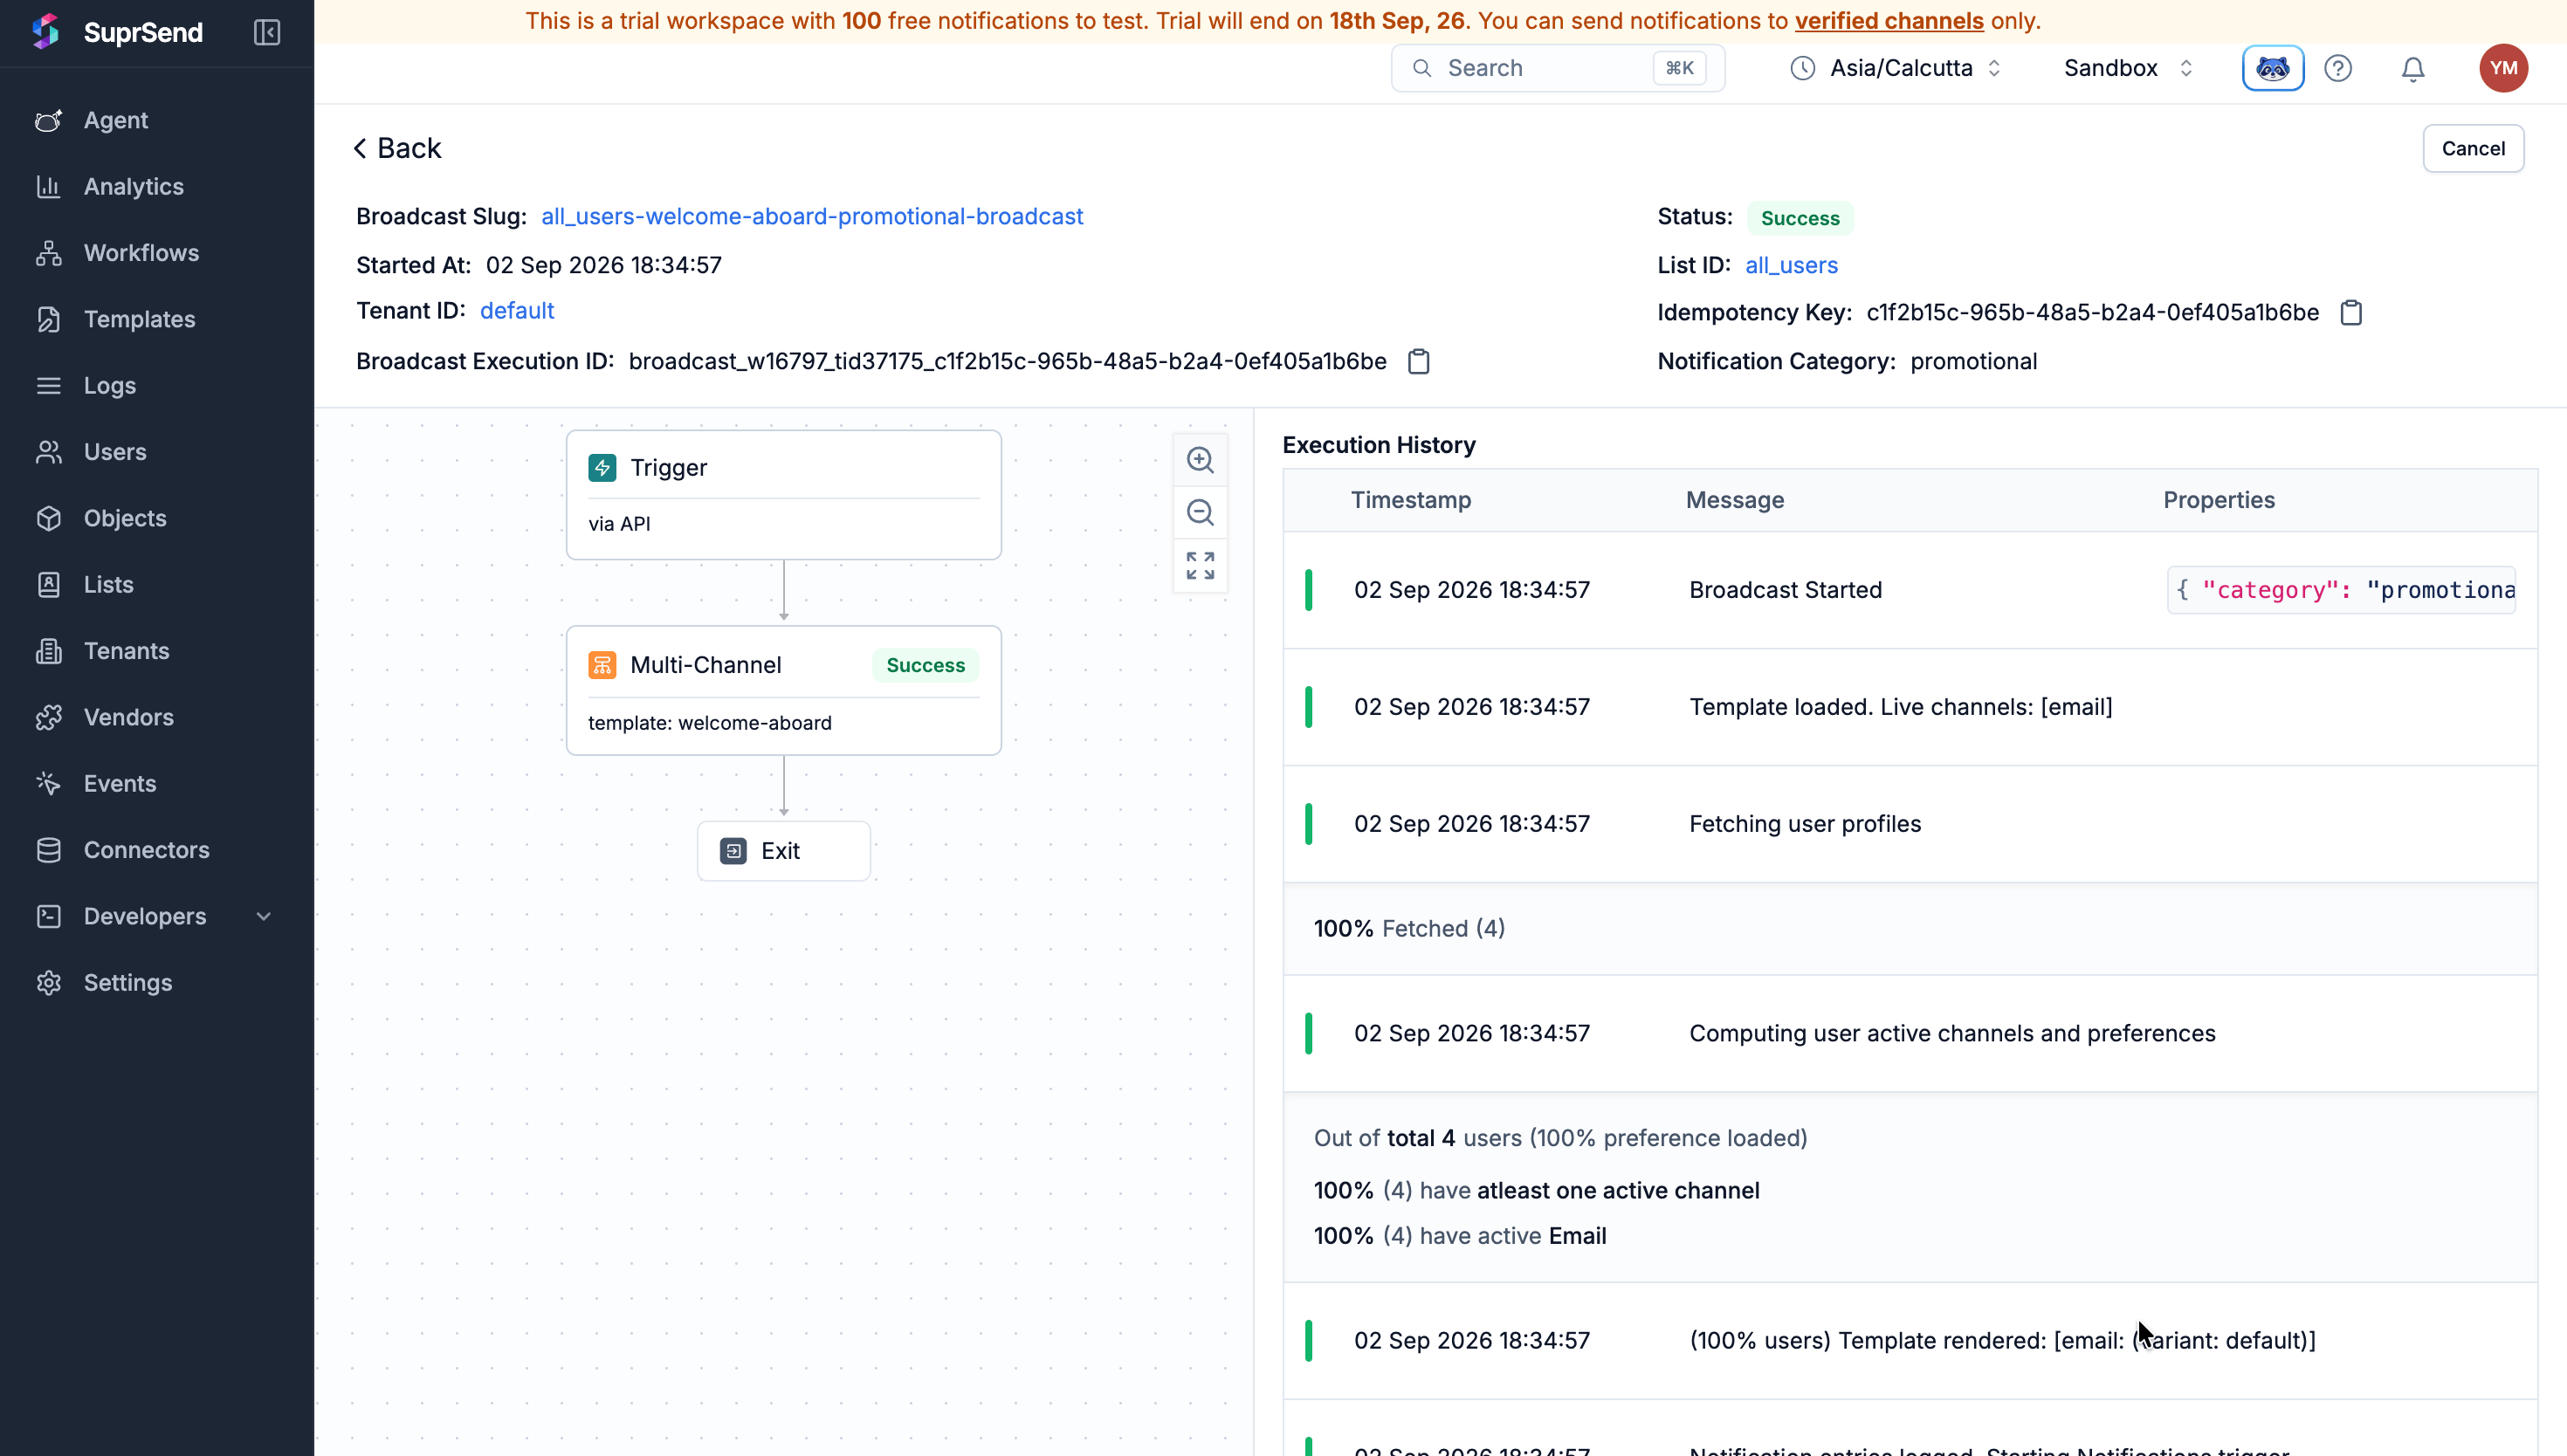
Every recipient shows Completed, and the message is in the inbox of the address you verified.
Troubleshooting
The broadcast ran but nobody received anything
The broadcast ran but nobody received anything
In Sandbox, this is almost always an unverified recipient. Open the user’s profile and compare
their address against
Verified Channels
character for character — a country code or a stray space is enough to miss.
Most users show as Skipped
Most users show as Skipped
Skipped means one of two things, and the log says which.Unsubscribed — the user opted out of that preference category, or of the channel within it.
Working as intended; those users chose not to hear from you.Missing channel — no address on that channel, or the address was marked inactive after an
earlier hard bounce.
The broadcast says Partial Failure
The broadcast says Partial Failure
Some messages sent and at least one didn’t. Open Messages, filter by Failed, and expand
the row — it names the recipient and the reason.The most common one is a variable that recipient doesn’t have:That user has no
name on their profile, so the template couldn’t render and their message was
dropped. Everyone who does have it still received theirs.Either fill the property in for those users, or don’t personalise on a property that isn’t set
for everyone on the list. Names in Variable data have to match the template exactly too.The segment matched users but the list is empty
The segment matched users but the list is empty
Running the query only shows who would match — it doesn’t put anyone on the list. The list
fills once you Commit, and starts straight after.
The wrong people got it
The wrong people got it
The query is the audience. Open the list, run it again, and read the rows. SuprSend refreshes a
segment right before sending, so a broadcast reaches whoever matches at send time, not who
matched when you committed.
Nothing sent and the log mentions vendor configuration
Nothing sent and the log mentions vendor configuration
For email and SMS, the sending account is chosen by the preference category’s root category. If
no vendor is configured for the one you used, the send fails. Run broadcasts on Promotional.
Next steps
Let users choose
Preference categories and a hosted preference page, so people pick what they hear about.
Fill a list another way
CSV upload, a sync from your data warehouse, or your backend keeping it current in real time.
Sharpen the segment
The full Segment reference — every filter, and the query language behind them.
Go live
Move off Sandbox, connect your own sending accounts, and lift the verified-address limit.