Add SMS, WhatsApp, in-app inbox, push, Slack and Microsoft Teams to your SuprSend integration.
Integrate SuprSend sent one email from your backend. This guide adds every
other channel to it.
You need what that guide left you with: the live order-shipped template, the live
order-shipped-notification workflow, and the two calls in your backend that sync a user and
trigger that workflow.
Everything runs in Sandbox, where SuprSend’s vendors are already connected. Four channels still
need a moment of setup first: in-app inbox, Slack and Teams have to be switched on, and mobile push
needs a Firebase or APNS account of your own. Each section says so up front.
Sandbox delivers only to numbers you’ve verified. Add yours at
Developers → Verified Channels
in international format — +15555555555. One number covers SMS and WhatsApp.
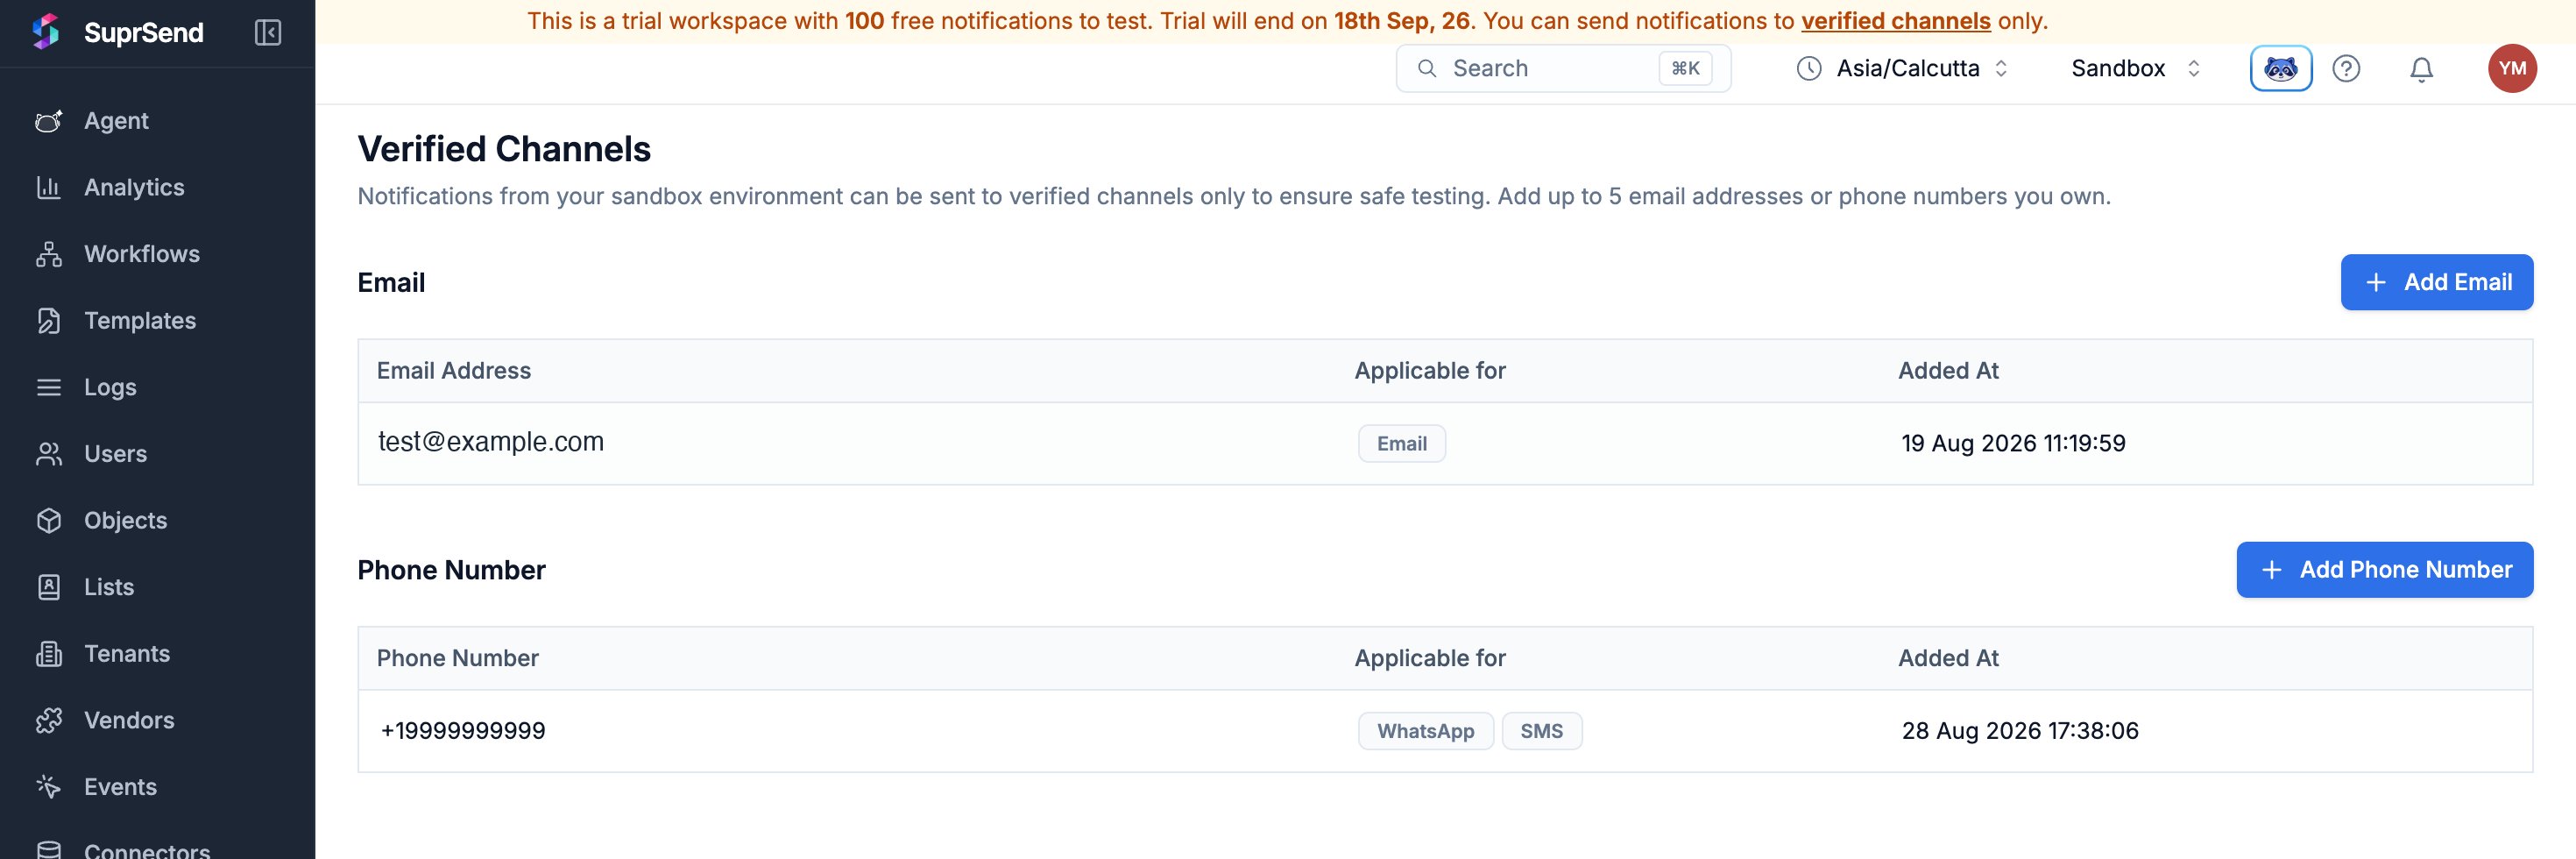
Your signup email was already on this list, which is why email needed no such step. The limit is 5
addresses and 5 numbers, and it applies to Sandbox only.
The template needs content for the new channel, and the workflow needs to deliver on it.
Dashboard Agent
Dashboard
Open Agent with Cmd+/ and paste:
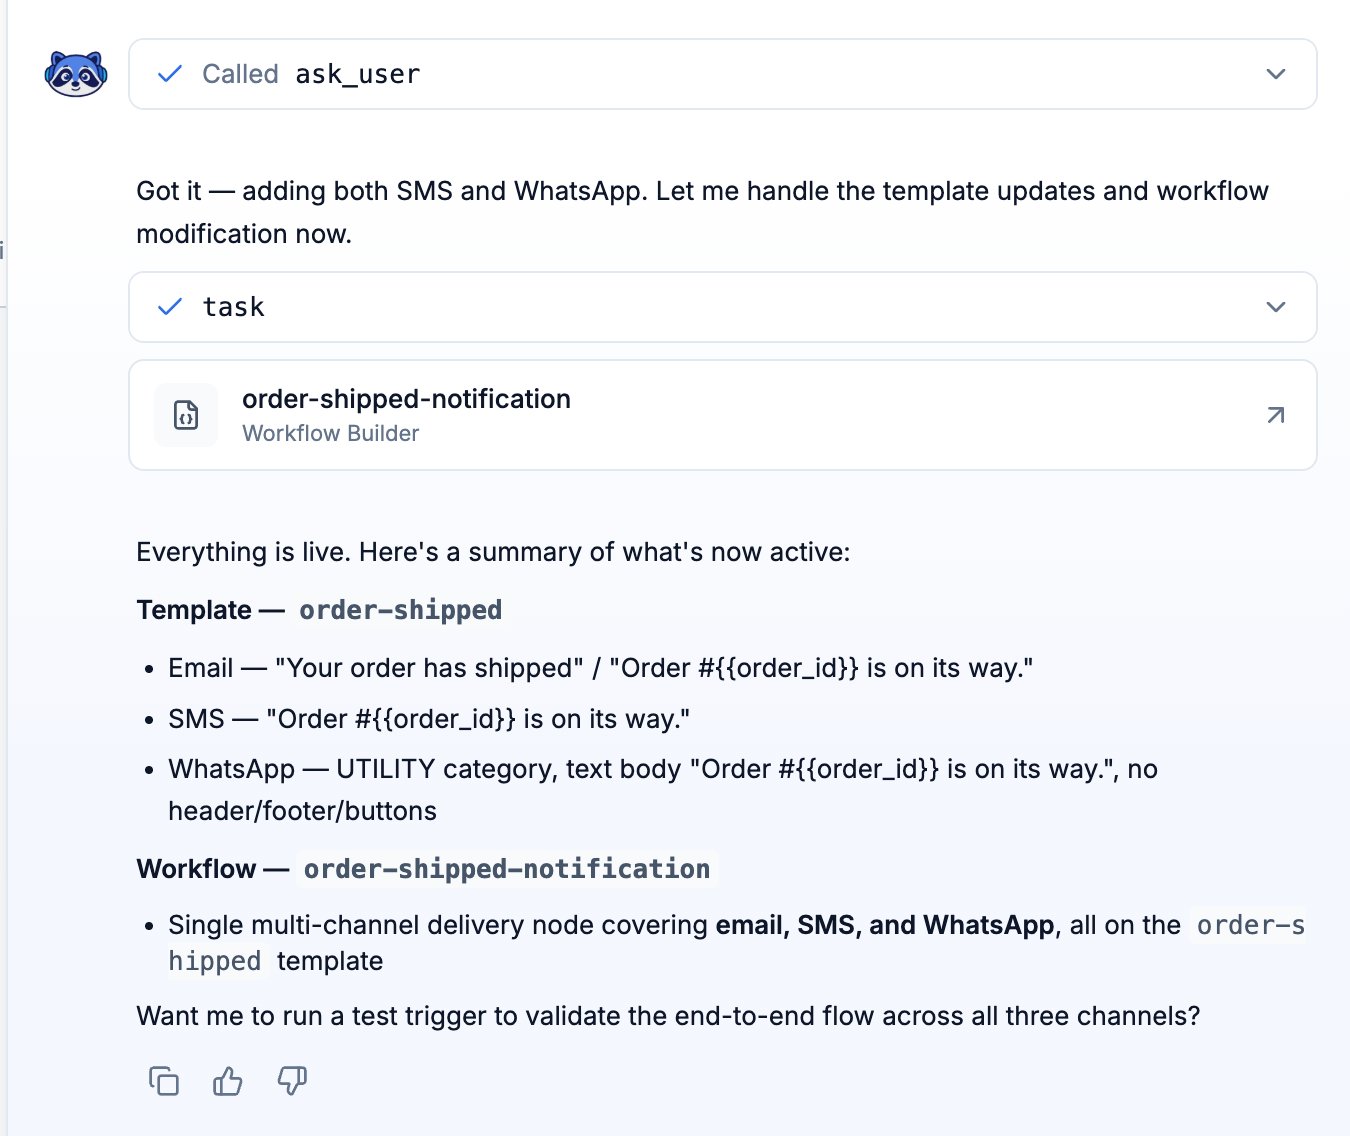
Add channels to my existing order-shipped notification.Ask me which channels I want — sms, whatsapp, or both — before you start.For each channel I pick, add content to the existing "Order Shipped" template,alongside the email that's already there.Body for every channel: Order #{{order_id}} is on its way.WhatsApp also needs category Utility, type Text, and no header, footer or buttons.Then open the workflow "Order Shipped Notification" and replace its single-channelemail delivery node with one multi-channel node on the same template, coveringemail and every channel I picked.Commit the template and the workflow, then tell me which channels are live on each.
Agent asks which channels you want, then edits the template, then the workflow that uses it, and
commits both.
One template holds content for every channel. You’re adding to order-shipped, not creating
anything new.
1
Open the template and add the channel
Go to Templates and open order-shipped. The channels run across the top of the editor —
Email is already there. Add SMS or WhatsApp.
2
Write the body
Order #{{order_id}} is on its way. It’s the same variable your email uses, filled by the same
trigger call.
3
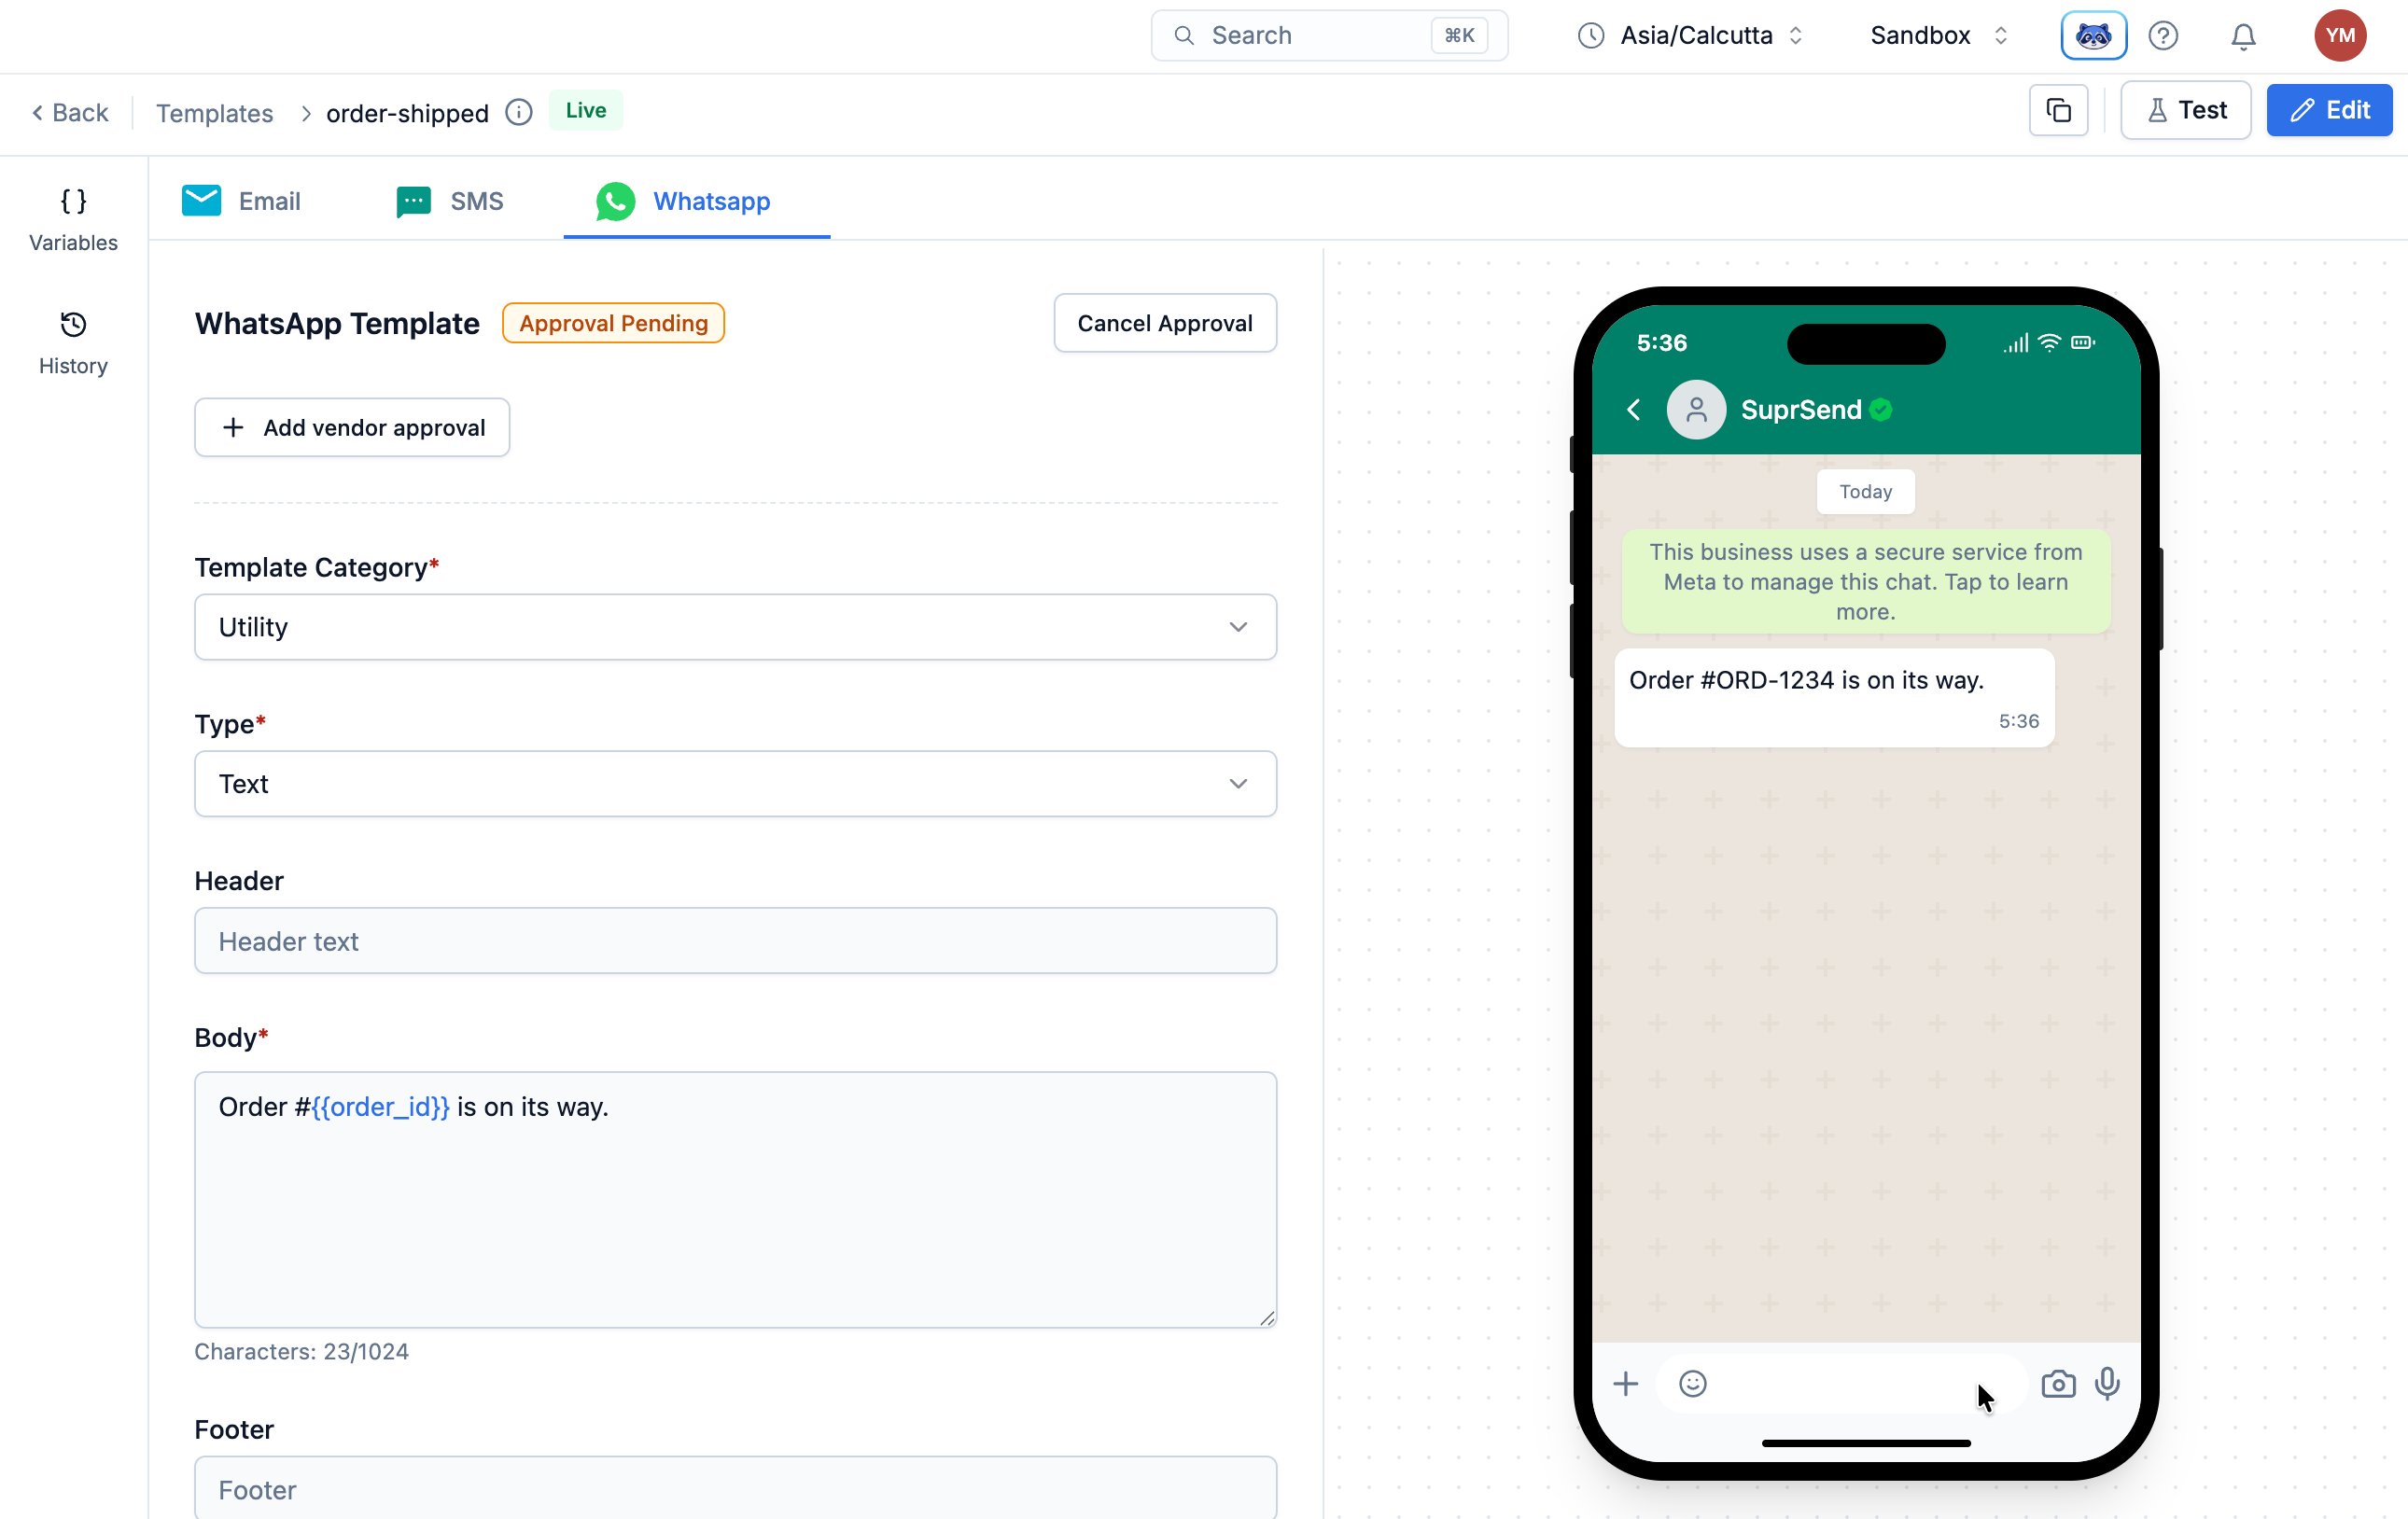
Fill WhatsApp's extra fields
Only for WhatsApp. It won’t accept a template without these four:
Field
Value here
Options
Category
Utility
Utility, Marketing, Authentication
Type
Text
Text, Media
Footer
Empty
60 characters
Buttons
None
Call to action, Quick reply, None
An order update is Utility. WhatsApp reclassifies templates whose content doesn’t match the
category, and a wrong category is the most common cause of rejection. Full field reference:
WhatsApp templates.
4
Commit the template
Click Commit in the top right.
5
Point the workflow at the new channels
Open order-shipped-notification from Workflows. Delete the Email delivery node, add a
Multi-channel node in its place, select the order-shipped template and the channels to
send on, then Commit.
A multi-channel node sends on every active channel of its template, so
this is the last time you edit the workflow. Adding a channel later is a template change and a profile
change only.
These templates are approved by someone other than SuprSend. WhatsApp always: on commit the
version goes to Approval Pending, SuprSend submits it to Meta, and most clear within minutes to
hours. SMS only when you send to Indian numbers, where TRAI requires
DLT registration — outside India, SMS goes live immediately on commit.A version awaiting approval cannot send and cannot be tested. The badge on the template shows its
state, and everything under review is listed at Templates → Approvals. On rejection it returns
to draft.
Your app probably already has the user’s phone number. SuprSend doesn’t — nothing has mapped it to
their profile yet. That mapping is the only code change, and it goes in the sync call you already
wrote.
AI editor
Write it yourself
One prompt adds the channels to the sync and re-runs both calls. Paste it into Claude Code,
Cursor, Windsurf, or whichever editor you use.
Copy the prompt
Add more channels to the SuprSend integration already in this codebase.Ask me which channels to add — sms, whatsapp, or both — and wait for my answer.Already built, do not re-create: the SuprSend client, the code that syncs a user toSuprSend, the code that triggers "order-shipped-notification", and the template andworkflow behind them. The workflow already delivers on these channels. What'smissing is the phone number on the SuprSend profile.If the SuprSend MCP server is connected, use it. My workspace is "sandbox" — passthat on every MCP call, because it otherwise defaults to staging. Use it to look upthe exact SDK method for each channel instead of writing it from memory, and tofetch the user back from SuprSend after you sync it. Use MCP to check your work,never to do the work.If it isn't connected, carry on without it and tell me so.1. Find the existing SuprSend user sync and show it to me before you change it.2. Look at the user record this codebase already syncs. If it holds a phone number, show me the number you found and ask whether to use it. If it holds none, tell me that and ask me for one. Either way, do not invent a number and do not proceed until I answer. Whichever number I confirm has to be one I have already added to Verified Channels in my SuprSend sandbox, in international format like +15555555555. Tell me that when you ask.3. Add one identity line per channel to that same sync, alongside what's already there, and pass the number through from wherever the sync is called.4. Leave the trigger call exactly as it is. It names the user by distinct_id and needs no change for a new channel.5. Run the sync and then the trigger once, and show me SuprSend's actual response to each. If you could not run them, say so plainly — do not tell me it worked.Finish with one line per file you edited, then tell me to open Logs → Requests →Workflow executions → Messages, and to expect one message row per channel.
Add the channels to the syncOne line per channel, alongside the email that’s already there. If your app stores a phone number
on its own user records, pass that value — this call is what maps it to the SuprSend profile.
const user = supr_client.user.get_instance("user_1a2b3c");user.add_email("you@example.com");user.add_sms("+15555555555");user.add_whatsapp("+15555555555");const res = await user.save();console.log(res);
user = supr_client.user.get_instance("user_1a2b3c")user.add_email("you@example.com")user.add_sms("+15555555555")user.add_whatsapp("+15555555555")res = user.save()print(res)
Subscriber user = suprClient.user.getInstance("user_1a2b3c");user.addEmail("you@example.com");user.addSms("+15555555555");user.addWhatsapp("+15555555555");JSONObject res = user.save();System.out.println(res);
user := suprClient.Users.GetInstance("user_1a2b3c")user.AddEmail("you@example.com")user.AddSms("+15555555555")user.AddWhatsapp("+15555555555")res, err := user.Save()
Use international format with the country code, and use a number you’ve added to Verified
Channels. remove_sms and remove_whatsapp take a channel back off a profile — full set at
Users.
Open Users, find user_1a2b3c, and check the Channels panel. The number is listed under both
SMS and WhatsApp.
Trigger itUnchanged from the last guide. Run the call you already have.
JSONObject body = new JSONObject() .put("workflow", "order-shipped-notification") .put("recipients", new JSONArray() .put(new JSONObject().put("distinct_id", "user_1a2b3c"))) .put("data", new JSONObject().put("order_id", "ORD-1234"));WorkflowTriggerRequest wf = new WorkflowTriggerRequest(body);JSONObject res = suprClient.workflows.trigger(wf);
The trigger names the user by distinct_id and nothing else. SuprSend reads which channels that
profile has, matches them against the template, and sends. That’s why the call survives every channel
you add — including inbox, push and Slack later.
Sandbox delivers only to verified numbers. Open
Developers → Verified Channels
and check that the exact number on the user profile is listed, country code included. An
unverified number is dropped silently.
The channel was skipped in the execution log
A delivery node skips a channel when the user profile has no identity for it. Open the user under
Users and check the Channels panel. If the number isn’t there, your sync ran before you added
the add_sms or add_whatsapp line. Run it again.
WhatsApp is stuck on Approval Pending
Meta is still reviewing. Most templates clear within minutes to hours, and the channel cannot send
or be tested until the version reads Live. If it’s rejected, the usual cause is a category
that doesn’t match the content — an order update belongs in Utility, not Marketing. Edit the
draft and commit again; the new version is reviewed separately.
The SMS template went to Approval Pending, not Live
You’re sending to an Indian number. TRAI requires every SMS template to be registered on the
DLT platform before it can send, so SuprSend submits it to your SMS vendor
on commit. It can’t be tested in draft. Sending anywhere else, an SMS template goes live the
moment you commit it.
The message arrived with a blank where the variable should be
Each channel renders its own content, so a variable can resolve in one and not another. Check that
the SMS or WhatsApp body uses {{order_id}}, the same key your trigger sends in data. Open the
message in Logs → Messages and use Message preview to see what rendered.
A channel stopped working after sending fine for a while
SuprSend marks a channel identity inactive after hard failures from the vendor — an unregistered
WhatsApp number, a bounced address — to protect your sender reputation. It stays inactive for 15
days for WhatsApp and 90 days for email. The user profile shows the channel as inactive.
A browser only hands over a push token after the user allows notifications, and the inbox only shows notifications to a browser that can prove which user is
looking. Both need code in your frontend, and one new endpoint in your backend that issues that proof.Do them together — same SDK, same provider, same token.
In-app inbox
Web push
Where it appears
Inside your app
The operating system, even when your app is closed
These are separate from the workspace key and secret your backend already uses. Collect all three
before you start — you’ll be asked for each one partway through.
# Backend only. Signs the user token that proves who's logged in.SUPRSEND_SIGNING_KEY=your_signing_key# Frontend. Both are safe in a browser bundle, but they need your framework's# public prefix: NEXT_PUBLIC_ in Next.js, VITE_ in Vite, REACT_APP_ in Create React App.NEXT_PUBLIC_SUPRSEND_PUBLIC_KEY=your_public_key# Only if you're adding web pushNEXT_PUBLIC_SUPRSEND_VAPID_KEY=your_vapid_public_key
The signing key must never reach the browser. Anything holding it can mint a token for any user and
read their inbox. Keep it wherever you keep your workspace secret.
Vendors → In-App Inbox also shows an Inbox secret. You don’t need it here. That’s for HMAC
authentication, which the React Native and Flutter inbox SDKs still use. The web SDKs authenticate
with a signed JWT instead, which is what the signing key above is for.
Sandbox doesn’t check your token yet. SuprSend only verifies user tokens when Enhanced
Security Mode is on — the switch beside your Public Key on the API Keys page — and it’s off in
Sandbox. A malformed or wrongly signed token still loads the inbox here, so a broken setup looks
like a working one until you reach Production. Build the token properly now, then turn the switch on
before you go live. See client authentication.
Add channels to my existing order-shipped notification.Ask me which channels I want — inbox, webpush, or both — before you start.For each channel I pick, add content to the existing "Order Shipped" template,alongside the channels already there.Inbox — header: Order shipped. Body: Order #{{order_id}} is on its way.Web push — title: Order shipped. Body: Order #{{order_id}} is on its way.Web push also needs an action URL. Ask me for it.Then open the workflow "Order Shipped Notification" and add every channel I pickedto its multi-channel delivery node. If that node is still a single-channel emailnode, replace it with a multi-channel node on the "order-shipped" template.Commit the template and the workflow, then tell me which channels are live on each.
1
Add the channel to your template
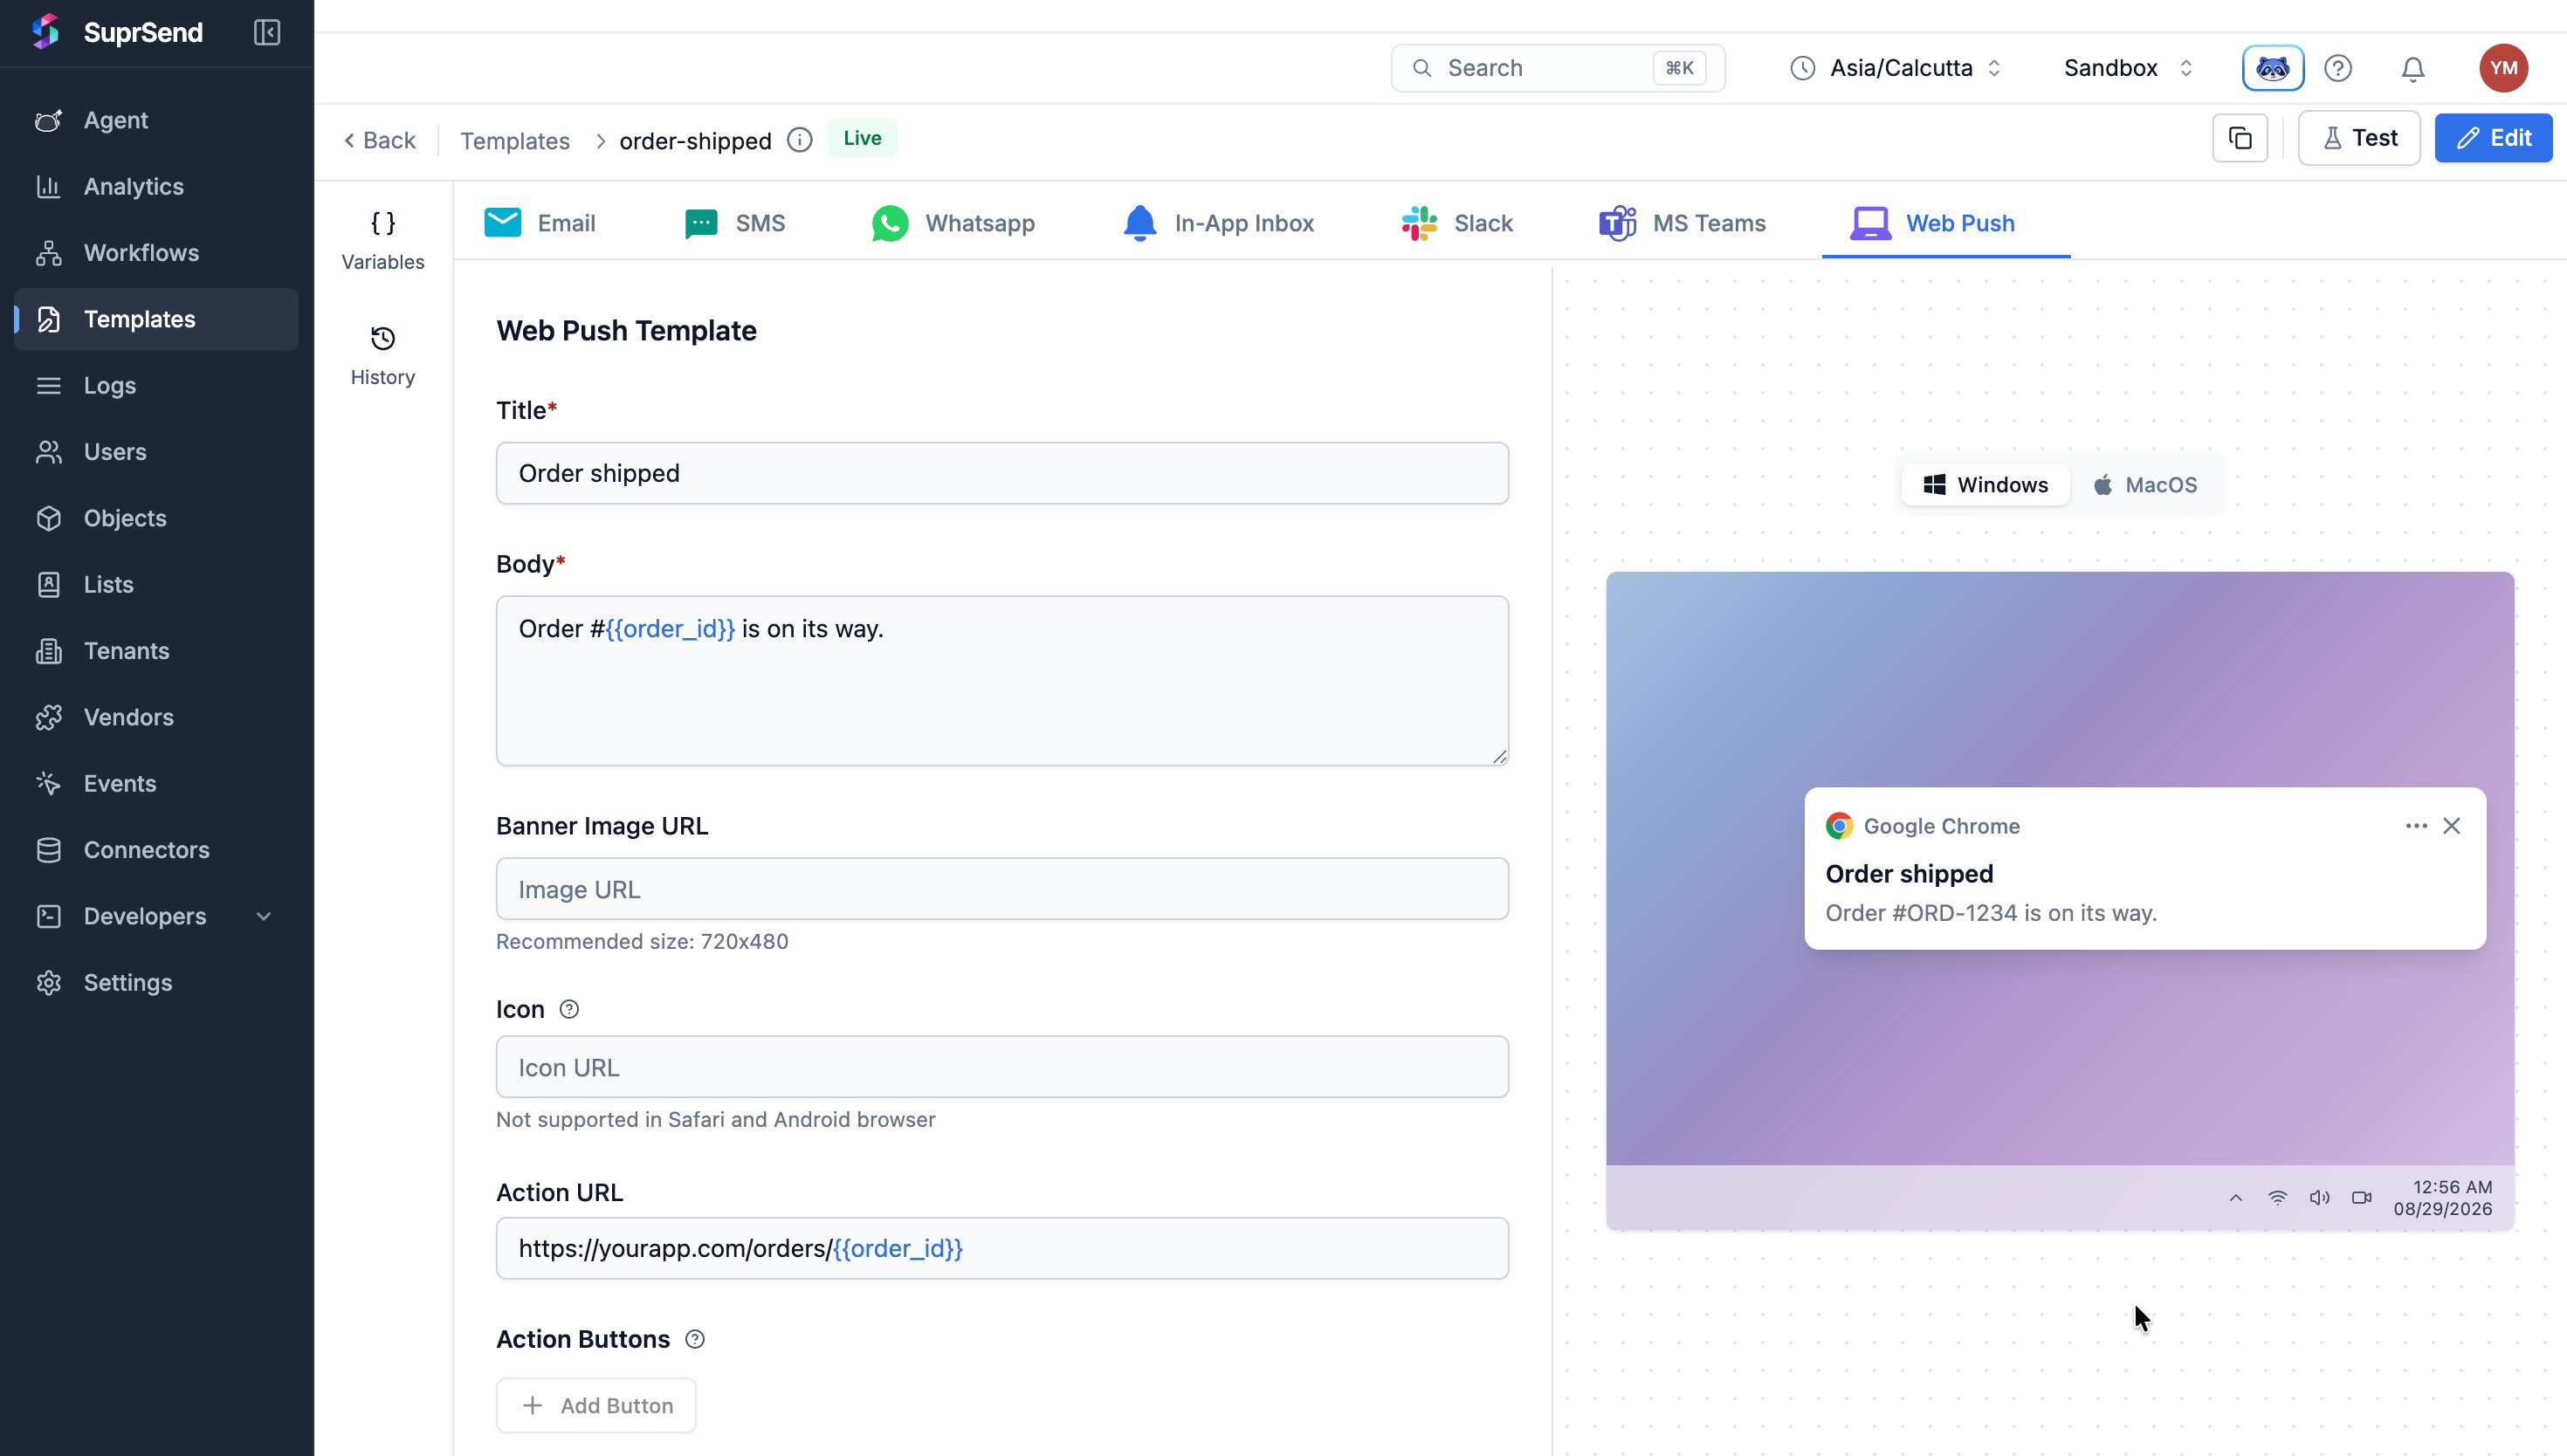
Open order-shipped from Templates and add the channel from the tab row.
In-app inbox
Web push
Required
Header, Body
Title, Body, Action URL
Body
Order #{{order_id}} is on its way.
Also available
Avatar, subtext, action buttons, tags, pinned, expiry, extra data
Banner image, up to 2 Chrome action buttons
Keep the web push title under 40 characters, and always set an Action URL — without one,
clicking the notification does nothing. Field references:
in-app inbox · web push.
2
Commit the template
Click Commit in the top right.
3
Point the workflow at the new channels
Open order-shipped-notification, select the new channels on the multi-channel delivery node,
and Commit. If the node is still the single-channel Email one, swap it for a
multi-channel node first.
Three things go in: a backend endpoint that mints a user token, the SuprSend provider around your app,
and the component or the push registration.
AI editor
Write it yourself
Copy the prompt
Add the SuprSend in-app inbox and web push to this application's frontend.Ask me which of the two I want — inbox, webpush, or both — and wait for my answer.Already built, do not re-create: the template "order-shipped", the workflow"order-shipped-notification", and the backend code that syncs a user and triggersthat workflow. Do not change the sync or the trigger call.Two credentials are involved, and they are not the ones the backend already uses:a public key, which is safe in frontend code, and a signing key, which is backendonly and must never end up in a browser bundle. Both are at Developers → API Keys.Ask me for each one when you need it. Do not open, read or print my .env.1. Work out what this frontend is built with. Use @suprsend/react for React, and @suprsend/web-components for Angular, Vue, plain HTML or anything else — both give a drop-in inbox. Only fall back to the headless @suprsend/web-sdk if I ask for a custom UI, because it means building the whole interface by hand. Tell me which one you picked, and why, before installing it.2. Add a backend endpoint that returns a signed user token for the logged-in user: an ES256 JWT signed with the signing key, with claims entity_type "subscriber", entity_id set to the same distinct_id the existing backend code already uses for that user, plus iat and exp. Put it with the SuprSend code that's already there. Never generate this token in the browser.3. On the frontend, initialise SuprSend with the public key, that user's distinct_id, and the token from the endpoint. Fetch a fresh token from the same endpoint when the old one expires.4. For inbox — render the drop-in inbox component somewhere always visible, like the existing header or nav. Tell me exactly where you put it.5. For webpush — add the service worker file at the site root so it is served from /serviceworker.js, and pass the Vapid Public Key from Vendors → Web Push. Ask me for it. Never use the private key in frontend code. Register push from a user action such as a button click, never on page load.6. Run the app and tell me exactly what to click to see it.7. Then run the existing trigger once, without changing it, and show me SuprSend's actual response. If you could not run either step, say so plainly — do not tell me it works.Finish with one line per file you created and per existing file you edited, then tellme to check both the app and Logs → Requests → Workflow executions → Messages.
1. Mint a user token in your backendThe inbox shows one user their own notifications, so SuprSend has to know the request really is
that user. Your backend proves it by signing a short-lived token with the signing key.
Claim
Value
entity_type
Always the literal string subscriber
entity_id
The same distinct_id your backend already syncs
iat
Issued-at, unix epoch seconds
exp
Expiry, unix epoch seconds
Algorithm is ES256. If your signing key is Base64, convert it to PEM first. Full reference:
client authentication.
Any ES256 library works — Java, Go, Ruby, PHP. Sign the claims above with your signing key.Serve this from an endpoint that already knows who’s logged in — the endpoint’s own auth is what
stops one user minting a token for another.2. Wrap your app in the provider
React
Angular, Vue, plain HTML
npm install @suprsend/react
import { SuprSendProvider } from "@suprsend/react";// SUPRSEND_PUBLIC_KEY must come from a browser-visible env var —// NEXT_PUBLIC_* in Next.js, VITE_* in Vite, REACT_APP_* in Create React Appconst res = await fetch("/api/suprsend-token");const { token } = await res.json();<SuprSendProvider publicApiKey={SUPRSEND_PUBLIC_KEY} distinctId="user_1a2b3c" userToken={token} refreshUserToken={async () => { const res = await fetch("/api/suprsend-token"); return (await res.json()).token; }}> <App /></SuprSendProvider>
refreshUserToken is called by the SDK before the current token expires, so the inbox keeps
working without a reload.
There’s a script-tag build too, for Django, Laravel, or anything not running npm. See
web components integration.
3. Render the inbox
React
Angular, Vue, plain HTML
Custom UI
import { Inbox } from "@suprsend/react";<Inbox pageSize={20} />
Inbox is the bell and popover. Put it in a header or nav — somewhere on screen at all times.
For a full-screen or side-sheet feed instead, use NotificationFeed inside
SuprSendFeedProvider, per
full screen and side sheet feeds.
Drop an empty container where the inbox should mount. The package fills it.
<div id="suprsend-inbox"></div>
Use <div id="suprsend-feed"></div> instead for a full-screen feed.
@suprsend/web-sdk is headless — you get the data and build the interface yourself.
npm install @suprsend/web-sdk@latest
import SuprSend from "@suprsend/web-sdk";const suprSendClient = new SuprSend(SUPRSEND_PUBLIC_KEY);await suprSendClient.identify("user_1a2b3c", userToken);const feedClient = suprSendClient.feeds.initialize();feedClient.initializeSocketConnection();feedClient.fetch();
The socket connection is what makes the feed update without a refresh. Methods for
markAsRead, markAsArchived and the rest are in
the JavaScript in-app feed reference.
4. Add web pushCreate serviceworker.js and serve it from the root of your domain, so it’s reachable at
https://yourdomain.com/serviceworker.js:
Then register the device from a button, not on page load:
import { useSuprSendClient } from "@suprsend/react";const suprSendClient = useSuprSendClient();async function enableNotifications() { const response = await suprSendClient.webpush.registerPush(); console.log(response);}
registerPush() asks the browser for permission, registers the service worker, and sends the
device token to SuprSend. Calling it on page load gets you denied — browsers block permission
prompts the user didn’t ask for, and a denial is hard to undo.
Open Users, find user_1a2b3c, and check the Channels panel. webpush appears once the
browser prompt is accepted. Inbox is already there — SuprSend adds it when the user is created,
so you never pass it in a trigger.
Web push needs HTTPS. localhost is exempt in most browsers, so local development works, but a
staging site served over plain HTTP will not.
This section covers the inbox on the web. React Native and Flutter have their own inbox SDKs, and they
still authenticate with an HMAC inbox secret rather than a JWT — see
HMAC authentication if that’s what you’re building.
The inbox updates without a refresh, because the feed holds an open socket connection. The push
notification arrives through the operating system, so it shows up even with the tab closed.
The bell shows an unread count and the notification is in the popover. Open
Logs and the execution has one message row per
channel.
The token identifies a different user than the one the workflow sent to. Check that entity_id in
the JWT is the exact distinct_id your backend used in recipients. A mismatch isn’t an error —
it’s a valid token for a user with no notifications.
Invalid token or signature errors
Three usual causes: the token was signed with the workspace secret instead of the signing key, the
algorithm isn’t ES256, or a Base64 signing key was passed without converting it to PEM first.
entity_type must be the literal string subscriber.You won’t see these errors in Sandbox — token verification only runs with Enhanced Security
Mode on. Check the claims against the table above rather than trusting that the inbox loaded.
The browser never asks to allow notifications
registerPush() was called on page load, or the site isn’t on HTTPS. Browsers ignore permission
prompts that aren’t tied to a user action. If you already denied it once, the prompt won’t return
— clear the site’s notification permission in browser settings and try again.
Web push registers but nothing arrives
Check /serviceworker.js loads in the browser at that exact path. A bundler that emits it to a
subdirectory breaks push silently — the scope of the service worker has to cover the pages you’re
registering from.
The web push notification arrives but clicking does nothing
The template has no Action URL. It’s a required field for web push, and without it the click has
no destination.
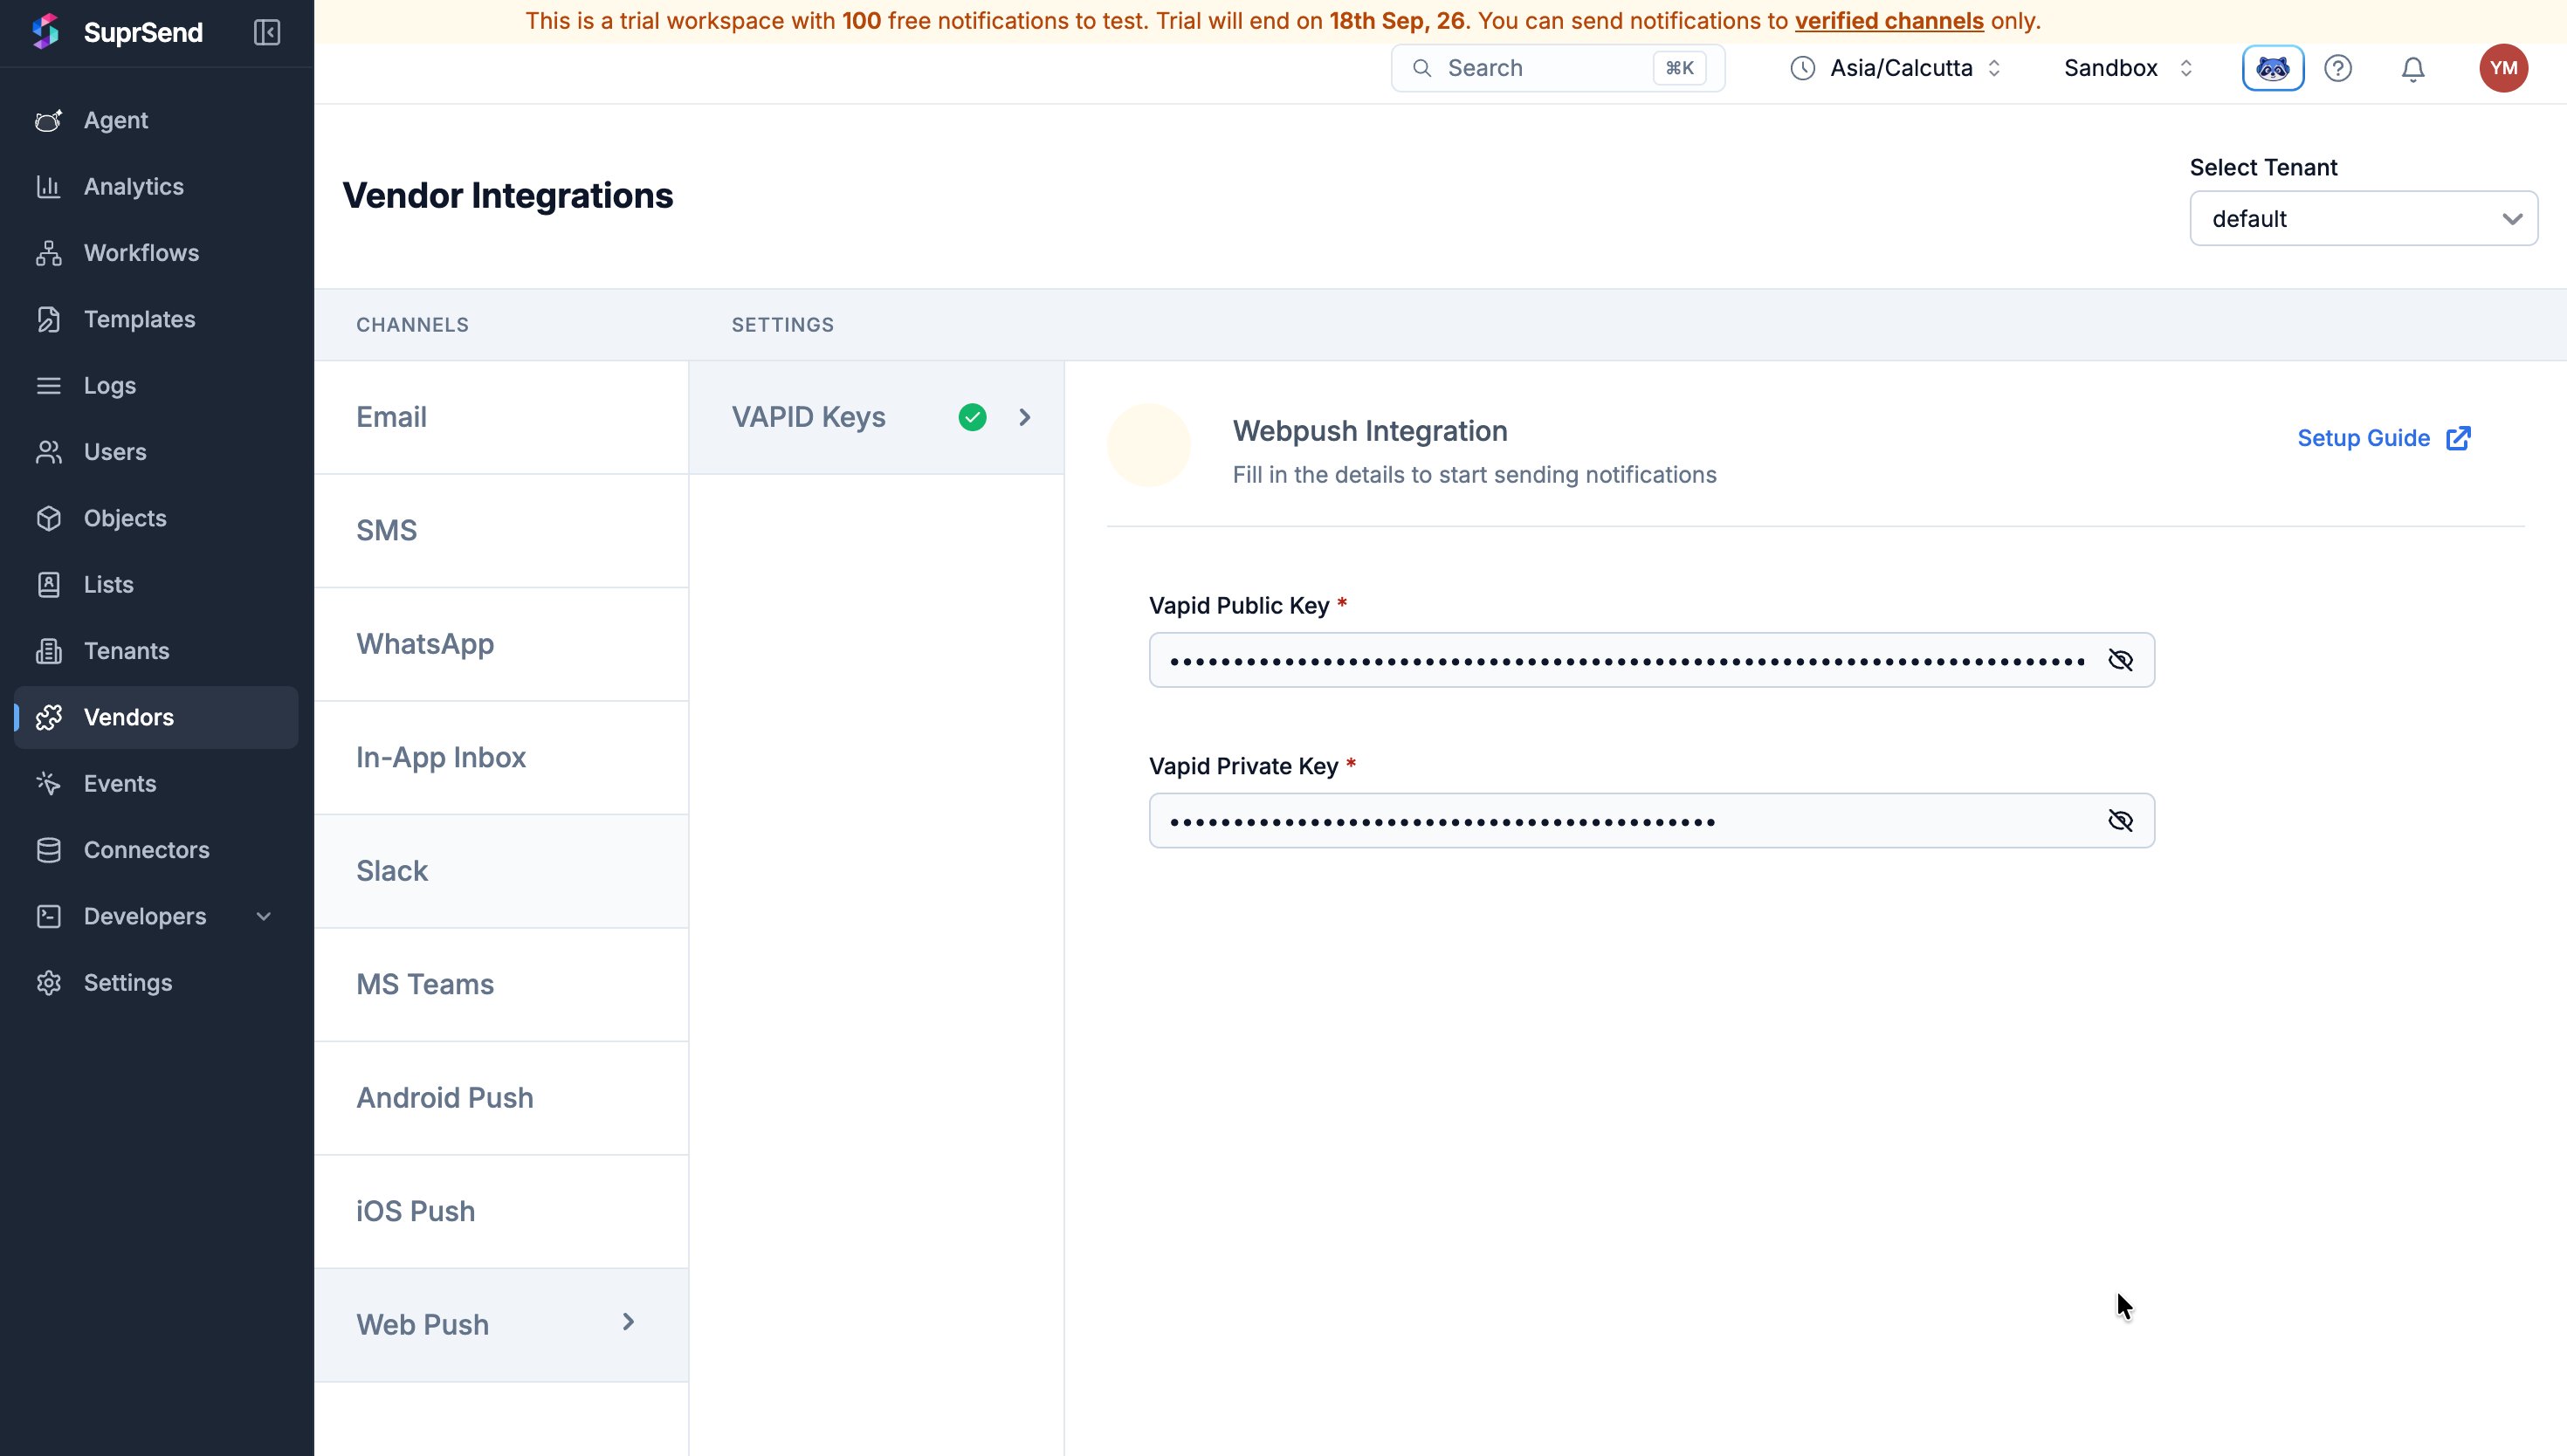
Every other channel in this guide borrows a SuprSend sandbox vendor. This one can’t. A push
notification is delivered by Google or Apple to one specific app, so it needs credentials tied to your
app — a Firebase project for Android, an Apple developer account for iOS.
Mode/Environment decides whether SuprSend talks to Apple’s sandbox or production APNS. A token
from a development build only works against the development setting, and the mismatch is the usual
cause of a rejected send.For iOS, three of the remaining values are easy to mislabel: the Auth Key ID is the code in the .p8
filename — AuthKeyABCD1234.p8 means ABCD1234. The Team ID is on your Apple developer
membership page. The Bundle ID is your app’s, and it has to match exactly or Apple rejects the
send. Full setup: FCM · APNS.
Add channels to my existing order-shipped notification.Ask me which channels I want — androidpush, iospush, or both — before you start.For each channel I pick, add content to the existing "Order Shipped" template,alongside the channels already there.Title: Order shippedBody: Order #{{order_id}} is on its way.Both need an action URL. Ask me for it.Then open the workflow "Order Shipped Notification" and add every channel I pickedto its multi-channel delivery node.Commit the template and the workflow, then tell me which channels are live on each.
1
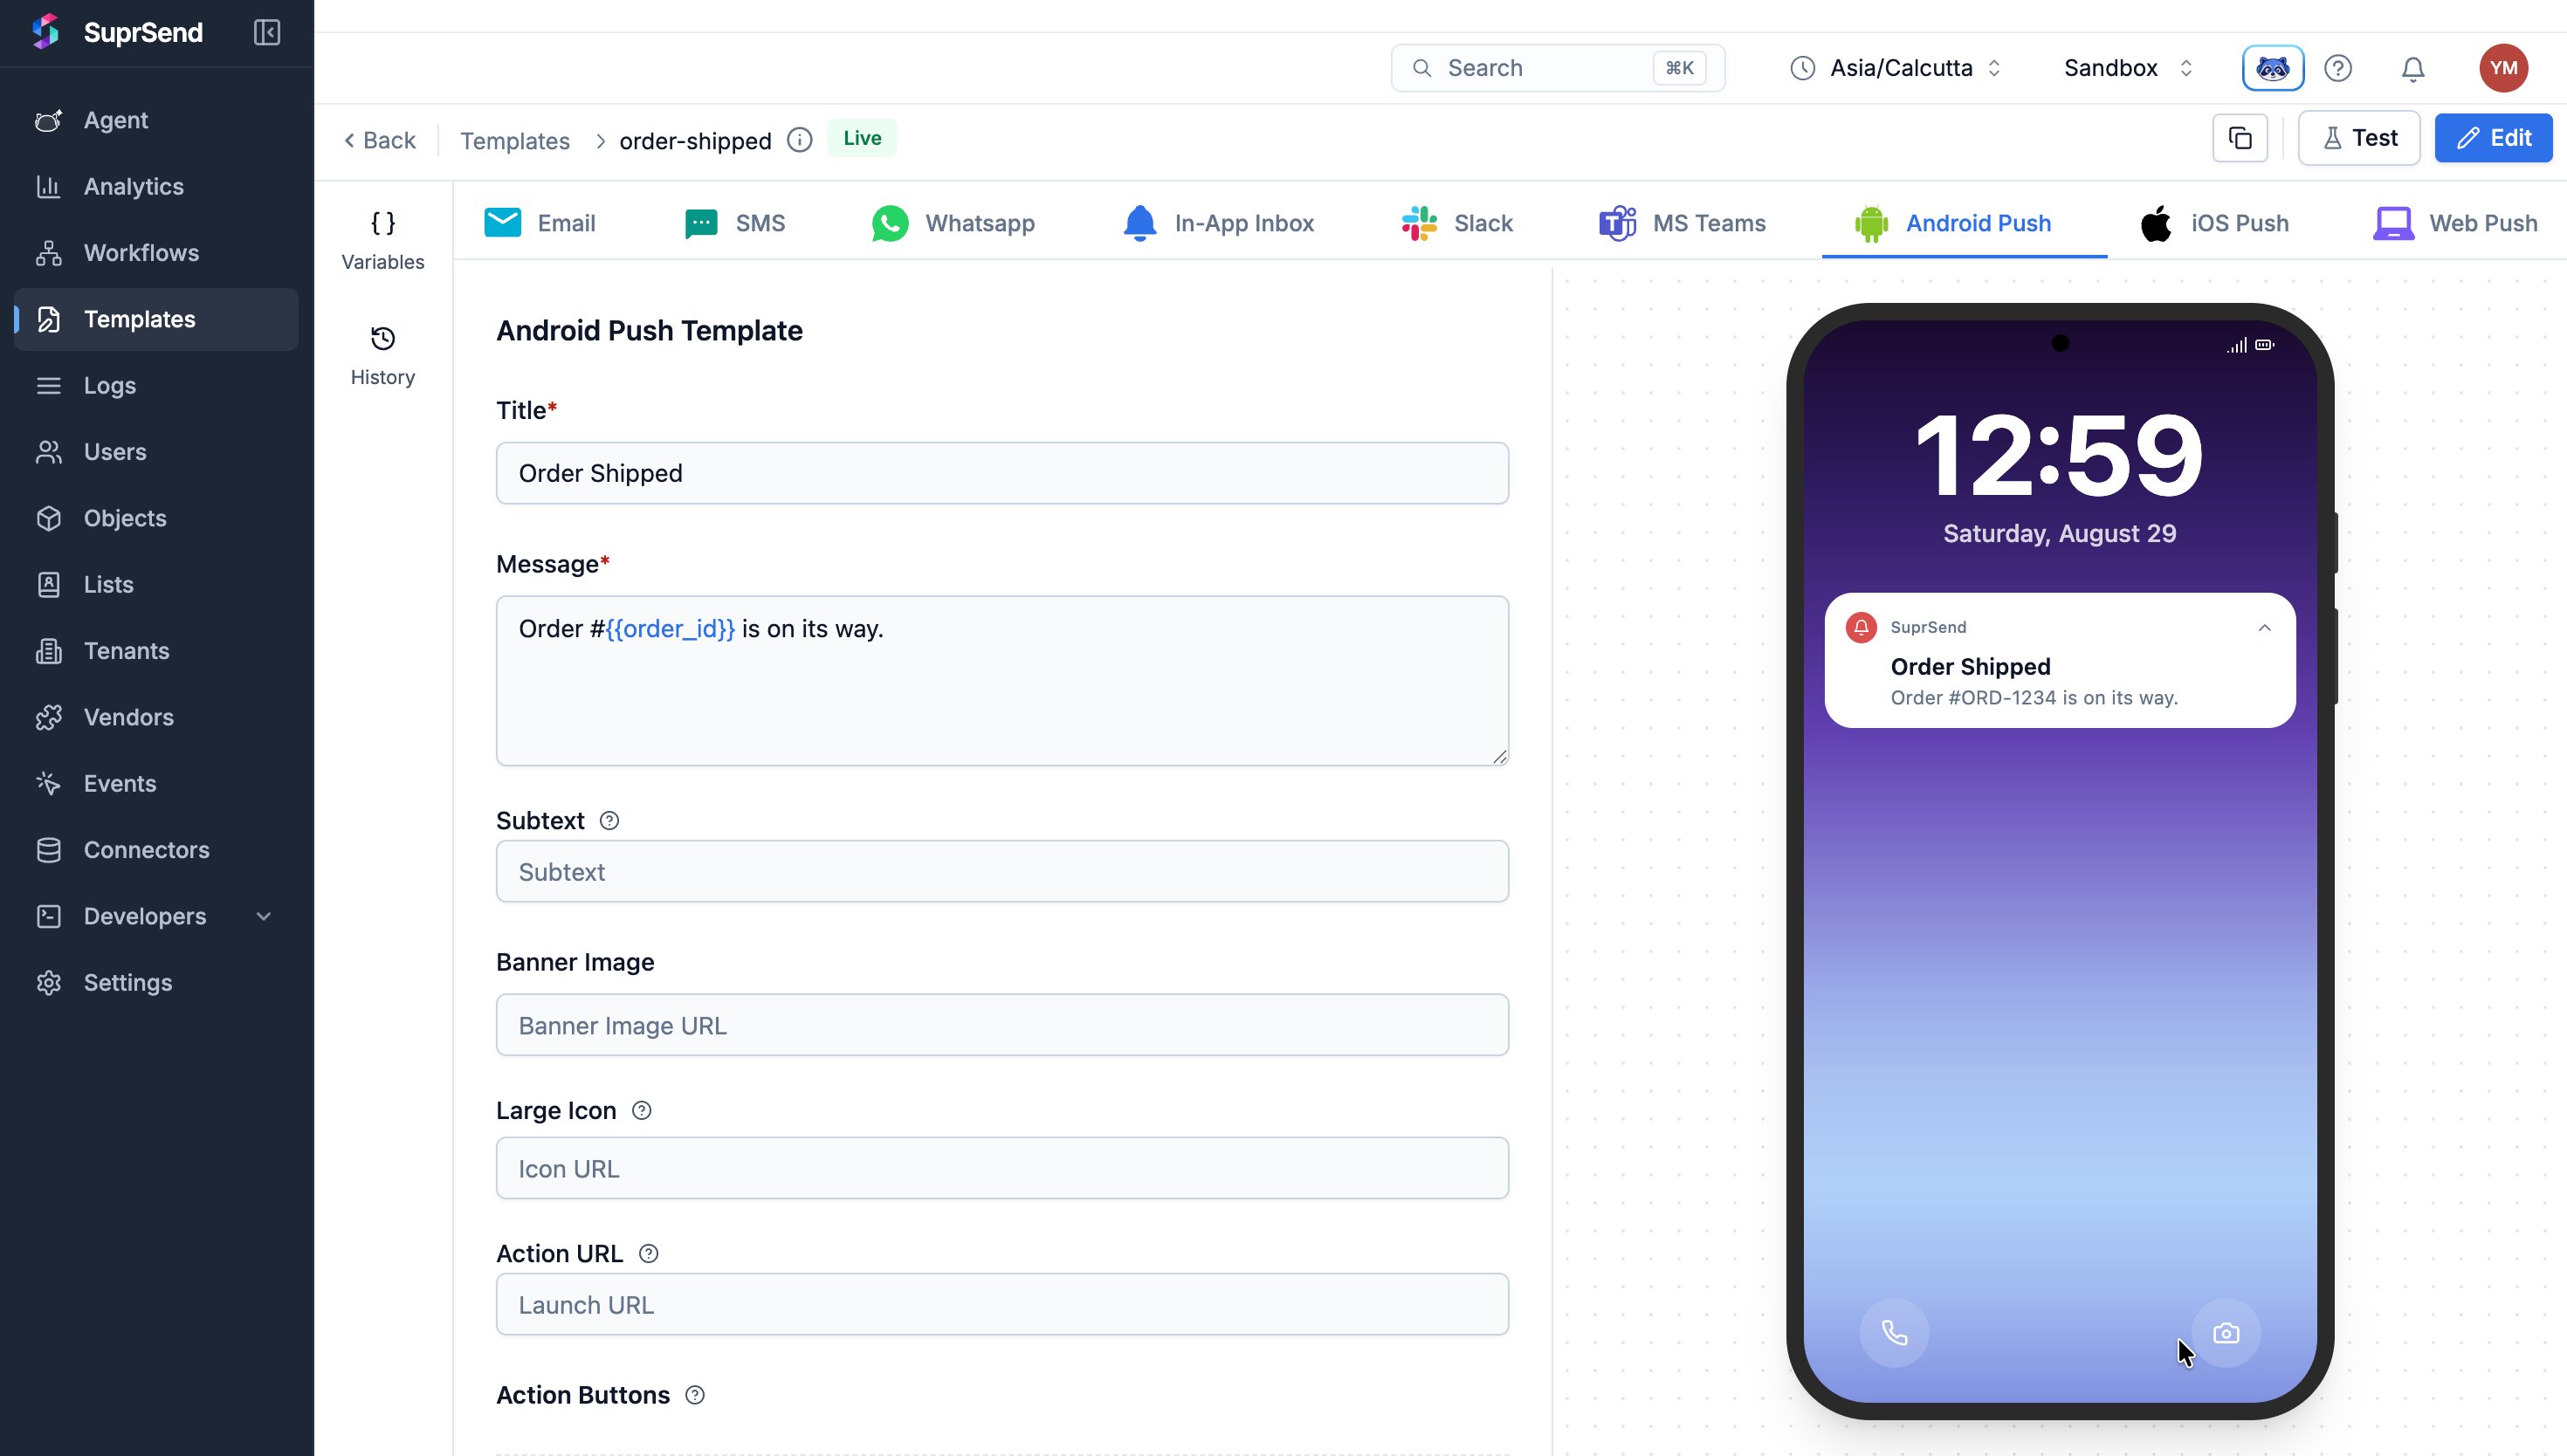
Add the channel to your template
Open order-shipped from Templates and add the channel from the tab row.
Android push
iOS push
Required
Title, Message, Action URL
Title, Body
Title length
Under 40 characters
Under 30 characters
Also available
Small and large icon, subtext, banner image, up to 3 action buttons
Image URL, action URL
Both truncate hard, so front-load the useful part of the body. On iOS the Action URL is
optional but worth setting — without one, tapping the notification just opens your app’s
default screen. Field references: Android push ·
iOS push.
2
Commit the template
Click Commit in the top right.
3
Point the workflow at the new channels
Open order-shipped-notification, select the new channels on the multi-channel delivery node,
and Commit again.
Your app has two jobs: identify the user with the same distinct_id your backend already syncs, and
hand SuprSend the device token that FCM or APNS issues. The calls differ per platform.
AI editor
Write it yourself
Copy the prompt
Add SuprSend mobile push to this app.Ask me which platforms I want — android, ios, or both — and wait for my answer.Already built, do not re-create: the template "order-shipped", the workflow"order-shipped-notification", and the backend code that syncs a user and triggers thatworkflow. Do not change the sync or the trigger call.1. Work out what this app is built with — native Android, native iOS, React Native, Flutter or Expo — and tell me before you install anything.2. Read the SuprSend documentation for that exact platform and follow it. Do not write SDK calls from memory: the method names and the init arguments differ per platform, and getting them wrong fails silently.3. Initialise the SuprSend SDK, then identify the user with the same distinct_id my backend already syncs. If you cannot work out that value from the codebase, ask me.4. Wire up FCM or APNS and pass the device token to SuprSend.5. List every native file you touched — Gradle, manifest, Info.plist, entitlements, AppDelegate — and tell me plainly what I still have to do myself in Xcode or Android Studio. I would rather do three manual steps than think it is finished when it isn't.6. Build and run it, then tell me exactly what to tap. If you could not build it, say so plainly — do not tell me it works.Finish with one line per file you created and per existing file you edited, then tell meto trigger the workflow and check Logs → Requests → Workflow executions → Messages.
Follow the SuprSend guide for your platform. Each pair covers the SDK first, then the push
wiring that hands SuprSend the device token.
A device token only exists after your app has run on a real device or emulator and the person has
accepted the notification permission prompt. Until then the profile has no push identity and the
delivery node skips the channel.
Open Users, find your user, and check the Channels panel for androidpush or iospush. Once
it’s there, trigger the workflow and the notification arrives on the device.
Three things have to happen in order: the app initialises the SDK, the person accepts the
permission prompt, and the app identifies the user. If any is missing, no token reaches SuprSend.
Identifying before the permission prompt is accepted is the most common ordering mistake.
The execution shows the channel skipped
Either the profile has no token, or the vendor isn’t configured. Unlike email or SMS, Sandbox has
no fallback push vendor — if Vendors → Android Push or iOS Push is empty, nothing sends.
iOS says BadDeviceToken or the send is rejected
Usually the Bundle ID on the vendor page doesn’t match the app that generated the token. It’s also
what happens when a token from a development build is used against a production APNS setting, or
the reverse.
The notification arrives but looks wrong or has no image
Android and iOS truncate at different lengths — 40 and 30 characters for the title. Rich images
need a public HTTPS URL, and on iOS they need a notification service extension in the app. Image
URLs aren’t supported at all on the Expo SDK.
These two are the only channels where the address belongs to someone else. It lives in a Slack or
Teams workspace that an administrator controls, so it has to be issued to you before you can send
anything.There are three ways to get one, and the honest split is between what you can paste and what you have
to build.
How you connect
What you store
Where it can send
DMs
Incoming webhook
A URL
Only the channel you chose when you created it
No
Your own bot
Slack: a bot token. Teams: a channel or user ID
Any channel or person in your workspace
Yes
Customer install
Slack: a token per customer. Teams: IDs plus the customer’s tenant ID
Any channel or person in each customer’s workspace
Yes
Whose workspace it is doesn’t change the method. Posting into a community or a customer’s workspace
still uses one of these three — someone with rights there either hands you a webhook URL or installs
your app. Joining a workspace yourself, through an invite link, authorises nothing.This guide covers the first two. Connecting a customer’s workspace needs an OAuth flow built into
your product — see the full Slack and Microsoft Teams guides.
Start with the incoming webhook. It’s the fastest thing in this guide that proves the channel works,
and you can move to a bot token later without changing anything in SuprSend.
Slack: enable the channel at Vendors → Slack.
There are no credentials to enter — the connection lives on the recipient, not on the vendor.Microsoft Teams: save the channel at Vendors → MS Teams.
Webhook
Bot
A webhook doesn’t use these credentials, but the vendor still has to be saved. Enter placeholder
values:
Field
Value
App ID
00000000-0000-0000-0000-000000000001
Password
placeholder
App Type
Single tenant
Tenant ID
00000000-0000-0000-0000-000000000002
Saving shows a sign-in error from Microsoft. Ignore it — webhook sends still go through.
Enter your bot’s App ID, Password (client secret), App Type and Tenant ID. Set App
Type to Single tenant for any bot created after 31 July 2025 — the wrong value fails every send
with 401. See Create a Teams app.
An incoming webhook is the quickest way in. It posts to one channel and can’t send DMs.
1
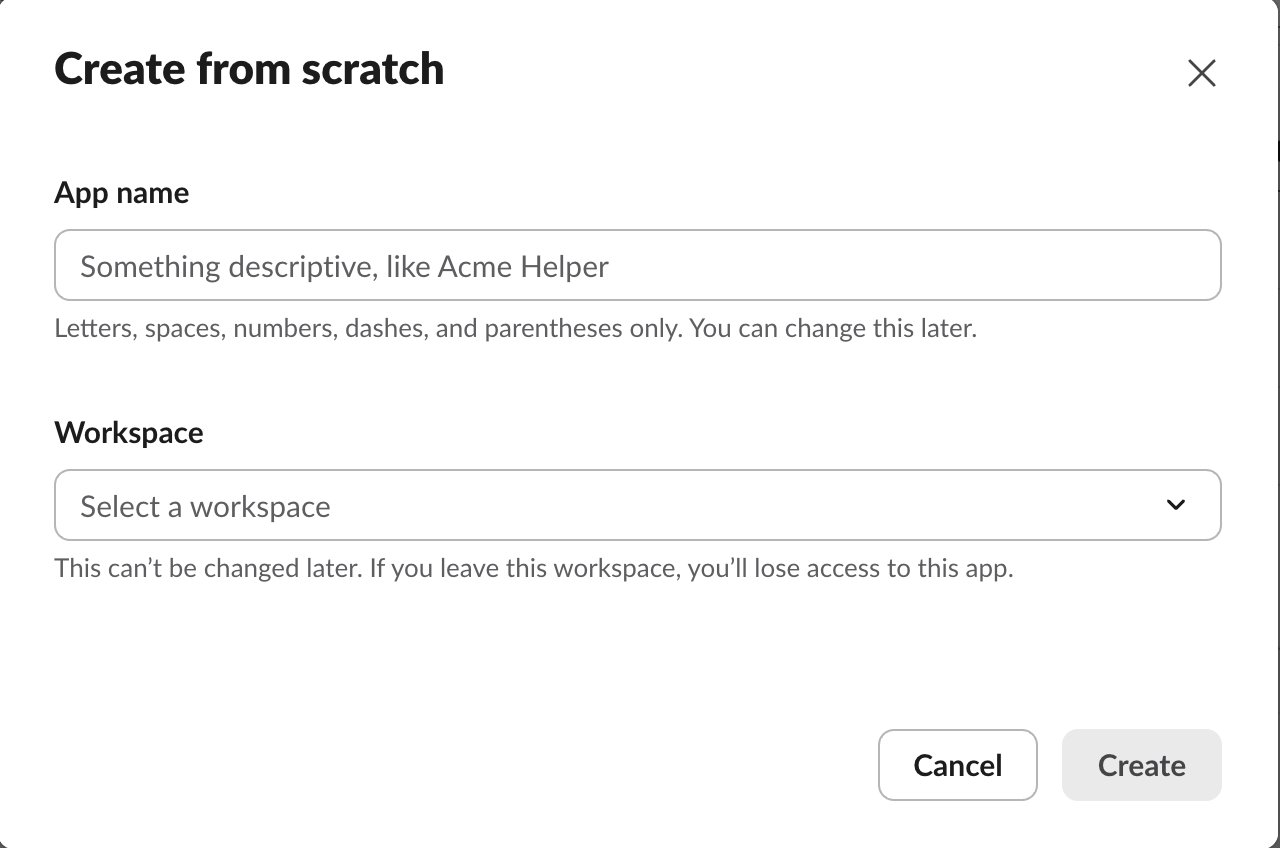
Create a Slack app
Go to api.slack.com/apps and create an app from scratch.
Name it and pick the workspace it belongs to — the workspace can’t be changed later.
2
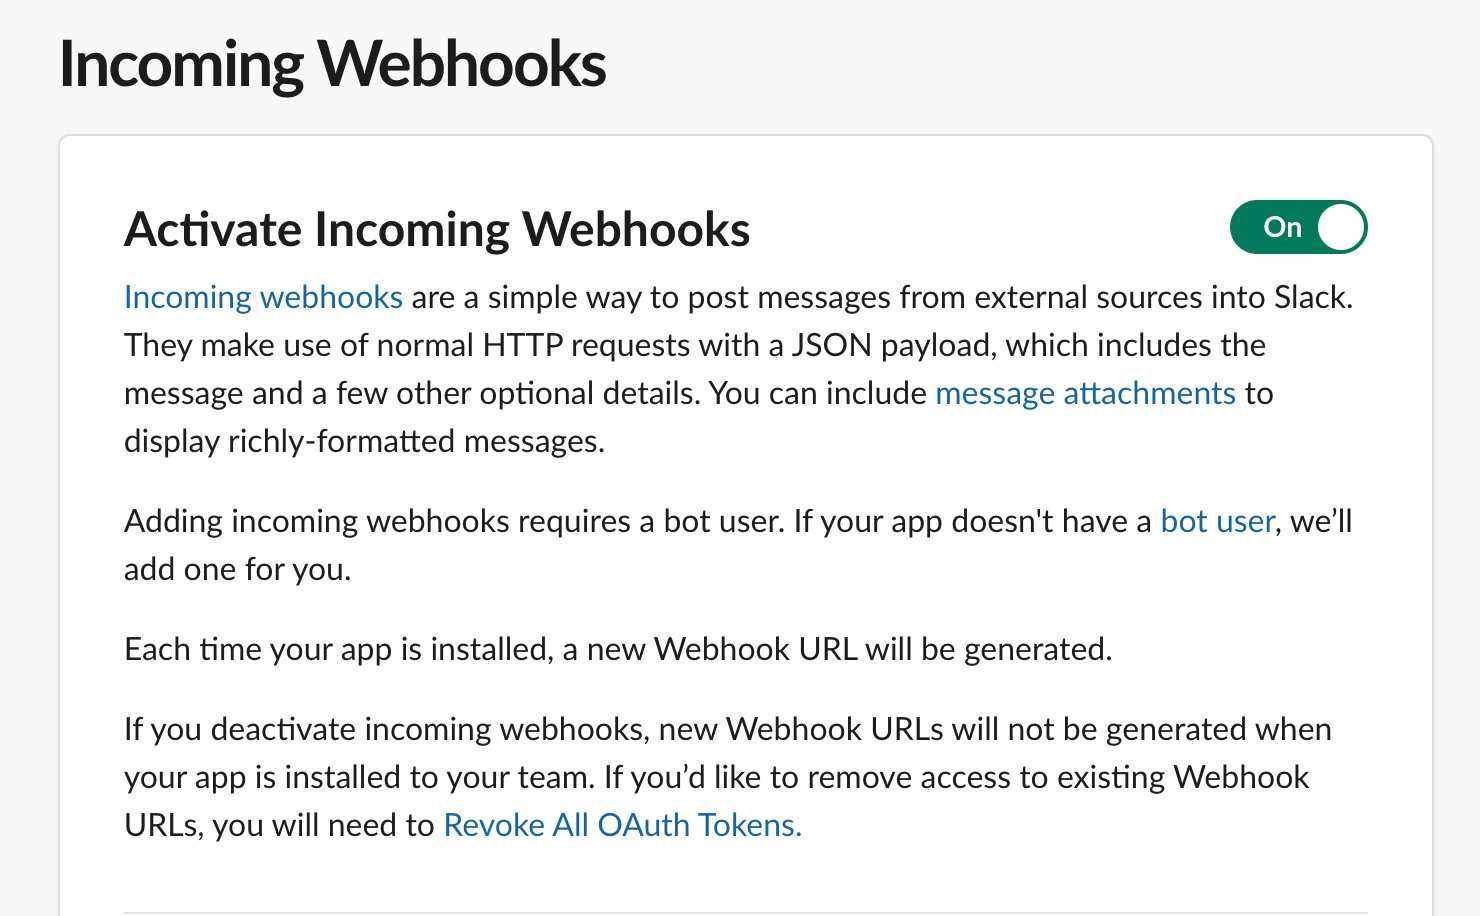
Activate incoming webhooks
Open Incoming Webhooks and switch Activate Incoming Webhooks on.
3
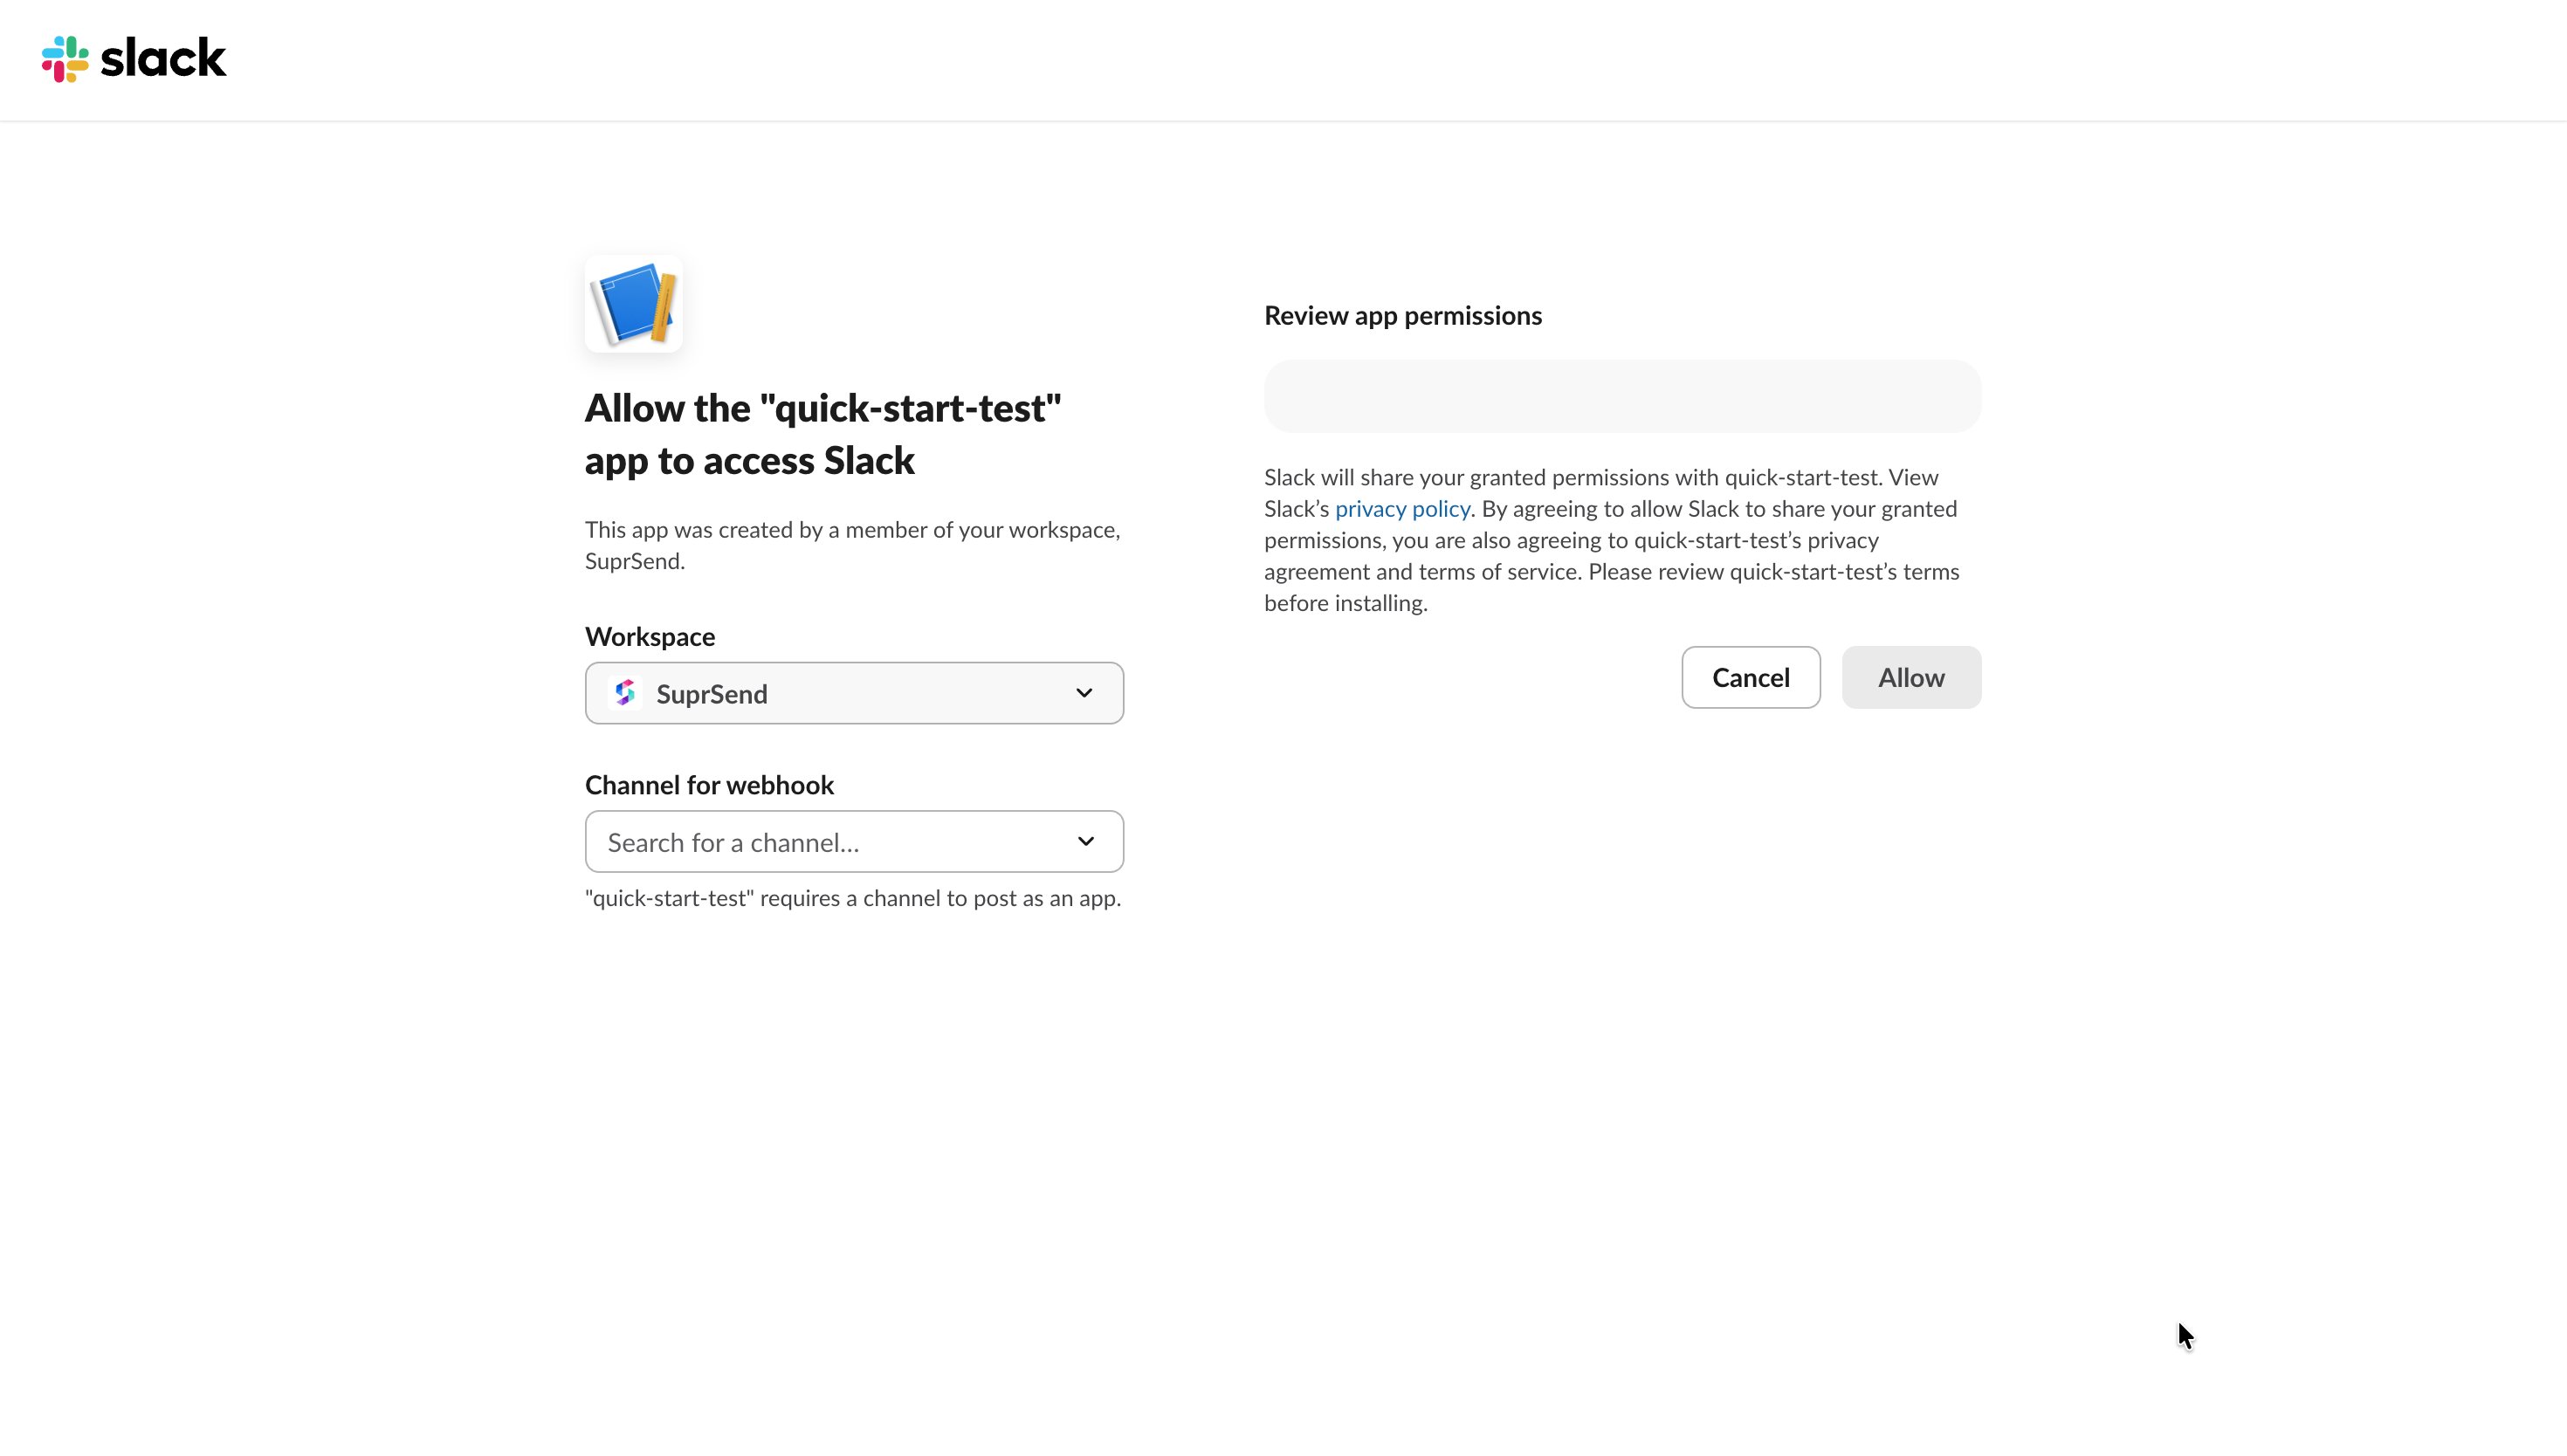
Point it at a channel
Click Add New Webhook to Workspace, pick the channel to post into, and Allow.
4
Copy the URL
It looks like https://hooks.slack.com/services/TXXXX/BXXXX/XXXXXXX.The channel you picked is the only one this URL can ever post to. To reach a second channel,
create a second webhook.
Or use a bot token — any channel, and DMs
Same Slack app, a different credential out of it. Add the OAuth scopes you need, install the app
to your workspace, and copy the bot token. It starts with xoxb-.
Sending to
Scopes
Store
A channel
chat:write, chat:write.public
channel_id + access_token
A person by Slack ID
chat:write, im:write, users:read
user_id + access_token
A person by email
chat:write, im:write, users:read.email
email + access_token
chat:write.public is what lets the bot post to a channel it hasn’t been invited to. Without it,
invite the bot to the channel first.
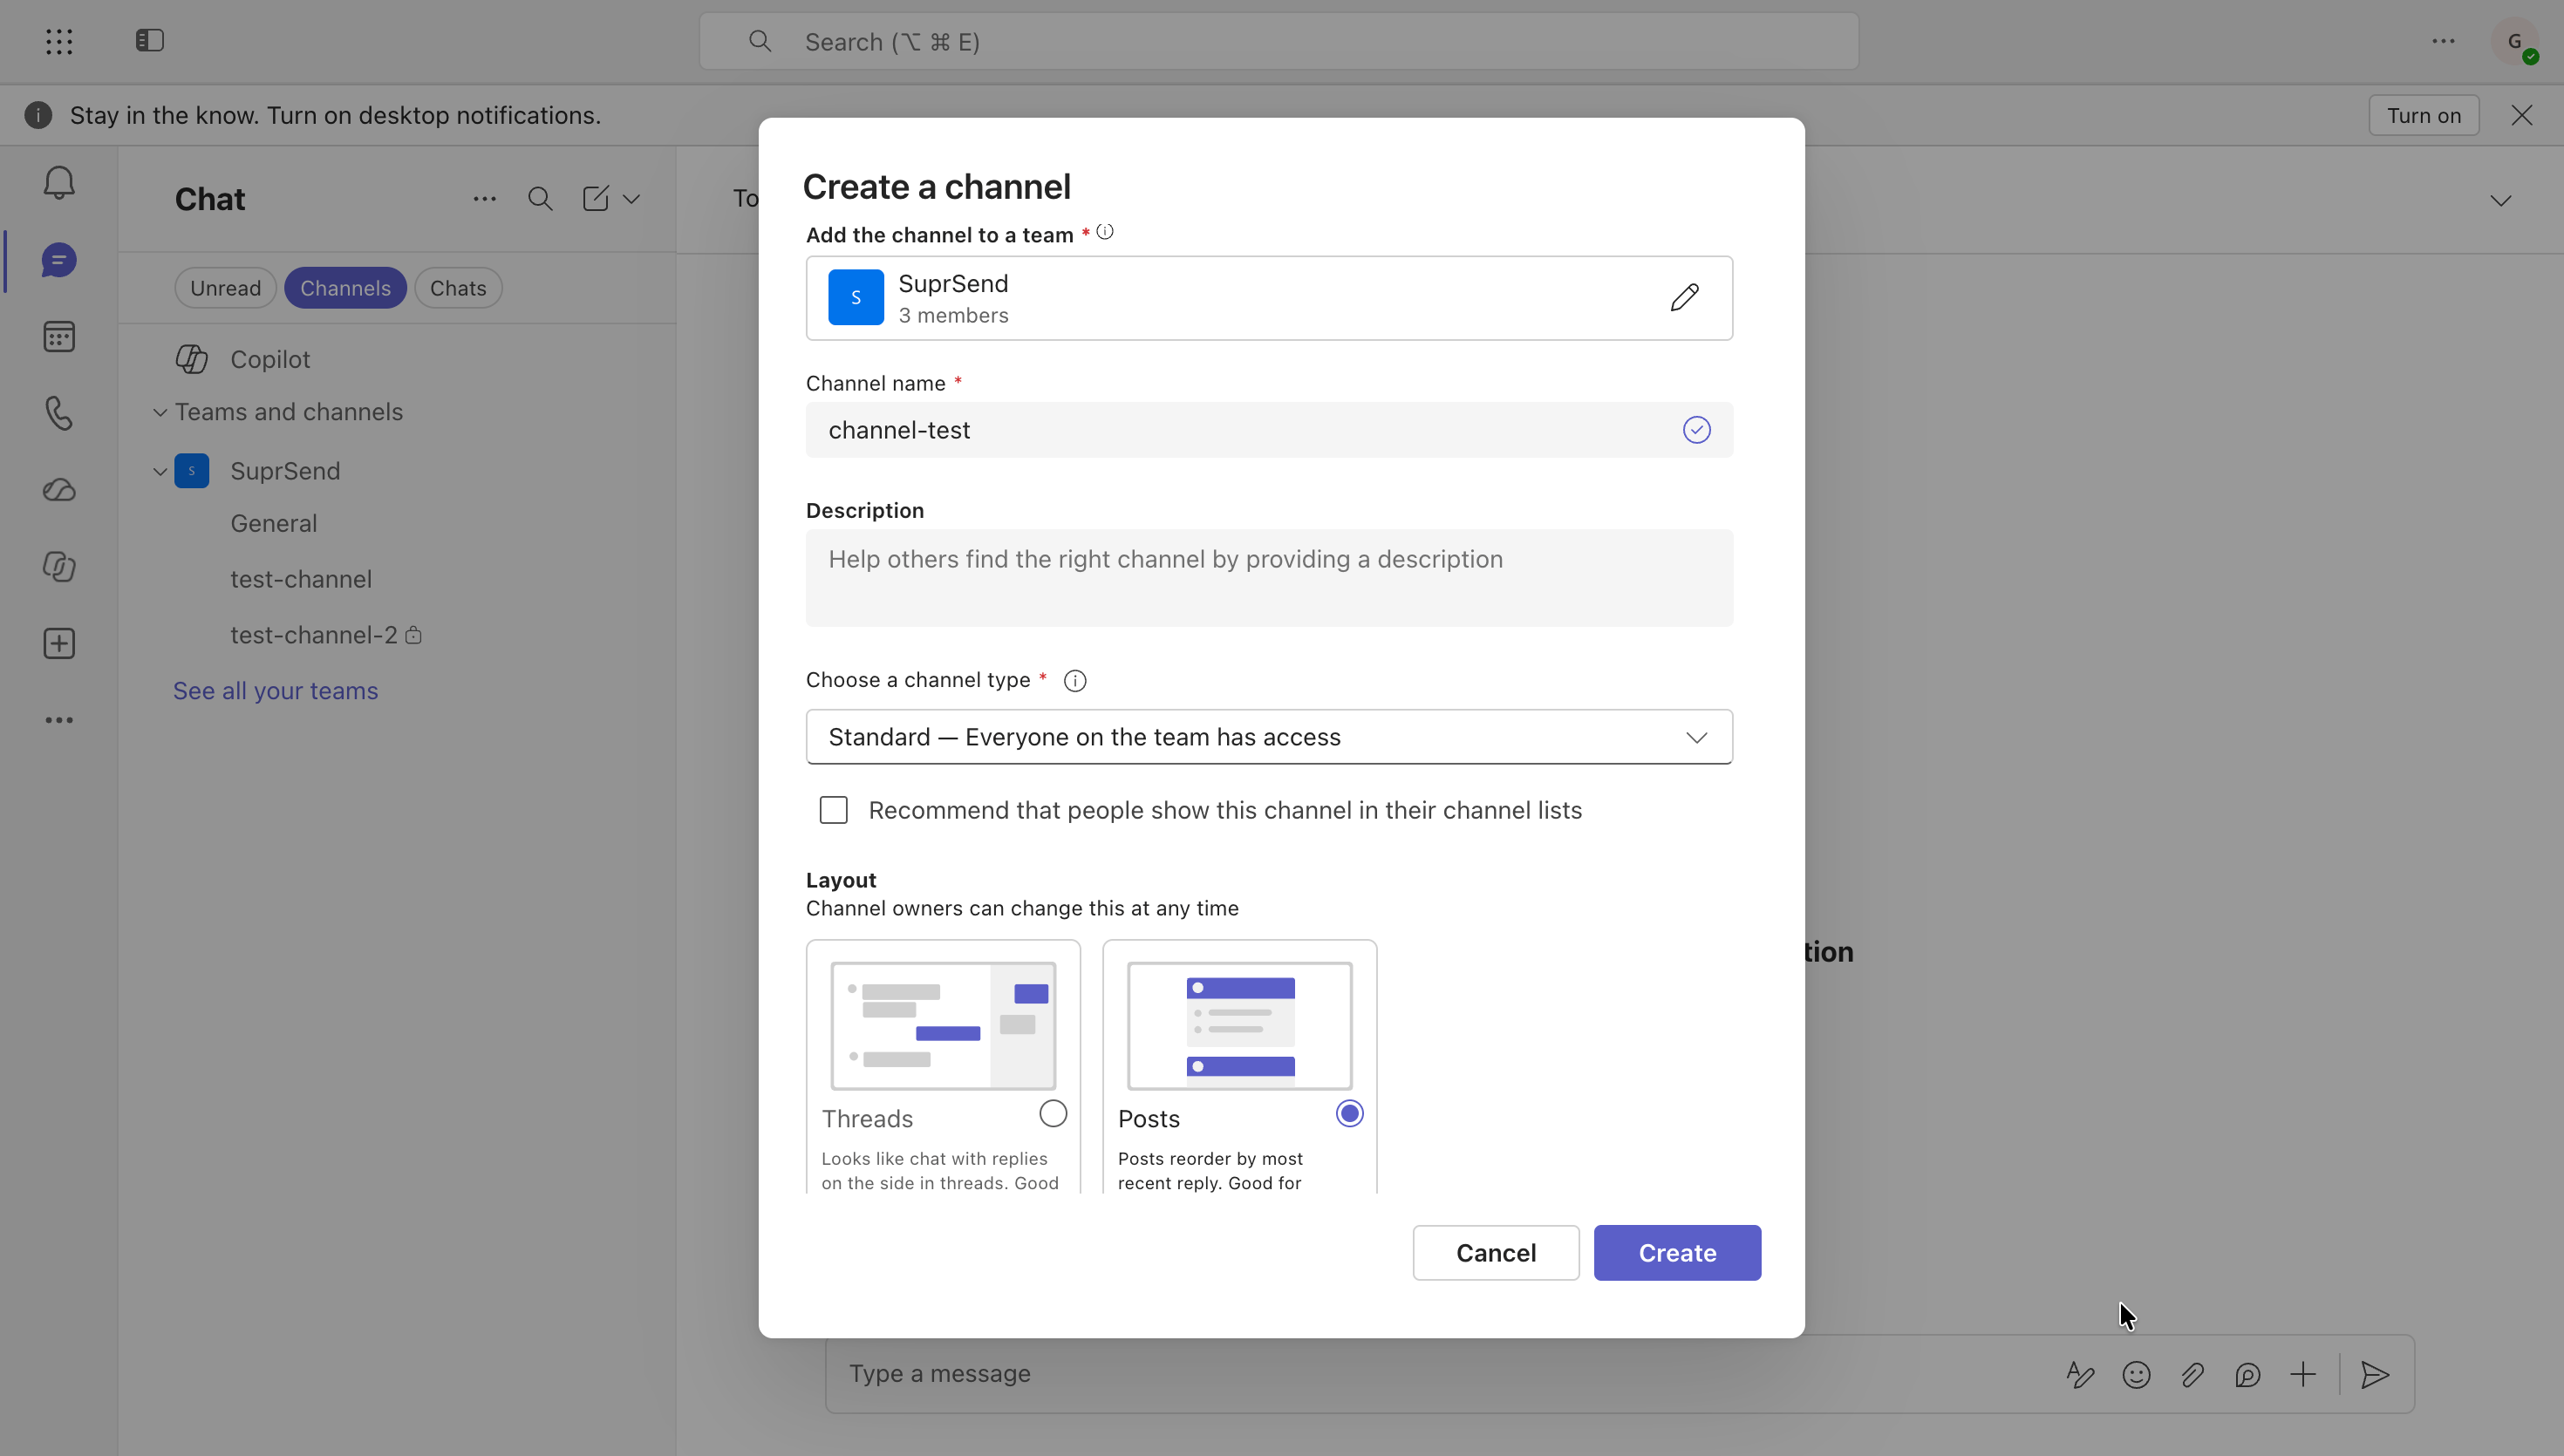
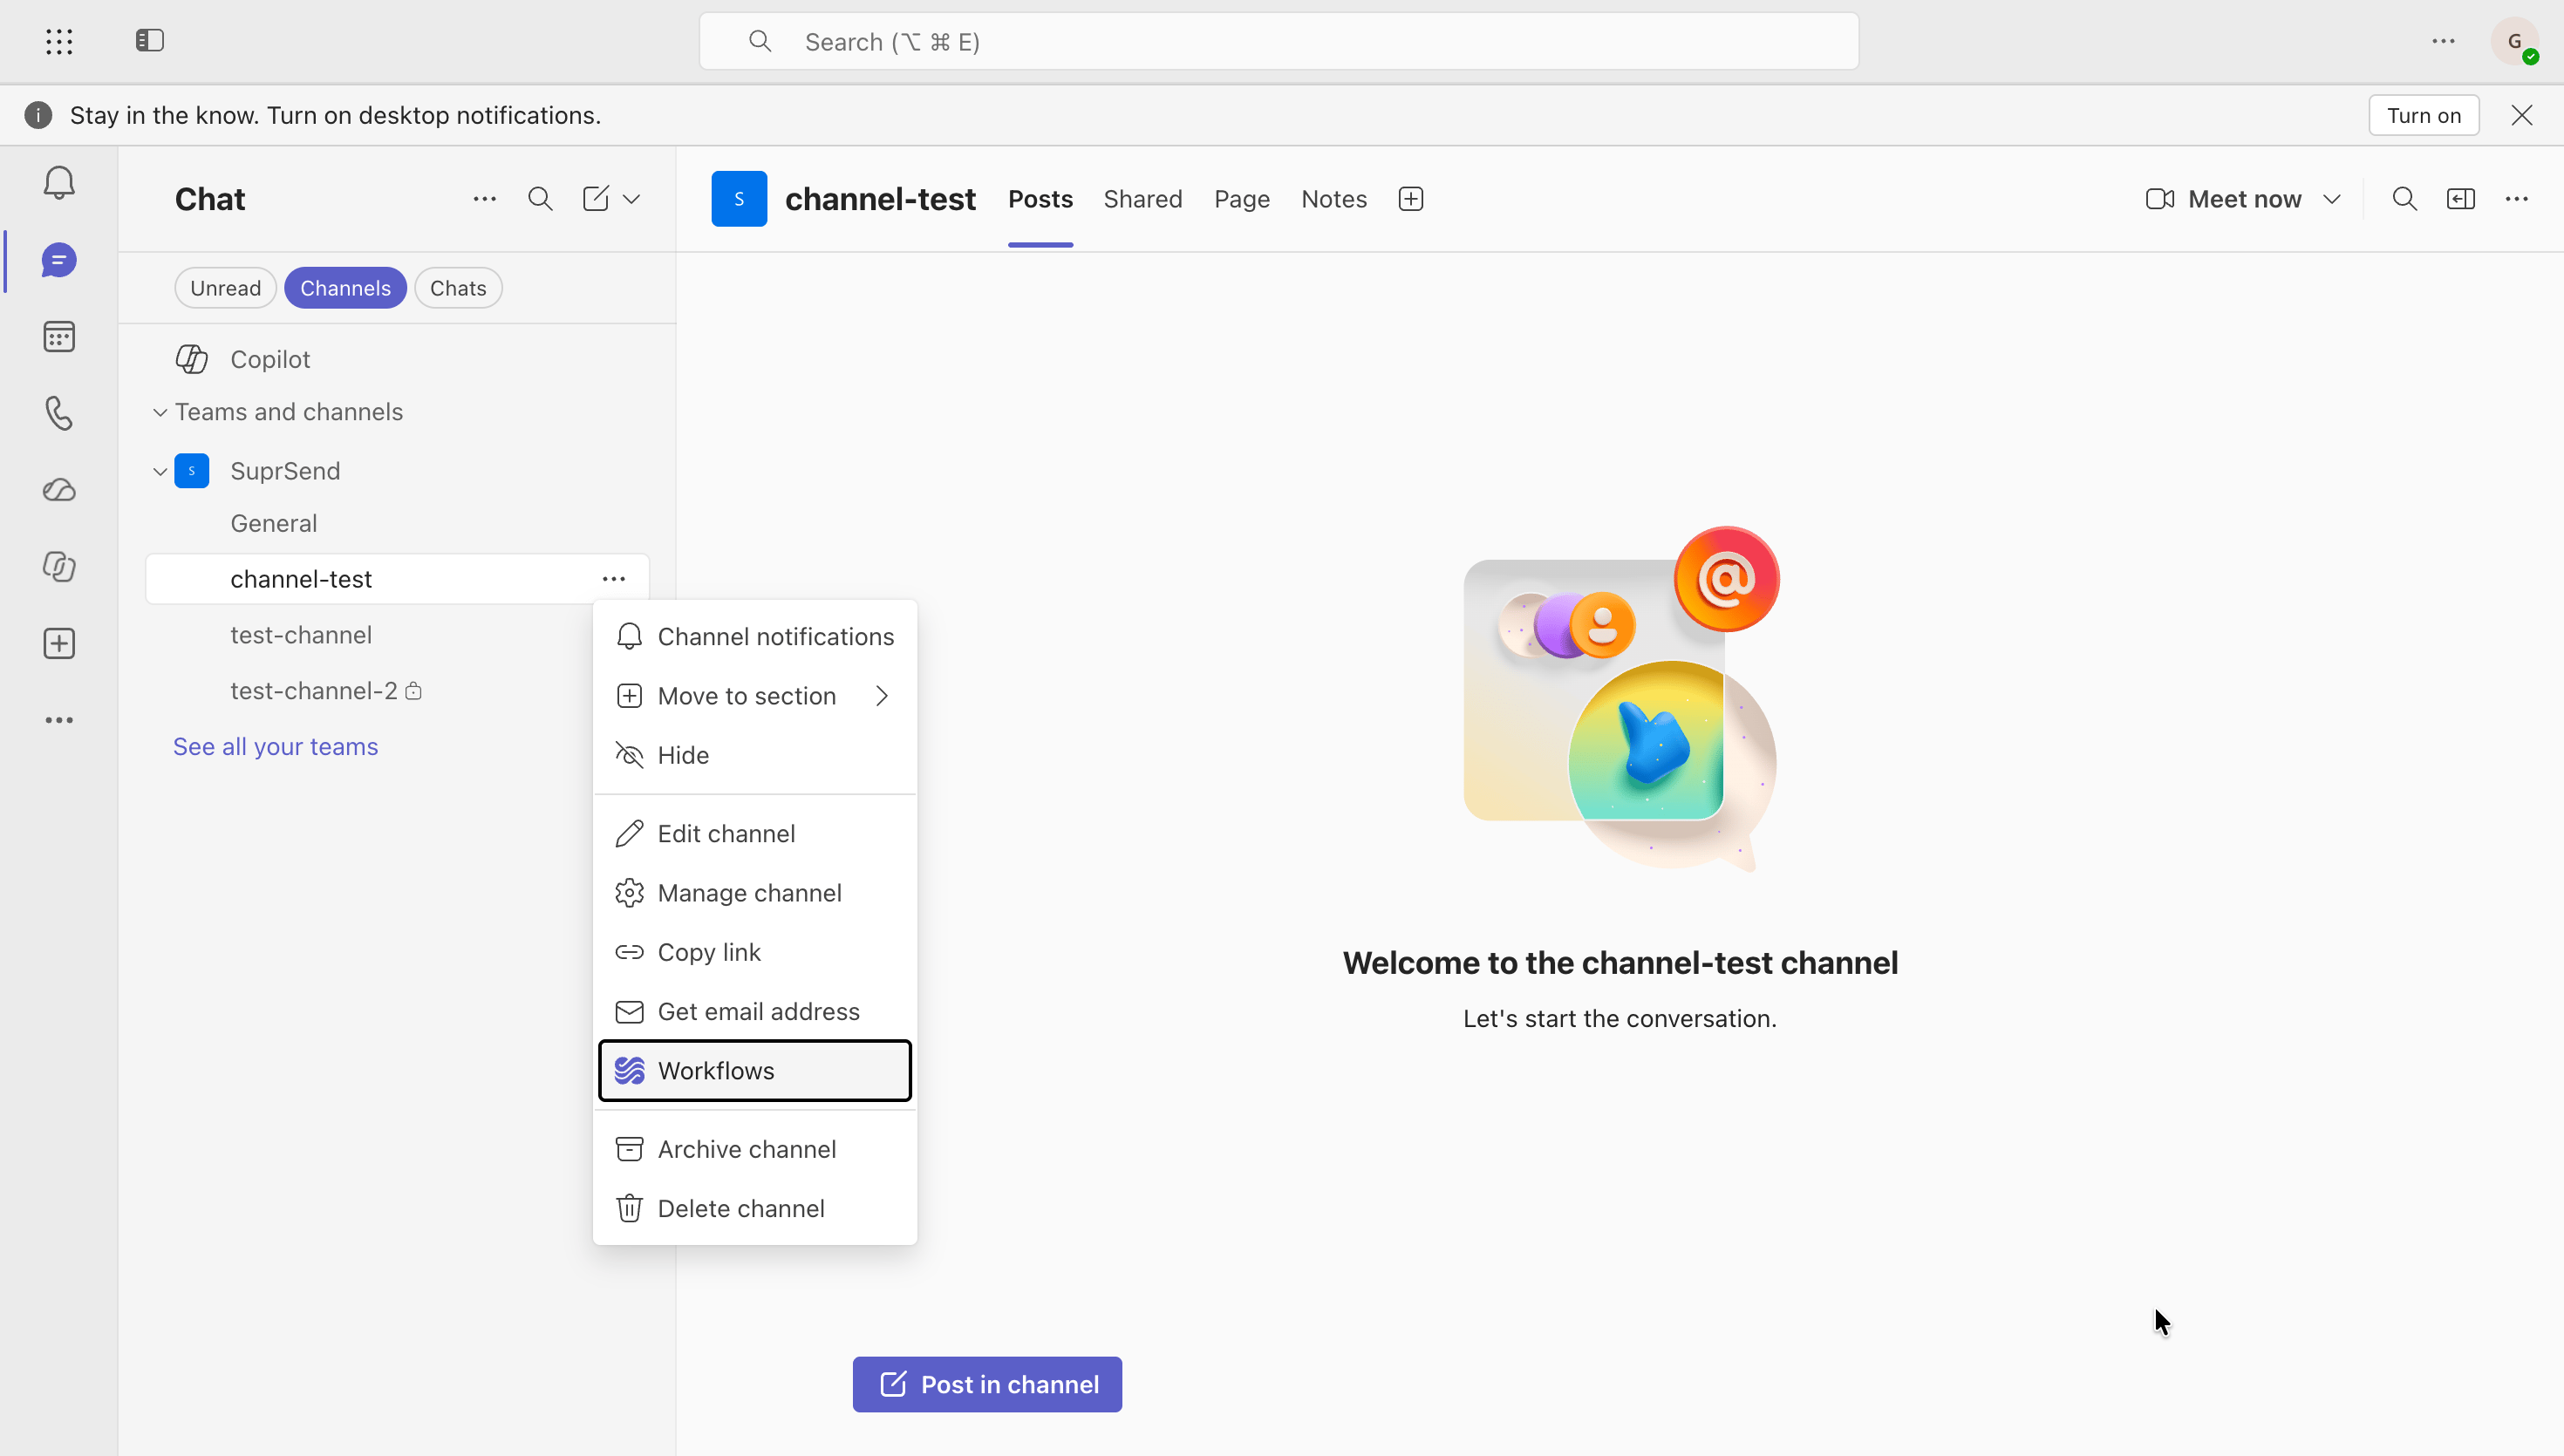
An incoming webhook is the quickest way in. It posts to one channel and can’t send DMs.
1
Pick a channel
In Teams, use an existing channel or create one. Choose
Standard and the Posts layout.
2
Open the channel's Workflows menu
Hover over the channel, select More options (…), and choose Workflows.
3
Pick the webhook template
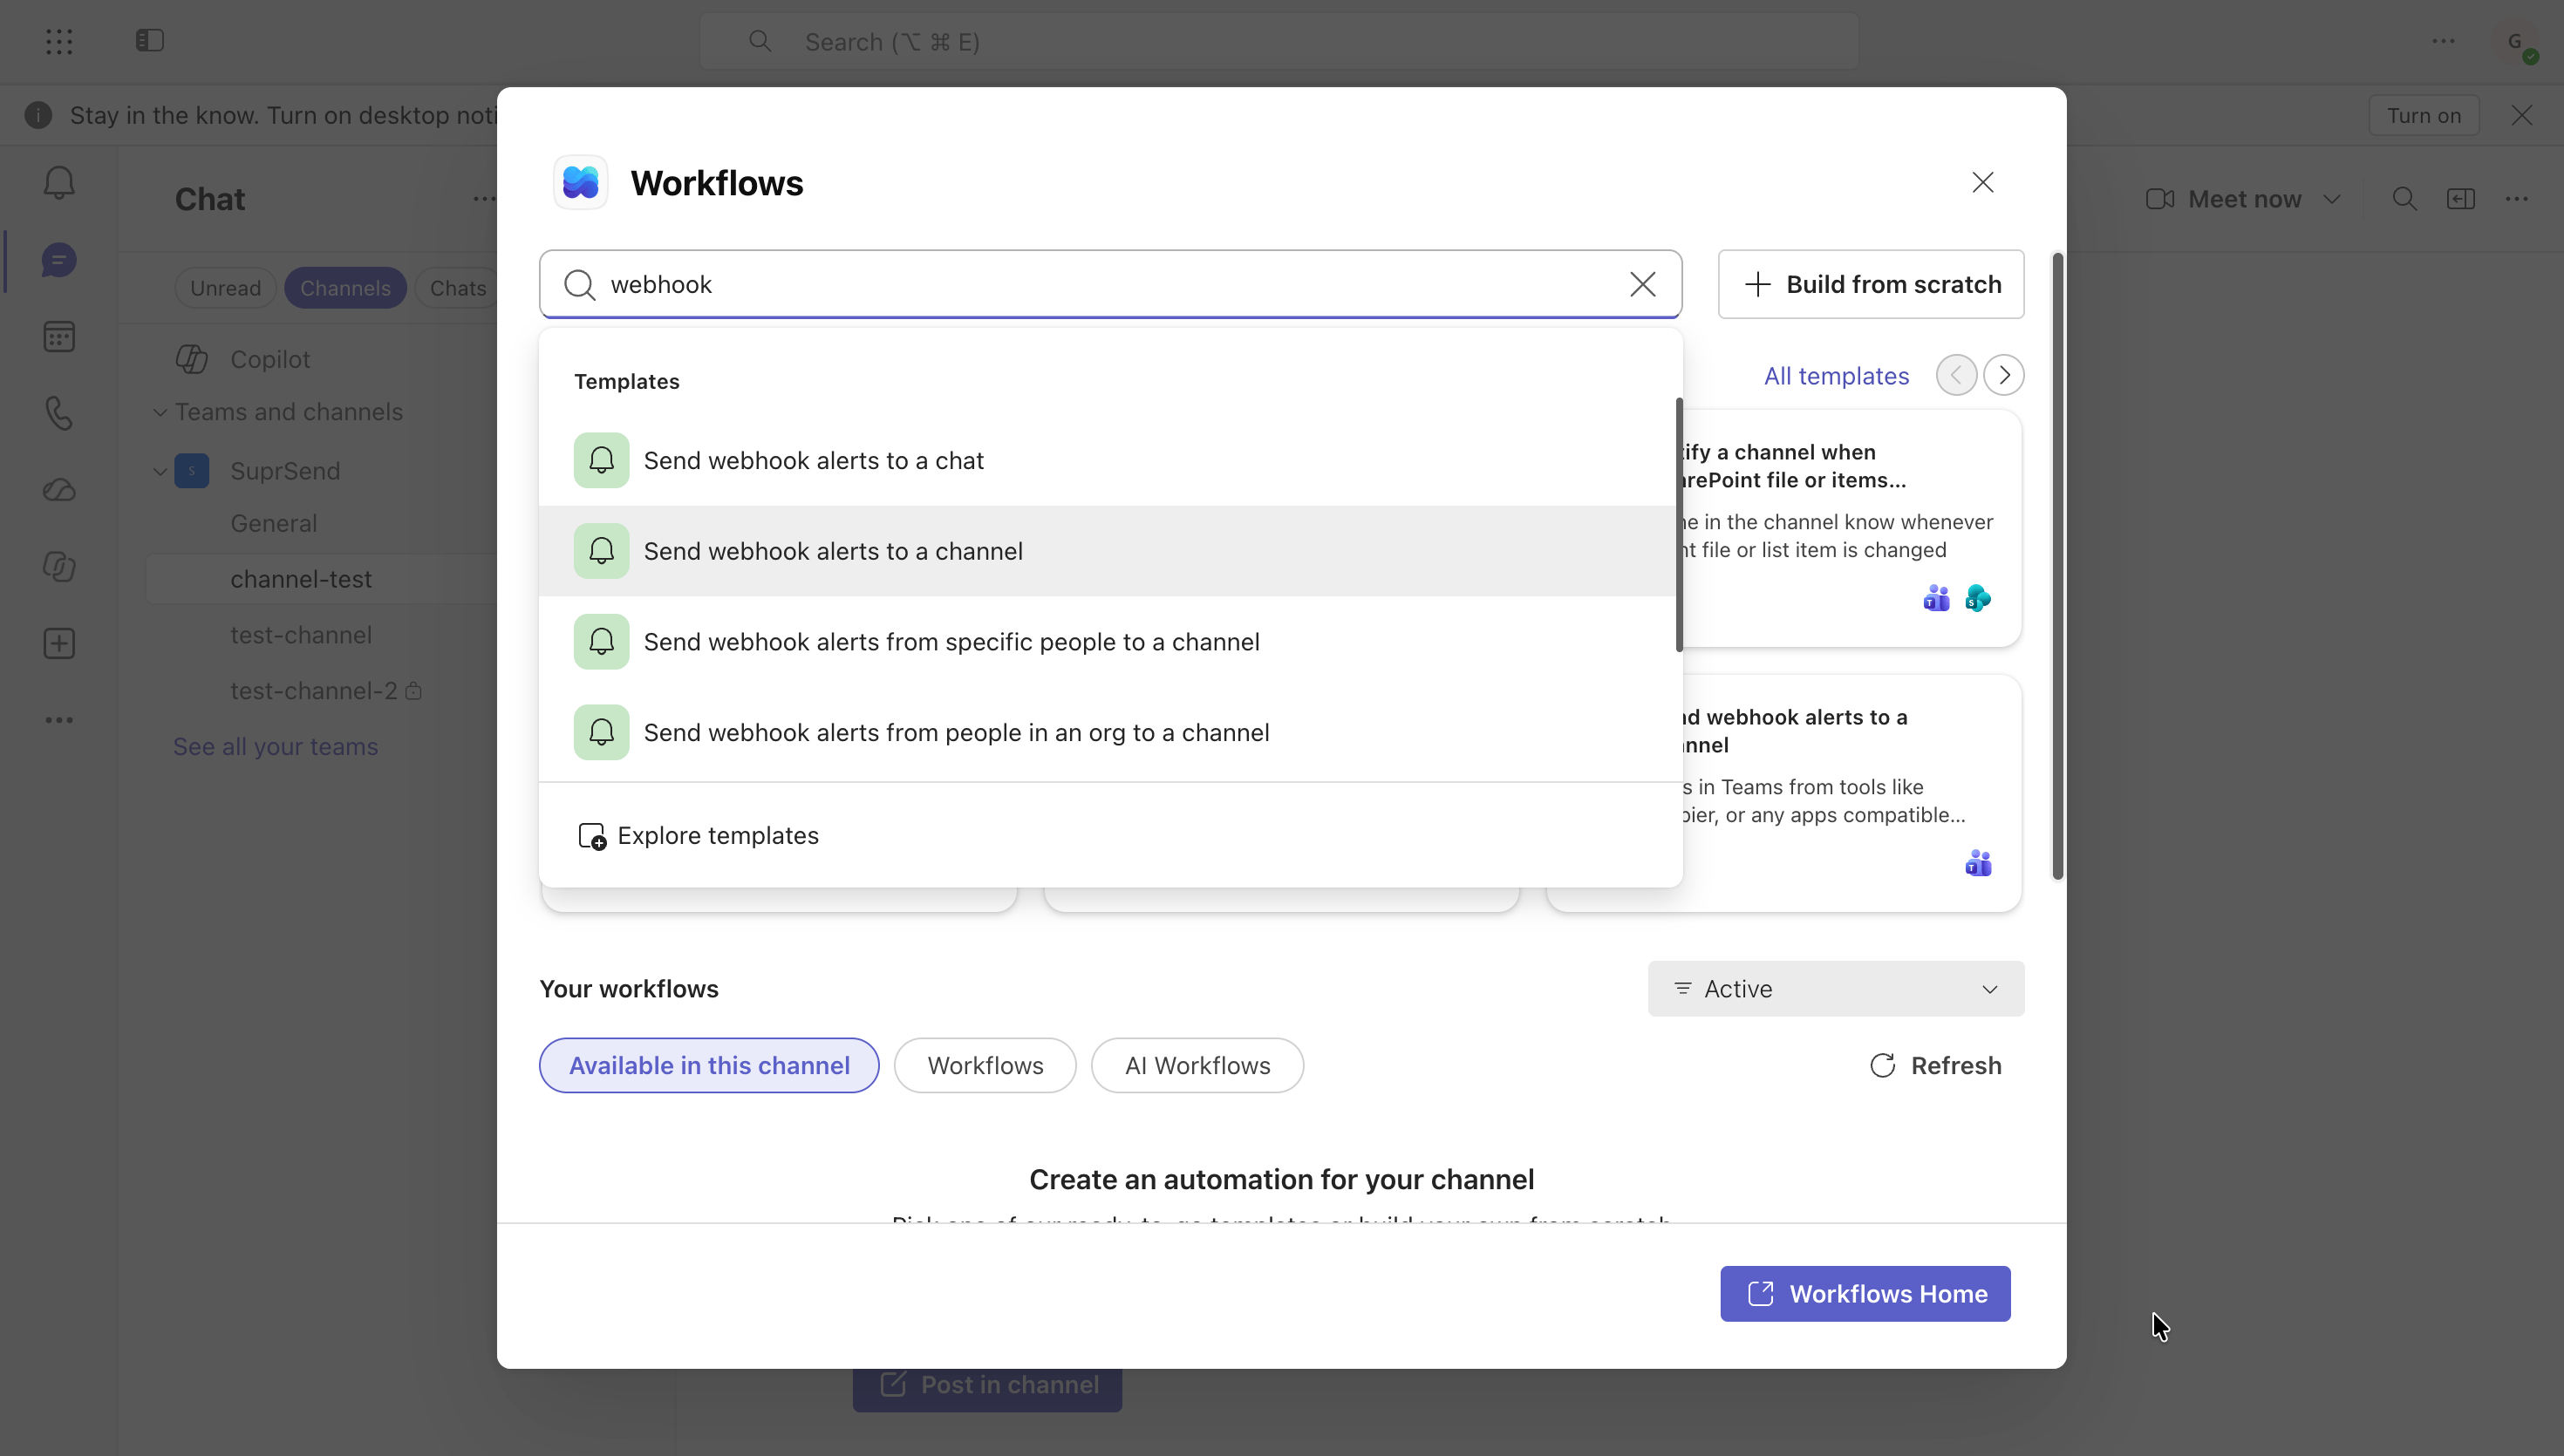
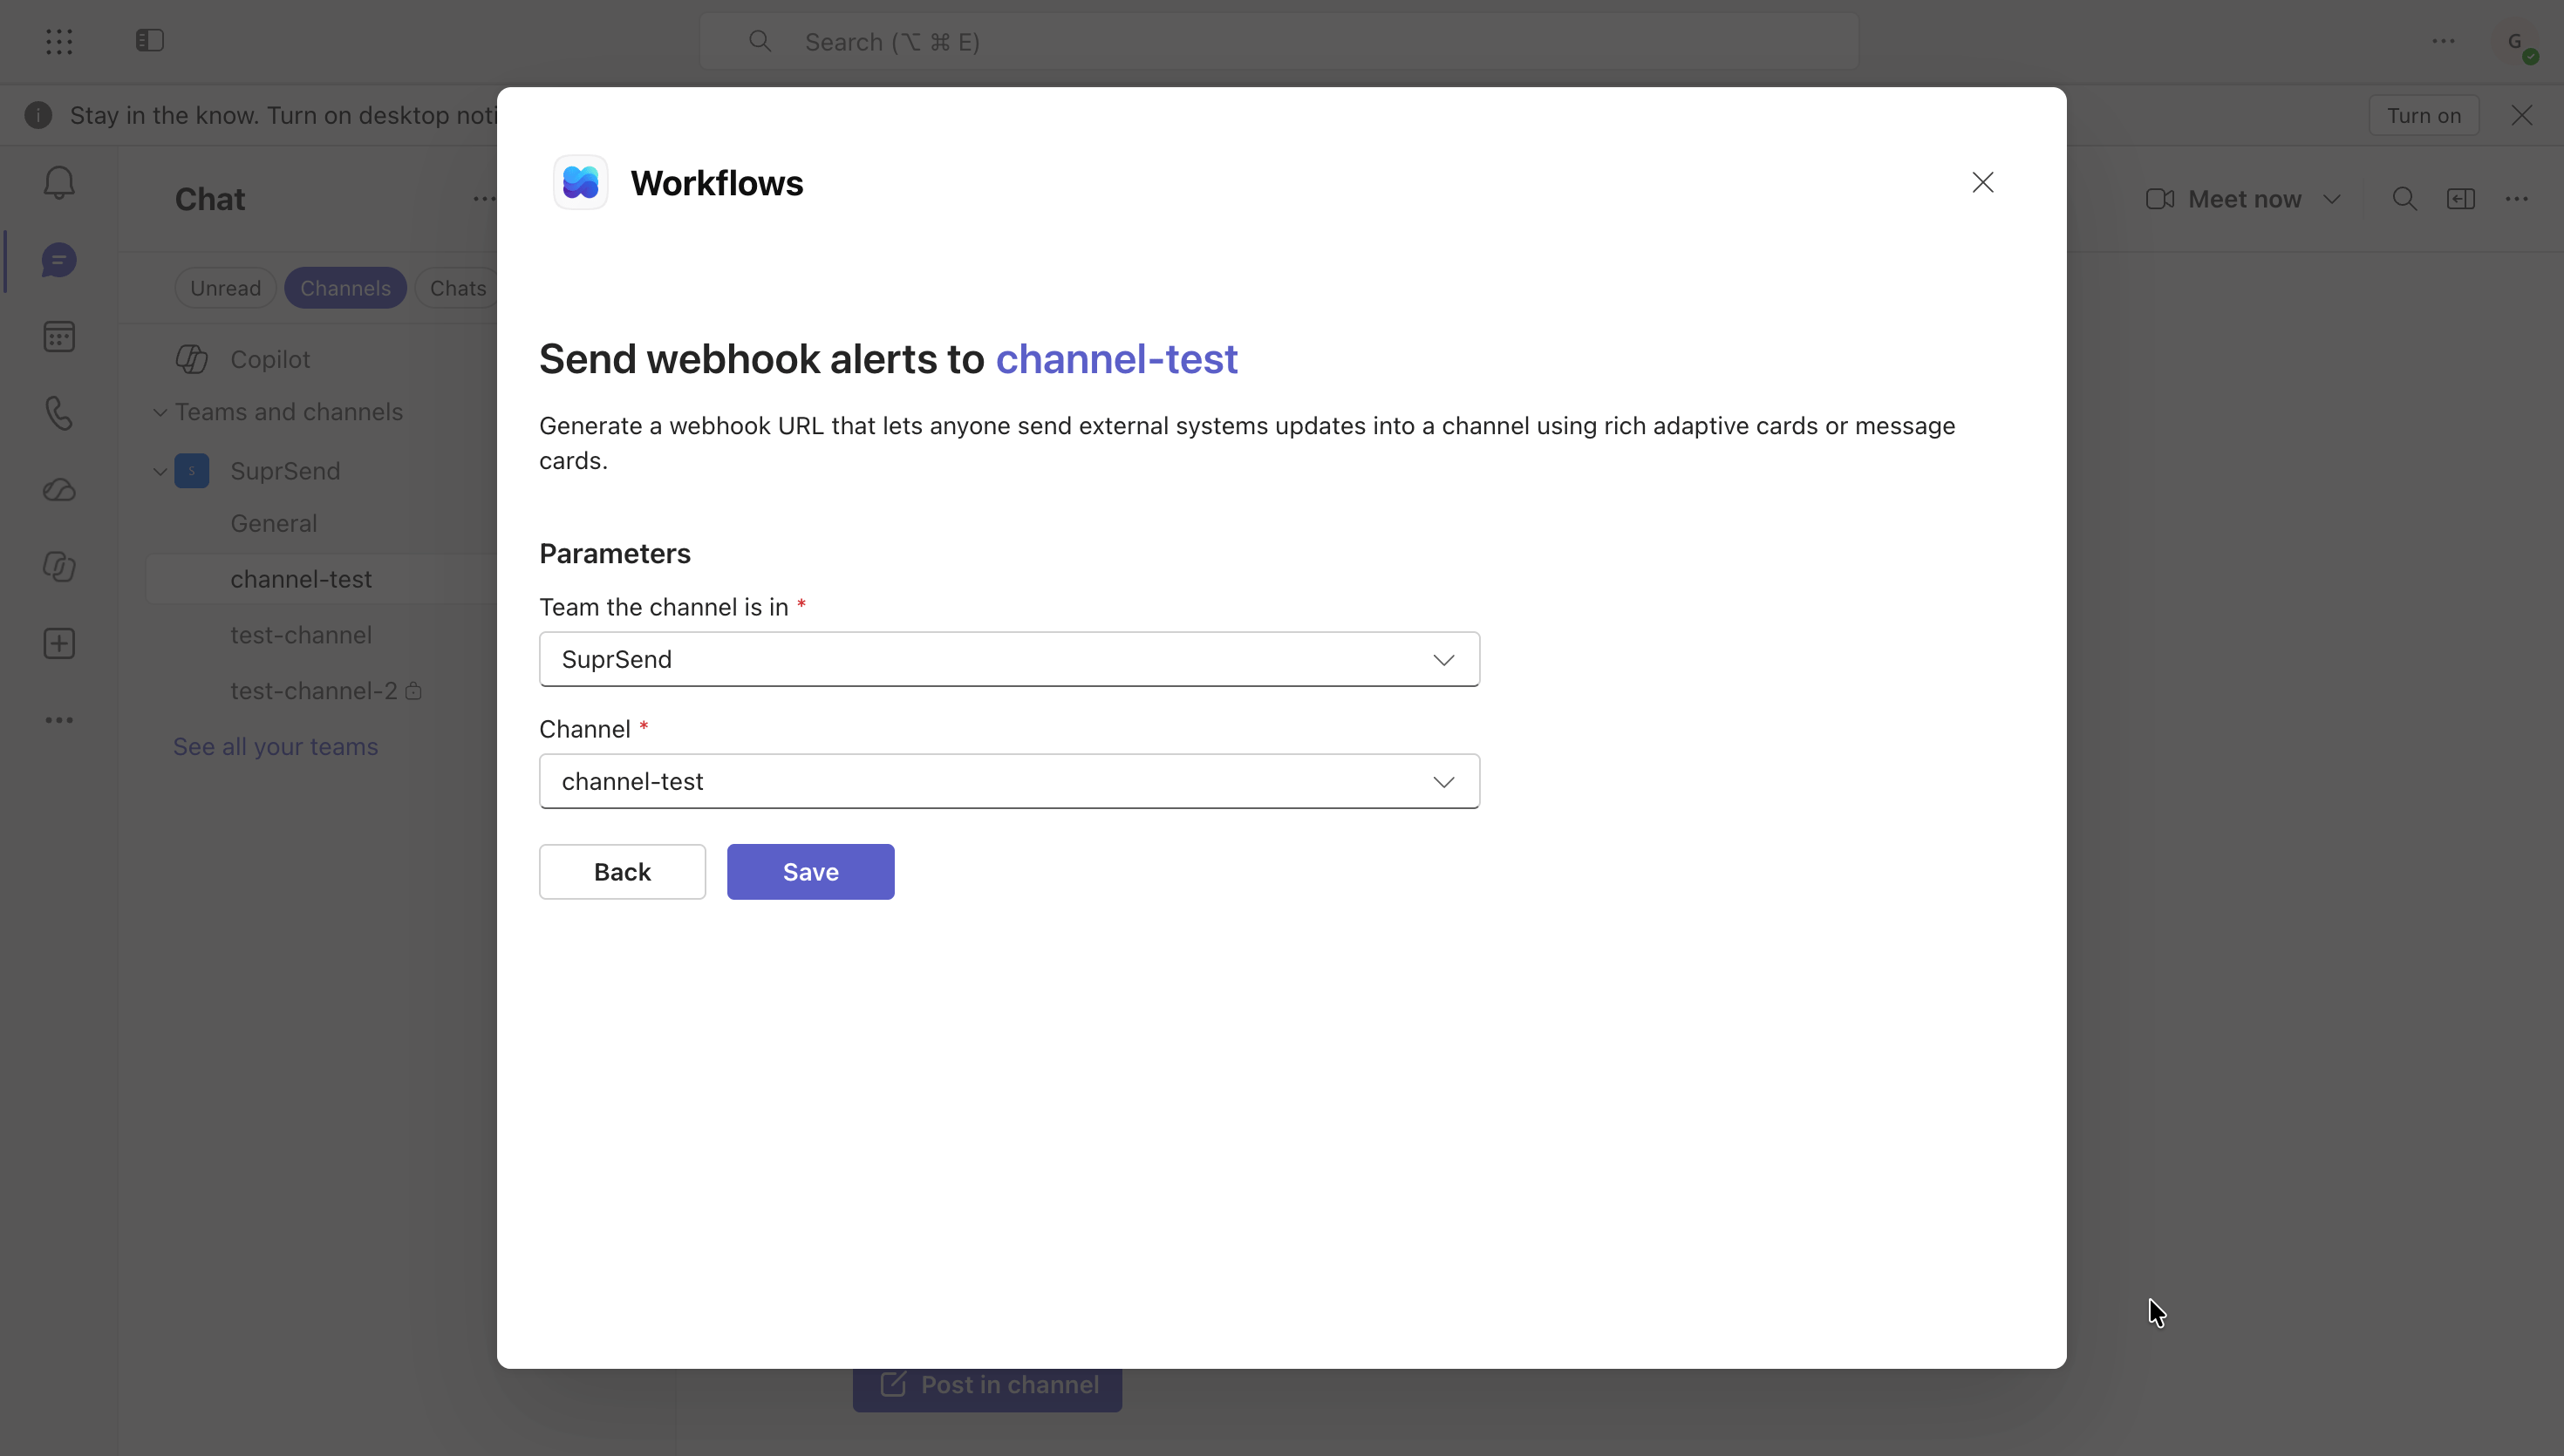
Search for webhook and choose Send webhook alerts to a channel.
Check the team and channel, then Save.
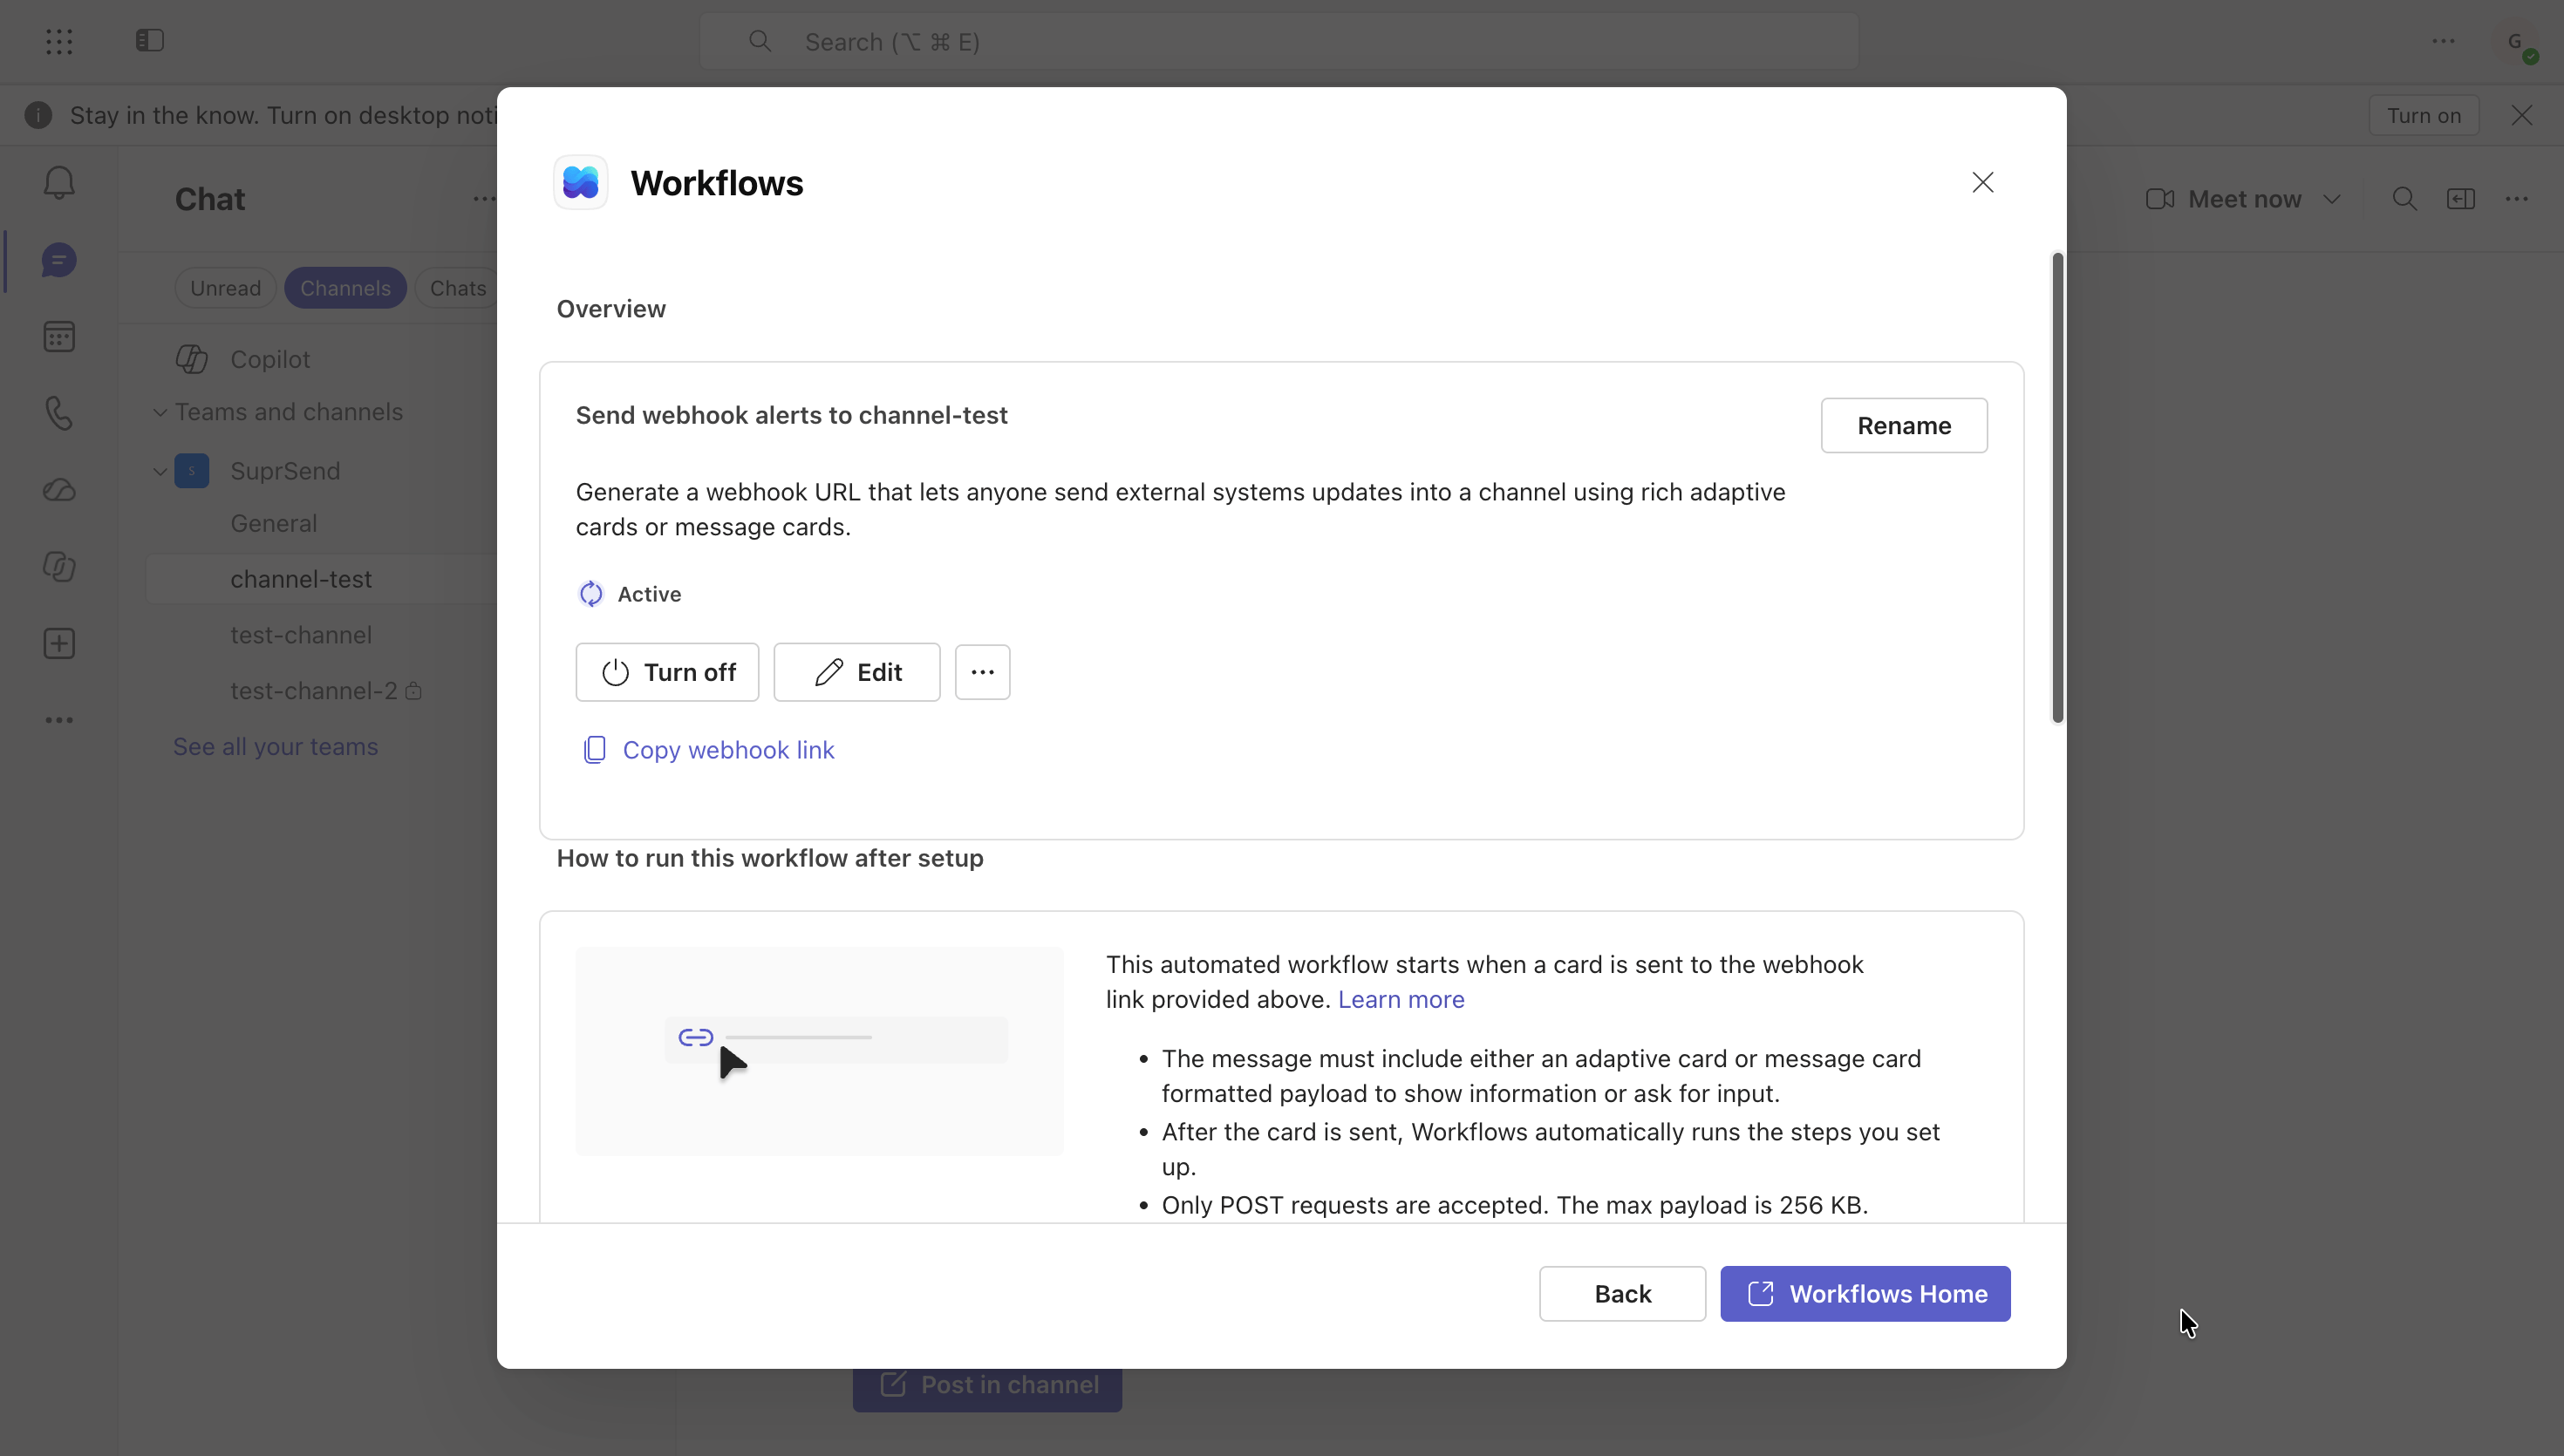
4
Copy the URL
Select Copy webhook link. It looks like
https://….environment.api.powerplatform.com/powerautomate/automations/direct/workflows/…&sig=….
The sig= part lets anyone post to the channel, so treat the URL like a secret. That channel is
the only one it can post to.
Ignore any Teams instructions that tell you to “add a connector”. Microsoft retired Office 365
connectors, and webhooks now come from the Workflows app. A workflow belongs to the person who
created it, not the channel — add a co-owner, or it stops when they leave.
Upload the app package in your Teams, then @mention the bot once in the channel you’ll
post to.
3
Copy the channel ID
On the channel, select ⋯ → Copy link. The part after /channel/ is the
conversation_id — decode %3A to : and %40 to @.
For a DM, store the person’s Entra object ID as user_id instead. tenant_id and service_url
are optional — SuprSend falls back to the vendor’s Tenant ID and Microsoft’s global endpoint.
Sending into your customers’ own workspaces works differently again — they install your app through an
OAuth flow you build, and you store a token per customer. Full walkthrough in the
Slack and Microsoft Teams guides.
Add channels to my existing order-shipped notification.Ask me which channels I want — slack, ms_teams, or both — before you start.For each channel I pick, add content to the existing "Order Shipped" template,alongside the channels already there.Body: Order #{{order_id}} is on its way.For ms_teams, use the JSONNET editor, not Markdown: an Adaptive Card, version 1.4,with that line as a single TextBlock. In JSONNET the variable is data.order_id,not {{order_id}}.Then open the workflow "Order Shipped Notification" and add every channel I pickedto its multi-channel delivery node.Commit the template and the workflow, then tell me which channels are live on each.
1
Add the channel to your template
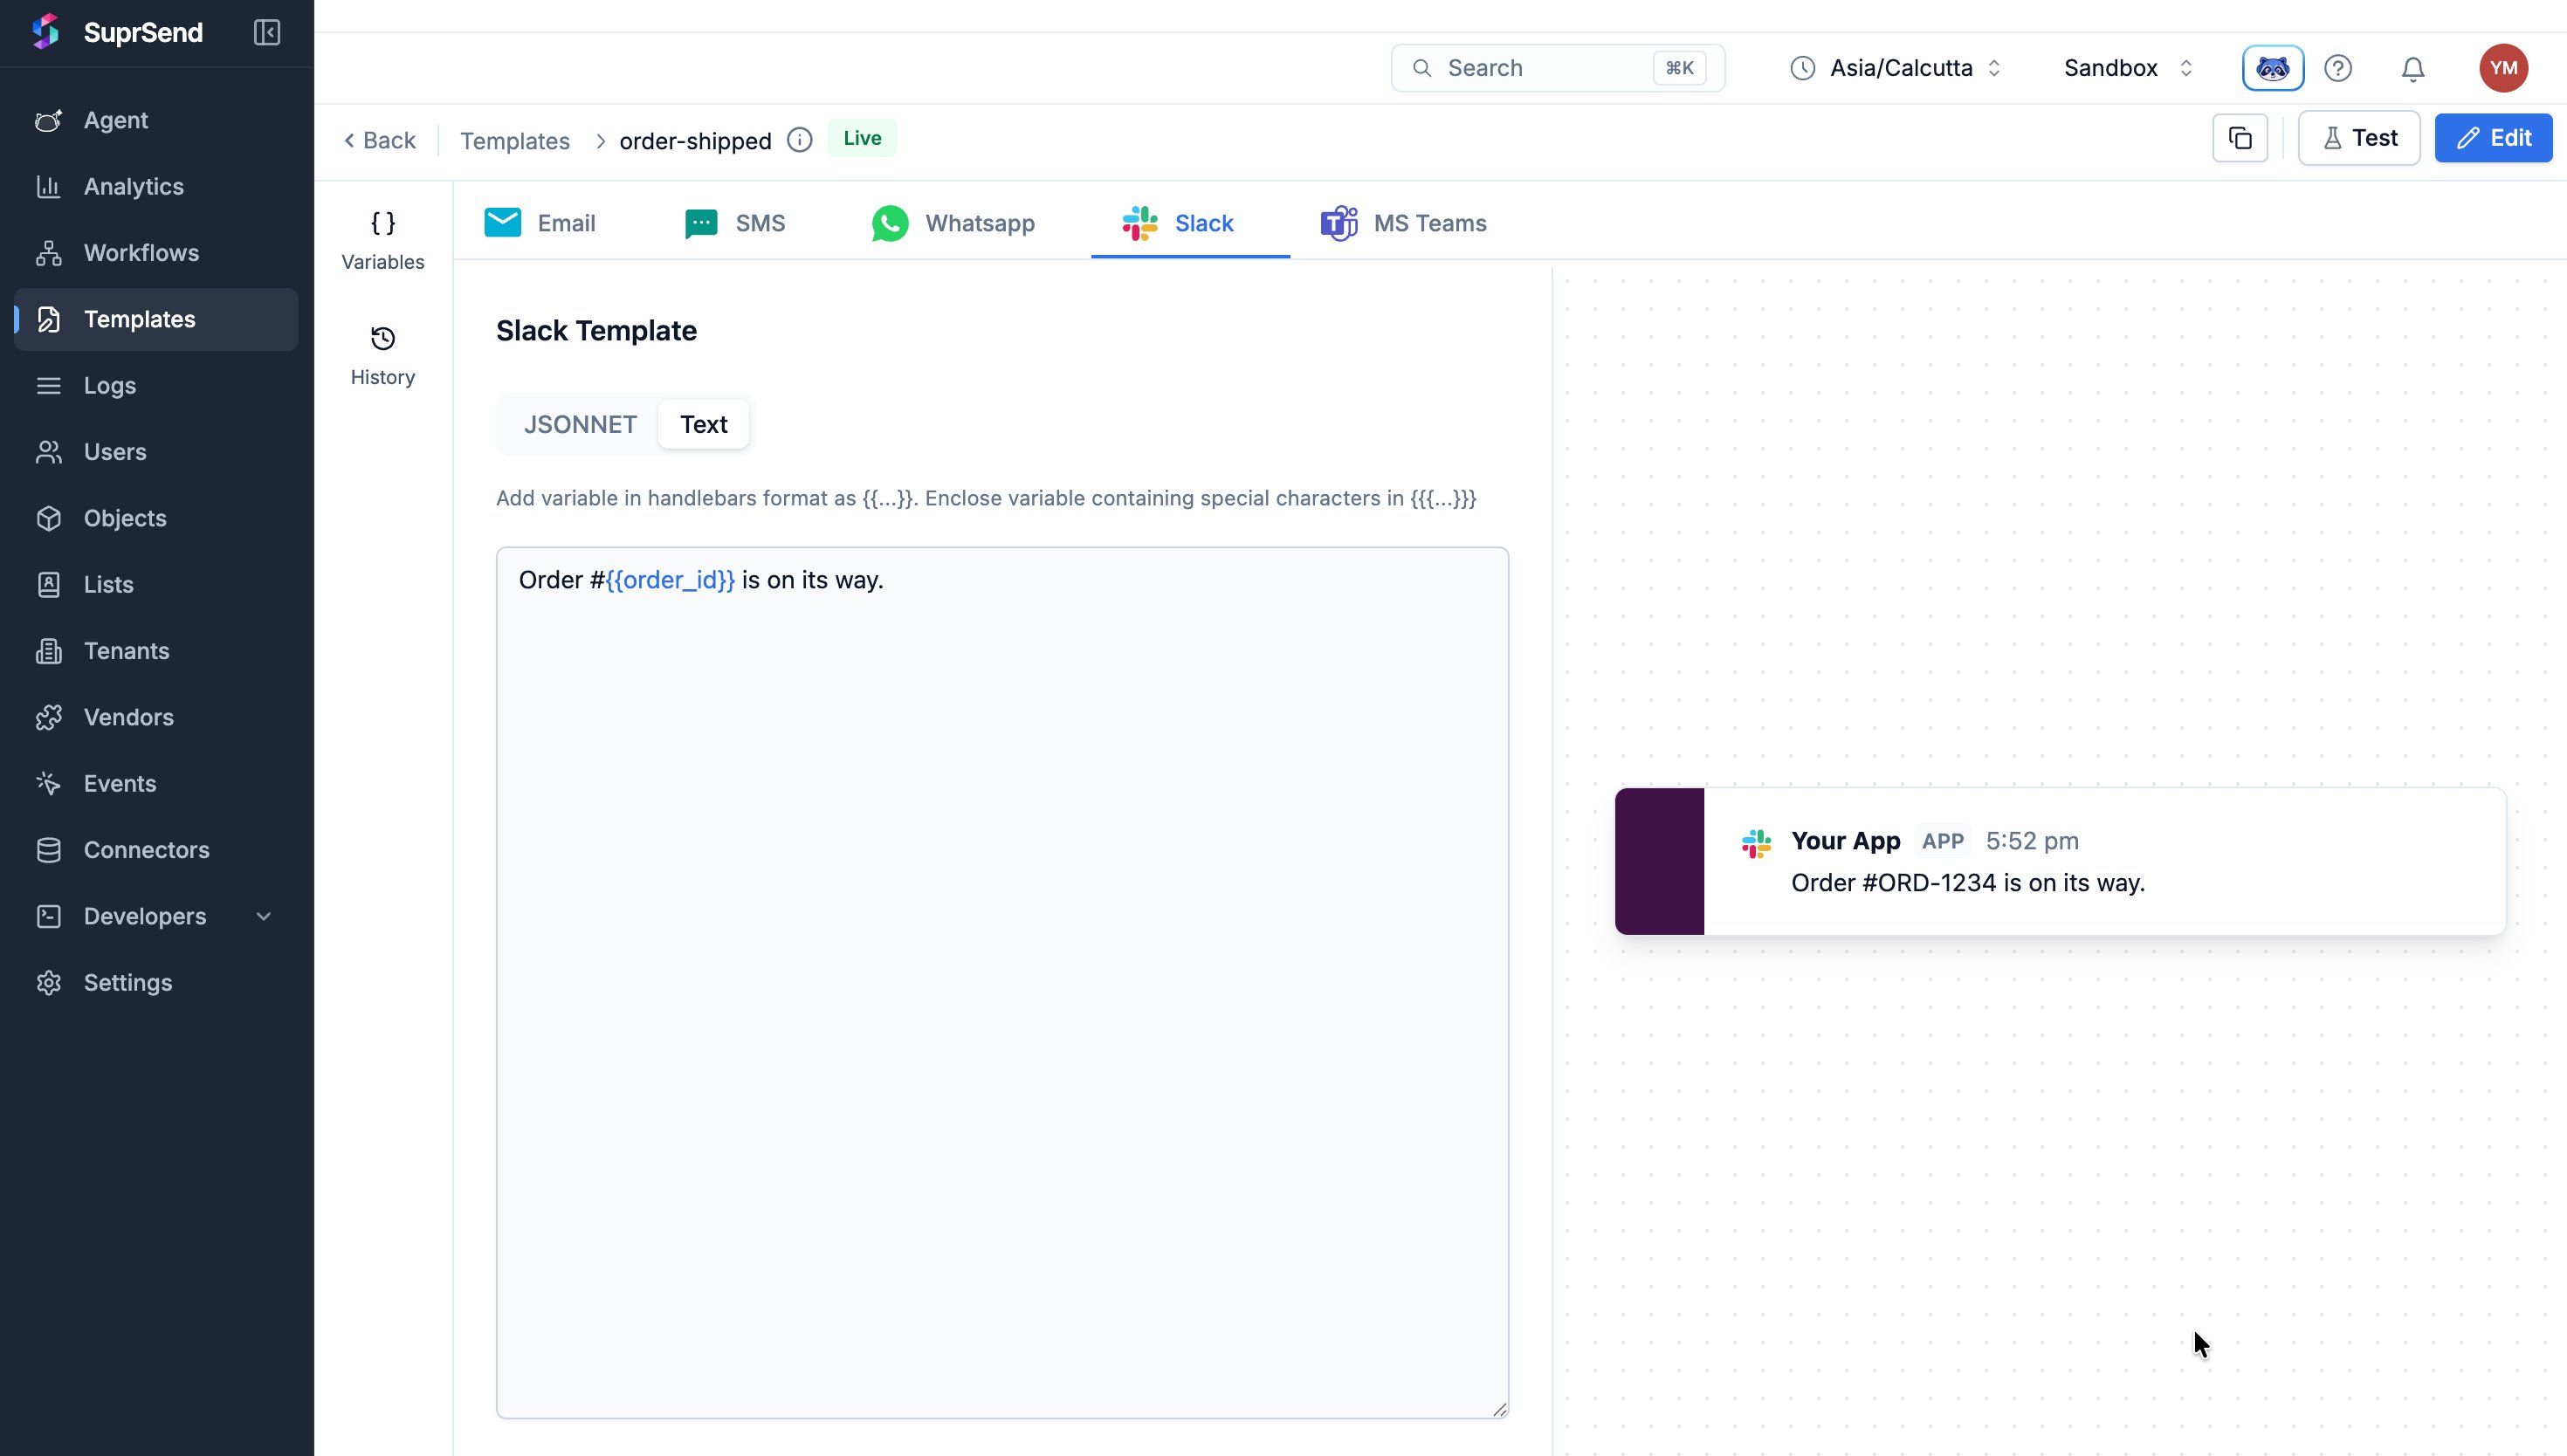
Open order-shipped from Templates, add Slack or MS Teams from the tab row, and
write the body: Order #{{order_id}} is on its way.
2
Pick an editor
Slack:Text handles a plain line like this one. Switch to JSONNET for
Block Kit when you need buttons, sections or images.Teams: use JSONNET, not Markdown. A Teams webhook only shows
Adaptive Cards — a Markdown message shows as delivered in Logs but
never appears in the channel.
{ "type": "AdaptiveCard", "version": "1.4", "body": [ { "type": "TextBlock", "text": "Order #" + std.toString(data.order_id) + " is on its way.", "wrap": true } ]}
3
Commit the template
Click Commit in the top right.
4
Point the workflow at the new channels
Open order-shipped-notification, select the new channels on the multi-channel delivery node,
and Commit again.
The value you copied goes on the user profile, the same way a phone number did.
AI editor
Write it yourself
Copy the prompt
Add Slack or Microsoft Teams to the SuprSend integration already in this codebase.Ask me two things before you write anything, and wait for both answers: a. Which channel — slack, ms_teams, or both. b. How I'm connecting — an incoming webhook URL, or a bot for my own workspace (Slack: a bot token; Teams: a bot already set up in Vendors). If I say anything else, stop and tell me it needs the full Slack or Teams integration guide rather than this quick start.Then ask me for the actual value: the webhook URL, or the bot token plus the channelID, Slack user ID, or email I want it sent to. For a Teams bot, ask for theconversation_id (or the person's user_id for a DM); tenant_id is optional. Use exactlywhat I give you and do not invent any of it.Already built, do not re-create: the SuprSend client, the code that syncs a user toSuprSend, the code that triggers "order-shipped-notification", and the template andworkflow behind them. The workflow already delivers on these channels.If the SuprSend MCP server is connected, use it. My workspace is "sandbox" — passthat on every MCP call, because it otherwise defaults to staging. Use it to look upthe exact SDK method and object shape for the channel instead of writing it frommemory, and to fetch the user back from SuprSend after you sync it. Use MCP to checkyour work, never to do the work.If it isn't connected, carry on without it and tell me so.1. Find the existing SuprSend user sync and show it to me before you change it.2. Add the channel identity to that same sync, alongside what's already there, using the object shape that matches what I gave you.3. A bot token or webhook URL is a credential. Read it from the environment, never hardcode it, and tell me the variable name you used so I can set it.4. Leave the trigger call exactly as it is.5. Run the sync and then the trigger once, and show me SuprSend's actual response to each. If you could not run them, say so plainly — do not tell me it worked.Finish with one line per file you edited, then tell me to check the Slack or Teamschannel, and Logs → Requests → Workflow executions → Messages.
One call per identity, on the sync you already wrote.
Slack also accepts user_id in place of email, and Teams accepts user_id in place of
conversation_id. If a profile somehow carries more than one of these, SuprSend picks in a fixed
order: for Slack, webhook, then channel_id, then user_id, then email; for Teams, webhook,
then conversation_id, then user_id.
A bot token can post as your app to anything it has access to. Read it from the environment like
any other secret — never commit it, and never ship it to a browser.
A Slack channel or a shared inbox often isn’t a person at all. When the recipient is a team rather
than a user, model it as an object and let people subscribe to it, instead of
hanging the channel off someone’s personal profile.
The bot isn’t in that channel and doesn’t have chat:write.public. Either add the scope and
reinstall the app, or invite the bot to the channel.
The DM never arrives, but the send succeeded
Sending by email needs users:read.email so Slack can resolve the address to a person. Without
it, or if that email doesn’t belong to anyone in the workspace, there’s nobody to deliver to.
invalid_auth or an expired token
Bot tokens are revoked when the app is uninstalled or reinstalled. Reinstalling issues a new
xoxb- token, and every profile storing the old one has to be updated.
The webhook worked, then stopped
Incoming webhook URLs are tied to the channel they were created for. Deleting or archiving that
channel, or removing the app, kills the URL permanently — you create a new one rather than
repointing it.
The Teams webhook stopped working on its own
A Workflows webhook is owned by the person who made it, not by the channel. It stops if they leave
the organisation, or if the workflow is turned off in the Workflows app. Add a co-owner. Teams also
throttles at more than four requests a second and rejects messages over 28 KB.
Logs say delivered, but nothing appears in Teams
The webhook accepted the request, then Teams dropped it — the Teams template is in Markdown.
Switch to JSONNET. Confirm in the channel, not just the logs.
Teams shows "We're sorry, this card couldn't be displayed"
The card version is too new for a webhook. Set it to 1.4 or 1.5.
Teams bot sends fail with 401
App Type on Vendors → MS Teams doesn’t match your Azure bot. Bots created after 31 July 2025
are Single tenant.
BotNotInConversationRoster
The bot isn’t in the team that owns the channel. @mention the bot once in that channel.