Postmark integration on SuprSend account
On the SuprSend dashboard, go to vendor page from side panel and click Email -> Postmark from the list of Vendors. This will open vendor details page as shown below: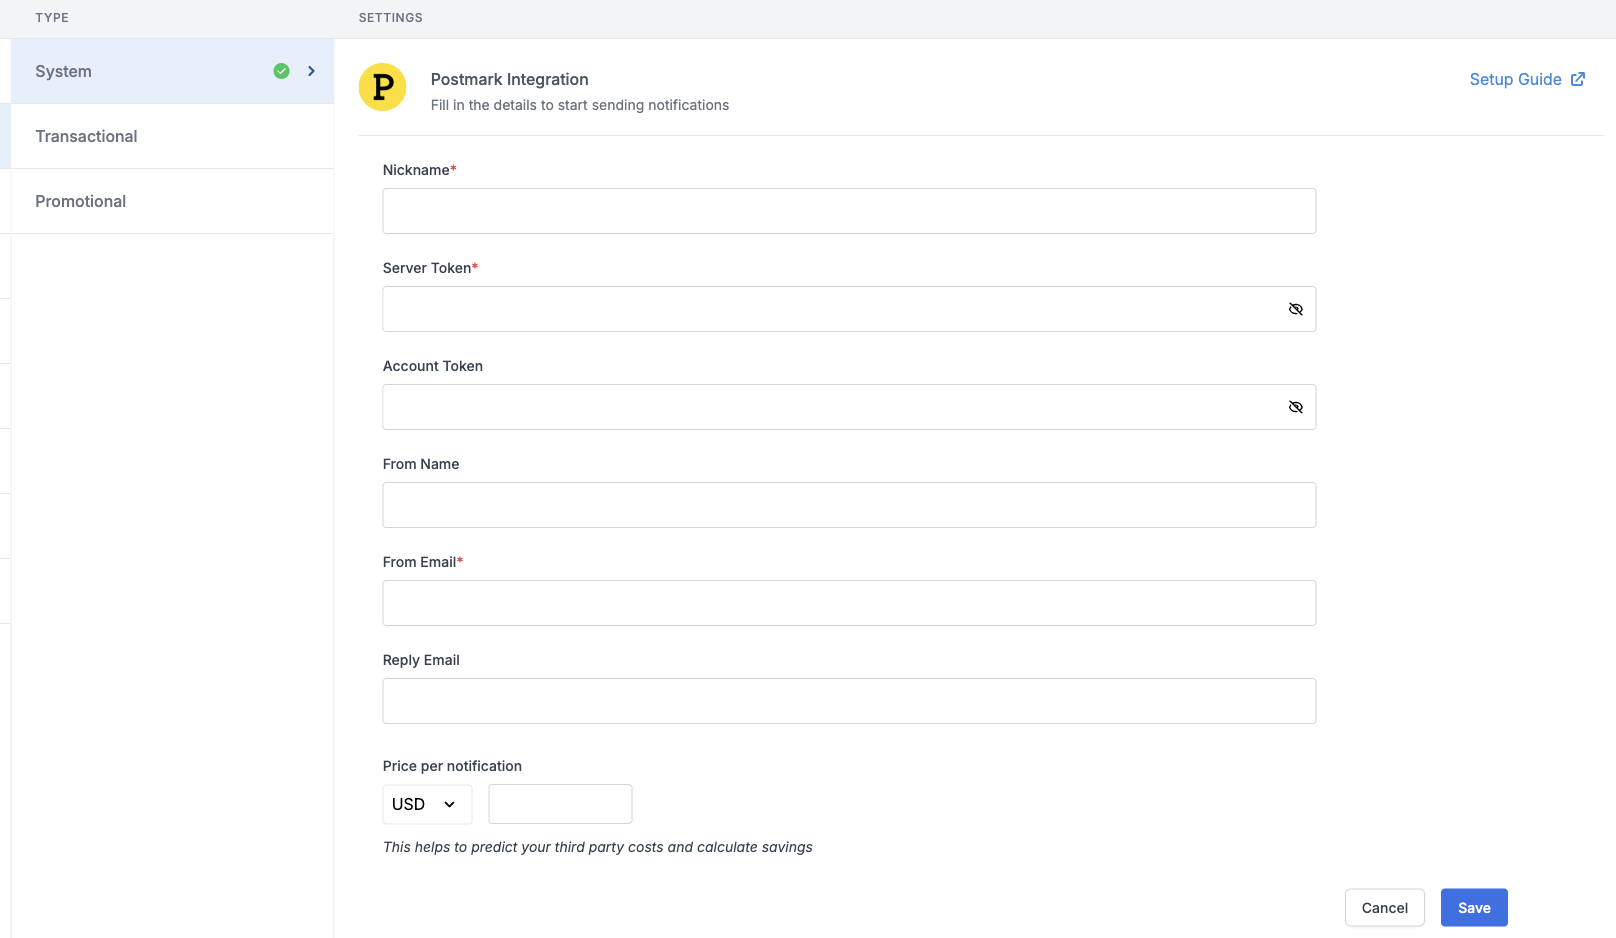
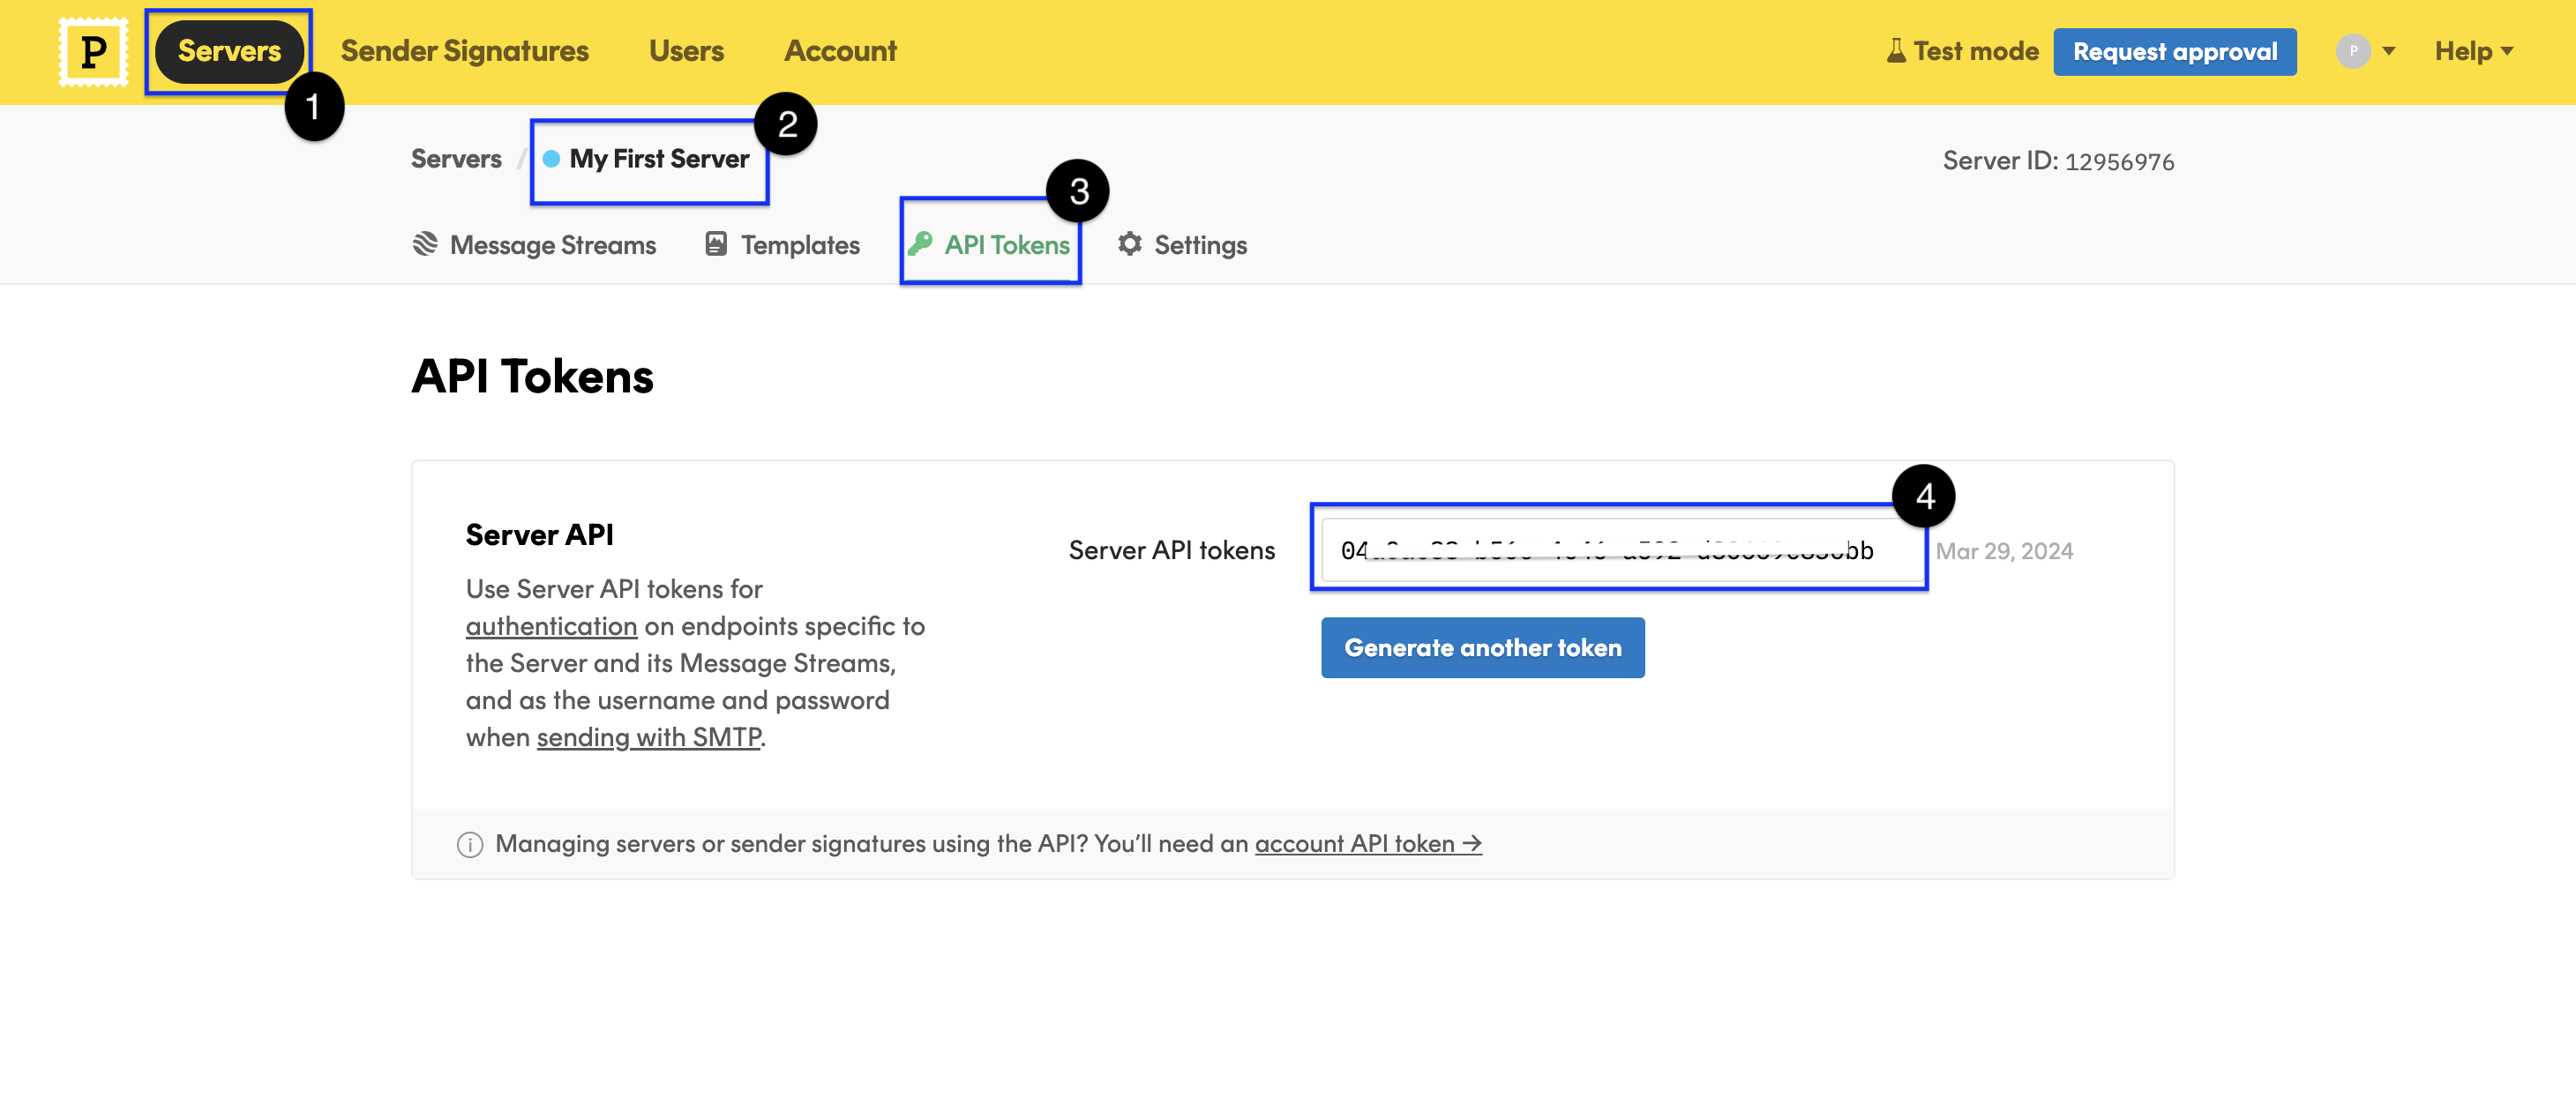
How to get a server token from Postmark
- Login to your Postmark account
- Go to servers section and select your email server
- Go to section API Tokens
- Copy the already generated API token or generate a new token.
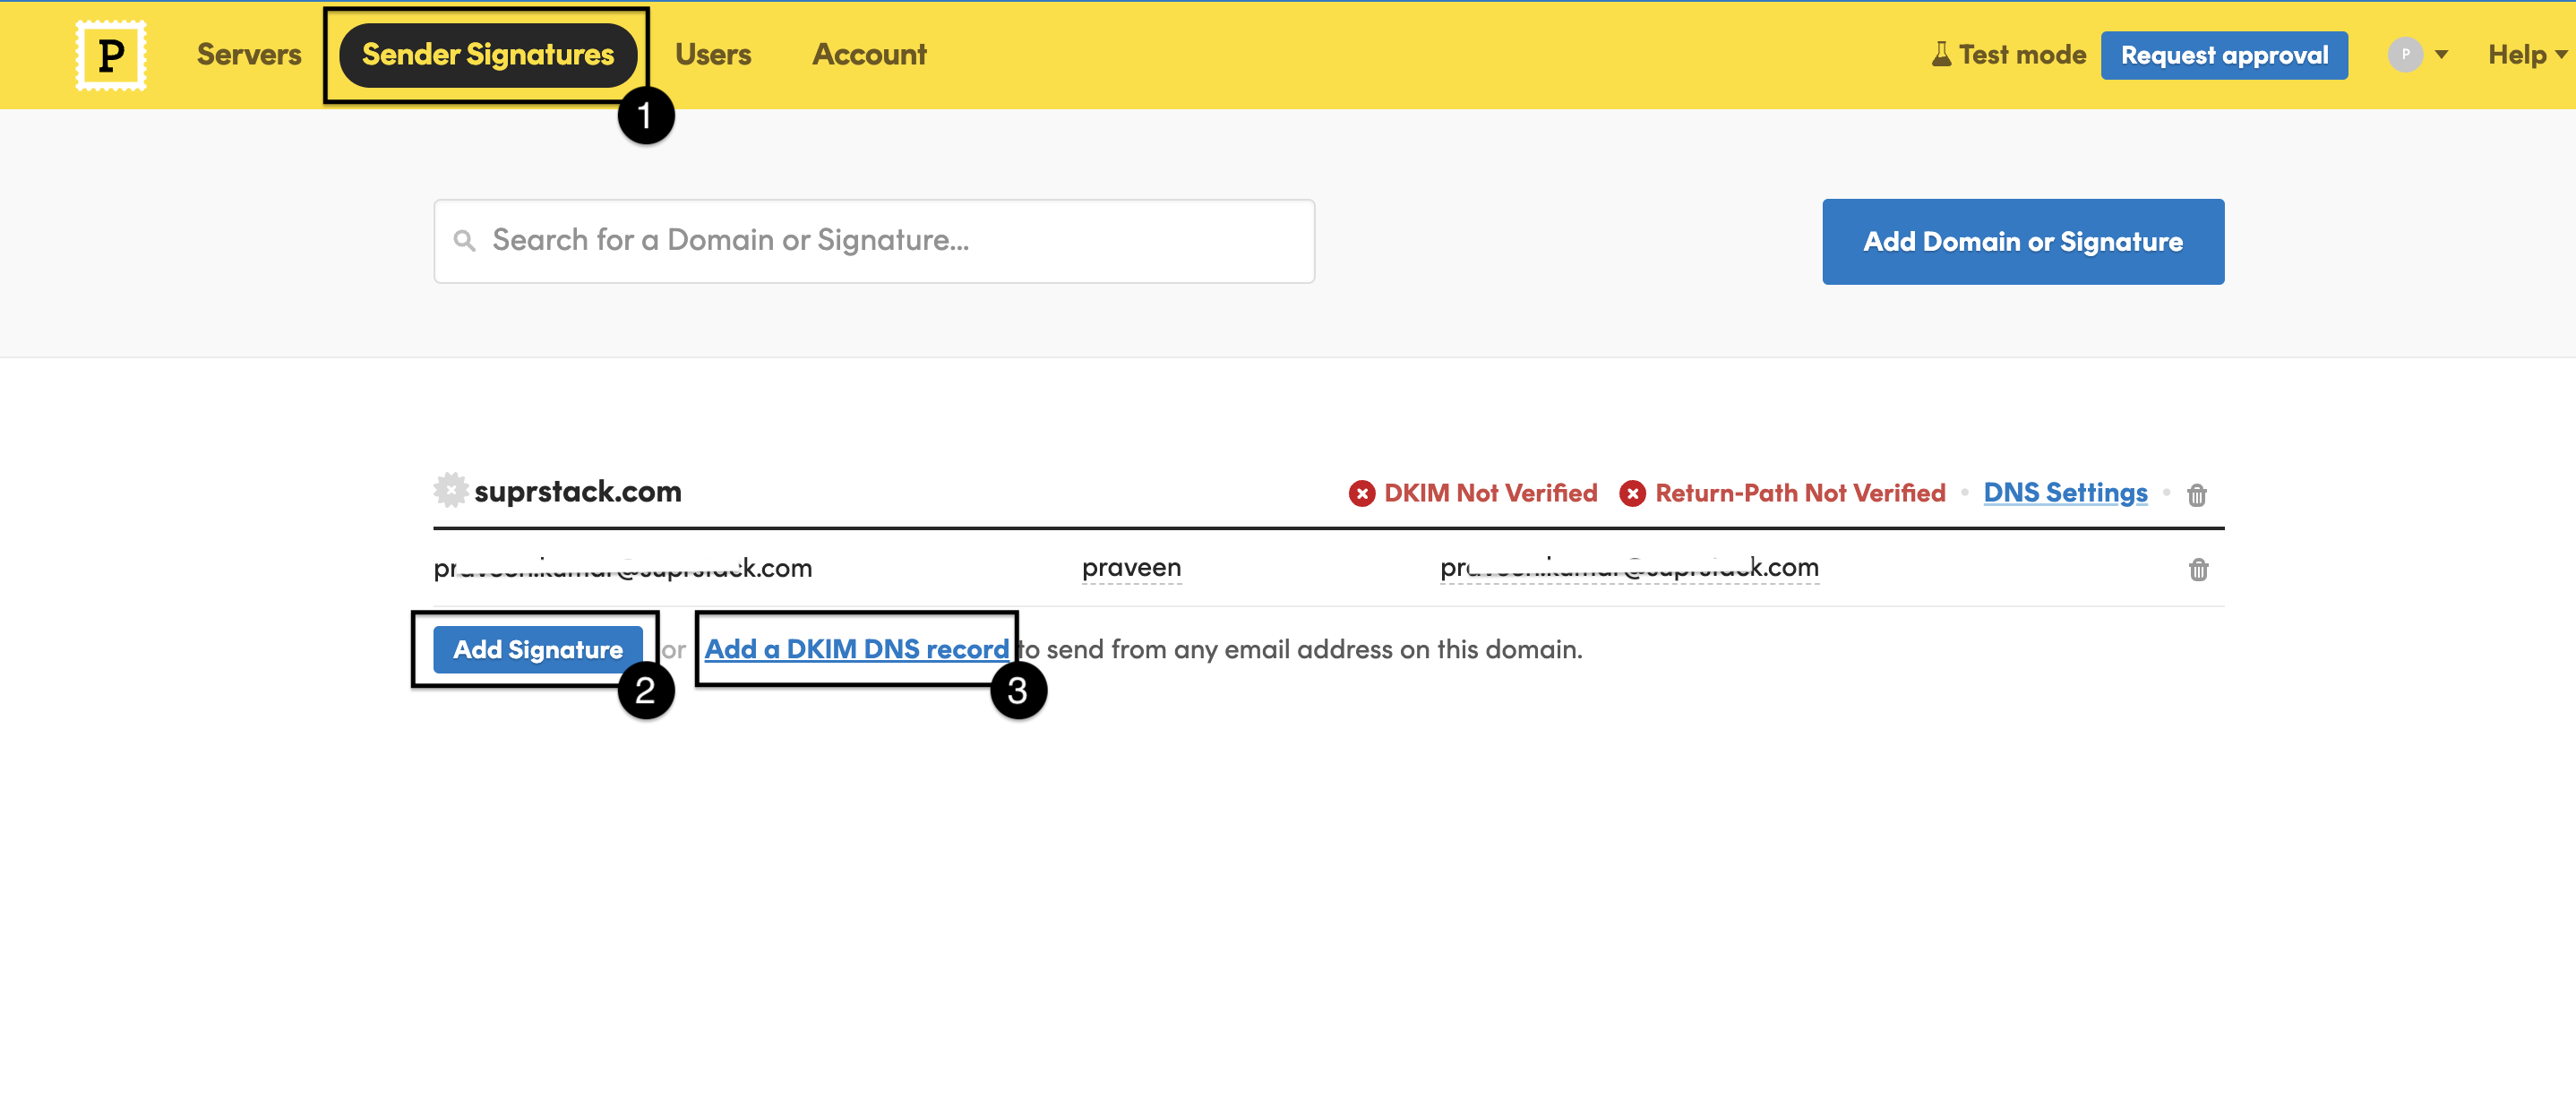
How to verify email and whitelist domain on Postmark
Email signature verification is an important step without which Postmark does not allow to send emails from the email added in Postmark account. You can add multiple emails by verifying them individually on Postmark or verify all the emails with your email domain. To do this, follow the steps below:- Go to Postmark -> Sender Signatures section
- Add your email, Postmark will send an email for verifying the added email address, complete the verification
- Alternatively you can also whitelist all the email addresses in your email domain by adding a DKIM DNS record.
Configuring Open/Click tracking for emails on Postmark
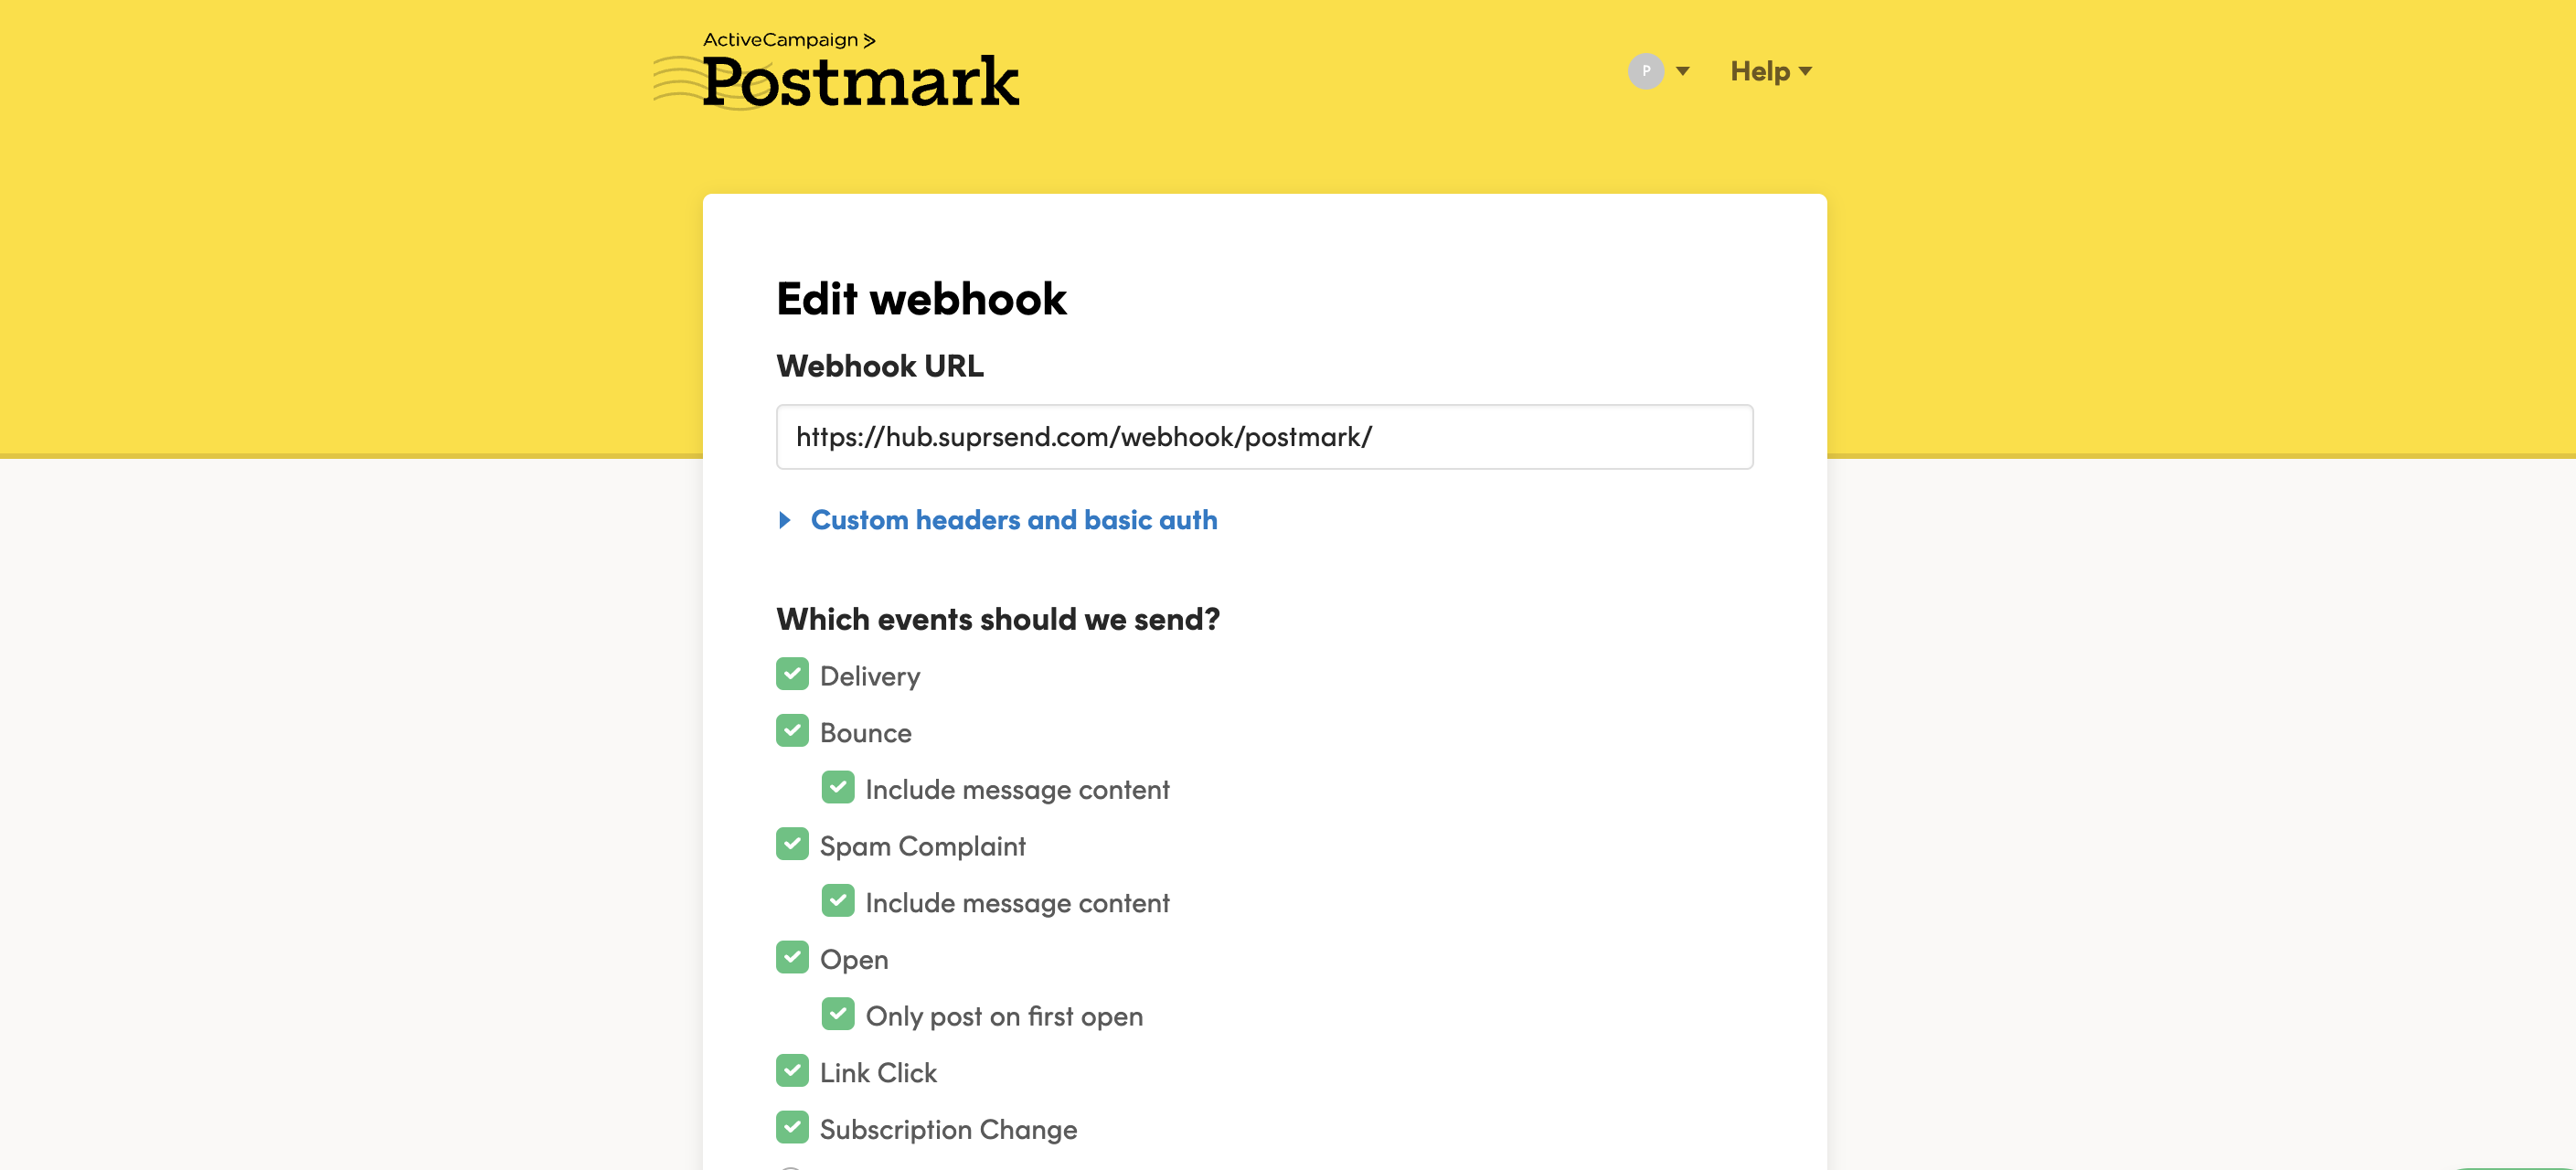
SuprSend uses webhooks to update notification statuses on delivery, user actions like open/click or the failure scenarios. This allows SuprSend to power your notification analytics. To allow SuprSend to receive these events via webhook, add SuprSend’s webhook URL in your Postmark account.- Go to Postmark -> servers -> select your server -> select your stream -> webhooks -> add webhook
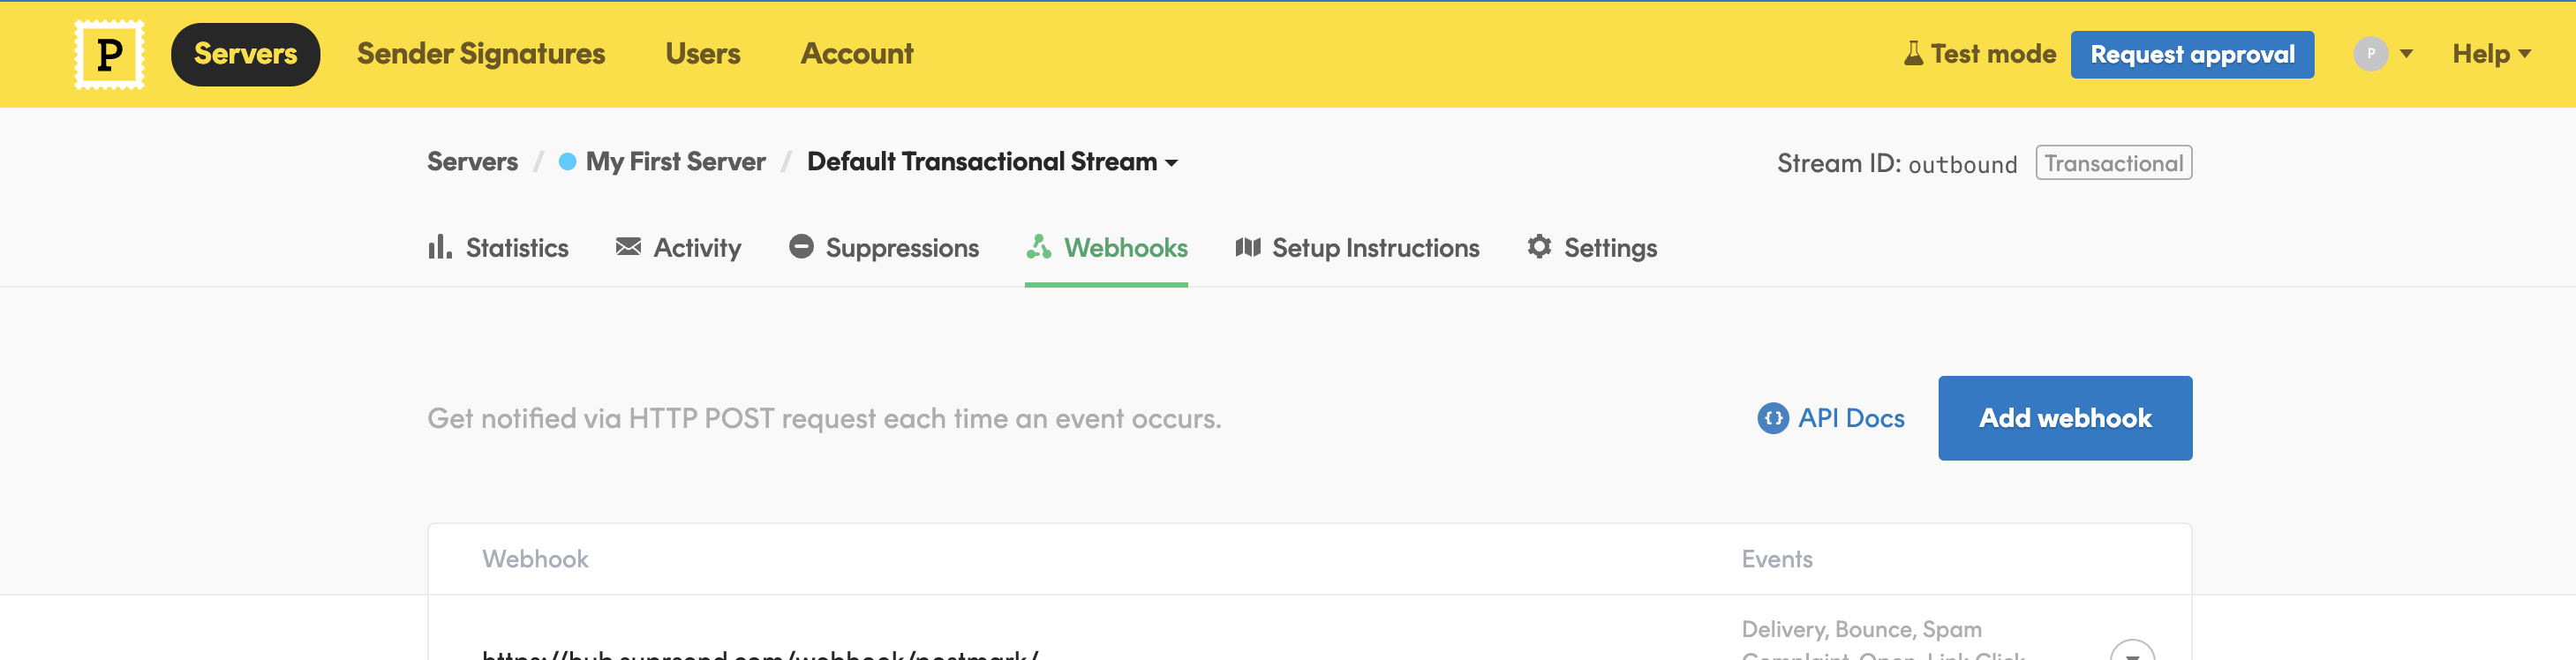
- On Add webhook, settings page, add
https://hub.suprsend.com/webhook/postmark/in webhook URL section and enable all events on Postmark.
How to add Unsubscription link in email
You can directly add unsubscription link in your email using$hosted_preference_url variable in your template. This link directs users to the SuprSend preference page. With SuprSend preference setting, you have the flexibility to create multiple preference categories based on the type of notifications. This allows users to opt-out of specific preference categories, providing them with granular control over their preferences compared to other email services where they can only opt-out from all marketing communications at once.
Why it’s important to give unsubscribe option in email?
First, it is required by the CAN-Spam Act. Second, if you don’t give them this option, they are more likely to click on the spam complaint button, which will cause more harm than allowing them to unsubscribe. Finally, many ESPs look for unsubscribe links and are more likely to filter your email if they don’t have them.