Pre-Requisites
Create Meta Developers account- Log in to your Facebook account.
- Click here and Get Started.
Set up WhatsApp business account on Meta
1
Create/add your business app on meta developers console
On the developer’s console create an app by clicking on 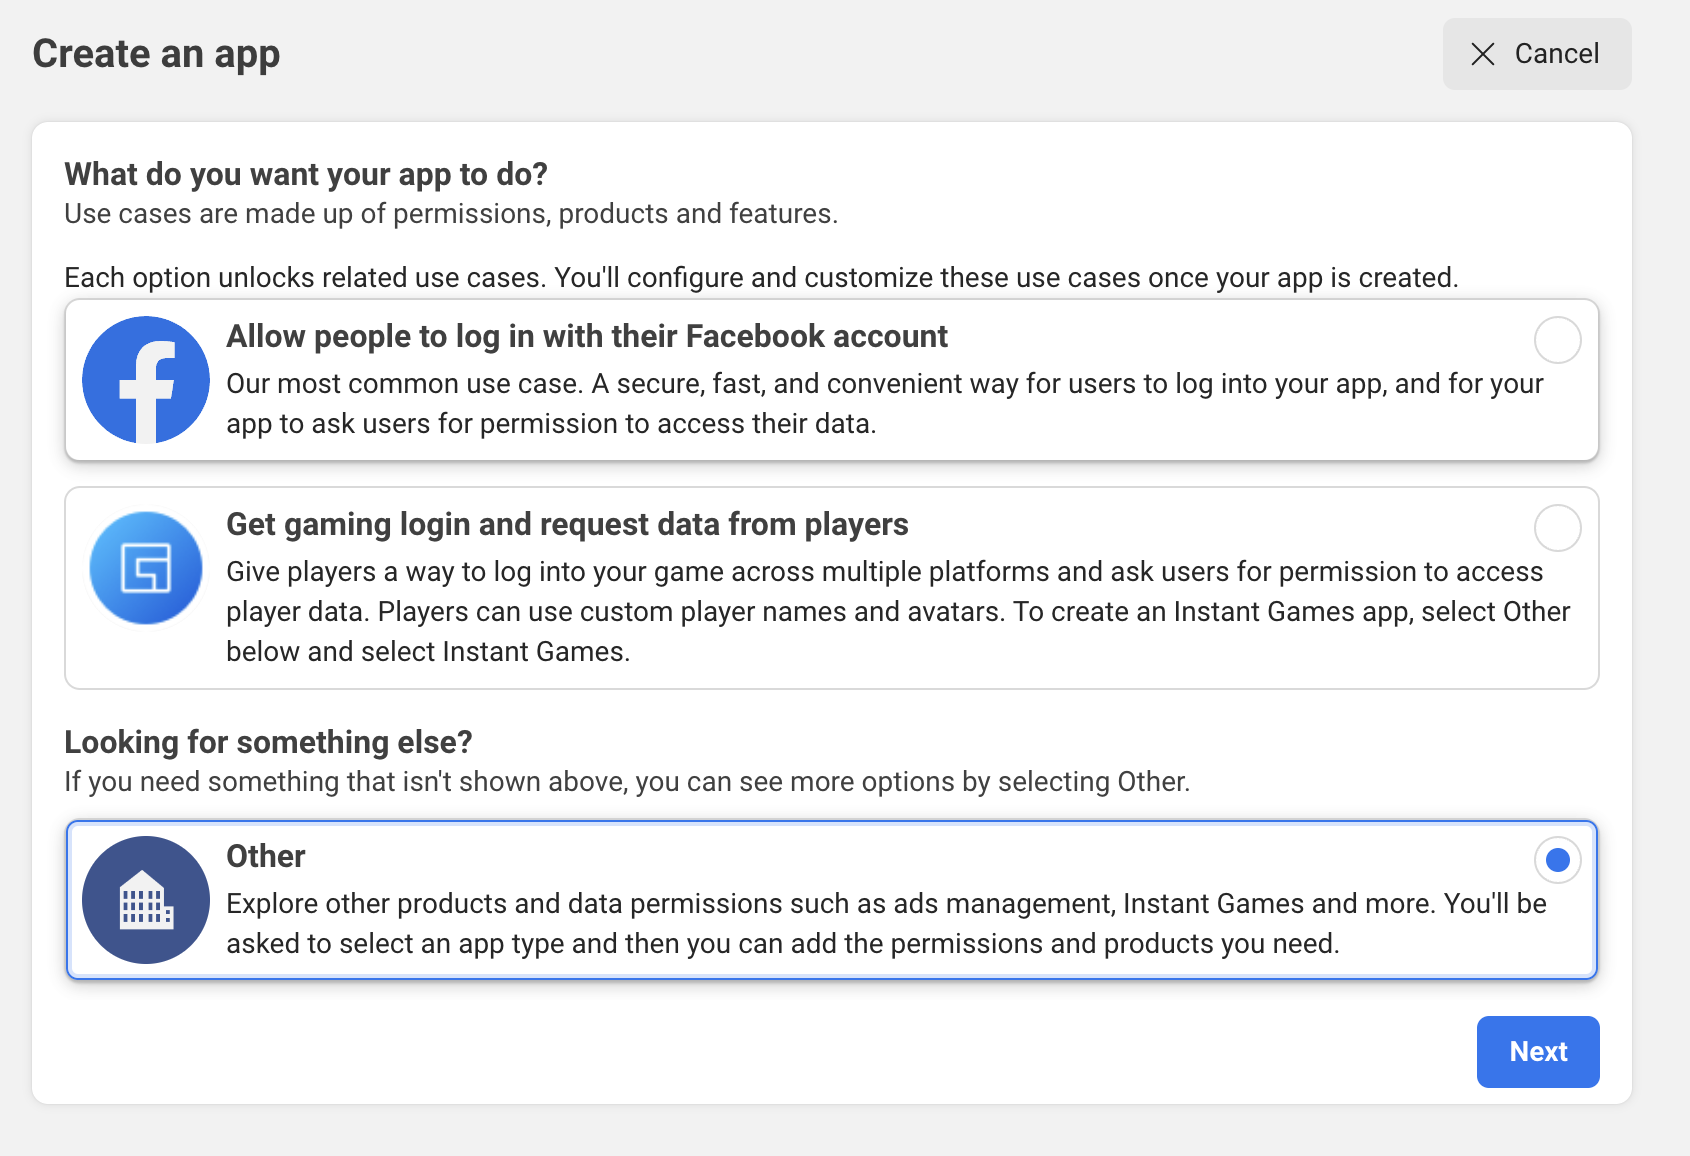
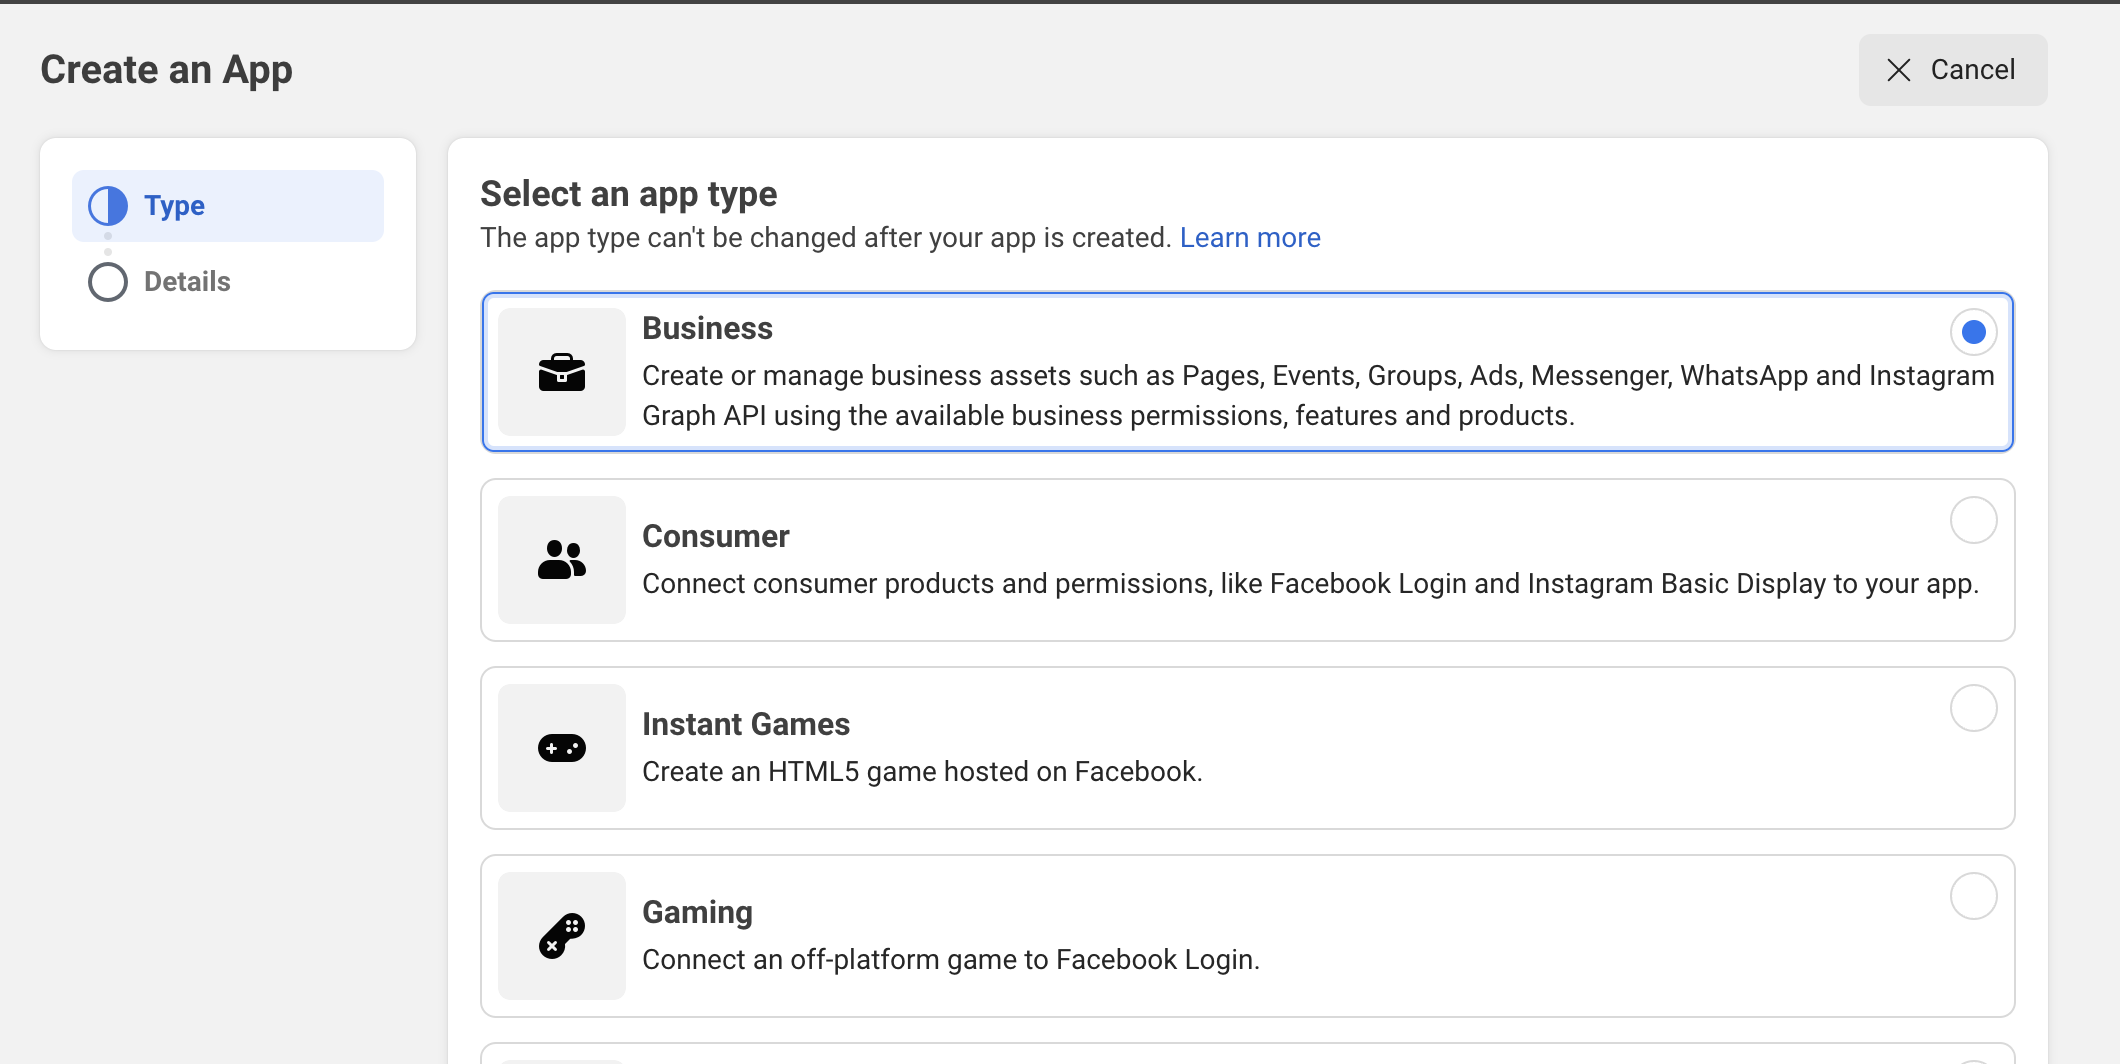
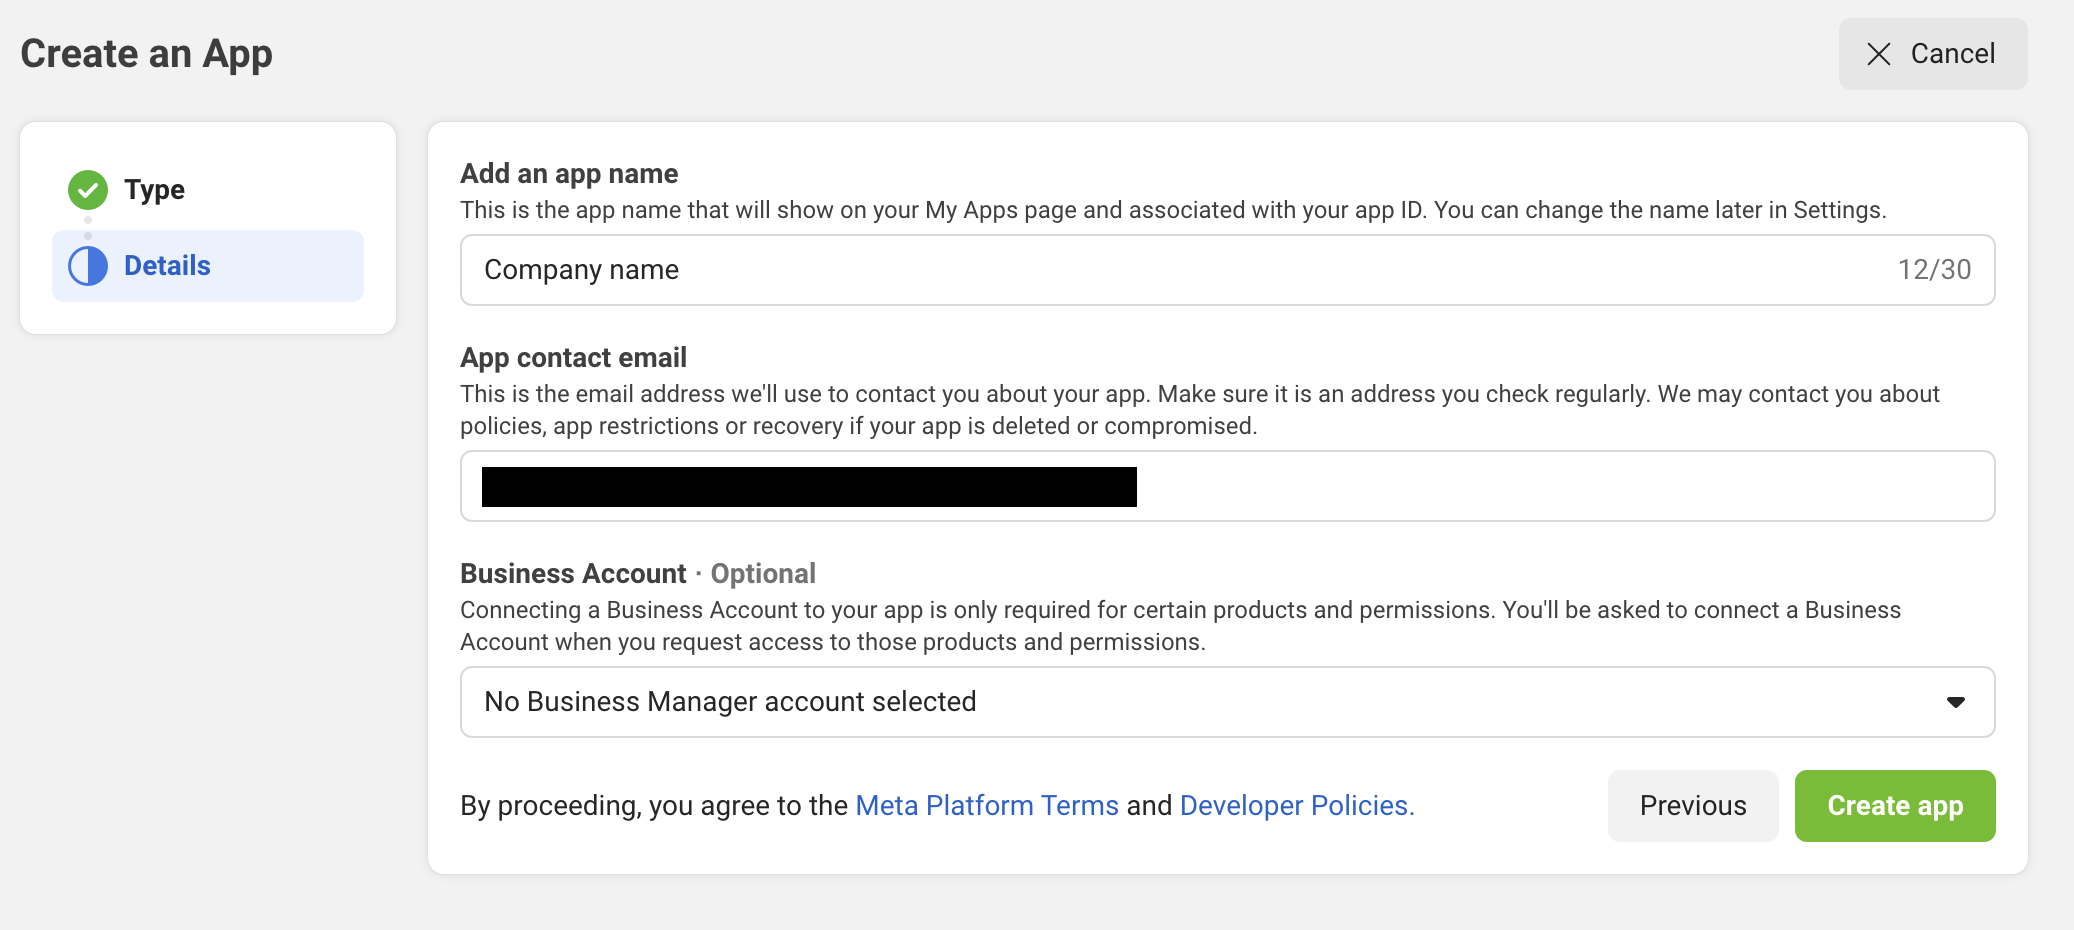
Create app button, then select Other on the next screen of “What do you want your app to do?”2
Setup WhatsApp Cloud API
Now that your app is created you need to add “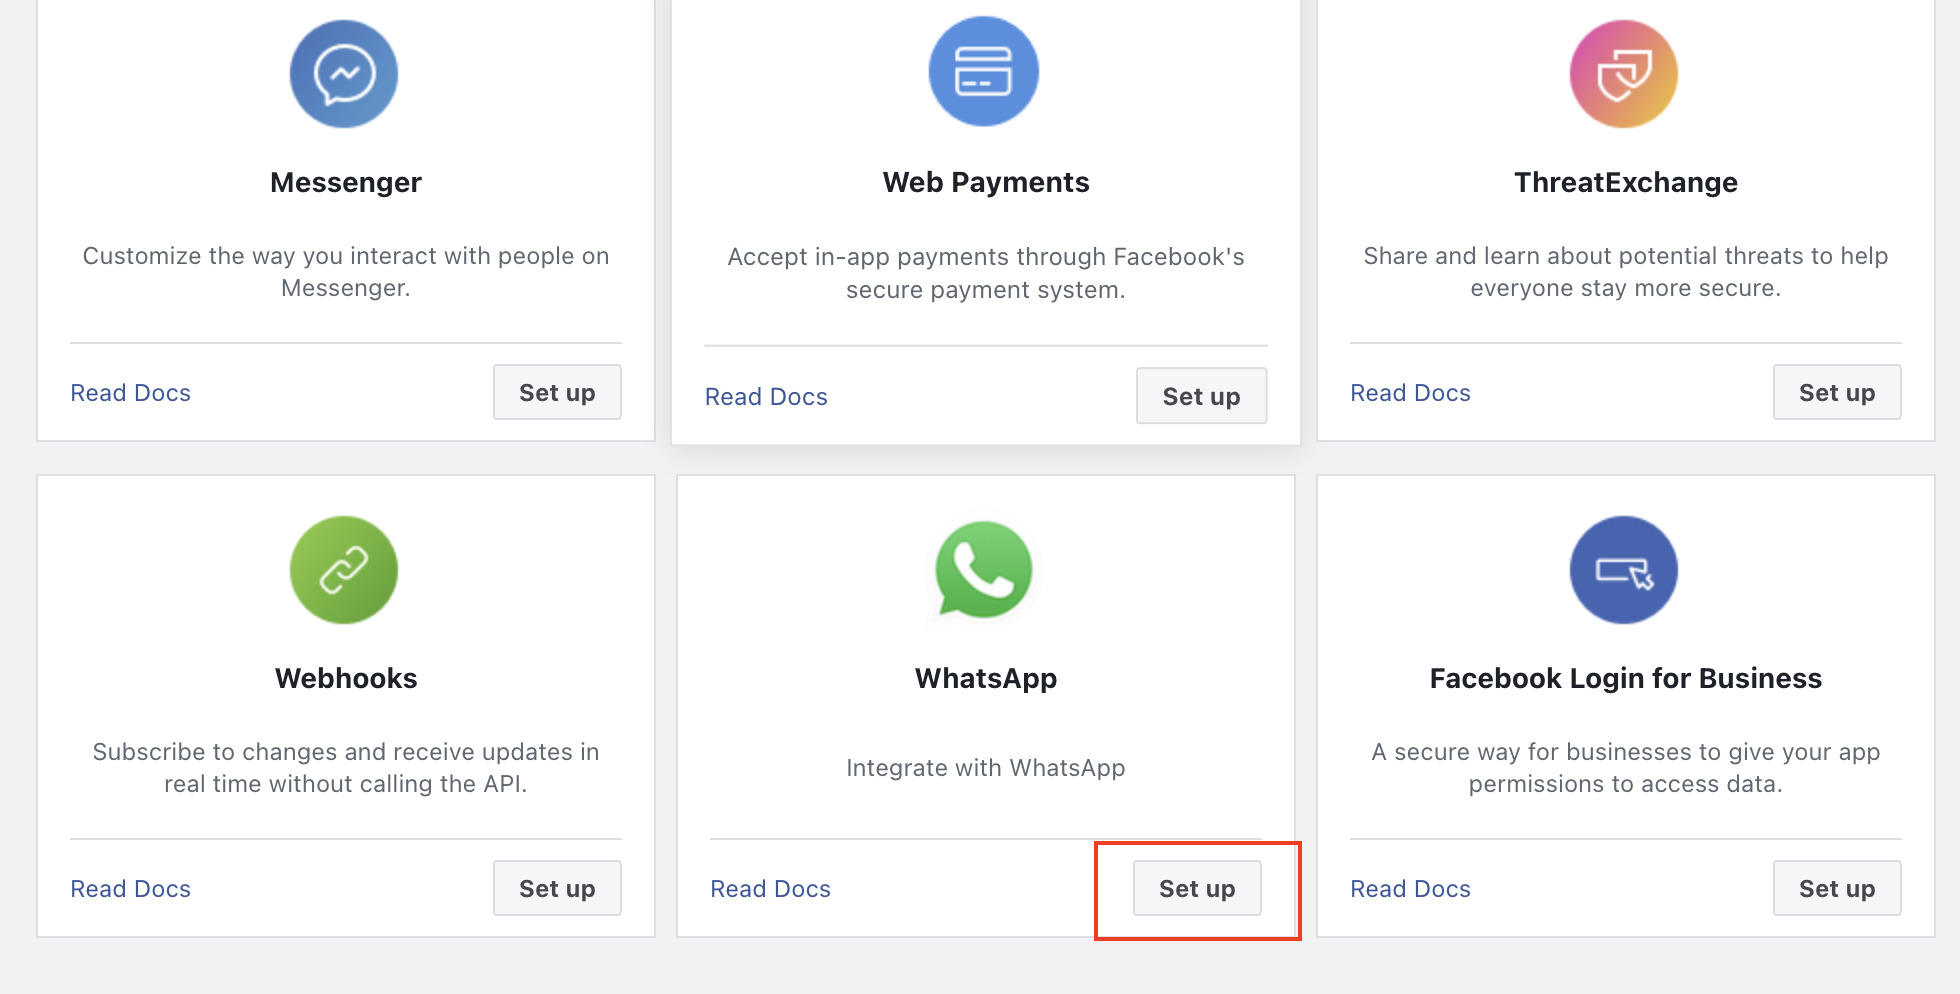
WhatsApp” product, scroll down and click “Set up” on WhatsApp. You will be redirected to the WhatsApp get started page, here you can “create a business account” or use an existing one.Continue. You’ll land on the app dashboard.3
Send a test message
On the App dashboard, select “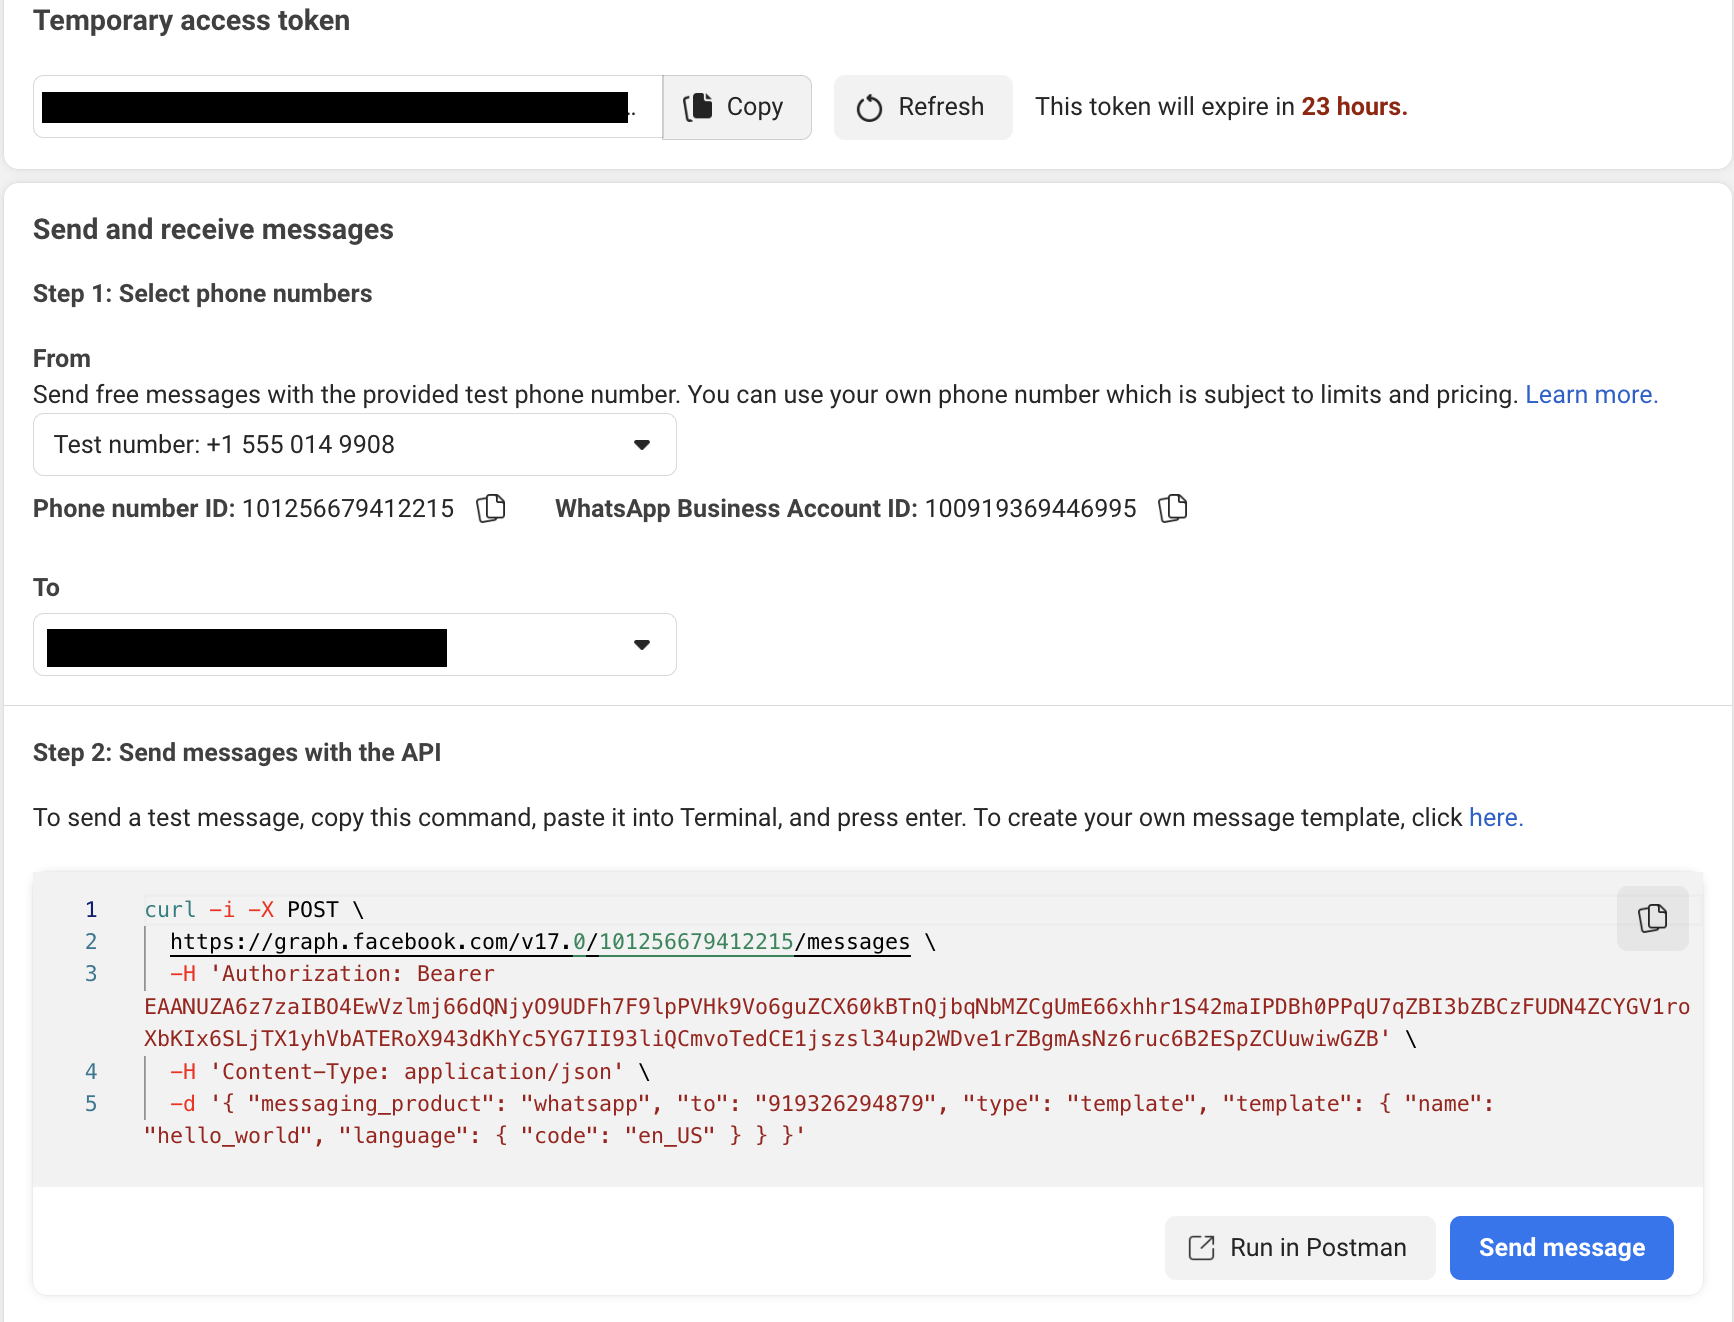
API Setup” from the left navigation menu. Here you’ll see a temporary access token, Phone number ID and a curl to send the message.Add your personal phone number in the “to” field to send a test message on your mobile number.4
Add a valid business phone number
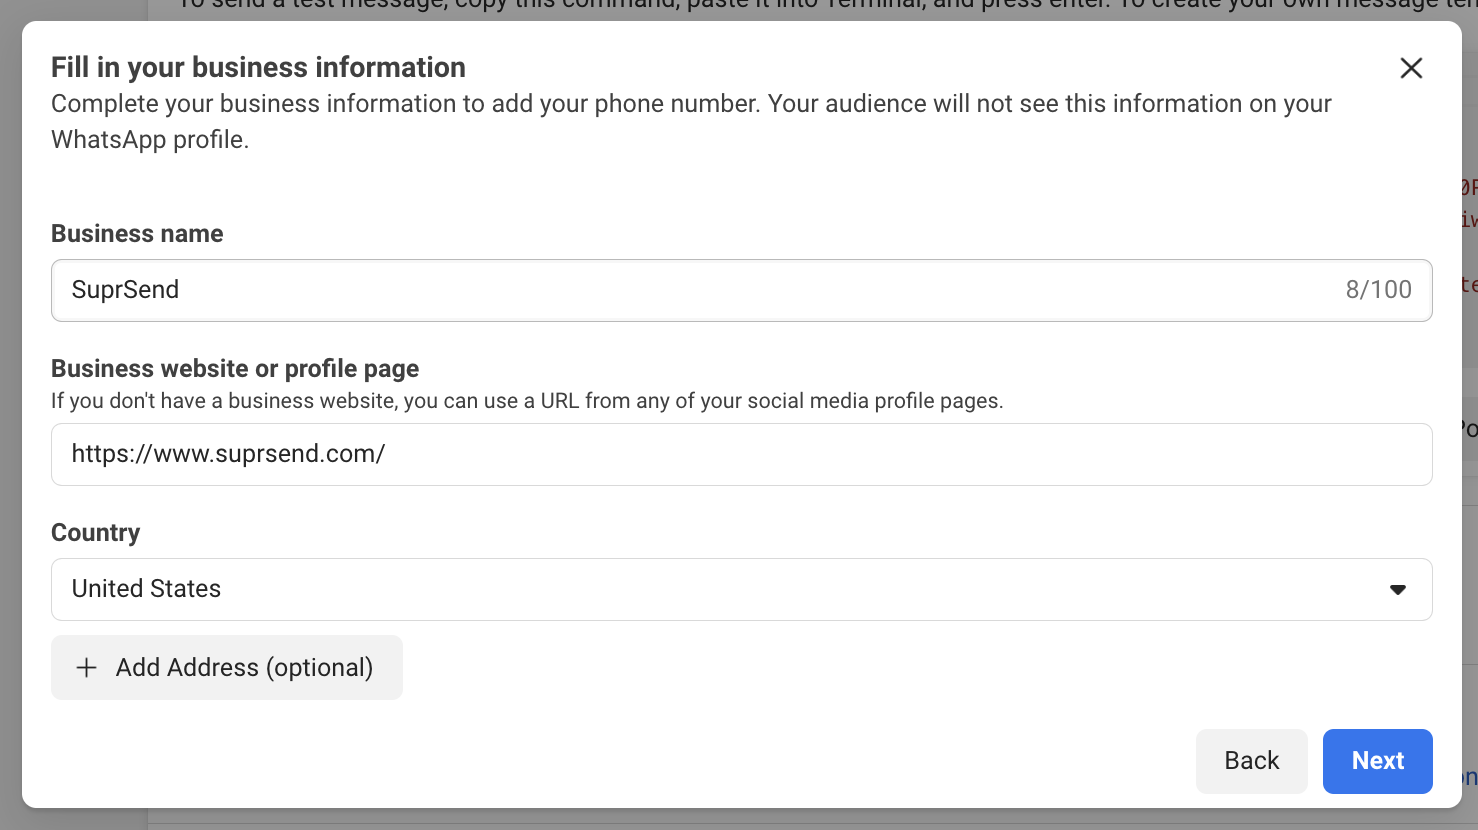
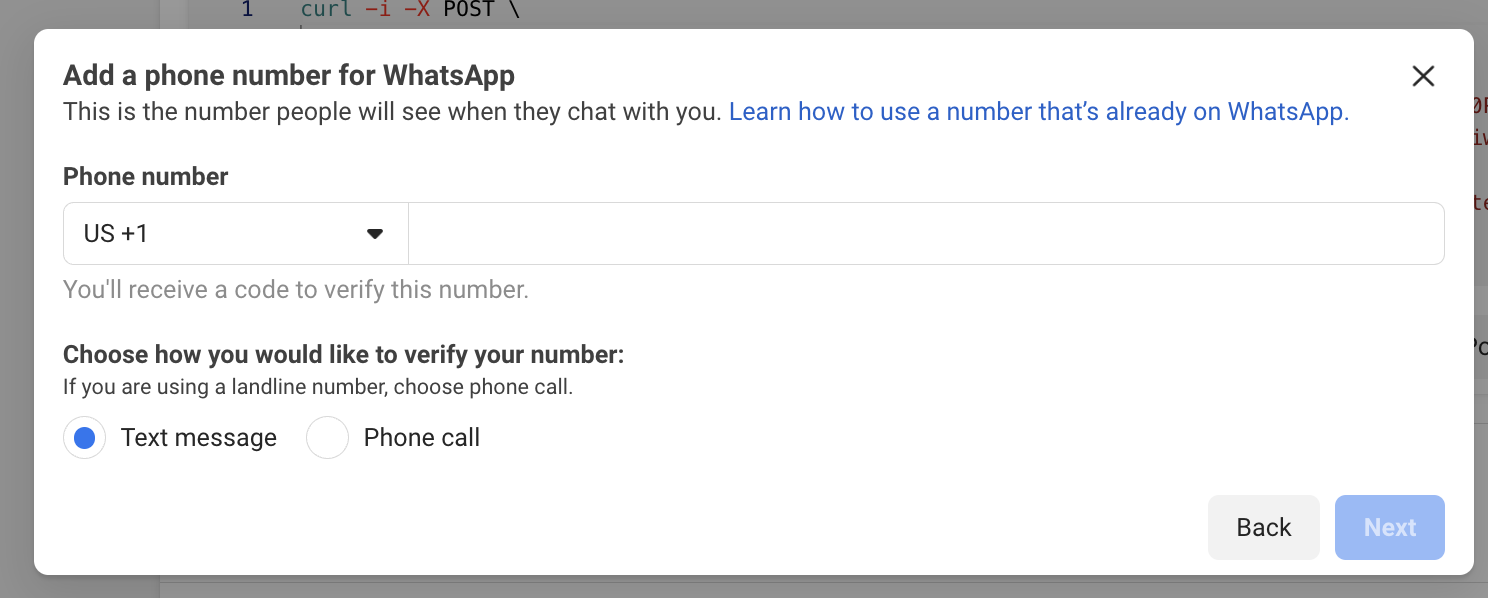
Scroll down to step 5 on the API page. To add your business phone number, Click on “Add phone number” and add your business information to register the number

Phone number ID and WhatsApp Business Account ID corresponding to this phone number shown in Step 1 of API Setup5
Generate access token
Because the testing access token only last 24 hours, we need to create a token that can last forever:
1
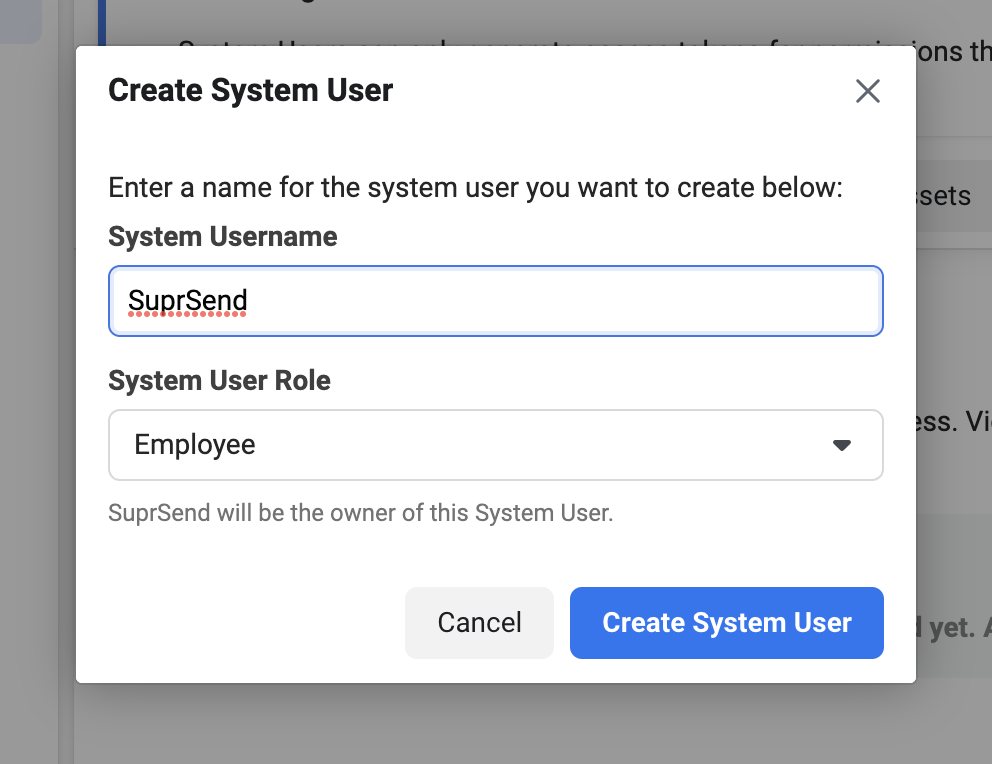
Create an admin user
- Sign into the Meta Business Suite.
- Locate your business account in the top-left dropdown menu and click its Settings (gear) icon. Click Business settings.
- Select Users -> System users from the left navigation panel
- Add SuprSend user and give it “
Employee” access
2
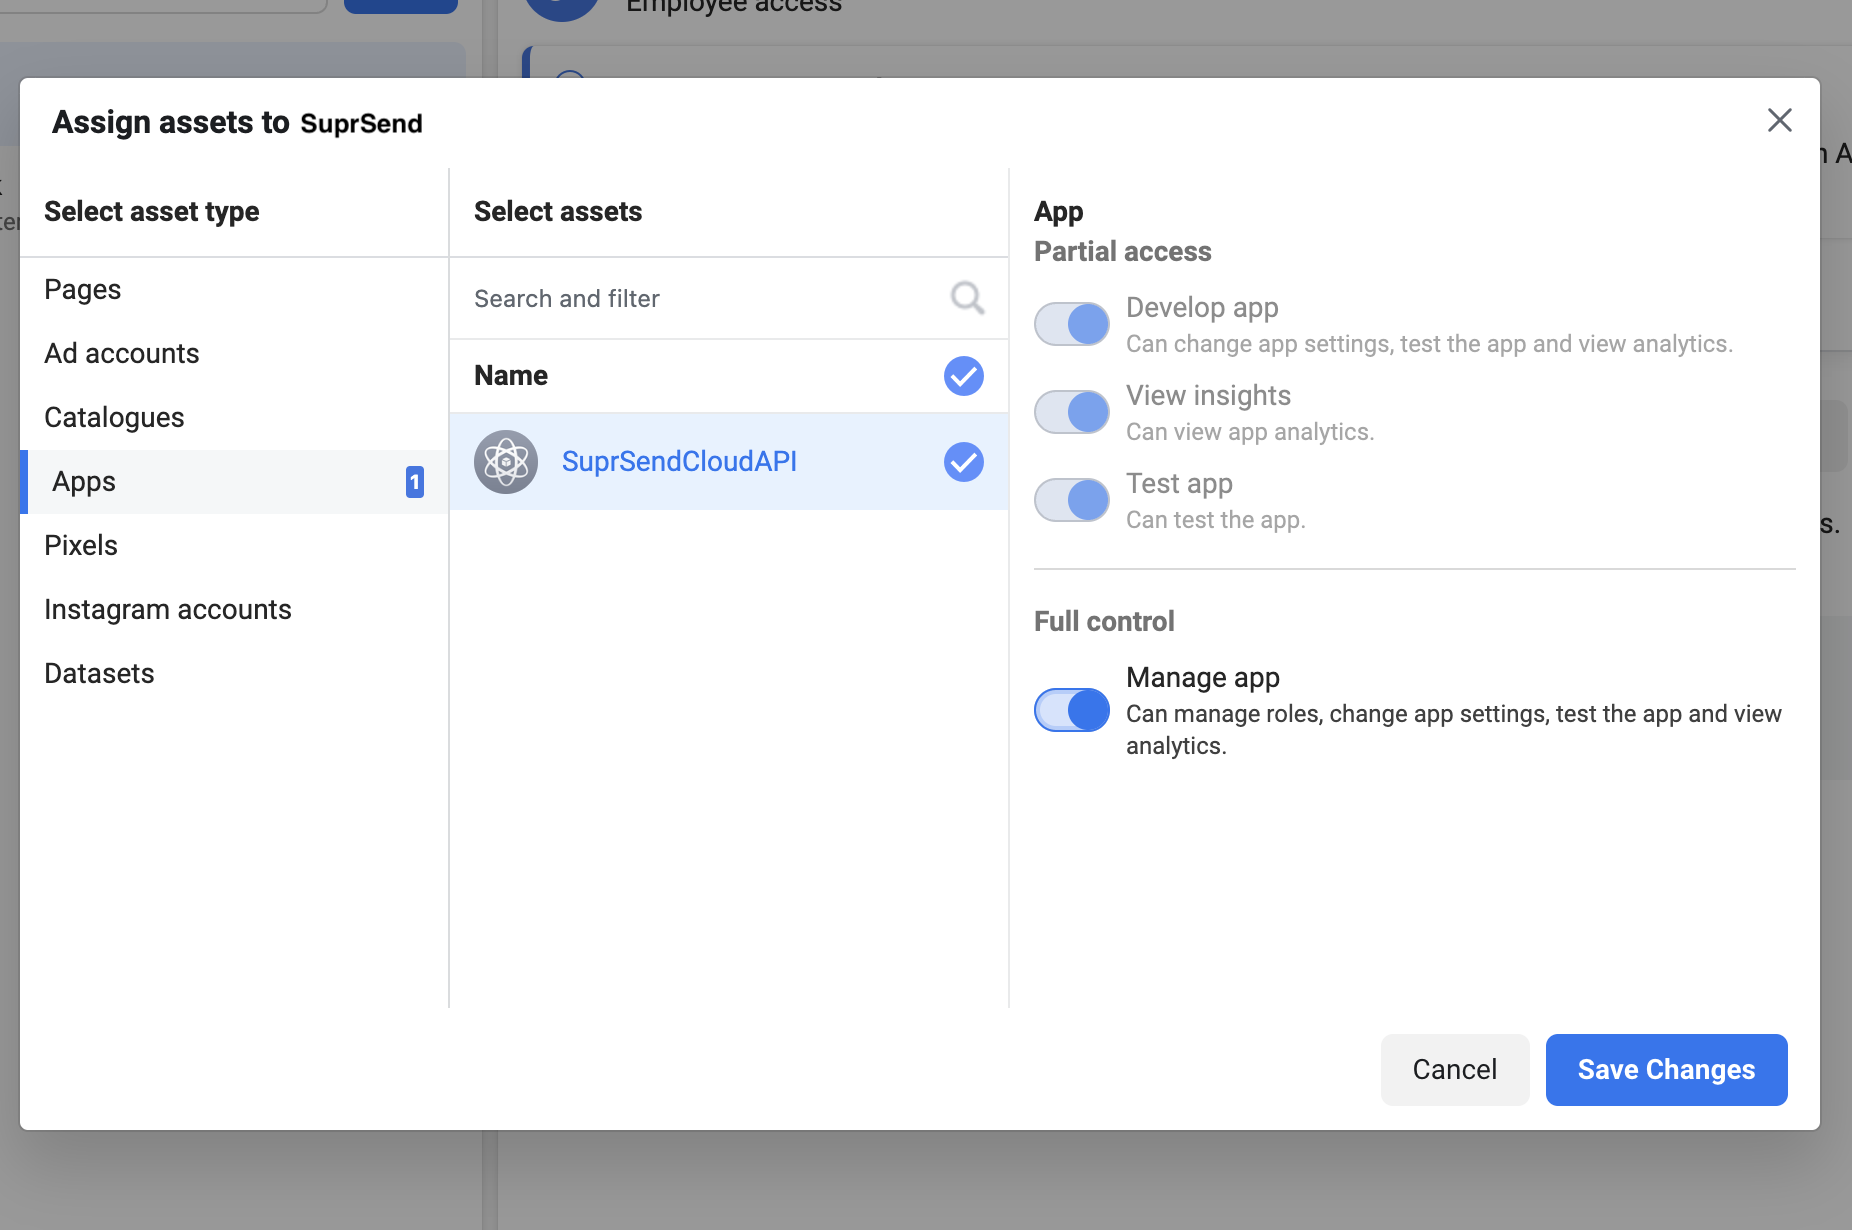
Assigning assets to the new user
- Select the user and Click on “Assign Assets.” Assign Full control to the new user. This will allow us to send messages on the behalf of this user through your WhatsApp cloud account.
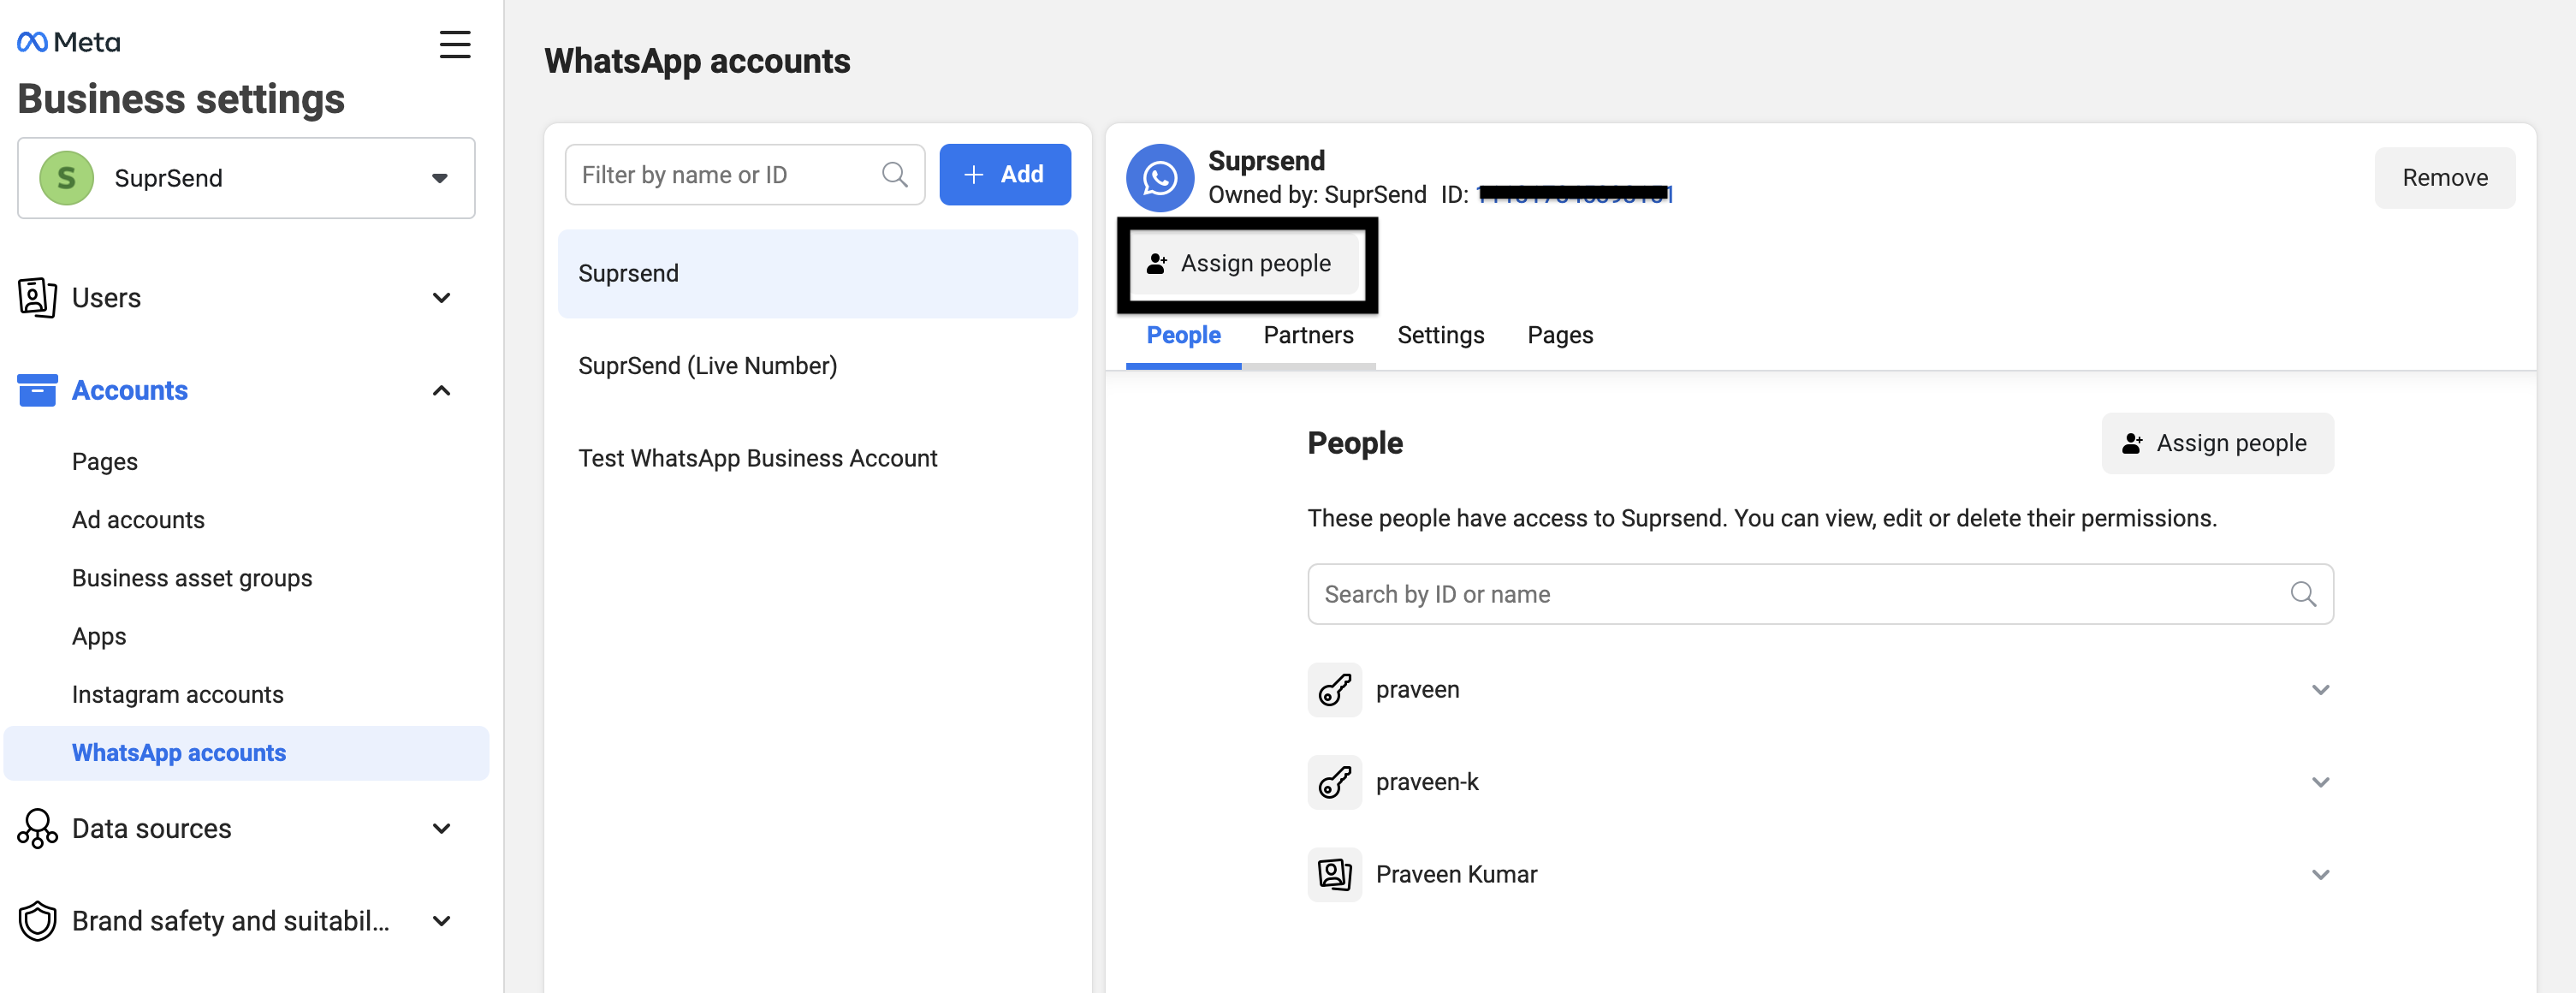
- Now, we’ll have to assign the system user to our WhatsApp account.
- To do this from WhatsApp settings page go to WhatsApp accounts -> select your account. Now on the right panel there will be an option toAssign People, from there assign the System User that we created above to your account. After it’s assigned you’ll be able to see in People section as shown in the image below.
3
Generate token
Go back to the system users page and select the recently created system user from the list. Then click the Generate new token button. Select your app, token expiry (never), and then on the bottom screen select permissions 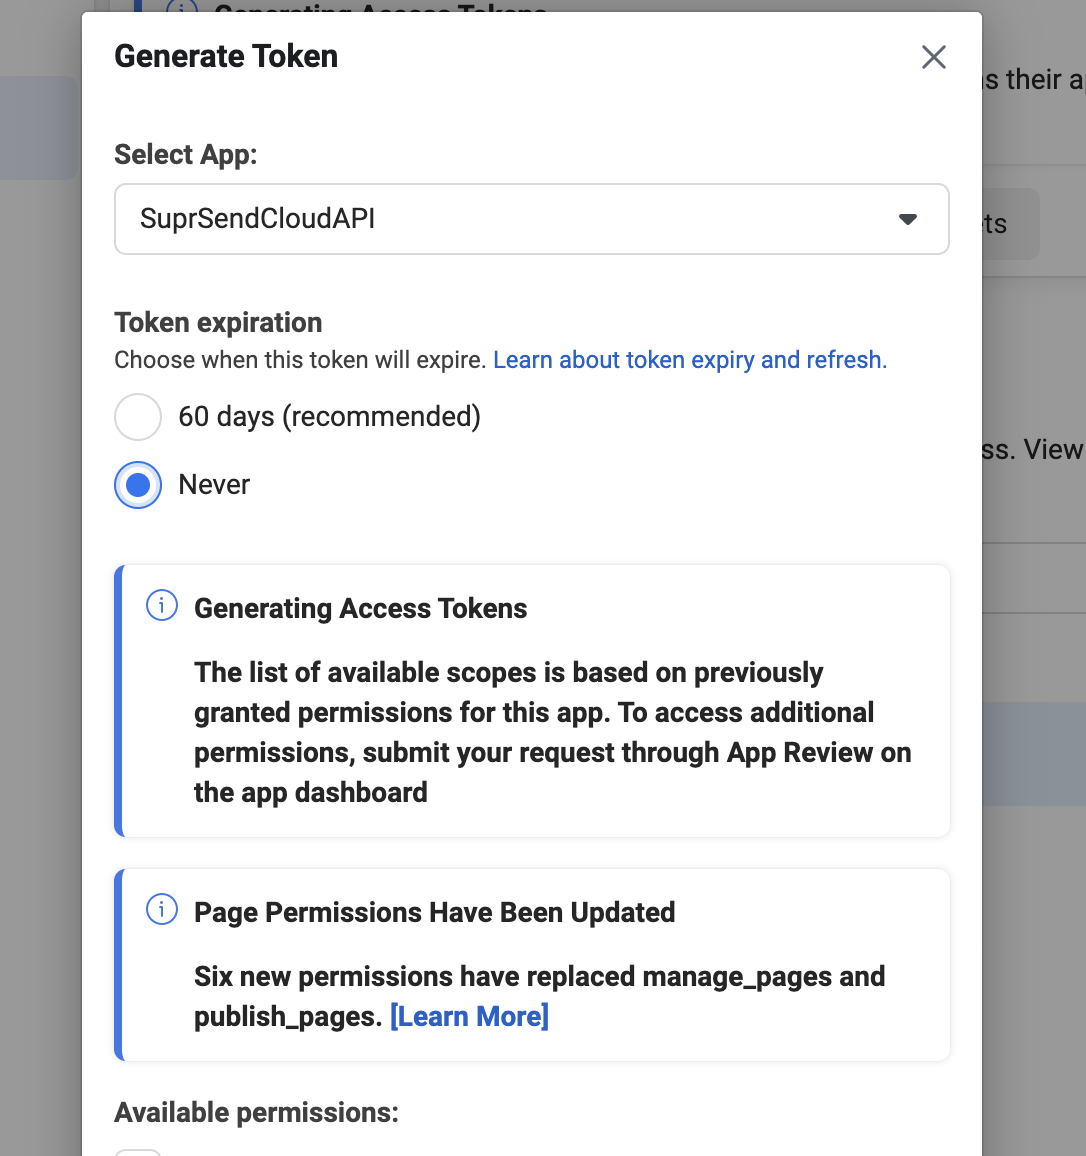
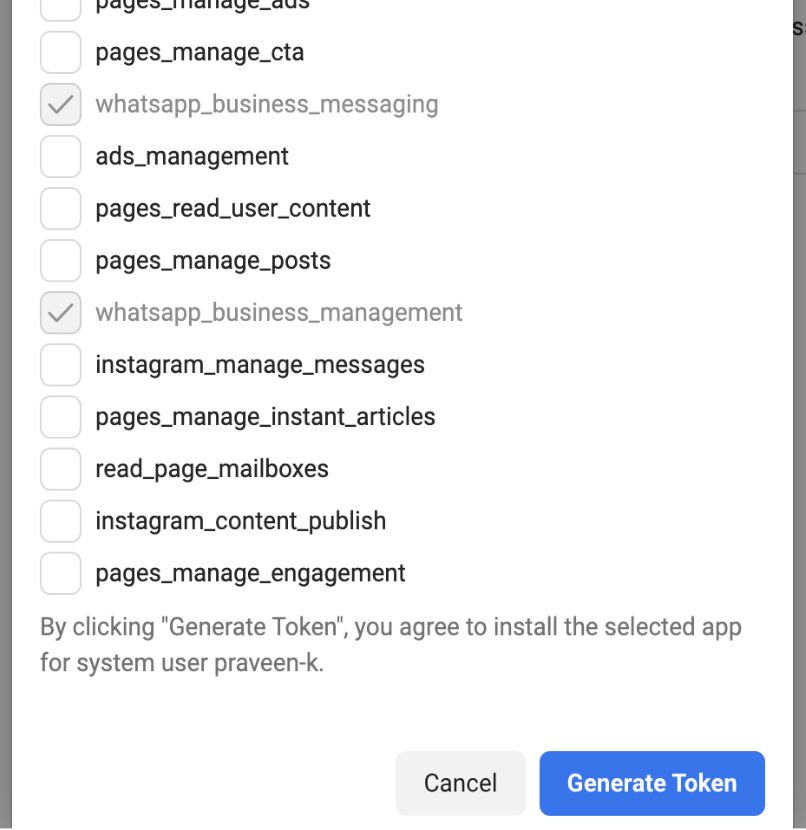
whatsapp_business_management and whatsapp_business_messaging.Copy the Generated TokenClick on generate token and copy the token value, please note this value will not be accessible later, so do store it someplace safe.
6
Change App Mode to Live
You have now successfully setup your WhatsApp business account. Change the App mode to live to start sending notification to your production users.
7
Get App ID
We will need App ID associated with your WhatsApp business account. You can either get it from the developers page as shown in screenshot above, to the left of App Mode.Alternatively, go to https://developers.facebook.com/apps, here you can see all the apps registered with your meta account. Copy the App ID from the App integrated with SuprSend.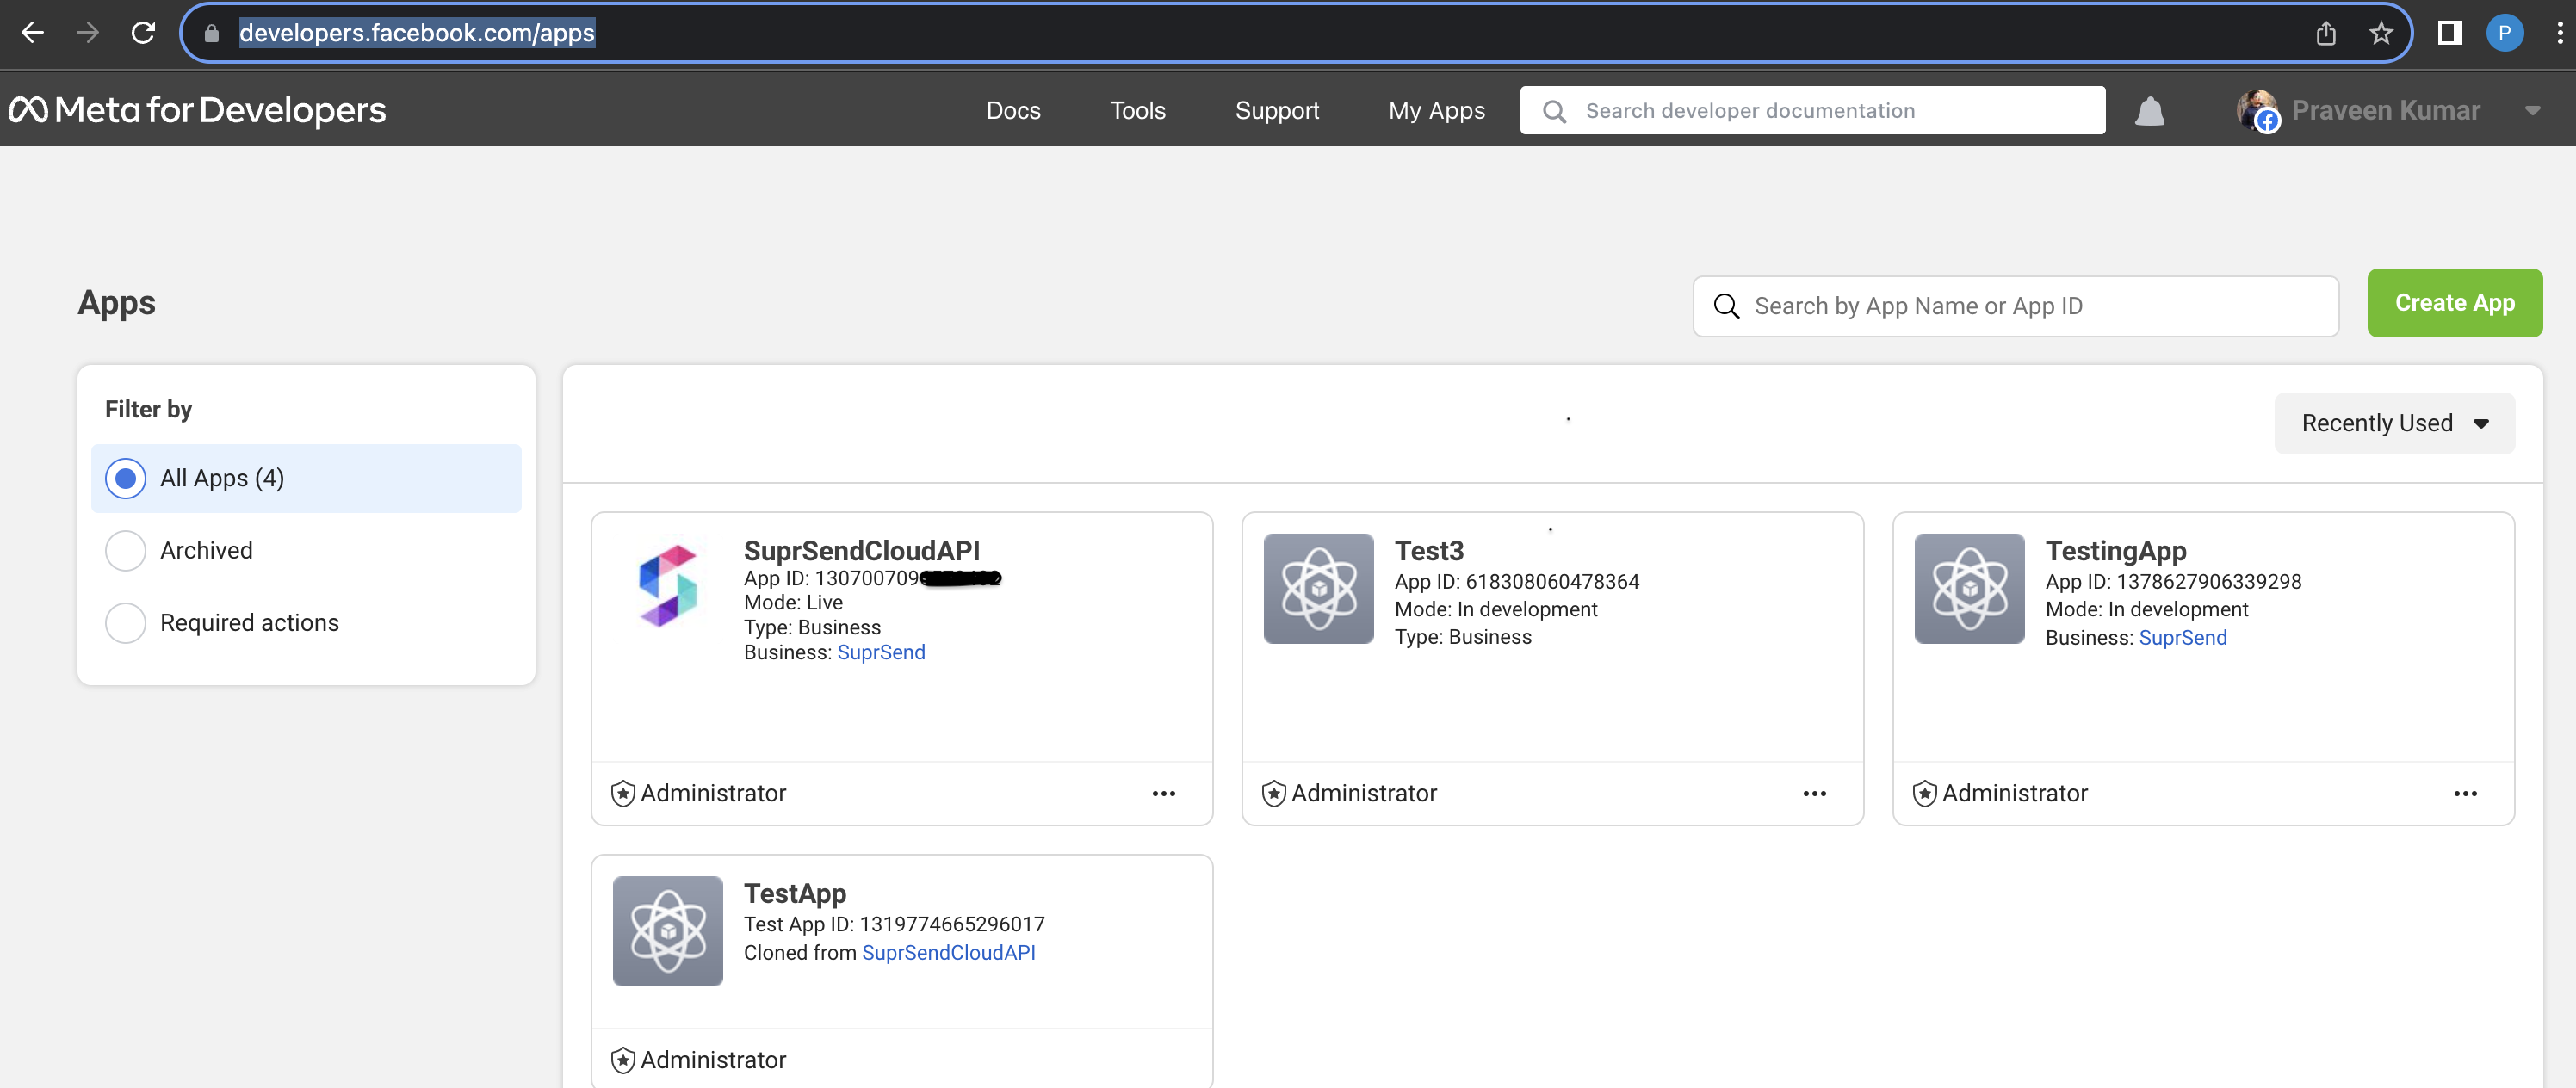
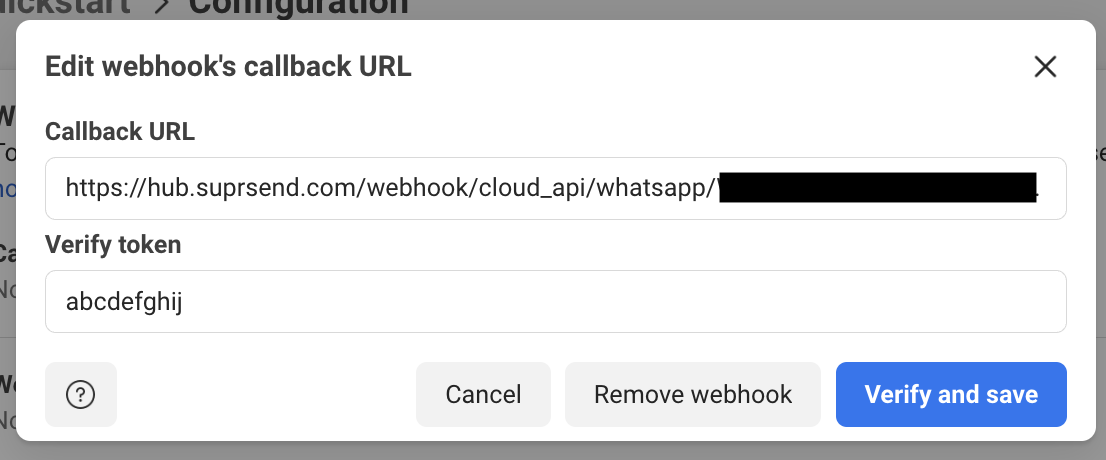
Configure webhook in Meta account for automated template approval and DLR tracking
One of the platform advantage of using SuprSend as a central communication system is that it shows notification analytics for all channels in your SuprSend account together. To configure webhook URL, copy the URL from the vendor page and add it on your app dashboard (WhatsApp -> Configuration). Set verify token as572bcee9-4558-45ee-bbbb-fac5cb08766d
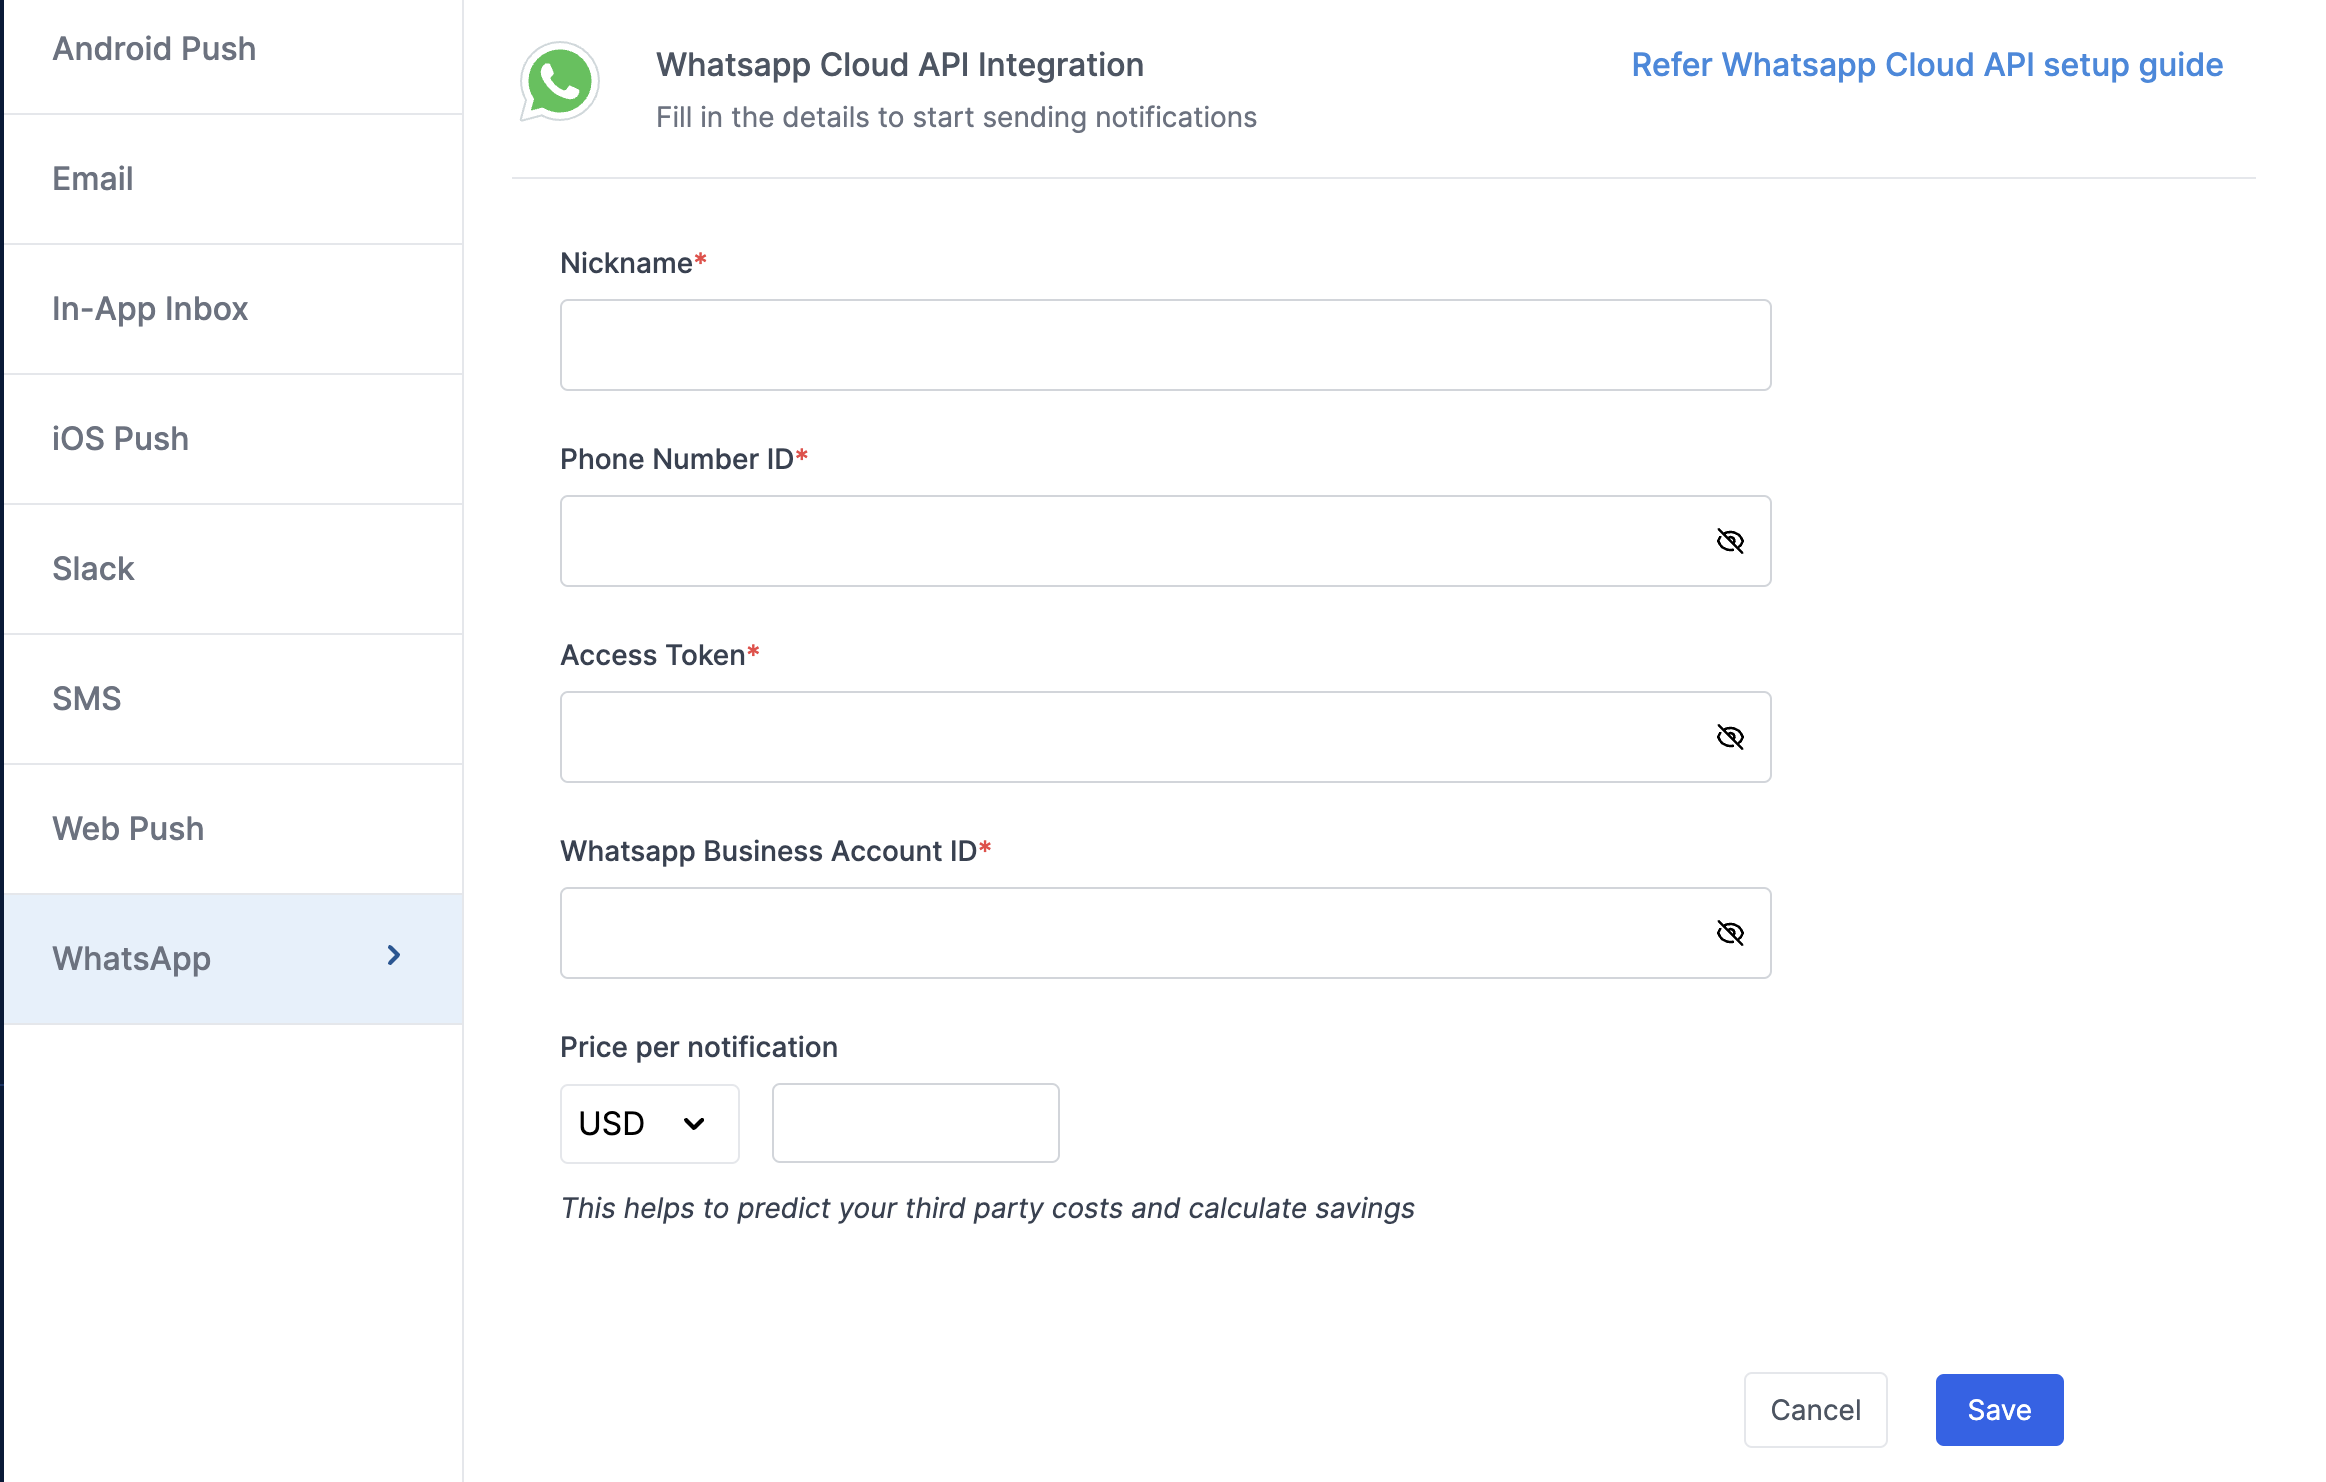
Add vendor configuration on SuprSend
On the SuprSend dashboard, go to vendor page from side panel and click WhatsApp -> WhatsApp Cloud API from the list of Vendors. This will open vendor details page as shown below: