{{variable_name}}).
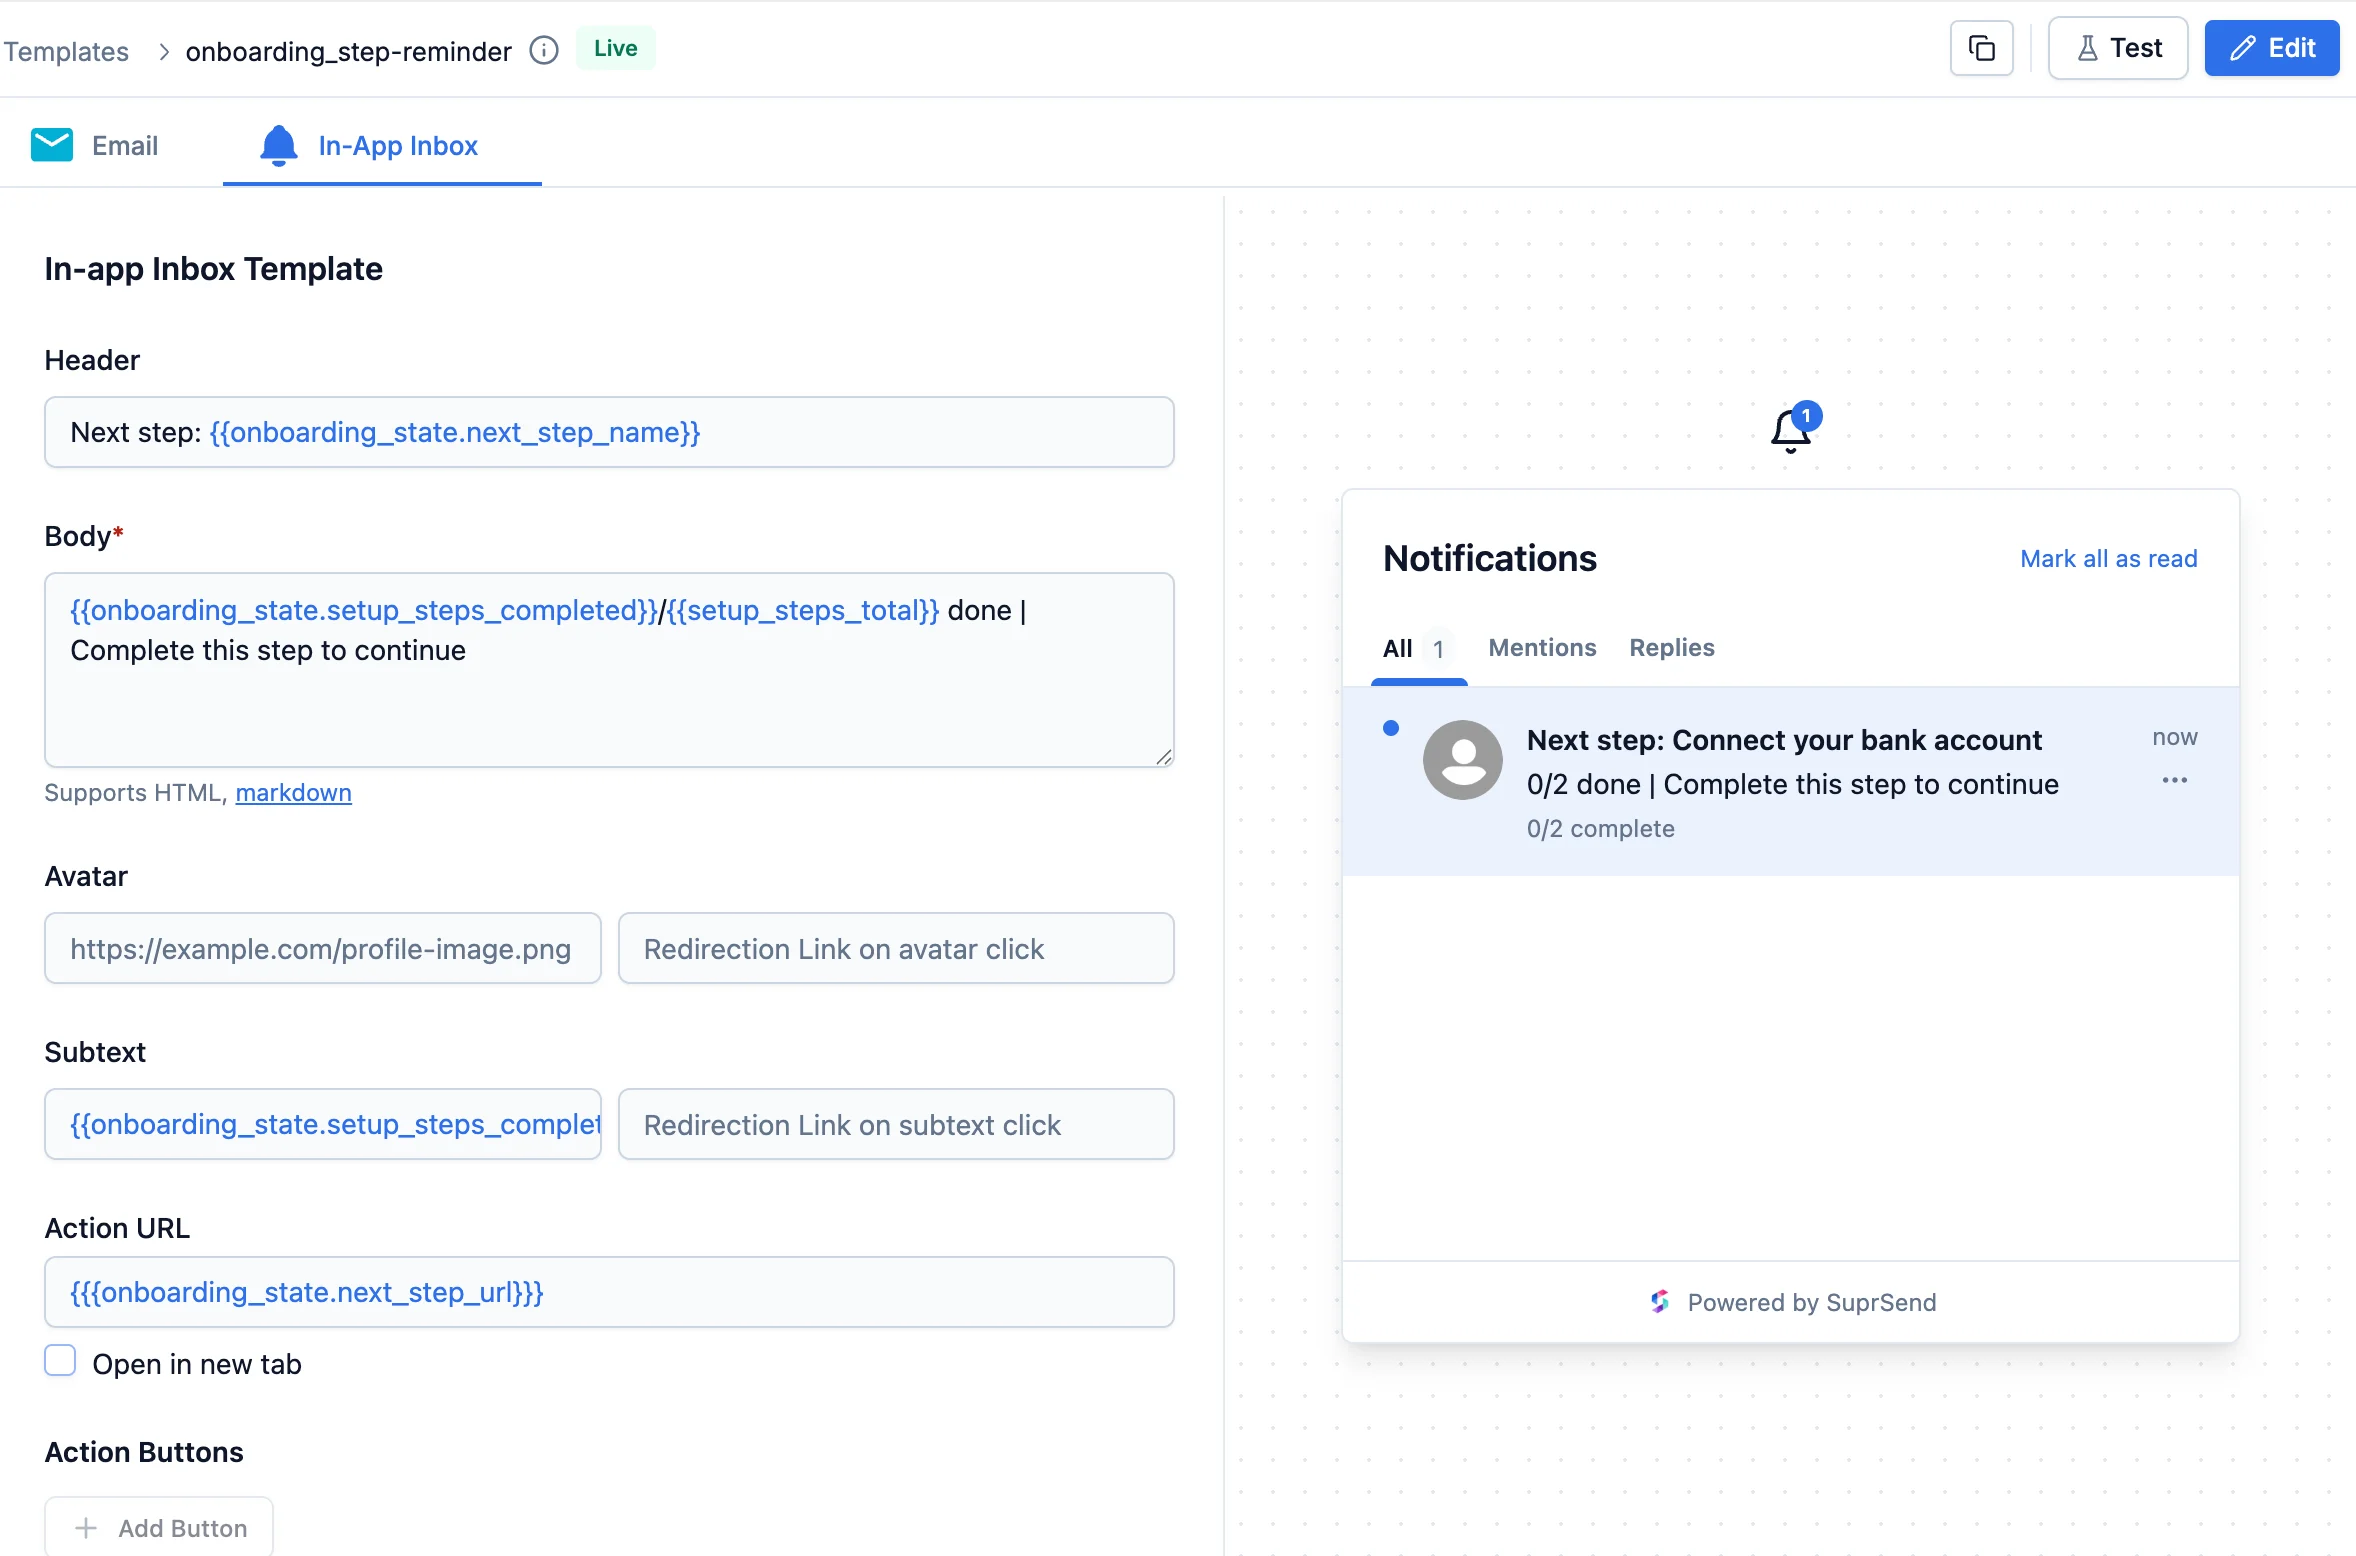
In-App Inbox editor with live notification card preview
Inbox fields
Header
Heading shown in bold at the top of the card. Use it for the summary:New comment received, Your story has got 30 views.
Body
Body of the notification. This is where the content of your notification will be passed. Supports both Markdown and HTML syntax, so you can format text, add links, lists, tables, images, and more.General formatting examples in Markdown and HTML
General formatting examples in Markdown and HTML
TableIn Markdown, separate the header row from the body with a row of dashes, and use pipes (
|) to separate columns:You can mix Markdown and HTML in the same body, and combine formatting with Handlebars variables — for example,
**{{order_status}}** to bold a dynamic value. Rendering of HTML/Markdown depends on your inbox frontend, so test in the live preview to confirm the result.- Markdown Guide — Basic Syntax
- Markdown Guide — Extended Syntax (tables and more)
- MDN — HTML elements reference
Avatar
Public image URL (.jpeg, .png). Use it to show the actor’s profile picture or a static icon based on notification type.
Inbox Notification with profile image in avatar
Subtext
Clickable footer line below the message. Use for secondary info like comment count, task ID, or timestamps.Action URL
URL the user is redirected to on card click. Toggle Open in new tab if needed.Action Buttons
Up to 2 buttons with text + URL. Use it for click actions like “View”, “Approve”, or other inline actions. You can use it to redirect users to a webpage or handle inline actions using custom click handlers.Tags
Tags filter and organise notifications inside multiple tabs. You can filter tabs by tag, preference category, or read status — for example, show allunread notifications with the mentions tag in a “Mentions” tab.
Tags in Inbox template vs Tags in Workflow: Template tags filter notifications in inbox tabs. Workflow tags only group workflows on the listing page and do not affect inbox filtering. To filter inbox tabs, add tags in the template and reference them in your inbox tab configuration.
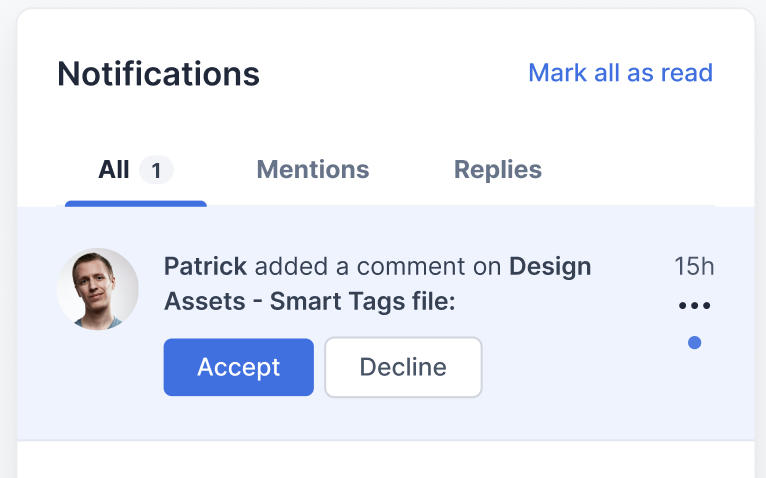
Inbox with tabs - All, mentions and replies
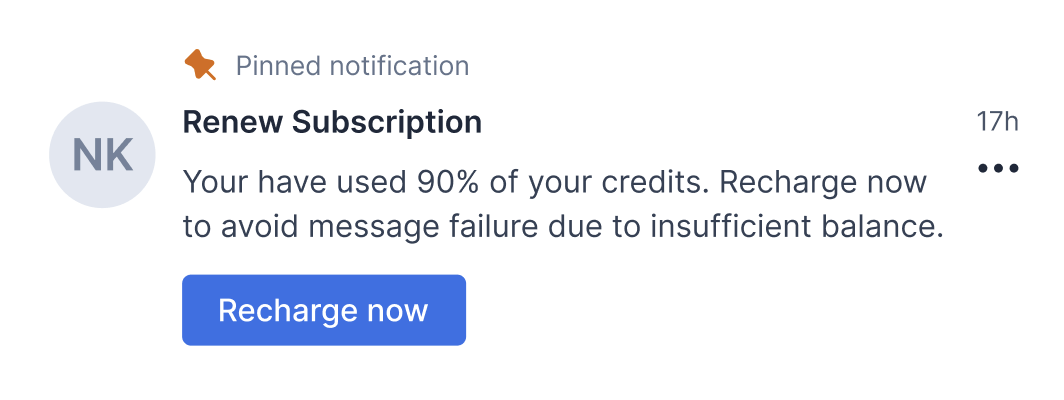
Pinned
Pinned notifications display with apinned badge and stay at the top of the notification list until they expire or the user archives them. Use it for notifications requiring immediate action - compliance tasks, plan renewals, or limited-time offers. Always combine with an expiry so stale pins don’t persist indefinitely.
Expiry
Expiry auto-deletes the notification once the set period elapses. It deletes the notification and does not archive it. So, you won’t be able to access these notifications in your store once they expire. You can configure it three ways: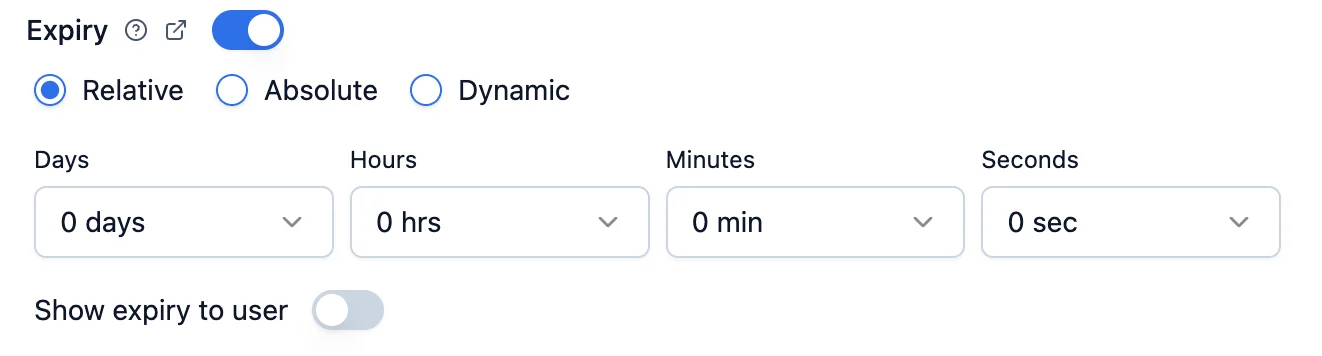
Relative expiry in Inbox
- Absolute Set a fixed date and time. The timestamp uses your local timezone.
- Relative
Set a duration relative to when the notification is sent — for example,
2 days 6 hours. - Dynamic
For expiry computed from your event or user data, use a Handlebars variable — for example,
{{expiry_time}}. The value can be:- An ISO-8601 timestamp (for example,
2024-03-02T20:34:07Z) — must be in the future. - A relative duration: an integer (seconds) or an interval string like
2d 6h 30m 0s.
- An ISO-8601 timestamp (for example,
- Always add an expiry to pinned notifications so they don’t stay on top forever.
- For time-sensitive notifications like flash sales or event reminders, use a dynamic expiry to auto-delete once the event time is reached.
- Avoid expiry on long-lived notifications users might reference later (product updates, blog posts).
- For everything else, set an expiry of 15 days or more to keep the inbox clean.
Show expiry to user
Enable this to display a countdown timer on the notification card. The timer shows in grey when more than 1 hour remains and turns red below 1 hour to drive urgency.
Expiry timer with different time remaining
Extra Data
A JSON field for passing custom key-value pairs alongside the notification. Use this for app-level metadata that your frontend can process — for example, deep link parameters, feature flags, or tracking IDs. This is also useful when you’re building a custom notification card that needs data the generic Inbox template fields don’t cover. Pass that extra data here, and your frontend can read it from the notification payload to render the card exactly how you want.Add variables in template
You can add dynamic variables in any template field using Handlebars syntax ({{variable_name}}). Variables are replaced with real data at the time of sending.
Use the Variables panel on the left to add sample data — this powers the live preview and lets you test the template. Once data is added there, typing { in any field shows auto-suggestions from your variables. Variables with missing data are highlighted in red, so you can spot gaps at a glance.
Sample data in the Variables panel is only used for preview and testing. The actual values must be passed at trigger time through your workflow or event trigger.
Example handlebars syntax
Preview
The right panel shows a live preview of the inbox notification card, updated in real time as you edit. Variables render using data from the Variables panel - select a recipient or tenant to preview with real data.Test template
Click Test in the top-right corner to send a real notification to a real user’s inbox. You can test in both draft and live mode, so you don’t need to commit before testing. The test modal has two tabs that control what gets sent:- Selected Channel - test only the In-App Inbox channel.
- Template Group - test all channels configured in the template group at once.
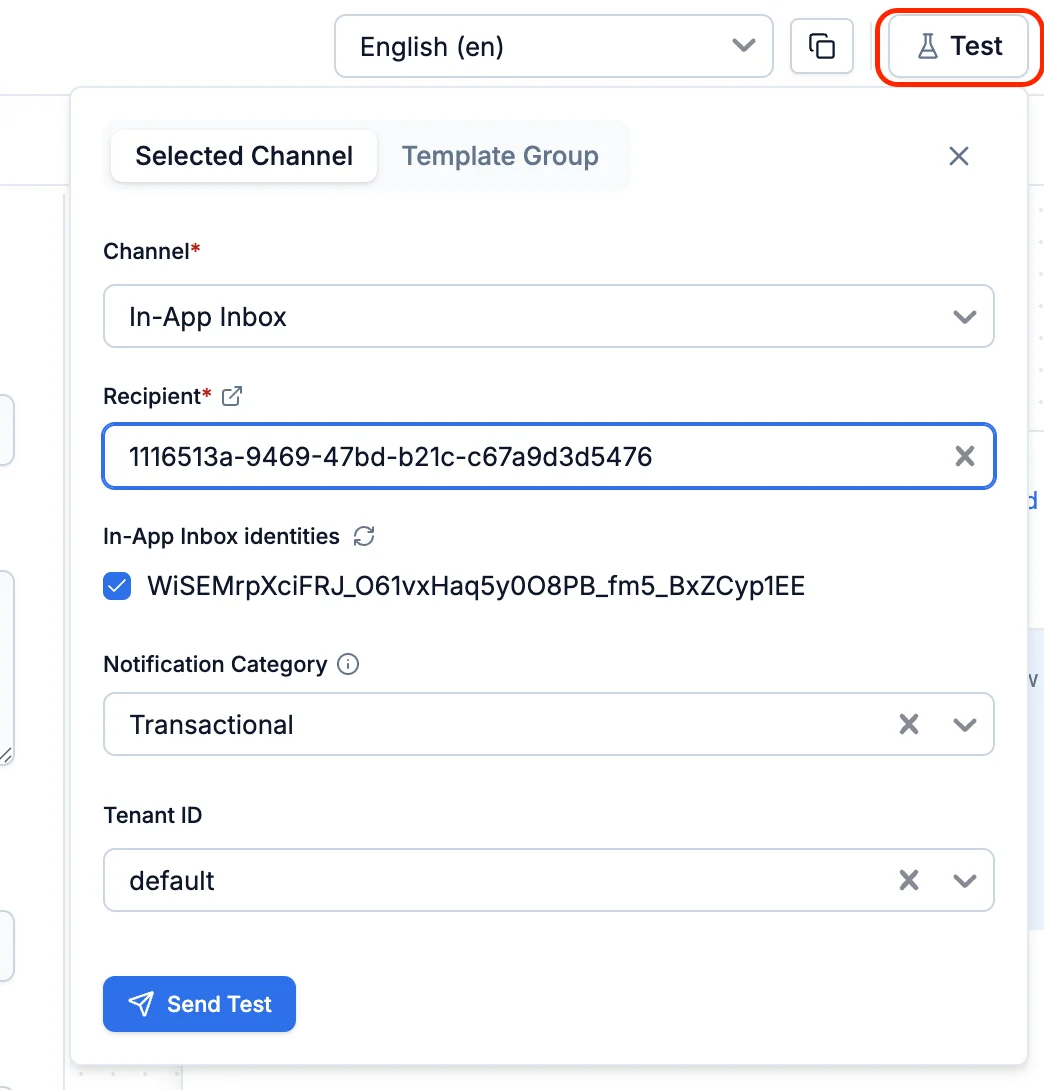
Test modal for the In-App Inbox channel
Commit Changes
Click Commit in the top bar to publish the current draft as a new live version. Add an optional description for versioning. Once committed, every notification triggered after this point uses the new content. This applies to already-running workflows too: the template version is resolved at the moment of delivery, not when the workflow starts. For example, if a workflow has a delay node and you commit a new template version before that delay finishes, the notification is sent with the latest version. Templates and workflows are versioned independently, so locking a workflow version does not lock its templates.Everything related to a template is versioned — channel content, metadata (name, description), and variables — and must be committed to take effect.
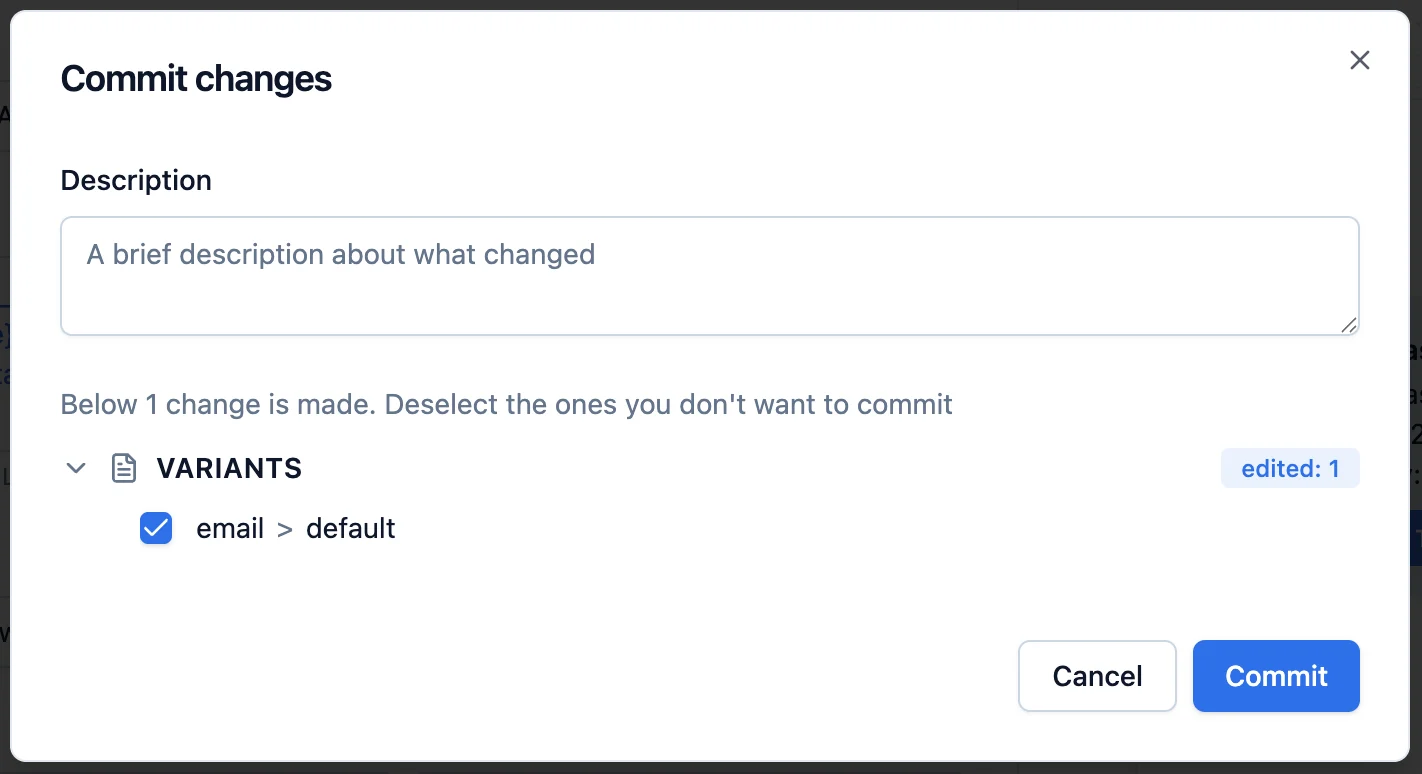
Commit changes modal
Frequently asked questions
How do I show different tabs in my Inbox?
How do I show different tabs in my Inbox?
You define tabs in your inbox tab configuration. Each tab is simply a filter over your notifications, and you can filter on any of these:
- Read status — for example, an “Unread” tab.
- Preference category — for example, a “Transactional” tab.
- Tag — for example, a “Mentions” tab showing notifications tagged
mentions.
When should I use Pinned Notification vs Expiry?
When should I use Pinned Notification vs Expiry?
- Pinned Notification - for notifications that must stay at the top until the user acts (compliance, critical alerts). Always combine with an expiry so they don’t stay pinned forever.
- Expiry - for short-lived notifications that lose relevance after a period (flash sales, event reminders), so they don’t linger once they’re stale. Use relative expiry for consistent durations, absolute for fixed deadlines, and dynamic for computed values from your payload.
How do I add dynamic expiry from my payload?
How do I add dynamic expiry from my payload?
Use a Handlebars variable like
{{expiry_time}} in the Dynamic Expiry field. The value can be an ISO-8601 timestamp (for example, 2024-03-02T20:34:07Z) or a relative duration (integer for seconds, or 2d 6h 30m 0s format).