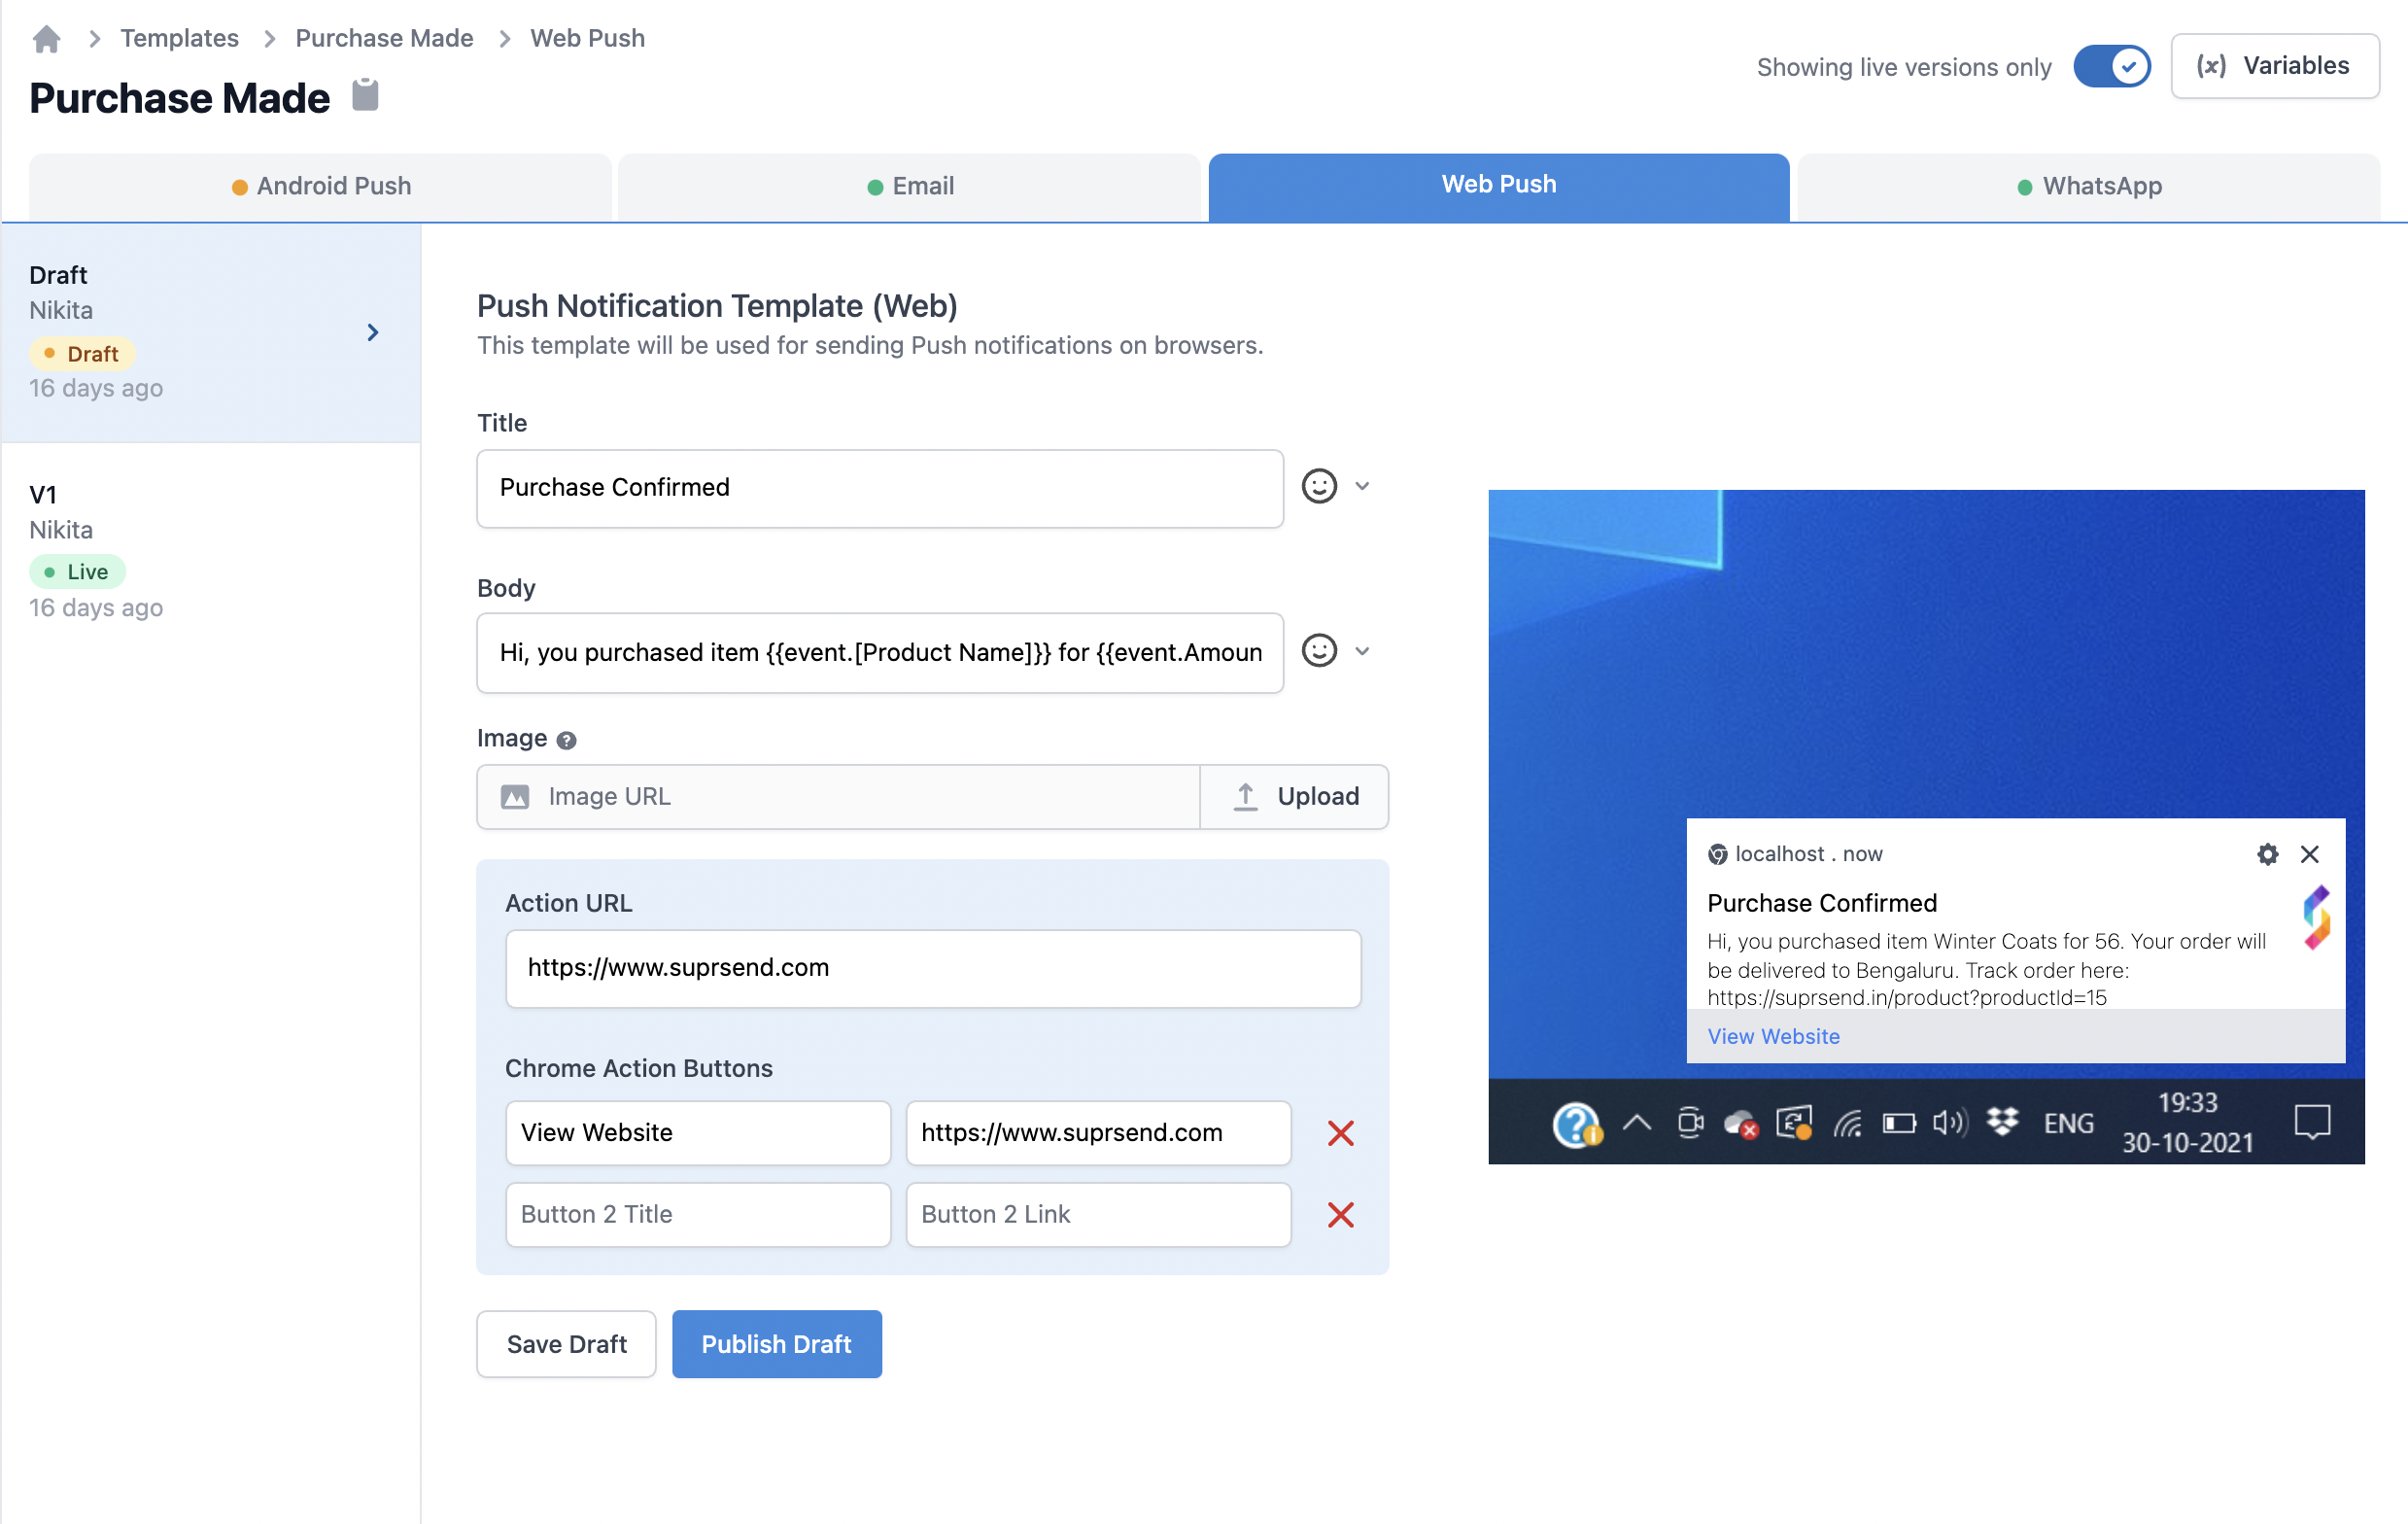
Design Template
You can design template with a simple form editor tool. You can add variables withHandlebarsjs language. You can check how the message will look in the preview section on the right side. Once designed, you can save the web push notification template by clicking on Save Draft. When you are ready, you can Publish Draft by providing a name to the version. This will become the Live version, and will be used whenever the associated workflow is triggered.

Web Push notification fields description
| Field | Description |
|---|---|
| Title | Small message text box. Note that this field will be displayed in single line only, and very long content can get curtailed. Use handlebarsjs to add variables. |
| Large Icon | The small icon will show up to the right of the notification text. SuprSend puts your organisation logo as default in the large icon, which you can set from ‘Organisations Tab’. This will be shown by default and cannot be changed. |
| Message | Large message text box. Use handlebarsjs to add variables. |
| Image | Optional Recommended banner filetypes are PNG, JPG, JPEG. SuprSend will auto-scale your image so that it doesn’t get cropped. |
| Action URL | Provide a URL where a user will go when he clicks on the push notification. Use handlebarsjs to add variables. |
| Action Buttons | Optional Enter up to 3 Button names and URL. You can use variable names using handlebarsjs in both action name and URL. You can give your android deeplink URL as well. The action button name color is picked up from your organisation settings. You cannot change button color in a template once it is created. |
Adding dynamic content in Web Push
There will always be the case where you would be required to add dynamic content to a template, so as to personalise it for your users. To achieve this, you can add variables in the template, which will be replaced with the dynamic content at the time of sending push. To send actual values to replace variables at the time of communication trigger, use one of our frontend or backend SDKs. Here is a step by step guide on how to add dynamic content in web push:Declaring Variables in the global 'Variables' button:
If you are at this stage, it is assumed that you have declared the variables along with sample values in the global Mock data button. To see how to declare variables before using them in designing templates, refer to this section in the Templates documentation.
Using variables in the templates:
Once the variables are declared, you can use them while designing the web push template. We support
handlebarsjs to add variables in the template. As a general rule, all the variables have to be entered within double curly brackets: {{variable_name}}If you have declared the variables in the global ‘Variables’ button, then they will come as auto-suggestions when you type a curly bracket {. This will remove the chances of error like variable mismatch at the time of template rendering.Note that you will be able to enter a variable name even when you have not declared it inside the Variables button. To manually enter the variable name, follow the handlerbarsjs guide here.Below are some examples of how to enter variables in the template design. For illustration, we are using the same sample variable names that we declared in the Templates section:-
To enter a nested variable, enter in the format
{{var1.var2.var3}}. Eg. to refer to city in the example above, you need to enter{{event.location.city}} -
To refer to an array element, enter in format
{{var1.[index].var2}}. Eg. to refer toproduct_nameof the first element of the arrayarray, enter{{array.[0].product_name}} -
If you have any space in the variable name, enclose it in square bracket
{{event.[first name]}}
-
Make sure you have entered the variable name and the sample value in the
Variablesbutton. -
Make sure you have entered the correct variable name in the template, as per the
handlebarsjsguideline.
