Design SMS notification content in SuprSend using a single body field with Handlebars variables, live phone preview, and unicode and length indicators.
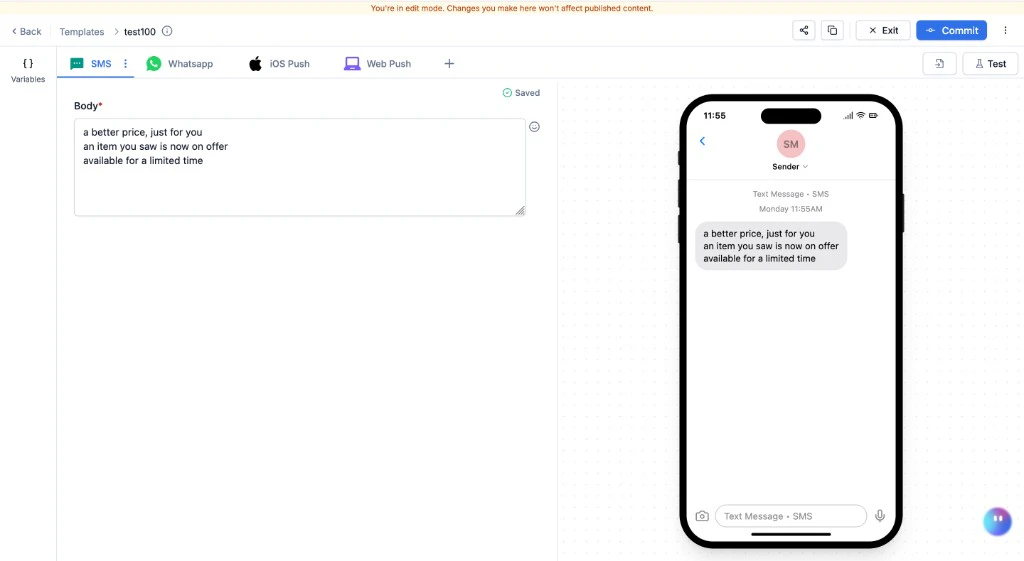
The SMS editor is a text editor with a live phone preview on the right. Content is personalised with Handlebars variables ({{variable_name}}).
SMS editor with live device preview
To send SMS, you need an SMS vendor integrated with SuprSend. See SMS vendor integrations for the vendor list and setup.
The SMS editor has a single field:Body - the full text of the SMS message. This is everything the recipient sees. Aim for one segment (160 GSM-7 characters) - each extra segment doubles cost. Front-load the key info, include one clear CTA, and avoid shortened URLs (some carriers flag them as spam; use a branded domain if needed). Supports Handlebars variables and emoji.
You can add variables in the template to personalise it for each recipient. Variables are replaced with actual data at send time. Pass values via your workflow trigger payload or use recipient/tenant properties.
1
Add variables in the Variables panel
Add sample data in the Variables panel (Input Payload section) on the left side of the editor. This powers auto-suggestions and the live preview. For the full guide on setting up variables, see Adding dynamic content.
2
Use variables in the template
Type {{ in the body field - matching variables appear as auto-suggestions. You can also type variable names manually following Handlebars syntax.Examples using this sample data:
If a variable cannot be rendered at send time (missing or mismatched data), SuprSend discards the SMS for that user. Other channels in the same template group (email, push, etc.) are still sent.
The right panel shows a live phone preview, updated in real time as you type. Variables render using data from the Variables panel.Click Test in the top-right corner to send a real SMS to a real phone number. This uses the live version - commit your changes before testing. See Testing a Template for the full guide.
Click Commit in the top bar to publish the current draft as a new live version. Add an optional description for versioning. The template goes live immediately and is used for all subsequent workflow triggers.
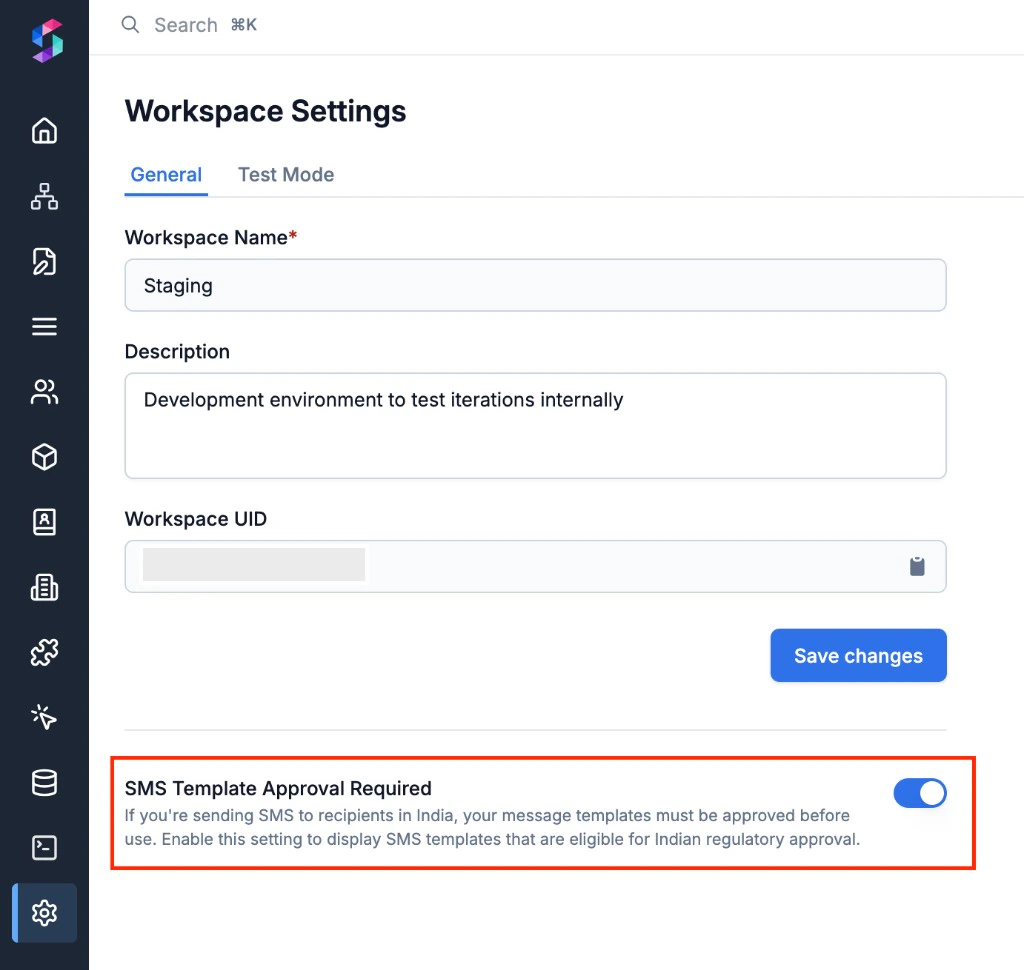
India requires all SMS templates to be registered and approved through a DLT (Distributed Ledger Technology) portal before they can be sent. The SMS editor shows additional fields when DLT approval is enabled.
With DLT enabled, the SMS editor shows:Message Type - select the type: Transactional (triggered by a user action - delivery updates, OTPs), Promotional (marketing messages without explicit consent), or Engagement (re-engagement messages to existing users - feature promotions, discount offers).Header - the sender ID (6 alphanumeric characters) registered with DLT. Separate headers exist for each message type.Body - the SMS content. Must exactly match the template registered on the DLT portal. Variables must align with the DLT placeholder format.
DLT templates cannot be tested in draft. You can only test a DLT SMS after it has been committed and approved. The Test button sends using the live (approved) version.
AI prompt - DLT compliance check:“Convert this SMS body to DLT format. Header: [6-char sender ID]. Category: [transactional/promotional]. Body: [paste text]. Convert Handlebars variables to DLT placeholder format, verify category match, and flag rejection risks.”
DLT (Distributed Ledger Technology) is a regulatory requirement in India. All SMS templates sent in India must be registered with a DLT portal, have an approved header (sender ID), and go through an approval process before going live. If you’re sending SMS outside India, you don’t need DLT - templates go live immediately on commit.
Why was my DLT template rejected?
Common reasons: the template body doesn’t exactly match the content registered on the DLT portal (even minor punctuation differences count), the header is not registered for the selected message type, or the variable placeholders don’t match the DLT registration.
Why is my SMS being sent as multiple segments?
SMS has a per-segment character limit. Each extra segment is billed separately by your vendor.
Encoding
Chars per segment
When it applies
GSM-7
160 (single), 153 (multi-part)
Standard Latin characters, digits, basic punctuation
A single emoji or non-Latin character forces the entire message into UCS-2, cutting capacity from 160 to 70. Avoid emojis in transactional SMS to keep costs down.
How do I add URLs in SMS without them breaking?
Use triple curly braces {{{url}}} instead of double. Double braces HTML-escape characters like &, ?, = - which breaks URLs. Triple braces output the raw value.
Can I send SMS in different languages?
Yes - use template variants. Create a variant for each language with a locale condition. Set the user’s preferred language via $locale on their profile - SuprSend auto-selects the matching variant. The default variant acts as the English fallback.
Can I test a DLT template before approval?
No. DLT templates can only be tested after they are committed and approved by the vendor. The Test button uses the live (approved) version. Non-DLT templates can be tested immediately after committing.
What happens if a variable is missing at send time?
SuprSend discards the SMS notification for that user. Other channels in the same template group (email, push, etc.) are still sent if they render successfully.